manuals.online logo
Brands
  1. Home
  2. •
  3. Brands
  4. •
  5. CURIOSIS
  6. •
  7. Laboratory Equipment
  8. •
  9. CURIOSIS Celloger Mini Installation guide

CURIOSIS Celloger Mini Installation guide

Automatic Live Cell Imaging System
Quick Manual
Device Layout
Basic operation
1) Installation
2) Set up
3) Starting
Description
1) Set up
2) Scan
3) Album
4) Analysis
Operation
1) Set up
2) Vessel Setting & Focusing
3) Image Scan & Time lapse image capture
4) Video recording
5) Confluency & Growth Curve
6) Additional setting
Table of contents
Device Layout
Front Layout Bright field lamp
Temperature and humidity sensor
Objective Lens
Vessel holder
X-Y Stage
X-Axis Motor
Side Layout Rear Layout
Bright field lamp
X-Y Stage Vessel holder
LAN & Power cable
connector
X-Axis Motor X-Axis Motor
LAN & Power cable connector
Basic Operation
1. Installation
Step 1. Unbox and take out the product from the box.
Step 2. Connect the cables to device and PC.
Connect the device to PC
LAN & Power Cable
2. Set up
Step 1. Prepare a sample.
Step 2. Put the device inside an incubator for 30min to equalize temperature and humidity .
Step 3. Place the sample on the stage.
Note: Check the connection between the PC and the device.
The whole procedure should be done in a clean area to avoid deceasing accuracy of captured imaging due to dust.
Please spread the cells sufficiently before capturing the imaging.
(Pay attention to avoid bubbles and check if there are any cell clumps)
Cell culture flask should be wetted by the culture media before capturing.
Cell seeding
2
Step 1. Double click a Celloger Mini App
Step 2. Select the location where to save the images
Step 3. Click the icon and press OK
Step 4. Press Start streaming button to display the current plate.
Note: If the device icon does not appear, enter the IP address directly.
3. Starting
3
1
Double Click!
4
Description
1. Setup
1Start
streaming Start cell image scanning
2Stop
streaming Stop cell image scanning
3Temperature
& Humidity Display of current temperature and humidity
4Image setting Adjust intensity, brightness, contrast,
autofocusing
5Frame
resolution
Select image resolution
- Normal / High
6Image
information
Display of image information
- pixel, size, zoom(magnification)
7 Scale bar Estimate cell length displayed on an image
13
5
6
7
2
Setup
Experiment setup including stage, vessel and focus
4
1. Setup
1 Jog Adjust XYZ stage
- speed, step, set position
2Manual
Position Set XYZ stage position manually
3 Vessel Select vessel type (see page 13)
4 Imaging
Set file format, frame resolution,
objective lens, autofocus, align image
imaging conditions setting (see page 13)
5 AF Set range for autofocusing
- depth, resolution, ROI (see page 13)
6 Exchange Move vessel position to exchange
7 Blink me! Find which device you are working on
when multi devices connected
2
1
3
4
5
6
7
Experiment setup including stage, vessel and focus
Setup
1. Setup
1 Vessel Select vessel type - Custom type
- 6 / 12 / 24 / 48 / 96 well plate
- 35 / 60 / 100mm dish
- 25 / 75 ㎠flask
2 Imaging Set file format - PNG / JPG / TIFF
Select frame resolution - Normal / High
Objective lens - 4x
Check details for imaging - Autofocus
- Align image
Display of imaging conditions - Intensity within 0 ~ 255
- Brightness within -2048 ~ 2047
- Contrast within 0 ~ 160
3 AF Set the range for autofocusing Depth: 0.1 / 0.05 / 0.02 / 0.01
Resolution: 0.005 / 0.002 / 0.001
ROI section Rows setting within 1 ~ 10
Columns setting within 1 ~ 10
Offset setting within 1 ~ 10
Checking Auto ROI
Checking Show ROI
1
2
3
2. Scan
1 Mode Start, stop and pause cell imaging
2Folder
setting Set location to save image
3 Progress Display of experiment progress
4 Schedule Set period and total schedule
5Frame
resolution
Select image resolution
- Normal, High
6Image
information
Display of image information
- pixel, size, zoom(magnification)
7 Scale bar Estimate cell length displayed on an image
1
3
5
6
4
7
Progress control of automatic scan and time-lapse capturing
Scan
2
2. Scan
1 Progress Display of experiment progress - Cycle time remaining
- Elapsed time
- Start date
- End date
2 Schedule Set period and total schedule Period: Max 24 hours, 59 minutes
Total time: Max 9999 day, 24 hours, 59 minutes
Rest time: Min 10 minutes, Max 9999 minutes
Total cycle and Req. Storage are calculated automatically
3 Stage Set the location of capturing images
1
2
3
3. Album
1 Video Select video preview and recording
(see page 22)
2FPS
(frame per second) Control video speed [Range: 1~30]
3Folder
setting Import saved images
4Frame
resolution
Select image resolution
- Normal, High
5Image
information
Display of image information
- pixel, size, zoom(magnification)
6 Scale bar Estimate cell length displayed on an image
1
3
4
5
6
2
Save scan images as a video
Album
4. Analysis
1 Run Run cell confluency analysis
(see page 23)
2 Source Select image type
- live image, local image, time-lapse images
3 Results Display of cell confluency data
- Data (Percentage), Graph (Confluency)
4 Color Adjust color for data analysis
5Image
information
Display of image information
- pixel, size, zoom(magnification)
6 Scale bar Estimate cell length displayed on an image
7 Refresh Get back to original image data
1
2
5
3
6
7
4
Acquire cell confluency data
Analysis
Operation
1. Set up
Step 1. Press Start streaming button, then image is displayed.
Step 2. To adjust illumination, use the LED intensity, camera brightness, camera contrast on
the imaging tap.
Step 3. Select Frame resolution of Normal or High
Autofocusing
Camera contrast
Camera brightness
LED intensity
Normal High
Frame Resolution Result
Imaging set
Step 1.
Select the Vessel type and image saving format.
Step 2.
Specify where to capture the images.
Step 3.
Adjust the focus using the autofocusing button or jog tap.
Step 4.
After specifying position for each well, press button.
Note: X-Y-Z position is displayed on the left.
2. Vessel Setting & Focusing
1
2
4
3
How to Set the all center positions
Right-click the well plate and apply the all center positions
of well.
▶Focus manually before using the autofocusing function.

Other manuals for Celloger Mini

2

Other CURIOSIS Laboratory Equipment manuals

CURIOSIS FACSCOPE B User manual

CURIOSIS

CURIOSIS FACSCOPE B User manual
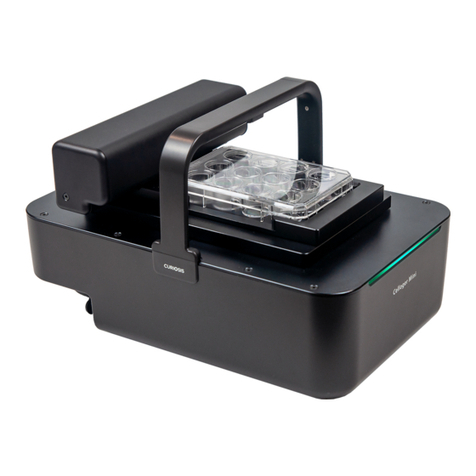
CURIOSIS FACSCOPE B Instruction manual

CURIOSIS

CURIOSIS FACSCOPE B Instruction manual

CURIOSIS Celloger Mini Installation guide

CURIOSIS

CURIOSIS Celloger Mini Installation guide

CURIOSIS Cellpuri Installation guide

CURIOSIS

CURIOSIS Cellpuri Installation guide

CURIOSIS FACSCOPE B User manual

CURIOSIS

CURIOSIS FACSCOPE B User manual

CURIOSIS Celloger Mini Plus Installation guide

CURIOSIS

CURIOSIS Celloger Mini Plus Installation guide

CURIOSIS Celloger Mini Plus User manual

CURIOSIS

CURIOSIS Celloger Mini Plus User manual

CURIOSIS Celloger Nano User manual

CURIOSIS

CURIOSIS Celloger Nano User manual

CURIOSIS Celloger Mini User manual

CURIOSIS

CURIOSIS Celloger Mini User manual
Popular Laboratory Equipment manuals by other brands

Agilent Technologies 1290 infinity user manual

Agilent Technologies

Agilent Technologies 1290 infinity user manual

SciCan Bravo Operator's manual

SciCan

SciCan Bravo Operator's manual

Rain Bird 42SA+/4PK user manual

Rain Bird

Rain Bird 42SA+/4PK user manual

Guth Laboratories 2100 Operation manual

Guth Laboratories

Guth Laboratories 2100 Operation manual

Malvern Instruments Mastersizer X manual

Malvern Instruments

Malvern Instruments Mastersizer X manual

Air Science Purair FLOW-24 User's operation manual

Air Science

Air Science Purair FLOW-24 User's operation manual

NIEUWKOOP RQflex plus 10 manual

NIEUWKOOP

NIEUWKOOP RQflex plus 10 manual

Bruker Ascend 400'54 user manual

Bruker

Bruker Ascend 400'54 user manual

Julabo CORIO CD Original operating manual

Julabo

Julabo CORIO CD Original operating manual

Tuttnauer 2340E Operation & maintenance manual

Tuttnauer

Tuttnauer 2340E Operation & maintenance manual

Esco ETS-Lindgren GTEM! 5411 installation manual

Esco

Esco ETS-Lindgren GTEM! 5411 installation manual

VERDER Carbolite Gero HT 5/350 Installation, operation and maintenance instructions

VERDER

VERDER Carbolite Gero HT 5/350 Installation, operation and maintenance instructions

Gamry Instruments ParaCell Operator's manual

Gamry Instruments

Gamry Instruments ParaCell Operator's manual

Amersham Biosciences TE 70 user manual

Amersham Biosciences

Amersham Biosciences TE 70 user manual

PHYWE Air Track Rail 11202.17 operating instructions

PHYWE

PHYWE Air Track Rail 11202.17 operating instructions

Hermle Z 216 M user manual

Hermle

Hermle Z 216 M user manual

Thermo Scientific Sorvall RC6 Plus Operation instructions

Thermo Scientific

Thermo Scientific Sorvall RC6 Plus Operation instructions

Leica MICA user manual

Leica

Leica MICA user manual

manuals.online logo
manuals.online logoBrands
  • About & Mission
  • Contact us
  • Privacy Policy
  • Terms and Conditions

Copyright 2025 Manuals.Online. All Rights Reserved.