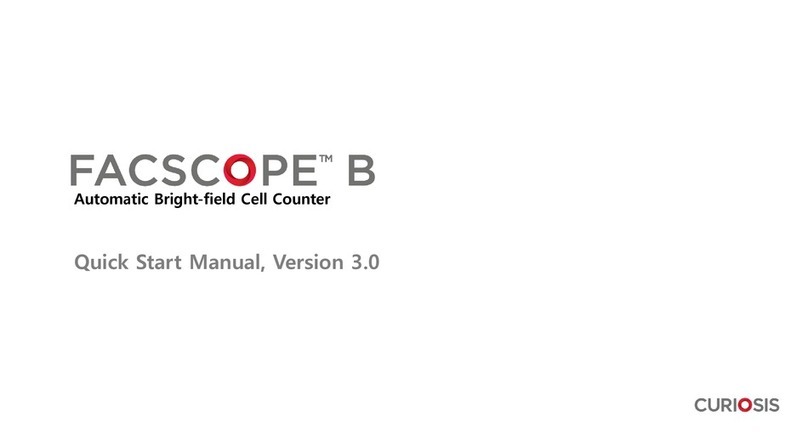
CURIOSIS FACSCOPE B User manual

Automatic Cell Counter
Instruction manual

2
Developed and manufactured by CURIOSIS Inc.
E-mail: info@curiosis.co.kr
Website: http://www.curiosis.com
CURIOSIS Inc.
10 Teheran-ro 38-gil, Gangnam-gu, Seoul, Republic of Korea
Tel: +82-2-508-5236
Fax: +82-2-508-5246
Copyright © 2021, by CURIOSIS Inc.
All rights reserved. Published in Korea.
CR-IFU-002(Rev.5)

3
Package contents
FACSCOPETM B Automatic cell counter package includes the following items.
Item
Quantity
FACSCOPETM B main device
1
Instruction manual
1
Quick manual
1
Main power cable
1
USB memory
1
FACSCOPE Slide (for 200 tests, Optional)
50 ea. per box
Keypad (Optional)
1
Barcode scanner (Optional)
1
Thermal printer (Optional)
1
When receiving the package,
• Check that all items listed above are included in your package.
• Examine the device carefully for any damage during shipping.
• Contact your local distributor or info@curiosis.co.kr if any items are missing or damaged.
• Any loss or damage claims must be filed with the carrier.

4
Safety instruction
READ ALL INSTRUCTION BEFORE USE
Caution
• Check the power supply input voltage and do not plug in when the voltage is unmatched.
• Check the power cable is connected to a grounded and 3-conductor power wall outlet.
• Check the power cable is properly grounded to avoid potential electrical shock.
• Check the main power switch is off when plugging in the power cable to the wall outlet or when
unplugging the power cable.
• Power on using the main switch located in the rear panel and wait about 2-3 minutes for the device
to reboot.
• Do not insert any metallic objects into the device through backside air vent to avoid electrical shock
causing personal injury or device damage.
• Place the device where there is 10cm clearance from the surroundings for proper air-cooling.
• Do not disassemble the device and contact the authorized service center if required.
• Use authorized accessories only.
• Operator should have the general knowledge on cell counting procedure and safe handling of
biological samples.
• Operate the device carefully as described in this manual.
• Cell counting time may vary according to cell type and concentration.
Warning
• Battery
There is a lithium battery inside this device. Replacing it with incorrect type can cause the risk of
explosion. The battery should not be replaced by the user. Contact the authorized service center if
required.
• Sample handling
Sample may contain infectious biohazardous substances. Operator should wear gloves while
handling the samples.
• Waste
Dispose the used FACSCOPE Slides as biohazardous waste and do not reuse them.

5
Product specifications
FACSCOPETMB
Voltage
AC 100~240 V, 50~60 Hz
Current
Max. 1.0 A, 50 W
Objective lens
4 x
Light source
4 W Green LED
Camera
5Mega pixels high resolution
monochrome CMOS image
sensor
Weight
5 Kg
Size (W × L × H)
163 × 293 × 216 mm
Measuring
concentration range
1 x 10⁴ ~ 1 x 10⁷ cells/mL
Detectable cell
diameter
5 ~ 60µm
Measuring speed*
Quick mode: ≈ 20s per test
Normal mode: ≈ 30s per test
Precise mode: ≈ 100s per test
Counting area
Quick mode: ≈ 0.15 µL
Normal mode: ≈ 0.9 µL
Precise mode: ≈ 3.6 µL
FACSCOPE
Slide
(Cat. No.
CRFCB-CSD50)
(Optional)
Quantity
50 slides/box (for 200 tests)
Sample loading
volume
20 µL
Accessories
(Optional)
Power cable
1.5 m
USB memory
Support USB 2.0
(Optional)
Keypad or
Barcode scanner or
Thermal printer
USB type

6
Device layout
Front view
• Slide holder door – Slide holder is ejected from / inserted into the device.
• Touchscreen LCD display – Preview, automatic cell counting processes and the results are
displayed.
• 3 control buttons
Slide holder door
Touchscreen LCD display
Button 3(Setting screen)
Button 1(Insert/Eject slide holder)
Button 2(Start counting)

7
Rear view
Rear view
• 3 USB ports – Keypad, Barcode scanner, Thermal printer (optional), or USB memory are
connected to these ports.
• Ethernet port – LAN cable is connected to this port for PC interface.
• Power switch – Main device power ON/OFF control.
• Power cable socket – Power cable is connected to this socket.
USB Port
- Keypad
- Barcode Scanner
- Thermal Printer
- USB Memory
Ethernet Port
- PC Interface
Power Switch
Power Cable Socket

8
Table of contents
Package contents 3
Safety instruction 4
Product specifications 5
Device layout 6
Introduction
FACSCOPETM B – Automatic cell counter 10
FACSCOPE Slide (50 slides for 200 tests per box, Cat. No. CRFCB-CSD50)
Getting started
Pre-requirements 12
Basic installation 13
Power up and initial display 14
General operation
Sample preparation 15
Basic operation 16
Preview prior to counting 18
Making a stop while counting 20
Set counting option 21
A. Changing user group 22
B. Setting Count mode 23
C. Creating Preset 24
D. Editing Preset
E. Selecting Channel
3
4
5
6
10
11
12
13
14
15
16
18
20
21
22
23
24
27
29

9
F. Entering Channel ID
Result screen
A. Analyzing by Histogram
B. View result image
C. Printout Cell Count Result using Thermal Printer
D. Exporting the Report into a USB memory
E. Exporting Data (all history) into a USB memory
F. Showing channel ID
On the Setting screen
A. Checking Firmware information and Updating Firmware
B. Bead Quality Control
C. Setting Time
Maintenance and cleaning
Appendix
A. Trouble shooting
B. Examples of error and inaccurate result
C. The contents of result data
D. Example and explanation of PDF report
E. FAQ
30
35
36
38
40
40
42
44
45
46
48
50
51
52
54
57
58
59

10
Introduction
FACSCOPETM B – Automatic Cell Counter
FACSCOPETM B is a fully automated cell counting system based on a brightfield microscopy technique
for mammalian cell counting. The FACSCOPETM B utilizes high-powered LED light source, CMOS image
detection (5 Mega pixels), precise X-Y-Z stages and on-slide image processing technologies for fast
and accurate cell analysis.
Cell counting using FACSCOPETM B is done by 3 steps, (1) cell staining, (2) loading sample slide,
and (3) counting. Cells are mixed with trypan blue dye to distinguish between the live and dead cells.
The stained sample is pipetted into the disposable plastic slide (4 tests per slide) and the slide is
loaded into the FACSCOPETM B. After loading the slide, the optic system automatically focuses on the
slide and then the system acquires and analyzes images automatically. The precise X-Y-Z stages move
through the preset routes to take multiple images for each channel. Highly sensitive CMOS sensor
acquires bright-field microscopy images and sends them to the integrated system for image
processing and analysis. The whole counting process takes 2 minutes (in Normal mode) and the
counting results are displayed on the LCD touch screen panel located in front of the instrument.

11
FACSCOPE Slide (50 slides for 200 tests per box, Cat. No. CRFCB-CSD50)
FACSCOPE Slide is a disposable plastic hemocytometer with 4 channels engraved with Neubauer
Improved pattern. Each channel has an enclosed structure of 100um depth and hydrophilic surface.
The precise capacity and diffusible surface make cells evenly distributed and this leads to accurate
analysis. FACSCOPE Slide can be used for mammalian cell counting with automatic cell counter
FACSCOPETM B and can also be used for manual counting method. The measuring range of cell
concentration is 1 x 10⁴ ~ 1 x 10⁷ per mL when used with FACSCOPE B.
For cell counting, prepare cell suspension for counting and mix it with trypan blue or
erythrosine B at a one to one ratio. Each channel of FACSCOPE Slide is filled with 20 μL of mixture
and is loaded into the FACSCOPETM B. After the completion of analysis, the results will be displayed.
Keep FACSCOPE Slide box upright and at a room temperature. It should be used immediately
after unsealing the package. Follow the exact procedure detailed in the Instructions for Use section.

12
Getting started
Pre-requirements
For normal and stable operation of the device, the following environmental conditions should be
satisfied.
• Room temperature between 20 ~ 35 °C.
It is not recommended to operate the device at low temperature condition (below 10 °C)
In those conditions, warm up the device for over 10 minutes before use.
• Relative humidity between 0 ~ 95 %.
• Place the device at corrosive gases-free or other substances-free area.
• Place the device at dust-free or other airborne particles-free area.
• Avoid direct sunlight, vibration, magnetic or electromagnetic fields.
• Do not put any heavy materials on the top of the device.

13
Basic installation
1. Unbox FACSCOPETM B package and place the
device on a flat and dry surface.
2. Plug the accompanying power cable into
the power cable socket.
3. Connect optional peripherals (keypad,
barcode scanner, or thermal printer) to the
USB port if necessary.
4. Switch on the power switch.
Check that the main power switch is in I (ON)
position.

14
Power up and initial display
1. Once the main power is switched on, the
boot image is displayed on the LCD touch
screen. When booting is completed,
initializing process starts and internal
motorized stages start moving.
2. Initializing progress is displayed while
processing.
3. When initializing is finished, the slide
holder is ejected, and Home screen is
displayed on the LCD touch screen.
4. After loading a slide with sample, the
device is ready to count.

15
General Operation
Sample Preparation
Cell suspension, 0.4% trypan blue(or 0.2% erythrosin B) micro tube 1.5ml, pipette, tips, and
FACSCOPE Slide are necessary for cell counting. The whole procedure should be done in a clean area
to avoid contamination that might lead to decrease in accuracy.
STEP 1. Prepare necessary items.
STEP 2. Place 20μL of trypan blue in the micro tube and add an equal volume of the cell
suspension.
NOTE: Before sampling the cell suspension, gently resuspend the cells at least 6 times
(pay attention to avoid bubbles and check if there are any cell clumps or agglomerates)
The sampling should be in middle of the cell suspension, not on the surface or the bottom.
STEP 3. Mix the sample in the micro tube by pipetting the vial 3~5 times gently.
NOTE: Be careful not to create bubbles.
STEP 4. Load 20μL of the stained cell sample onto each channel of FACSCOPE Slide.
NOTE: The sampling should be in middle of the cell suspension, not on the surface or the bottom, and
ensure that no bubbles enter the channel.

16
Basic Operation
STEP 1. Insert FACSCOPE Slide loaded with the sample onto the slide holder.
NOTE: Make sure the arrow on the slide points toward the instrument.
STEP 2. Press Start button to start counting procedures. The slide holder will be inserted
automatically, and auto-focusing is performed prior to counting each sample.

17
STEP 3. Counting progress is indicated as shown in following image. For completion of each sample,
the count results (unit: x104/mL) are displayed.
STEP 4. Once counting is completed, the slide holder is ejected automatically. Remove the FACSCOPE
Slide from the slide holder.

18
Preview prior to counting
STEP 1. Load a slide and press Preview button.
STEP 2. Select a channel to preview.
STEP 3. Positioning and Autofocusing

19
STEP 4. See the cell image of the selected channel.
STEP 5. Press Mark and the detection mark is displayed according to the selected preset.
Live/Dead definition can be modified at this stage.
STEP 6. Counting

20
Making A Stop While Counting
STEP 1. To make stop while counting, press the STOP button.
STEP 2. Confirmation message box is displayed as shown the following image.
Press the Yes button.
STEP 3. Once stop counting is confirmed, all remaining process are stopped and the slide holder is
ejected automatically.
Other manuals for FACSCOPE B
2
Table of contents
Other CURIOSIS Laboratory Equipment manuals

CURIOSIS
CURIOSIS Celloger Mini Installation guide

CURIOSIS
CURIOSIS Celloger Mini Plus Installation guide

CURIOSIS
CURIOSIS Celloger Mini User manual

CURIOSIS
CURIOSIS Celloger Nano User manual

CURIOSIS
CURIOSIS Celloger Mini Plus User manual

CURIOSIS
CURIOSIS FACSCOPE B Instruction manual

CURIOSIS
CURIOSIS FACSCOPE B User manual
CURIOSIS
CURIOSIS Cellpuri Installation guide

CURIOSIS
CURIOSIS Celloger Mini Installation guide