manuals.online logo
Brands
  1. Home
  2. •
  3. Brands
  4. •
  5. Curt Group
  6. •
  7. Automobile Accessories
  8. •
  9. Curt Group 19750 User manual

Curt Group 19750 User manual

CURTMFG.COM •PRODUCT SUPPORT: 877.287.8634 •19750-INS-RA •12/10/2020 •ECN7812 •PAGE 1
Product Registration and Warranty
CURT stands behind our products with
industry-leading warranties. To get copies
of the product warranties, register your
purchase or provide feedback, visit:
warranty.curtgroup.com/surveys
Weight Carrying Capacity
Gross vehicle weight rating 5,000 lbs.
INSTALLATION MANUAL 19750
Tools Required
Ratchet Torque wrench
Socket, 9/16" Socket, 3/4"
Open end
wrench, 9/16"
Open end
wrench, 3/4"
Level of Difficulty
Moderate
Installation difficulty levels are based on time
and effort involved and may vary depending on
the installer level of expertise, condition of the
vehicle and proper tools and equipment.
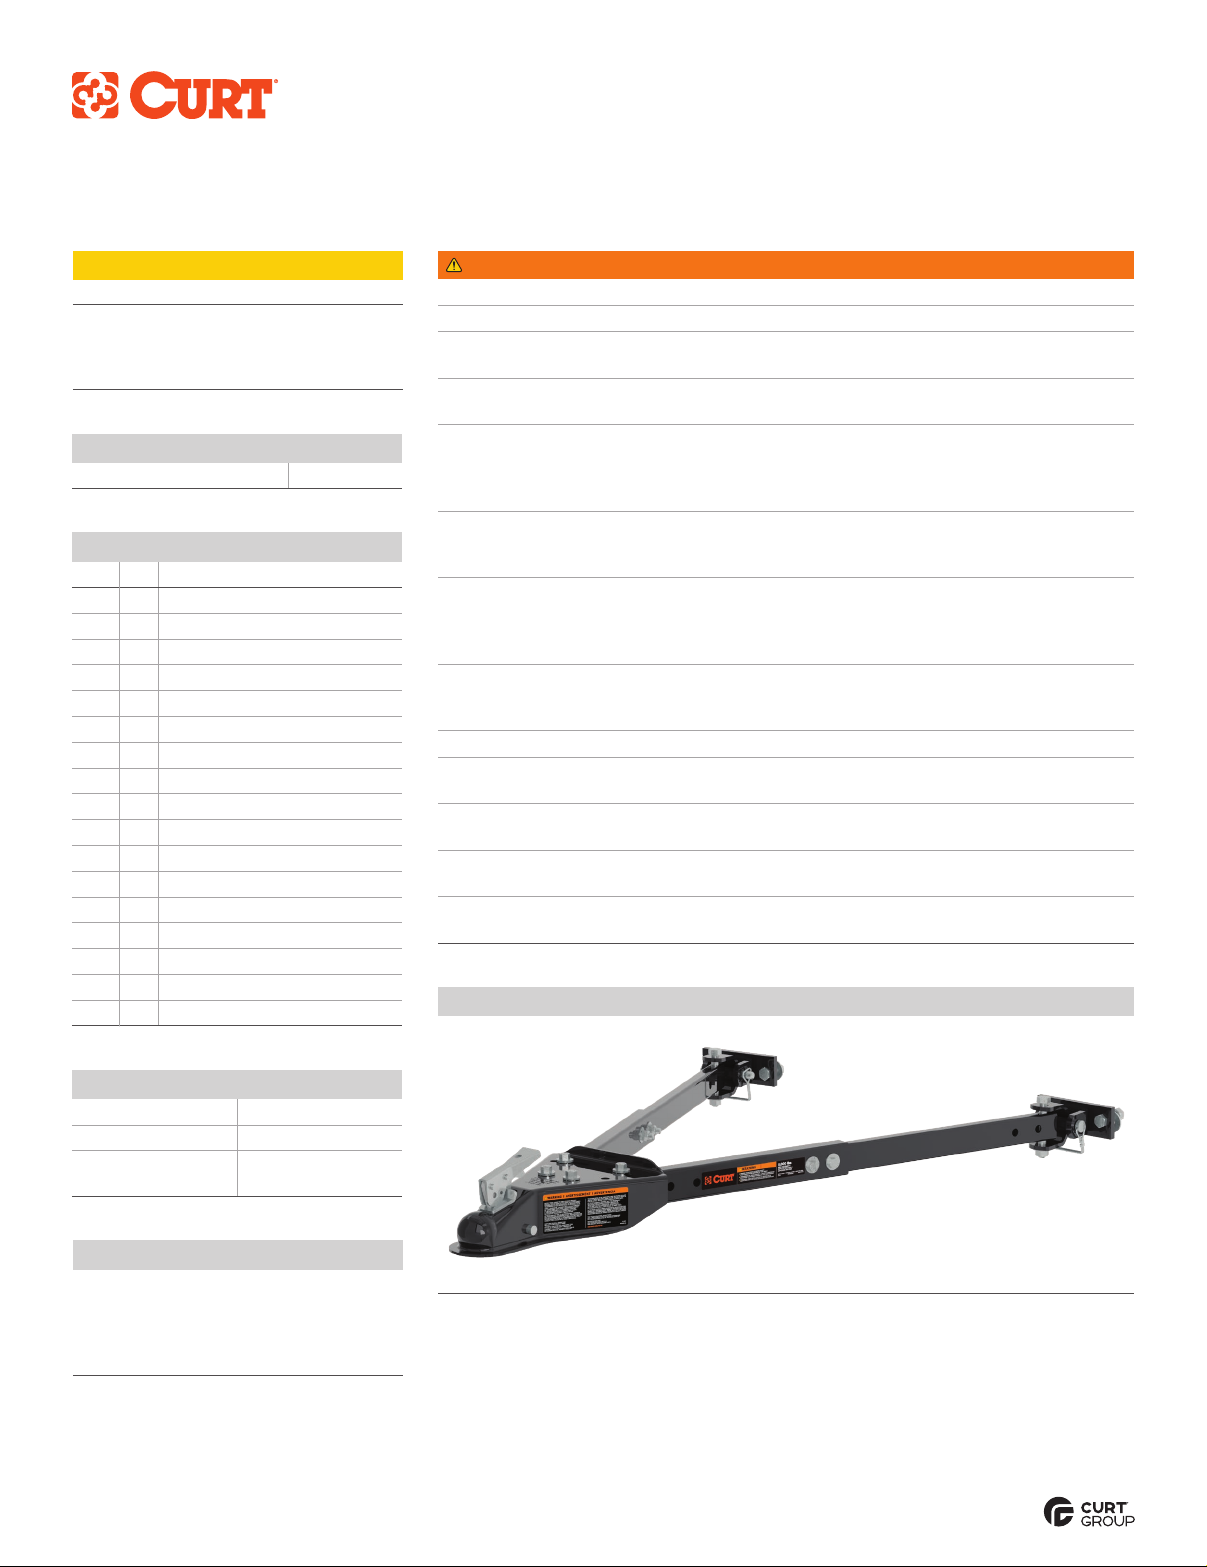
Product Photo
Parts List
Item Qty Description
1 2 Front tube
2 4 Nut, 1/2"
3 2 Clevis mount
4 4 Hex bolt, 1/2"-13 x 1-3/4"
5 2 Hex bolt, 1/2" -13 x 3-1/2"
6 4 Flat washer, 1/2"
7 2 Bolt plate weldment
8 2 Leg adapter weldment
9 1 Coupler assembly
10 2Safety pin, 1/2"
11 2Top lock flange nut, 1/2"-13
12 4Center lock hex nut, 3/8"-16
13 2Tow bar arms
14 8Flat washer, 3/8"
15 4Serrated washer
16 4Hex bolt, 3/8"-16
17 4Nylock nut, 3/8"-16
WARNING
Never exceed the vehicle manufacturer's recommended gross vehicle weight rating (GVWR).
Follow your vehicle's owner's manual for all flat towing steps and limitations.
When operating the tow bar ensure you are in a safe
position from vehicle movement and pinch points.
Verify adequate clearances between both vehicles
and your towing system in all maneuvering situations.
Always use safety cables when towing. Ensure the safety cables are long enough
to allow for turns without becoming entangled with the tow bar or latch handles.
Safety or electrical cables becoming entangled with the latch handles could
cause one or more arms to collapse, resulting in major damage, injury or death.
Damage may occur if cables come in contact with the ground, tow bar arms
or the latch handles. Never wrap cables around tow bar arms. Inspect safety
cables prior to towing. Never use damaged safety cables.
Ensure that your towing vehicle is of adequate size to properly control
your towed vehicle. Vehicle performance (braking, handling, acceleration,
turning radius) can be drastically affected by the towed vehicle. Allow for
additional time and space for stopping, changing lanes, passing and turning.
Be sure towing and towed vehicles are aligned with proper tire air pressure.
Low air pressure and misaligned vehicles may cause excessive wear,
poor vehicle tracking and extra stress on your towing system.
Never back up while flat towing a vehicle. Damage to both vehicles and towing system may occur.
Inspect the tow bar and towing system prior to every use. Check for cracked welds, loose,
worn or damaged parts. Do not tow with a damaged or worn tow bar or towing system.
Severe bumps can damage your towing system. Avoid rough terrain and sharp turns.
Always tow at reduced speeds, never exceed 50 miles per hour.
Never use towed vehicle for storage, this may cause you to
exceed the capacity of the tow bar or your towing system.
The steering wheel of the towed vehicle must be unlocked to allow vehicle to track freely while
towing. Failure to do so may result in loss of control, property damage, personal injury or death.
CURTMFG.COM •PRODUCT SUPPORT: 877.287.8634 •19750-INS-RA •12/10/2020 •ECN7812 •PAGE 2
Step 2
Secure the clevis mount to the attachment surface
with 1/2"-13 x 1-3/4" hex bolts (#4), 1/2" flat washers (#6)
and 1/2"-13 center lock hex nuts (#2).
Torque all 1/2" fasteners to 75 ft-lbs.
Attachment
surface
ASSEMBLY
CLEVIS MOUNT INSTALLATION
6
4
3
2
Notes
Installer / owner is responsible for locating rigid mounting points to
attach clevis mounts. A structure may need to be fabricated to allow
the tow bar to be attached to the frame of the towed vehicle.
It is recommended that clevis mounts be secured to a flat, nearly
vertical area of the bumper.
Clevis mounts should be spaced equally from center line of vehicle.
Recommended clevis mount spacing is 26" to 41", with 33" preferred.
Step 1
Mark both centers of the clevis mounts (#3)
on the attachment surface at the desired width.
Using the clevis mount as a template, drill two
1/2" holes into the attachment surface, both sides.
10
11
12
13
14
15
16
17
9
8
7
6
5
4
3
2
1
Parts List
Item Qty Description
1 2 Front tube
2 4 Center lock hex nut, 1/2"-13
3 2 Clevis mount
4 4 Hex bolt, 1/2"-13 x 1-3/4"
5 2 Hex bolt, 1/2" -13 x 3-1/2"
6 4 Flat washer, 1/2"
Parts List
Item Qty Description
7 2 Bolt plate weldment
8 2 Leg adapter weldment
9 1 Coupler assembly
10 2Safety pin, 1/2"
11 2Top lock flange nut, 1/2"-13
12 4Center lock hex nut, 3/8"-16
NOTICE
Visit www.curtmfg.com for a full-color copy of this instruction manual, as well as helpful videos, guides and much more!
Before you begin installation, read all instructions thoroughly.
Proper tools will improve the quality of installation and reduce the time required.
Ensure towed vehicles tail lights, turn signals, and brake lights are operational and trailer connections secure before towing
Before towing, ensure the towed vehicle is properly equipped for flat towing by following the manufacturer's
recommendations and requirements. This includes proper transmission settings and releasing the emergency brake.
Periodic inspection of your product should be performed to ensure all hardware and / or components remain secure.
To help prevent damage to the product or vehicle, refer to the specified torque specifications when securing hardware during the installation process.
Parts List
Item Qty Description
13 2Tow bar arm
14 8Flat washer, 3/8"
15 4Serrated washer, 3/8"
16 4Hex bolt, 3/8"-16
17 4Nylock nut, 3/8"-16
CURTMFG.COM •PRODUCT SUPPORT: 877.287.8634 •19750-INS-RA •12/10/2020 •ECN7812 •PAGE 3
Step 2
Attach tow bar arms (#13) to the front tubes (#1)
using 3/8"-16 hex bolts (#16), 3/8" flat washers (#14),
and 3/8 -16 nylock nuts (#17).
Loosely secure the coupler assembly (#9) to the front tubes (#1)
using the bolt plate weldments (#7), 3/8" serrated washers (#15)
and 3/8"-16 center lock hex nuts (#12).
Step 1
Secure the leg adapter weldments (#8) to tow bar arms (#13) with
1/2"-13 x 3-1/2" hex bolts (#5) and 1/2"-13 top lock flange nuts (#11).
Tighten the 1/2" hardware until contact is made
with both sides of the tow bar arms.
NOTICE
Tow bar arms (#13) must swing freely;
back off hardware slightly if necessary.
Attach the tow bar assemblies to the previously installed
clevis mounts (#3) using the 1/2" safety pin (#10)
Before Every Towing Use
Adjust the coupler to fit the trailer ball by turning the nut under
the coupler. The coupler latch needs to engage the coupler and the
coupler must not be loose on the trailer ball. Always ensure there
is no free play between the coupler and hitch ball before towing.
The coupler latch must be secured with a
safety pin or a coupler lock (sold separately).
Attach two safety chains between the vehicles (sold separately).
Individual safety chains must have a break strength equal
to or exceeding the gross weight of the towed vehicle.
Use of safety chain is required.
Connect the appropriate wiring for stop,
turn, tail and marker lights (sold separately).
Check for proper clearance between vehicles in a turning situation.
Unlock the steering wheel for towing to allow
the front wheels of the towed vehicle to 'track'.
Set transmission for towing according to the owner's manual.
Verify recreational towing procedures in the vehicle owner's manual.
Use only vehicles equipped with manual transmissions or with
automatic transmissions with pumps that allow towing or drive shaft
disconnects. Manual transmissions must be in neutral
HOOK-UP
INSTALL ATION
Step 3
Center the coupler assembly with the towed vehicle
and torque the 3/8" fasteners to 31 ft-lbs.
Step 4
Attach the tow bar coupler to the 2" ball of the towing vehicle.
NOTICE
Ensure that the tow bar coupler is straight and that the
height difference between the ball and the clevis mount does
not exceed 6". Adjust ball height to make the tow bar level.
Attachment
surface
10
11
12
13
13
14
14
15
16
17
9
8
7
5
3
1
TOWING BASICS & SAFETY INFORMATION
For information on safely towing your trailer,
visit curtmfg.com/understanding-towing.
Coupler adjustment nut
Always pin or lock
coupler when in use

Other Curt Group Automobile Accessories manuals

Curt Group ARIES S225045 User manual

Curt Group

Curt Group ARIES S225045 User manual

Curt Group 13387 User manual

Curt Group

Curt Group 13387 User manual

Curt Group 51189 User manual

Curt Group

Curt Group 51189 User manual

Curt Group 40247 User manual

Curt Group

Curt Group 40247 User manual

Curt Group 18113 User manual

Curt Group

Curt Group 18113 User manual

Curt Group Aries TrailCrusher 2156000 User manual

Curt Group

Curt Group Aries TrailCrusher 2156000 User manual

Curt Group Retrac 207800 User manual

Curt Group

Curt Group Retrac 207800 User manual

Curt Group Liverne 401801 User manual

Curt Group

Curt Group Liverne 401801 User manual

Curt Group 13415 User manual

Curt Group

Curt Group 13415 User manual

Curt Group 60638 User manual

Curt Group

Curt Group 60638 User manual

Curt Group 16190 User manual

Curt Group

Curt Group 16190 User manual

Curt Group Aries 4490 User manual

Curt Group

Curt Group Aries 4490 User manual

Curt Group 18151 User manual

Curt Group

Curt Group 18151 User manual

Curt Group ARIES AL234046 User manual

Curt Group

Curt Group ARIES AL234046 User manual

Curt Group Retrac 207700 User manual

Curt Group

Curt Group Retrac 207700 User manual

Curt Group ARIES S224046 User manual

Curt Group

Curt Group ARIES S224046 User manual

Curt Group 3025101 User manual

Curt Group

Curt Group 3025101 User manual

Curt Group 13458 User manual

Curt Group

Curt Group 13458 User manual

Curt Group Aries 2074113 User manual

Curt Group

Curt Group Aries 2074113 User manual

Curt Group Aries 3025175 User manual

Curt Group

Curt Group Aries 3025175 User manual

Curt Group 58975 User manual

Curt Group

Curt Group 58975 User manual

Curt Group 60639 User manual

Curt Group

Curt Group 60639 User manual

Curt Group 48411 User manual

Curt Group

Curt Group 48411 User manual

Curt Group 70105 User manual

Curt Group

Curt Group 70105 User manual

Popular Automobile Accessories manuals by other brands

bosal 027542 Fitting instructions

bosal

bosal 027542 Fitting instructions

matson RV MAINTAINER RV210 manual

matson

matson RV MAINTAINER RV210 manual

Dometic DELIBOX DEL90H Installation and operating manual

Dometic

Dometic DELIBOX DEL90H Installation and operating manual

Porsche Mobile Charger Connect Driver manual

Porsche

Porsche Mobile Charger Connect Driver manual

Access LORADO Installation instructions and owner's manual

Access

Access LORADO Installation instructions and owner's manual

Discount Car Stereo BLU-CHRY98 Quick start installation guide

Discount Car Stereo

Discount Car Stereo BLU-CHRY98 Quick start installation guide

Whispbar K349W Fitting instructions

Whispbar

Whispbar K349W Fitting instructions

Westin 21-3570 installation instructions

Westin

Westin 21-3570 installation instructions

Prorack K1207 Fitting instructions

Prorack

Prorack K1207 Fitting instructions

Mazda KMV6V7210 installation instructions

Mazda

Mazda KMV6V7210 installation instructions

Webasto HOLLANDIA 300 CLASSIC user manual

Webasto

Webasto HOLLANDIA 300 CLASSIC user manual

Perimeter View PVW1 Pairing guide

Perimeter View

Perimeter View PVW1 Pairing guide

STO N SHO SNS 160 Installation procedures

STO N SHO

STO N SHO SNS 160 Installation procedures

Hama 137428 operating instructions

Hama

Hama 137428 operating instructions

ARB INTENSITY SOLIS user guide

ARB

ARB INTENSITY SOLIS user guide

Thule 1072 instructions

Thule

Thule 1072 instructions

Car-Interface CI-UCON7-JEEP manual

Car-Interface

Car-Interface CI-UCON7-JEEP manual

Sintrones VBOX-3150 user manual

Sintrones

Sintrones VBOX-3150 user manual

manuals.online logo
manuals.online logoBrands
  • About & Mission
  • Contact us
  • Privacy Policy
  • Terms and Conditions

Copyright 2025 Manuals.Online. All Rights Reserved.