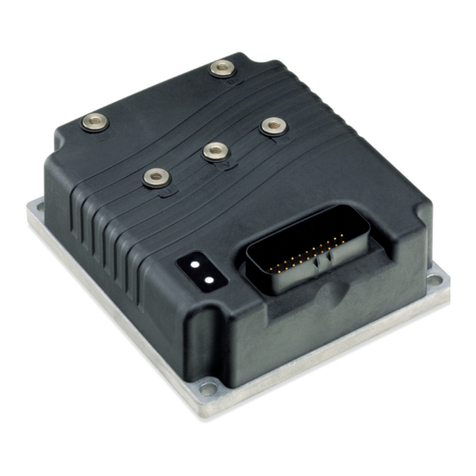
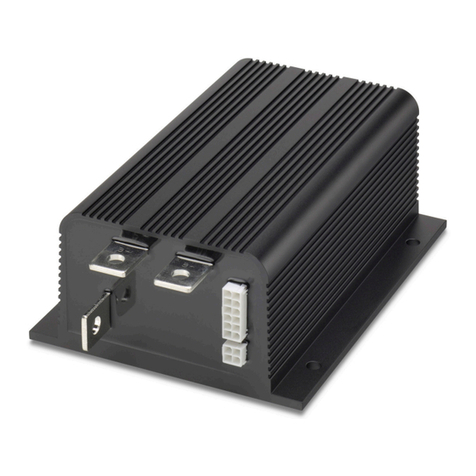
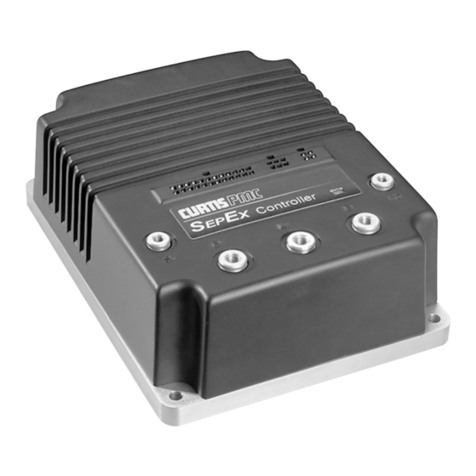
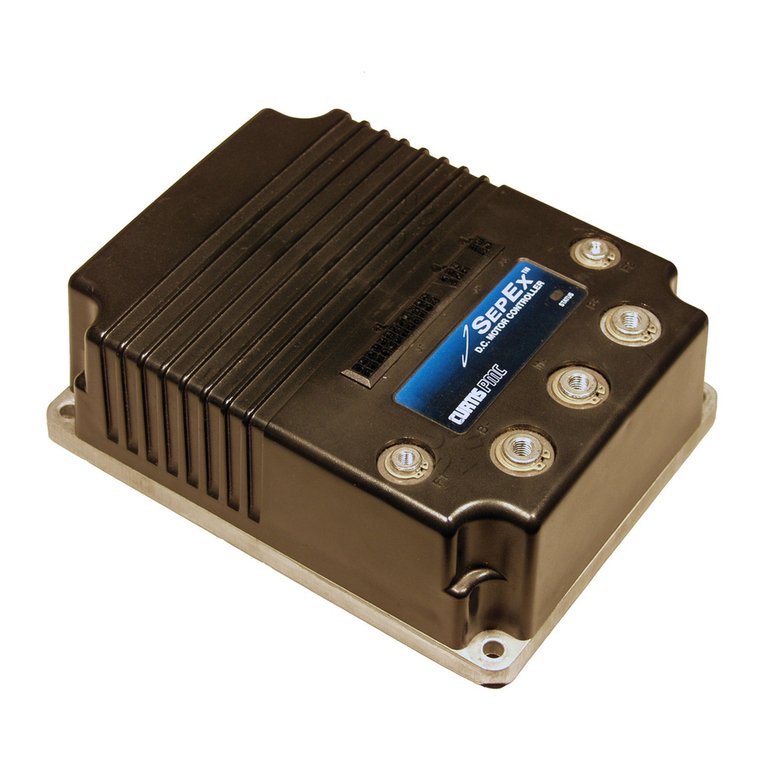
Curtis MultiMode 1214-8 User manual

MANUAL
© 2003 CURTIS INSTRUMENTS, INC.
DESIGN OF CURTIS PMC 1200 SERIES
CONTROLLERS PROTECTED BY U.S.
PATENT NO. 4626750.
1214-8 / 1215-8 / 1219-8 Manual
p/n 16369, Rev. C: April 2003
CURTIS INSTRUMENTS, INC.
200 Kisco Avenue
Mount Kisco, NY 10509 USA
Tel: 914-666-2971
Fax: 914-666-2188
www.curtisinst.com
MultiMode™
MOTOR CONTROLLERS
1214-8
1215-8
1219-8

Curtis 1214-/15-/19-8 Manual ii
12345678901
1
234567890
1
1
234567890
1
1
234567890
1
1
234567890
1
1
234567890
1
1
234567890
1
1
234567890
1
1
234567890
1
1
234567890
1
1
234567890
1
1
234567890
1
1
234567890
1
1
234567890
1
1
234567890
1
1
234567890
1
1
234567890
1
1
234567890
1
1
234567890
1
1
234567890
1
1
234567890
1
1
234567890
1
1
234567890
1
1
234567890
1
1
234567890
1
1
234567890
1
1
234567890
1
1
234567890
1
1
234567890
1
1
234567890
1
1
234567890
1
1
234567890
1
1
234567890
1
1
234567890
1
1
234567890
1
1
234567890
1
1
234567890
1
1
234567890
1
1
234567890
1
1
234567890
1
1
234567890
1
1
234567890
1
1
234567890
1
1
234567890
1
1
234567890
1
1
234567890
1
1
234567890
1
1
234567890
1
1
234567890
1
1
234567890
1
1
234567890
1
1
234567890
1
1
234567890
1
1
234567890
1
1
234567890
1
1
234567890
1
1
234567890
1
1
234567890
1
1
234567890
1
1
234567890
1
1
234567890
1
1
234567890
1
1
234567890
1
1
234567890
1
1
234567890
1
1
234567890
1
1
234567890
1
1
234567890
1
1
234567890
1
1
234567890
1
1
234567890
1
1
234567890
1
1
234567890
1
1
234567890
1
1
234567890
1
1
234567890
1
1
234567890
1
1
234567890
1
1
234567890
1
1
234567890
1
1
234567890
1
1
234567890
1
1
234567890
1
1
234567890
1
1
234567890
1
1
234567890
1
1
234567890
1
1
234567890
1
1
234567890
1
1
234567890
1
1
234567890
1
1
234567890
1
1
234567890
1
1
234567890
1
1
234567890
1
1
234567890
1
1
234567890
1
1
234567890
1
1
234567890
1
1
234567890
1
1
234567890
1
1
234567890
1
1
234567890
1
1
234567890
1
1
234567890
1
1
234567890
1
1
234567890
1
1
234567890
1
1
234567890
1
1
234567890
1
1
234567890
1
1
234567890
1
12345678901
CONTENTS
1. OVERVIEW ..................................................................... 1
2. INSTALLATION AND WIRING ................................... 3
Mounting the Controller............................................ 3
Connections: Low Current......................................... 4
Connections: High Current ....................................... 5
Wiring: Standard Configuration ................................ 6
Wiring: Throttle ........................................................ 8
Wiring: Emergency Reverse Check .......................... 12
Contactors, Switches, and Other Hardware ............. 13
Installation Checkout ............................................... 14
3. PROGRAMMING AND ADJUSTMENT .................... 16
4. MAINTENANCE .......................................................... 17
Cleaning ................................................................... 17
Diagnostic History ................................................... 17
Testing the Fault Detection Circuitry ...................... 18
5. DIAGNOSTICS AND TROUBLESHOOTING .......... 19
Programmer Diagnostics .......................................... 19
LED Diagnostics ...................................................... 21
6. PROGRAMMER MENUS............................................. 22
APPENDIX AGlossary of Features and Functions.......... A-1
APPENDIX BSpecifications ........................................... B-1
CONTENTS

Curtis 1214-/15-/19-8 Manual iii
FIGURES
FIG. 1: Curtis 1215-8 motor controller ....................................1
FIG. 2: Mounting dimensions,
Curtis 1214-/15-/19-8 controller ................................. 3
FIG. 3: Standard wiring diagram ..............................................6
FIG. 4: Wiring for 5kΩ–0 throttle (“Type 1”) ......................... 8
FIG. 5: Wiring for 20kΩpot used as a wigwag-style
throttle (“Type 1”) .......................................................9
FIG. 6: Wiring for 0–5kΩthrottle (“Type 3”) ......................... 9
FIG. 7: Wiring for 0–5V throttle (“Type 2”).......................... 10
FIG. 8: Wiring for 0–10V throttle (“Type 2”)........................ 11
FIG. 9: Wiring for 3-wire pot throttle (“Type 2”) ..................11
FIG. 10: Wiring for Curtis ET-XXX electronic throttle
(“Type 2”) ................................................................. 12
FIG. A-1: Ramp shape (throttle map) for controller with
maximum speed 100% and creep speed 0 ................ A-8
FIG. A-2: Ramp shape (throttle map) for controller with
maximum speed 100% and creep speed 10%........... A-9
FIG. A-3: Ramp shape (throttle map) for controller with
maximum speed 60% and creep speed 10%............. A-9
TABLES
TABLE 1: Troubleshooting chart ................................................ 20
TABLE 2: LED codes ................................................................. 21
FIGURES / TABLES

Curtis 1214-/15-/19-8 Manual 1
1
1 — OVERVIEW
OVERVIEW
Curtis 1214-8, 1215-8, and 1219-8 programmable motor speed controllers
provide efficient, cost-effective, and simple-to-install control for a variety of large
industrial vehicles. Typical applications include walkie/rider pallet trucks, fork
lifts, stackers, reach trucks, and other industrial trucks.
The 1207-based microprocessor logic section combined with a Curtis
MOSFET power section gives the 1214-/15-/19-8 controller high power and
advanced features in a rugged, compact package. The optional handheld pro-
grammer enables the user to set parameters, conduct tests, and obtain diagnostic
information quickly and easily.
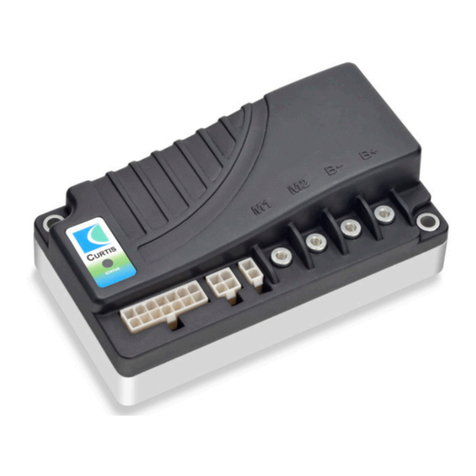
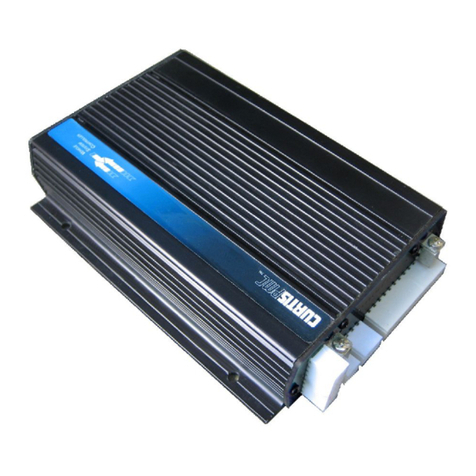
Fig. 1 Curtis 1215-8
motor controller. The
1214-8 and 1219-8
controllers are similar, but
differ in overall length.
M- (motor armature)
24-pin low-power connector
4-pin connector for handheld programmer
LED
B+ (positive battery)
B- (negative battery) A2 (plug diode to
motor armature)
Like all Curtis motor controllers, the 1214-/15-/19-8 controller offers superior
operator control of the vehicle’s motor drive speed. Features include:
✓Power MOSFET design, providing
•infinitely variable drive and plug brake control
•silent high-frequency operation
•high efficiency (for reduced motor and battery losses)
✓Overvoltage and undervoltage protection
✓Thermal protection/compensation circuitry that provides
undertemperature cutback, constant current limit over operating range,

Curtis 1214-/15-/19-8 Manual 2
and linear rollback in overtemperature—thus preventing sudden power
loss regardless of thermal conditions
✓Intelligent handheld 13XX programmer provides a full set of parameter
and function settings
✓Diagnostic and test information for the controller—and other system
components—readily available through both an on-board LED and the
optional handheld programmer
✓Meets or exceeds EEC fault detect requirements, with circuitry and
software to detect faults in the throttle circuit, MOSFET drive circuits,
MOSFET output, contactor drivers, and contactors
✓Programmable input sequencing options include several combinations
of neutral start and static return to off (SRO)
✓Arcless contactor switching with microprocessor-controlled contactor
sequencing
✓Smooth, controlled plug braking—with either variable (throttle-
dependent) or fixed plug current limit
✓Neutral braking option provides automatic plug braking in neutral
✓MultiMode™input selects between two different operating modes,
thus allowing optimization of vehicle characteristics for different driving
conditions
✓Emergency reverse (belly button switch) provides full function
with a single input
✓Anti-rollback (ramp start) provides full power for starting on ramps
✓Simple contactor and switch wiring, with coil drivers monitored
for shorts and open circuits—thus ensuring fail-safe operation
✓Flexible throttle circuitry accommodates a variety of throttle types:
5kΩ–0, 0–5kΩ, 0–5V, 0–10V, inductive, Hall, etc.
✓Programmable “ramp shape”(static throttle map) provides flexibility
in selecting throttle response feel
✓Sealed package, providing environmental protection
✓Power connections made by tin-plated solid copper busses,
with a polarized Molex connector for control signals
Familiarity with your Curtis controller will help you install and operate it
properly. We encourage you to read this manual carefully. If you have questions,
please contact the Curtis office nearest you.
1 — OVERVIEW
Curtis 1214-/15-/19-8 Manual 3
INSTALLATION AND WIRING
MOUNTING THE CONTROLLER
The controller can be oriented in any position, but the location should be
carefully chosen to keep the controller as clean and dry as possible. If a clean,
dry mounting location cannot be found, a cover must be used to shield the
controller from water and contaminants.
To ensure full rated output power, the controller should be fastened to a
clean, flat metal surface with four screws. The case outline and mounting hole
dimensions are shown in Figure 2. Access is needed at the front of the controller
to plug the programmer into its connector, and to view the LED.
Although not usually necessary, a thermal joint compound can be used to
improve heat conduction from the case to the mounting surface.
2
2 — INSTALLATION & WIRING
Fig. 2 Mounting
dimensions,
Curtis 1214-/15-/19-8
controllers.
169
(6.66)
5
.5
(0
.22
)
180
(7.1)
23
(0.893)
81.3
(3.2)
3.18 (0.125)
26.4
×
20.6
×
2.3 (1.04
×
0.81
×
0.09);
8.4 (0.33) dia. hole thru
7.1 (0.28) dia., 4 plcs
[6 plcs in 1219]
Dimensions in millimeters and (inches)
“B”
“A”
1214 1215 1219
“A”
210 (8.275) 253 (9.975) 309 (12.180)
“B”
165 (6.490) 208 (8.190) 264 (10.394)
[1219 MODELS ONLY]

Curtis 1214-/15-/19-8 Manual 4
CONNECTIONS: Low Current
A 24-pin low current connector in the front of the controller provides the low
current logic control connections (see pin list below). The mating connector is
Molex Mini-Fit Jr., part number 39-01-2245. Contact Molex regarding compat-
ible pins: 39-00-0078 for #16 AWG, 39-00-0039 for #18–24 AWG.
2 — INSTALLATION & WIRING
Pin 1 keyswitch input (KSI)
Pin 2 brake input
Pin 3 mode selection input
Pin 4 n/c
Pin 5 throttle: 0–10V
Pin 6 emergency reverse input
Pin 7 n/c
Pin 8 n/c
Pin 9 n/c
Pin 10 forward input
Pin 11 reverse input
Pin 12 n/c
Pin 13 throttle: 3-wire pot high
Pin 14 throttle: pot low
Pin 15 throttle: 0–5V (3-wire pot wiper)
Pin 16 throttle: 2-wire 5kΩ–0 or 0–5kΩinput
Pin 17 main contactor driver output
Pin 18 forward contactor driver output
Pin 19 reverse contactor driver output
Pin 20 n/c
Pin 21 n/c
Pin 22 n/c
Pin 23 n/c
Pin 24 emergency reverse (BB) check output [optional]
A 4-pin low power connector, also located on the front of the controller, is
provided for the handheld programmer.
24 23 22 21 20 19 18 17 16 15 14 13
121110987654321

Curtis 1214-/15-/19-8 Manual 5
CONNECTIONS: High Current
Four tin-plated solid copper bus bars are provided for the high current connec-
tions to the battery and motor:
M- output to motor armature
B- negative connection to battery
B+ positive connection to battery/field
A2 plug diode to motor armature
Cables are fastened to the bus bars by M8 (5⁄16")
bolts. When tightening the bolts, two opposing
wrenches should be used to prevent bending the bus
bars and putting undue strain on the internal con-
nections.
2 — INSTALLATION & WIRING
M-
B- B+
A2
Working on electric vehicles is potentially dangerous. Youshould
protect yourself against runaways, high current arcs, and outgassing
from lead acid batteries:
RUNAWAYS —Some fault conditions could cause the vehicle to run
out of control. Jack up the vehicle and get the drive wheels off the
ground before attempting these procedures or any other work on the
motor control circuitry.
HIGH CURRENT ARCS —Electric vehicle batteries can supply very high
power, and arcs can occur if they are short circuited. Always open
the battery circuit before working on the motor control circuit.
Wear safety glasses, and use properly insulated tools to prevent
shorts.
LEAD ACID BATTERIES —Charging or discharging generates hydrogen
gas, which can build up in and around the batteries. Follow the
battery manufacturer’s safety recommendations. Wear safety glasses.
☞
CAUTION

Curtis 1214-/15-/19-8 Manual 6
WIRING: Standard Configuration
The configuration shown in Figure 3 is a typical arrangement for most applica-
tions. For walkie applications, the brake switch is typically activated by the tiller,
and a belly button switch provides emergency reverse. The emergency reverse
check feature (wiring shown by dotted line) is a factory option.
For rider applications, the brake switch is typically a seat switch or a foot
switch, and there is no emergency reverse.
2 — INSTALLATION & WIRING
Fig. 3 Standard
wiring diagram,
Curtis 1214-/15-/19-8
controller.
A
BRAKE/
SEAT MODE
SELECT EMERG.
REV
FORWARD REVERSE REV
CONTACTORS
MAIN
FWD
B-
B+
POWER
FUSE
KEYSWITCH
CONTROL
FUSE
POLARITY
PROTECTION
DIODE
5kΩ–0
THROTTLE
(TYPICAL)
MAIN
CONTACTOR
REVERSE
CONTACTOR
FORWARD
CONTACTOR
A1 A2
M- A2
B- B+
SWITCHES SWITCHES
S1S2
PRECHARGE RESISTOR
(250 Ω, 5 W)
B-B-

Curtis 1214-/15-/19-8 Manual 7
Standard Power Wiring
In every wiring configuration, it is imperative that the field be wired between B+
and A2 and that the armature be wired between M- and the A2 terminal. The
internal plug diode used in the 1214-/15-/19-8 is connected between M- and A2.
Therefore, the armature and field positions cannot be interchanged. Reversing
contactors can be used to switch either the armature or the field.
Standard Control Wiring
Wiring for the input switches and contactors is shown in Figure 3 (see detail
below). The main contactor, if one is used, is normally connected directly to the
controller. Optionally, the main contactor can be switched directly by the
keyswitch or brake, leaving Pin 17 unconnected.
The throttle shown in Figure 3 is a 5kΩ–0 type. Various other throttles can also
be accommodated, and are discussed in the throttle wiring section.
2 — INSTALLATION & WIRING
24-pin detail (see Fig. 3):
MODE
SELECT
FORWARD KEYSWITCH
EMERGENCY
REVERSE
CHECK
OUTPUT
(factory option)
BRAKE
or
SEAT SWITCH
EMERGENCY
REVERSE
(walkies only)
REVERSE
MAIN
CONTACTOR
REVERSE
CONTACTOR
2-WIRE POT
(5 k
Ω
)
FORWARD
CONTACTOR
POT
LOW
24 23 22 21 20 19 18 17 16 15 14 13
121110987654321

Curtis 1214-/15-/19-8 Manual 8
WIRING: Throttle
Wiring for various throttles is described below. These include 5kΩ–0 and 0–5kΩ
throttles, 0–5V and 0–10V throttles, 3-wire potentiometer throttles, and elec-
tronic throttles. If the throttle you are planning to use is not covered, contact the
Curtis office nearest you.
5kΩ–0 Throttle (“Type 1”)
The 5kΩ–0 throttle (called a “Type 1”throttle in the programming menu of the
handheld programmer) is a 2-wire resistive throttle that connects between the
2-Wire Pot pin (Pin 16) and the Pot Low pin (Pin 14), as shown in Figure 4. It
doesn’t matter which wire goes on which pin. For Type 1 throttles, zero speed
corresponds to 5kΩand full speed corresponds to 0Ω.
2 — INSTALLATION & WIRING
Fig. 4 Wiring for 5k
Ω
–0
throttle (“Type 1”).
In addition to accommodating the basic 5kΩ–0 throttle, the Type 1 throttle
input can be used to implement a wigwag-style throttle. Using a 20kΩpotenti-
ometer wired as shown in Figure 5, the pot wiper can be set such that the
controller has 5kΩbetween Pins 14 and 16 when the throttle is in the neutral
position. The throttle mechanism can then be designed such that rotating it
either forward or back decreases the resistance between Pins 14 and 16, which
increases the controller output. The throttle mechanism must provide signals to
Fig. 5 Wiring for 20k
Ω
potentiometer used as a
wigwag-style throttle
(“Type 1”).
14 1315161718192021222324
121110987654321
Pin 16
Pin 14 2-Wire Pot
Pot Low
PIN KEY
20 kΩ
FASTERFASTER
14 1315161718192021222324
121110987654321
Pin 16
Pin 14
2-Wire Pot
Pot Low
PIN KEY
5kΩ–0
FASTER

Curtis 1214-/15-/19-8 Manual 9
2 — INSTALLATION & WIRING
Fig. 6 Wiring for 0–5k
Ω
throttle (“Type 3”).
the controller’s forward and reverse inputs independent of the throttle pot
resistance. The controller will not sense direction from the pot resistance.
With Type 1 throttles, broken wire protection is provided by the controller
sensing the current flow from the 2-Wire Pot pin through the pot and into the
Pot Low pin. If the Pot Low input current falls below 0.1 mA, a throttle fault is
generated and the controller is disabled. NOTE: The Pot Low pin (Pin 14) must
not be tied to ground.
0–5kΩThrottle (“Type 3”)
The 0–5kΩthrottle (“Type 3”in the programming menu) is a 2-wire resistive
throttle that connects between the 2-Wire Pot pin (Pin 16) and Pot Low (Pin 14).
It doesn’t matter which wire goes on which pin. For Type 3 throttles, zero speed
corresponds to 0Ωand full speed corresponds to 5kΩ.
With Type 3 throttles, broken wire protection is provided by the controller
sensing the current flow from the 2-Wire Pot pin through the pot and into the
Pot Low pin. If the Pot Low input current falls below 0.1 mA, a throttle fault is
generated and the controller is disabled. NOTE: The Pot Low pin (Pin 14) must
not be tied to ground.
0–5V, 0–10V, 3-Wire Potentiometer, or Electronic Throttle (“Type 2”)
With these throttles (“Type 2”in the programming menu), the controller looks
for a voltage signal at either the pot wiper/0–5V input (Pin 15) or the 0–10V
input (Pin 5). Zero speed corresponds to 0V and full speed corresponds to either
5V or 10V. Pot Low (Pin 14) is the current return path for all Type 2 throttles.
It is 200 mV above B- and must have at least 0.1 mA flowing into it to prevent
pot faults.
14 1315161718192021222324
121110987654321
Pin 16
Pin 14
2-Wire Pot
Pot Low
PIN KEY
0–5kΩ
FASTER

Curtis 1214-/15-/19-8 Manual 10
0–5V Throttle
Two ways of wiring the 0–5V throttle are shown in Figure 7. Broken wire
protection is provided by the controller looking for a minimum current into the
Pot Low pin. If the Pot Low input current falls below 0.1 mA, a throttle fault is
generated and the controller is disabled. If a throttle sensor is used, the sensor’s
ground return current must be less than 10 mA. If the 0–5V throttle input (Pin
15) exceeds 8 volts, the controller output will be disabled. NOTE: In Figure 7(a),
the throttle’s voltage input signal is in reference to Pot Low.
2 — INSTALLATION & WIRING
0–10V Throttle
Two ways of wiring the 0–10V throttle are shown in Figure 8. Broken wire
protection is provided by the controller looking for a minimum current into the
Pot Low pin. If the Pot Low input current falls below 0.1 mA, a throttle fault is
generated and the controller is disabled. If a throttle sensor is used, the sensor’s
ground return current must be less than 10 mA. If the 0–10V throttle input (Pin
5) exceeds 16 volts, the controller output will be disabled. NOTE: In Figure 8(a),
the throttle’s voltage input signal is in reference to Pot Low.
Fig. 7 Wiring for 0–5V
throttle (“Type 2”).
(b) 0–5V throttle sensor
(a) Ground-referenced 0–5V throttle
14 1315161718192021222324
121110987654321
14 1315161718192021222324
121110987654321
SENSOR OUTPUT
SENSOR GROUND
0–5V
SENSOR
+
+
-B-
4.7 kΩ
(Shunt impedance 150 k
Ω
to ground)
Pin 15
Pin 14
Pin 13
0–5V Input
Pot Low
Pot High
PIN KEY
Pin 15
Pin 14 0–5V Input
Pot Low
PIN KEY

Curtis 1214-/15-/19-8 Manual 11
3-Wire Potentiometer (500
Ω
–10k
Ω
) Throttle
The 3-wire potentiometer is used in its voltage divider mode—with the voltage
source and return being provided by the controller. Pot High provides a current-
limited 5V source to the potentiometer, and Pot Low provides the return path.
Wiring is shown in Figure 9.
2 — INSTALLATION & WIRING
Fig. 9 Wiring for 3-wire
potentiometer throttle
(“Type 2”).
As with the 2-wire throttles, broken wire protection is provided by the
controller looking for a minimum current into the Pot Low pin. If the Pot Low
input current falls below 0.1 mA, a throttle fault is generated and the controller
is disabled. NOTE: The Pot Low pin (Pin 14) must not be tied to ground.
14 1315161718192021222324
121110987654321
OFF
ON
500Ω–10kΩ
Pin 15
Pin 14
Pin 13
Pot Wiper
Pot Low
Pot High
PIN KEY
Fig. 8 Wiring for 0–10V
throttle (“Type 2”).
(b) 0–10V throttle sensor
(a) Ground-referenced 0–10V throttle
14 1315161718192021222324
121110987654321
14 1315161718192021222324
121110987654321
SENSOR OUTPUT
SENSOR GROUND
0–10V
SENSOR
+
+
-B-
4.7 kΩ
Pin 14
Pin 13
Pin 5
Pot Low
Pot High
0–10V Input
PIN KEY
PIN KEY
Pot Low
0–10V Input
Pin 14
Pin 5

Curtis 1214-/15-/19-8 Manual 12
Curtis ET-XXX Electronic Throttle
The Curtis ET-XXX provides throttle and forward/reverse inputs; wiring is
shown in Figure 10.
2 — INSTALLATION & WIRING
Fig. 10 Wiring for Curtis
ET-XXX electronic throttle
(“Type 2”).
14 1315161718192021222324
121110987654321
GREEN
ORANGE
BLACK
BLACK/WHITE
WHITE
WHT/BRN
B-
KEYSWITCH
B+
Pin 15
Pin 14
Pin 11
Pin 10
Pin 1
0–5V Input
Pot Low
Reverse
Forward
KSI Input
PIN KEY
WHT/
GRN
WIRING: Emergency Reverse Check
An optional wire connected directly to the emergency reverse (belly button)
switch provides for broken wire detection when that feature is enabled at the
factory. The emergency reverse check output wire periodically pulses the emer-
gency reverse circuit to check for continuity. If there is no continuity, the
controller limits the vehicle to 15% speed and a fault code is indicated.
If the option is selected and the check wire is not connected, the vehicle
speed is limited to 15%. If the option is not selected and the check wire is
connected, no harm will occur—but continuity will not be checked.
The emergency reverse check output wire is connected to Pin 24, as shown
by the dotted line in the basic wiring diagram (Figure 3).

Curtis 1214-/15-/19-8 Manual 13
2 — INSTALLATION & WIRING
CONTACTORS, SWITCHES, and OTHER HARDWARE
Main Contactor
A main contactor allows the controller to be disconnected from the battery. In
24V applications a main contactor is optional, but in 36–48V applications a
main contactor is required. A heavy-duty single-pole, single-throw (SPST)
contactor with silver-alloy contacts is recommended.
After initial closing of the contacts, inrush currents flow as the controller’s
internal filter capacitors are charged. A 250Ω, 5W resistor can be used across the
contactor to precharge the capacitors and reduce the inrush current through the
contacts.
A built-in coil suppression diode is connected between the main contactor
coil output and the brake/seat switch input.
Forward/Reverse Contactors
For forward/reverse, a paired single-pole, double-throw (2×SPDT) contactor is
recommended. With 4-terminal split field motors, two single-pole, single-throw
(SPST) contactors are typically used. The coil voltage should match the vehicle
voltage. The maximum allowed coil current is 1 ampere.
A built-in coil suppression diode is connected between each forward/reverse
contactor coil output and the brake/seat switch input.
Forward/Reverse, Emergency Reverse, and Mode Selection Switches
These switches can be any type of single-pole, single-throw (SPST) switch
capable of switching the battery voltage at 10 mA.
Keyswitch
The vehicle should have a master on/off switch to turn the system off when not
in use. The keyswitch provides logic power for the controller, and coil current for
the contactors. The keyswitch must be capable of carrying these currents.
Circuitry Protection Devices
For reverse polarity protection, a diode should be added to the control circuit. It
must be sized appropriately for the maximum contactor coil currents. To protect
the control wiring from accidental shorts, a low current fuse (appropriate for the
maximum current draw) should be connected in series with the battery feed.
These devices are both shown in the wiring diagrams.

Curtis 1214-/15-/19-8 Manual 14
INSTALLATION CHECKOUT
Before operating the vehicle, carefully complete the following checkout proce-
dure. If you find a problem during the checkout, refer to the diagnostics and
troubleshooting section (Section 5) for further information.
The installation checkout can be conducted with or without the handheld
programmer. The checkout procedure is easier with a programmer. Otherwise,
observe the LED for diagnostic codes. (The codes are listed in Section 5.)
Put the vehicle up on blocks to get the drive wheels off
the ground before beginning these tests.
Do not stand, or allow anyone else to stand, directly in
front of or behind the vehicle during the checkout.
Make sure the keyswitch is off and the brake is applied
(brake switch open), the throttle is in neutral, and the
forward/reverse switches are open.
Wear safety glasses and use well-insulated tools.
1. If a programmer is available, connect it to the programmer connector.
2. Turn the keyswitch on. The programmer should “power up”with an
initial display, and the controller’s Status LED should begin steadily
blinking a single flash. If neither happens, check for continuity in the
keyswitch circuit and controller ground.
3. If you are using a programmer, put it into the diagnostic mode by
pressing the DIAGNOSTICS key. The display should indicate “No Faults
Found.”
Close the brake/seat switch. To do this on a walkie, pull the tiller
down to the operating position. The LED should continue blinking a
single flash and the programmer should continue to indicate no faults.
If there is a problem, the LED will flash a diagnostic code and the
programmer will display a diagnostic message. If you are conducting the
checkout without a programmer, look up the LED diagnostic code in
Section 5 (Diagnostics and Troubleshooting).
When the problem has been corrected, it may be necessary to cycle
the brake/seat switch in order to clear the fault code.
2 — INSTALLATION & WIRING
☞
CAUTION

Curtis 1214-/15-/19-8 Manual 15
4. With the brake/seat switch closed, select a direction and operate the
throttle. The motor should begin to turn in the selected direction. If it
does not, verify the wiring to the forward/reverse switches, forward/
reverse contactors, and motor. The motor should run proportionally
faster with increasing throttle. If not, refer to Section 5.
5. If you are using a programmer, put it into the test mode by pressing
the TEST key. Scroll down to observe the status of the forward, reverse,
brake, emergency reverse, and mode switches. Cycle each switch in
turn, observing the programmer. Each input should show the correct
state on the programmer.
6. Specific material handling directives, such as prEN1175, require testing
of the controller’s fault detection circuitry. This can be done as follows:
a) Disconnect the battery and make sure the keyswitch is off.
b) Using an inline fuse holder fitted with a 10-amp fuse and
alligator clips, connect the controller’s M- and B- terminals.
c) Turn the keyswitch on, release the brake, and apply the throttle.
The motor should not operate, and the direction contactors
should not pull in.
d) Leave the keyswitch on and remove the inline fuse wire. The
vehicle status should continue to remain off.
e) Cycle the keyswitch off and on, release the brake, and apply the
throttle. The vehicle should now operate normally.
7. Take the vehicle off the blocks and drive it in a clear area. It should have
smooth acceleration and good top speed.
8. Test the plug braking of the vehicle. Verify that the plug braking option
is as desired (variable or fixed).
9. Verify that all options, such as high pedal disable (HPD), static return
to off (SRO), and anti-tiedown, are as desired.
10. On walkies, check to see whether the emergency reverse (belly button)
feature is working correctly. If you have the optional emergency reverse
check wiring, verify that the circuit is operational by momentarily
disconnecting one of the emergency reverse wires. The vehicle should
be limited to 15% speed and a fault indicated.
11. If you used a programmer, disconnect it when you have completed the
checkout procedure.
2 — INSTALLATION & WIRING

Curtis 1214-/15-/19-8 Manual 16
3
3 — PROGRAMMING & ADJUSTMENT
PROGRAMMING AND ADJUSTMENT
To change a parameter using the programmer, press the PROGRAM key, and scroll
down the Program Menu until the desired parameter is the top line of the display.
Press the appropriate CHANGE VALUE key (“up”or “down”) until the desired num-
ber is reached. The parameter is now set at the desired value. All programming
occurs in real time. In other words, the parameters can be changed while the
vehicle is in operation.
The upper and lower limits of parameters are set at the factory. When the
programmer is used to adjust a parameter and a limit is reached, the display stops
changing. To see why the display has stopped changing, press the MORE INFO key.
If the limit is related to another parameter, that information will be displayed;
changing the value of the related parameter may allow the original parameter to
be adjusted further. Otherwise, the display says “Max Limit”or “Min Limit.”
In addition to adjusting parameters, the programmer can be used to change
various options—such as throttle type, HPD, SRO, etc. Typically, the brake/seat
switch must be cycled before the new options take effect.
“CLONING”
One of the most powerful features of the programmer is its ability to “clone”
controllers. The programmer can read all the parameters and options from one
controller and write them to other controllers. Cloning only works between
controllers with the same model number and software version.
For example, the programmer can read all the information from a 1215-
8105 controller and write it to other 1215-8105 controllers. However, it cannot
write that same information to 1215-8106 controllers. If this is attempted, an
error message will be displayed.
PEACE-OF-MIND PROGRAMMING
Each time the programmer is connected to the controller, it acquires all the
controller’s parameters and stores them in its temporary memory. You can revert
back to these original settings at any time during a programming session via the
Special Program Menu. Select “Reset All Settings”by scrolling it to the top of the
display window, press the MORE INFO key, and follow the instructions displayed.
Any inadvertent changing of parameters can be “undone”using this procedure—
even if you can’t remember what the previous settings were—as long as the
programmer has not been unplugged and power has not been removed from
the controller.

Curtis 1214-/15-/19-8 Manual 17
4
4 — MAINTENANCE
MAINTENANCE
There are no user-serviceable parts inside Curtis controllers. No attempt should
be made to open the controller. Opening the controller may damage it and will
void the warranty.
However, it is recommended that the controller exterior be cleaned periodi-
cally, and—if a handheld programmer is available—this periodic cleaning pro-
vides a good opportunity to check the controller’s diagnostic history file.
The 1214-/15-/19-8 controller is inherently a high power device. When work-
ing around any battery powered vehicle, proper safety precautions should be
taken. These include, but are not limited to: proper training, wearing eye
protection, avoiding loose clothing and jewelry, and using insulated wrenches.
CLEANING
Although the 1214-/15-/19-8 controller requires virtually no maintenance when
properly installed, the following minor maintenance is recommended in certain
applications.
1. Remove power by disconnecting the battery.
2. Discharge the capacitors in the controller by connecting a load (such as
a contactor coil or a horn) across the controller’s B+ and B- terminals.
3. Remove any dirt or corrosion from the bus bar area. The controller
should be wiped clean with a moist rag. Allow it to dry before recon-
necting the battery.
4. Make sure the connections to the bus bars are tight. Use two wrenches
for this task in order to avoid stressing the bus bars; the wrenches should
be well insulated.
DIAGNOSTIC HISTORY
The handheld programmer can be used to access the controller’s diagnostic
history file. Connect the programmer, press the MORE INFO key, and then—while
continuing to hold the MORE INFO key—press the DIAGNOSTICS key. The program-
mer will read out all the faults that the controller has experienced since the last
☞
CAUTION
This manual suits for next models
2
Table of contents
Other Curtis Controllers manuals

Curtis
Curtis 1310 User manual

Curtis
Curtis 1268-5411 User manual

Curtis
Curtis 1268-5403 User manual

Curtis
Curtis MultiMode 1207B User manual

Curtis
Curtis 1232E User manual

Curtis
Curtis 1204M User manual

Curtis
Curtis 1239E User manual

Curtis
Curtis 1268 User manual

Curtis
Curtis 1212S User manual

Curtis
Curtis 1222 User manual

Curtis
Curtis 1313 User manual

Curtis
Curtis MultiMode 1228 User manual

Curtis
Curtis 1212 User manual

Curtis
Curtis 1232E User manual

Curtis
Curtis 1204 User manual

Curtis
Curtis 1298 User manual

Curtis
Curtis 1232E User manual

Curtis
Curtis 1297 User manual

Curtis
Curtis 1244 User manual

Curtis
Curtis 1268 User manual