manuals.online logo
Brands
  1. Home
  2. •
  3. Brands
  4. •
  5. Curtis
  6. •
  7. Controllers
  8. •
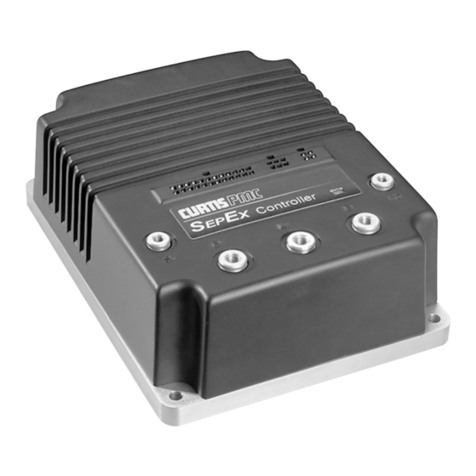
  9. Curtis PMC 1204 Series User manual

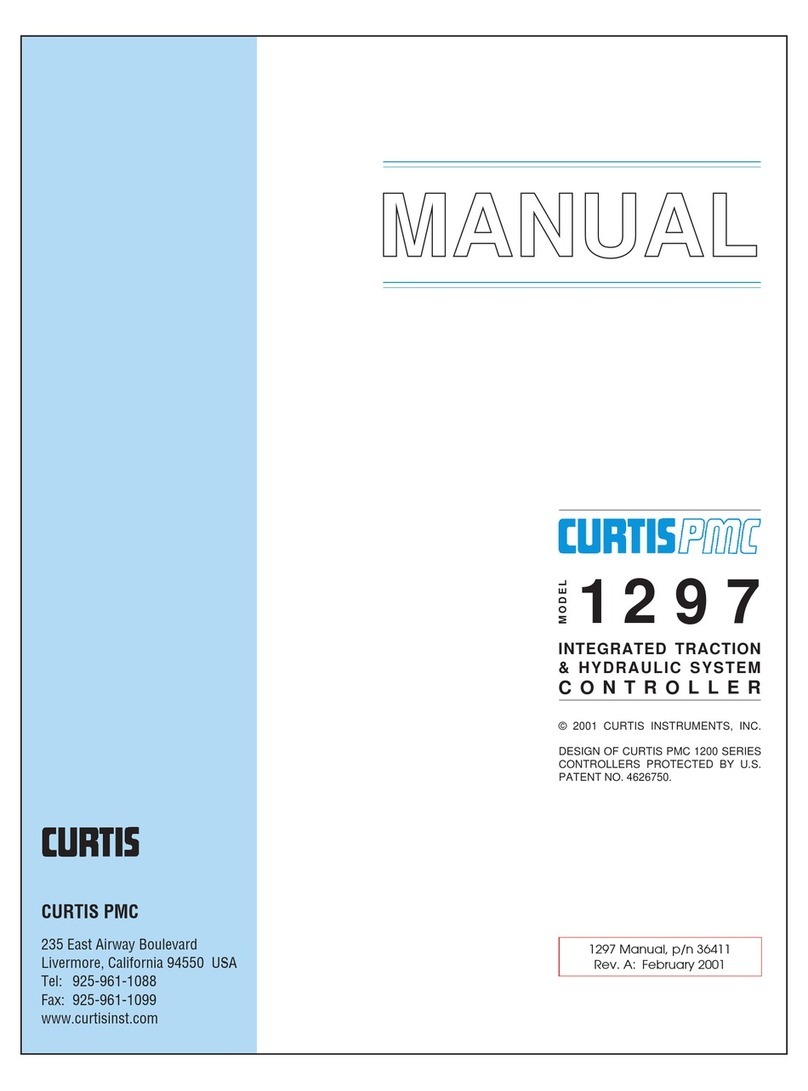
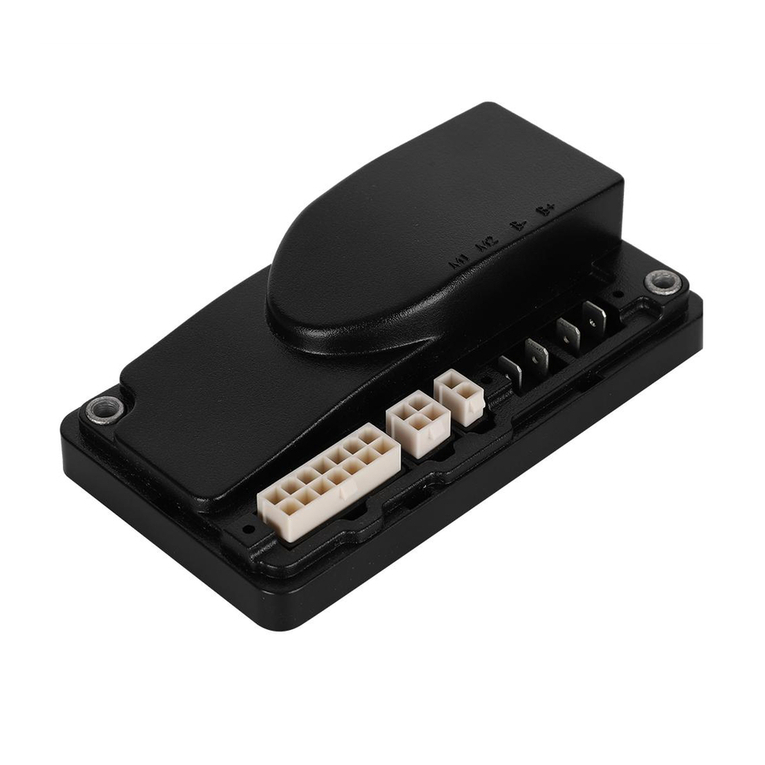
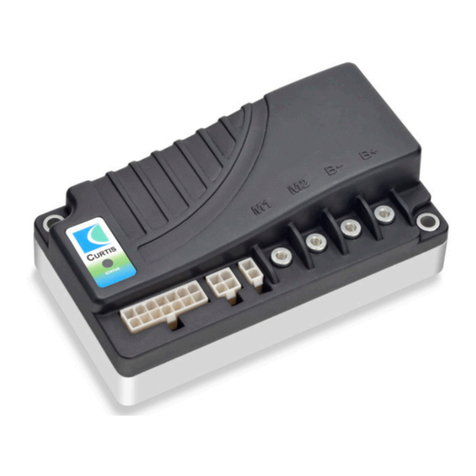
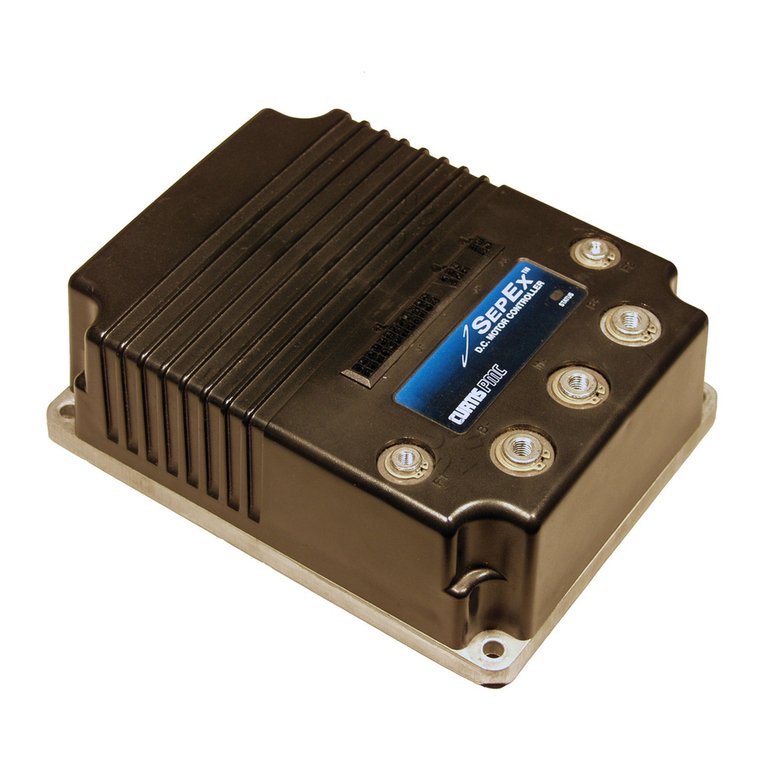
Curtis PMC 1204 Series User manual

MANUAL
© 1999 CURTIS INSTRUMENTS, INC.
DESIGN OF CURTIS PMC 1200 SERIES
CONTROLLERS PROTECTED BY U.S.
PATENT NO. 4626750.
1204X/1205X
and 1209/1221
MOTOR CONTROLLERS
1204X / 1205X / 1209 / 1221 Manual
p/n 98796, Rev. D: May 1999
CURTIS PMC
235 East Airway Boulevard
Livermore, California 94568 USA
Tel: 925-961-1088
Fax: 925-961-1099
www.curtisinst.com
1204X / 1205X / 1209 / 1221 Manual
p/n 98796, Rev. D: May 1999
© 1999 CURTIS INSTRUMENTS, INC.
This electronic version of the 1204X/1205X/1209/1221 manual is offered as a conve-
nience to our customers. You may download any or all of it.
Ifyouwouldlikeahardcopyofthepublishedmanual,pleaseorderitbypartnumberfrom
the Curtis office nearest you.
The electronic version of the manual is identical to the printed version published in May
1999 with the following exceptions:
Minor corrections were made to the dimensions shown in Figure 3.
Bookmarks have been added to the electronic version to speed the process of going
directly to a particular part of the document.
CURTIS INSTRUMENTS, INC.
200 KISCO AVENUE
MOUNT KISCO, NEW YORK 10549 USA
☎914-666-2971 FAX 914-666-2188
■CURTIS PMC
235 EAST AIRWAY BOULEVARD
LIVERMORE, CALIFORNIA 94550 USA
☎925-961-1088 FAX 925-961-1099
■
ADDITIONAL OFFICES
located in
Bulgaria, China, England, France, Germany,
India, Italy, Japan, Netherlands, Puerto Rico,
Russia, Sweden, and Switzerland
Curtis PMC 1204X/1205X/1209/1221 Manual iii
12345678901
1
234567890
1
1
234567890
1
1
234567890
1
1
234567890
1
1
234567890
1
1
234567890
1
1
234567890
1
1
234567890
1
1
234567890
1
1
234567890
1
1
234567890
1
1
234567890
1
1
234567890
1
1
234567890
1
1
234567890
1
1
234567890
1
1
234567890
1
1
234567890
1
1
234567890
1
1
234567890
1
1
234567890
1
1
234567890
1
1
234567890
1
1
234567890
1
1
234567890
1
1
234567890
1
1
234567890
1
1
234567890
1
1
234567890
1
1
234567890
1
1
234567890
1
1
234567890
1
1
234567890
1
1
234567890
1
1
234567890
1
1
234567890
1
1
234567890
1
1
234567890
1
1
234567890
1
1
234567890
1
1
234567890
1
1
234567890
1
1
234567890
1
1
234567890
1
1
234567890
1
1
234567890
1
1
234567890
1
1
234567890
1
1
234567890
1
1
234567890
1
1
234567890
1
1
234567890
1
1
234567890
1
1
234567890
1
1
234567890
1
1
234567890
1
1
234567890
1
1
234567890
1
1
234567890
1
1
234567890
1
1
234567890
1
1
234567890
1
1
234567890
1
1
234567890
1
1
234567890
1
1
234567890
1
1
234567890
1
1
234567890
1
1
234567890
1
1
234567890
1
1
234567890
1
1
234567890
1
1
234567890
1
1
234567890
1
1
234567890
1
1
234567890
1
1
234567890
1
1
234567890
1
1
234567890
1
1
234567890
1
1
234567890
1
1
234567890
1
1
234567890
1
1
234567890
1
1
234567890
1
1
234567890
1
1
234567890
1
1
234567890
1
1
234567890
1
1
234567890
1
1
234567890
1
1
234567890
1
1
234567890
1
1
234567890
1
1
234567890
1
1
234567890
1
1
234567890
1
1
234567890
1
1
234567890
1
1
234567890
1
1
234567890
1
1
234567890
1
1
234567890
1
1
234567890
1
1
234567890
1
1
234567890
1
1
234567890
1
1
234567890
1
1
234567890
1
1
234567890
1
1
234567890
1
1
234567890
1
1
234567890
1
1
234567890
1
1
234567890
1
1
234567890
1
1
234567890
1
1
234567890
1
12345678901
CONTENTS
1. OVERVIEW ....................................................................... 1
2. HARDWARE INSTALLATION ....................................... 3
Controller .................................................................... 3
Throttle ........................................................................ 5
Other Hardware ........................................................... 8
Main contactor ..................................................... 9
Forward/reverse contactors .................................... 9
Forward/reverse switches ....................................... 9
Emergency reverse relay ...................................... 10
Bypass contactor ................................................. 10
Keyswitch and interlocks .....................................10
Polarity protection diode..................................... 10
Control wiring fuse ............................................. 10
Power wiring fuse................................................ 10
3. WIRING ........................................................................... 11
Connections: Low Current......................................... 11
Connections: High Current .......................................12
Wiring: Typical Installation ....................................... 12
KSI wiring .......................................................... 12
Forward/reverse wiring ........................................ 13
Plug braking ................................................ 14
Freewheeling ................................................ 14
Emergency reverse........................................ 15
Throttle pot wiring ............................................. 16
Standard potbox wiring ............................... 16
Pots for twist-grip throttles .......................... 16
Reduced speed operation ............................. 17
Electronic throttle wiring .................................... 18
Bypass wiring ...................................................... 19
CONTENTS
Curtis PMC 1204X/1205X/1209/1221 Manual iv
CONTENTS
12345678901
1
234567890
1
1
234567890
1
1
234567890
1
1
234567890
1
1
234567890
1
1
234567890
1
1
234567890
1
1
234567890
1
1
234567890
1
1
234567890
1
1
234567890
1
1
234567890
1
1
234567890
1
1
234567890
1
1
234567890
1
1
234567890
1
1
234567890
1
1
234567890
1
1
234567890
1
1
234567890
1
1
234567890
1
1
234567890
1
1
234567890
1
1
234567890
1
1
234567890
1
1
234567890
1
1
234567890
1
1
234567890
1
1
234567890
1
1
234567890
1
1
234567890
1
1
234567890
1
1
234567890
1
1
234567890
1
1
234567890
1
1
234567890
1
1
234567890
1
1
234567890
1
1
234567890
1
1
234567890
1
1
234567890
1
1
234567890
1
1
234567890
1
1
234567890
1
1
234567890
1
1
234567890
1
1
234567890
1
1
234567890
1
1
234567890
1
1
234567890
1
1
234567890
1
1
234567890
1
1
234567890
1
1
234567890
1
1
234567890
1
1
234567890
1
1
234567890
1
1
234567890
1
1
234567890
1
1
234567890
1
1
234567890
1
1
234567890
1
1
234567890
1
1
234567890
1
1
234567890
1
12345678901
Wiring: Permanent Magnet Motors ........................... 19
Installation Checkout ................................................. 20
4. MAINTENANCE AND ADJUSTMENT .......................22
Controller .................................................................. 22
Potbox ........................................................................ 23
5. TROUBLESHOOTING AND BENCH TESTING ....... 25
Operational Notes ...................................................... 25
In-Vehicle Diagnostic Tests (Troubleshooting) .......... 26
Bench Testing ............................................................ 32
6. GLOSSARY: FEATURES AND FUNCTIONS .............. 36
APPENDIX AFunctional Description ................................ A-1
APPENDIX BPulse Width Modulation ............................. B-1
APPENDIX CElectrical Specifications................................ C-1
Curtis PMC 1204X/1205X/1209/1221 Manual v
FIGURES
FIG. 1: Curtis PMC 1205X full-feature
motor controller ......................................................... 1
FIG. 2: Mounting dimensions,
Curtis PMC 1204X/5X controllers ............................ 3
FIG. 3: Mounting dimensions,
Curtis PMC 1209/21 controllers................................ 3
FIG. 4: Mounting dimensions,
Curtis PMC potboxes PB-5, -6, -9, and -10 ............... 6
FIG. 5: Mounting dimensions, Curtis PMC footpedal ........... 6
FIG. 6: Mounting dimensions,
Curtis electronic throttle (ET series)........................... 7
FIG. 7: Typical installation,
1204X/1205X/1209/1221 controllers ........................ 8
FIG. 8: Basic wiring configuration,
1204X/1205X/1209/1221 controllers ...................... 13
FIG. 9: Control wiring for inhibiting plug braking,
in order to allow freewheeling .................................. 14
FIG. 10: Wiring for emergency reverse (enhanced
plug braking current)................................................ 15
FIG. 11: Standard throttle pot, 0–5kΩ................................... 16
FIG. 12: Bi-directional twist-grip throttle with
10 kΩcenter-tapped, 4-terminal pot ........................ 16
FIG. 13: Bi-directional twist-grip throttle with
a standard 20 kΩpot and a controller
with the optional 5kΩ–0 throttle input .................... 17
FIGURES
Curtis PMC 1204X/1205X/1209/1221 Manual vi
FIGURES/TABLES
FIG. 14: Reduced speed operation (with standard
(0–5kΩpot) ............................................................. 17
FIG. 15: Curtis electronic throttle (ET series)
with a controller having the optional
0–5V throttle input .................................................. 18
FIG. 16: Adjustment pots .......................................................23
FIG. 17: Guide to troubleshooting procedures ....................... 27
FIG. 18: Setup for bench testing ............................................. 33
FIG. A-1: Block diagram, Curtis PMC
1204X/1205X/1209/1221 controllers .................... A-1
FIG. B-1: Pulse width modulation.......................................... B-1
TABLES
TABLE C1: Electrical specifications, 1204X/1205X .................C-1
TABLE C2: Electrical specifications, 1209/1221 ......................C-2
Curtis PMC 1204X/1205X/1209/1221 Manual 1
OVERVIEW
OVERVIEW
Curtis PMC Model 1204X/1205X and 1209/1221 electronic motor speed
controllers are designed to provide smooth, silent, cost-effective control of motor
speed and torque on a wide variety of industrial electric vehicles.
Like all Curtis PMC 1200 series controllers, the 1204X/1205X and 1209/1221
models offer superior operator control of the vehicle’s motor drive speed. Key
features of these controllers include:
✓Infinitely variable drive and brake control
✓Power MOSFET design provides high efficiency (for reduced motor and
battery losses) and silent operation
✓High pedal disable (HPD) function monitors throttle status during turn-on
and prevents operation until throttle has been returned to neutral [optional
feature]
✓Thermal protection and compensation circuit provides both under-
temperature and overtemperature cutback, as well as steady current limit
throughout the entire operating range
✓Undervoltage cutback function protects against low battery voltage, includ-
ing low voltage caused by external loads
Fig. 1 Curtis PMC
1205X full-feature
electronic motor
controller.
Models 1204X, 1209,
and 1221 have
identical connections.
More Features ☞
1
Curtis PMC 1204X/1205X/1209/1221 Manual 2
OVERVIEW
Working on electric vehicles is potentially dangerous. You should protect
yourself against runaways, high current arcs, and outgassing from lead acid
batteries:
RUNAWAYS —Some fault conditions could cause the vehicle to run out of
control. Jack up the vehicle and get the drive wheels off the ground before
attempting these procedures or any other work on the motor control
circuitry.
HIGH CURRENT ARCS —Electric vehicle batteries can supply very high power,
and arcs can occur if they are short circuited. Always open the battery circuit
before working on the motor control circuit. Wear safety glasses, and use
properly insulated tools to prevent shorts.
LEAD ACID BATTERIES —Charging or discharging generates hydrogen gas,
which can build up in and around the batteries. Follow the battery
manufacturer’s safety recommendations. Wear safety glasses.
☞
CAUTION
✓Fault detection circuitry monitors battery, throttle connections, output
transistors, bypass contactor, etc., to prevent runaway conditions
✓Static return to off (SRO) function requires that forward or reverse selectors
be returned to neutral before output is allowed [optional feature]
✓Emergency reverse enhances plugging current when “belly-button”is acti-
vated on walkie-type applications [optional feature]
✓Delayed bypass (1A) output drives a bypass contactor [optional feature]
✓Forward, reverse, and bypass contactor driver outputs are internally pro-
tected against shorts in the contactor coils
✓Simple installation with no adjustments required
✓Tin-plated solid copper bus bars
✓Push-on connectors for control wiring
Familiarity with your Curtis PMC controller will help you to install and operate
it properly. We encourage you to read this manual carefully. If you have
questions, please contact the Curtis office nearest you.
Curtis PMC 1204X/1205X/1209/1221 Manual 3
HARDWARE INSTALLATION
CONTROLLER
The controller can be oriented in any position, but the location should be
carefully chosen to keep the controller as clean and dry as possible. If a clean,
dry mounting location cannot be found, a cover must be used to deflect dirt
and water splash.
The controller should be fastened with four screws to a clean, flat metal
surface that provides an adequate heat sink. The mounting surface is an integral
part of the overall heatsinking of the controller, and affects its ability to dissipate
heat. The case outline and dimensions are shown in Figure 2 (1204X and1205X
controllers) and in Figure 3 (1209 and1221 controllers).
Fig. 2 Mounting
dimensions, Curtis PMC
1204X/5X controllers.
3.3
(0.13)
70 (2.8)
133 (5.25)
MODEL 1204X:
174 (6.85)
MODEL
1205X:
225 (8.85)
113 (4.45)
130 (5.13)
146 (5.75)
16.5 (0.65)
1204X:
19 (0.75)
1205X:
44 (1.75)
7 (0.28) dia.
8 (0.33) dia.
22
×
19
×
3
(0.85
×
0.75
×
0.125)
6 (0.25)
male push-on,
2 plcs
Dimensions in millimeters and (inches)
2
Curtis PMC 1204X/1205X/1209/1221 Manual 4
Fig. 3 Mounting
dimensions, Curtis PMC
1209/21 controllers.
HARDWARE INSTALLATION
6 (0.25)
male push-on,
2 plcs
7 (0.28) dia.
15 (0.60)
MODEL
1209:
231 (9.1)
MODEL
1221:
282 (11.1)
3.3
(0.13)
80 (3.15)
37 (1.45)
Dimensions in millimeters and (inches)
MODEL
1209:
152 (6.0)
MODEL
1221:
203 (8.0)
180 (7.1)
165 (6.5)
143 (5.6)
8.4 (0.33) dia.
25
×
19
×
5
(1.0
×
0.75
×
0.187)
Be sure to mount the controller so as to allow access to the adjustment
screws.
Although not usually necessary, a thermal joint compound can be used to
improve heat conduction from the case to the mounting surface.
Curtis PMC 1204X/1205X/1209/1221 Manual 5
HARDWARE INSTALLATION
THROTTLE
0–5kΩInput
The standard controller throttle input is 0–5kΩ. Curtis PMC potboxes (PB-5,
-6, -9, -10) are designed to match this input. Some of these potboxes have a built-
in microswitch, eliminating the need to install a separate pedal-actuated
microswitch. Curtis PMC also offers a self-contained footpedal unit (FP-2) that
eliminates the need for fabricating and installing a pedal-potbox linkage. Mount-
ing dimensions for the potboxes and for the footpedal unit are shown in Figures
4 and 5.
Any potbox that provides a nominal 0–5kΩoutput (controller output
begins at ≈300 ohms, full output is ≈4400 ohms) will work with the standard
throttle input. For other types, contact your Curtis office.
If a Curtis PMC potbox is used, it must be mounted so as to allow
connection between the potbox lever arm and the vehicle accelerator linkage.
The lever arm provides a series of holes so that the accelerator pedal “throw”can
be converted into the correct amount of potentiometer rotation. Use of a second
return spring on the pedal, in addition to the potbox return spring, is required to
prevent an uncontrollable full-on throttle input (which could happen if there was
a single spring, and it broke). If the self-contained potbox spring is insufficient to
return the pedal by itself, two additional pedal return springs must be used.
It is also required that the accelerator pedal hit a mechanical stop at its full-
on position just before (≈1 mm [1/32"–1/16"]) the potbox lever hits its own full-
on stop. This mechanical stop will prevent the potbox lever arm from bending if
undue force is put on the pedal. Protection of the potbox from water and dirt will
help avoid problems of corrosion and electrical leakage.
After the potbox has been mounted, operation of the pot can be tested by
measuring the resistance between the two wires with an ohmmeter. With the
pedal not applied, the resistance should be less than 50 ohms. As the pedal is
applied, the resistance should rise smoothly until it reaches a value between 4500
and 5500 ohms. Values below 4500 ohms may cause a reduction in efficiency
and top speed. Values above 7000 ohms indicate a defective potbox, and will
cause controller shutdown.
5kΩ–0 Input
The 1204X/1205X/1209/1221 controllers are also available with 5kΩ–0 throttle
inputs. Using this throttle type, controller output begins at ≈4400 ohms with full
output at less than 300 ohms.
Curtis PMC 1204X/1205X/1209/1221 Manual 6
Fig. 4 Mounting
dimensions,
Curtis PMC potboxes
PB-5, -6, -9, and -10.
Fig. 5 Curtis PMC footpedal FP-2.
HARDWARE INSTALLATION
10 (0.38)
32
(1.25)
6
(0.25) 89 (3.5)
60
(2.37)
102 (4.0)
45
°
Dimensions in millimeters and (inches)
RIGHT-HAND OPERATION LEFT-HAND OPERATION
COM. N.O. N.C. N.C. N.O. COM.
WITH MICROSWITCH: PB-6
WITHOUT MICROSWITCH: PB-5 WITH MICROSWITCH: PB-9
WITHOUT MICROSWITCH: PB-10
42 (1.65)
52 (2.06)
Dimensions in millimeters and (inches)
≈
15
°
244 (9.6)
112 (4.4)
112
(4.4)
1.8 m
(6 ft)
WIRING:
BLACK
= throttle input
BLUE
= switch, common (Note:The green wire is not used with
WHITE
= throttle input
ORANGE
= switch, normally open 1204X/1205X/1209/1221 controllers)
BLK
ON
GRN
(not used)
WHT
ORG
BLU
COM.N.O.
Curtis PMC 1204X/1205X/1209/1221 Manual 7
HARDWARE INSTALLATION
Fig. 6 Mounting
dimensions,
Curtis electronic throttle
(ET series).
Dimensions in millimeters and (inches)
99.00
(3.90)
44.00
(1.73)
69.00
(2.72)
24.00
(0.94)
VIS TC 3×12
6.00
×
6.00
(0.24
×
0.24)
24.00
(0.94)
∅ M5
22.00
(0.87)
22.00
(0.87)
116
°
44.00
(1.73)
0–5V Input
A 0–5V throttle input option is also available for the 1204X/1205X/1209/1221
controllers. The negative side of the 5V source should be referenced to B- and
must be capable of driving an input impedance of 5kΩ.
Curtis offers two bi-directional, wigwag electronic throttle assemblies de-
signed for use with the 0–5V input: the ET series and the CH series.
The ET-XXX throttle assembly provides a 0–5V output and forward/reverse
relay coil drivers. Dimensions for the ET-series electronic throttles are shown in
Figure 6. The CH-XXX is a complete control head assembly, consisting of an
ET-XXX throttle integrated into a molded steel and plastic assembly designed for
mounting directly to a tiller stem. For more information about ET and CH
products, contact your nearest Curtis office.
Curtis PMC 1204X/1205X/1209/1221 Manual 8
HARDWARE INSTALLATION
Fig. 7 Typical installation, Curtis PMC 1204X/1205X/1209/1221 controllers.
CONTROL
WIRING
FUSE
POWER
WIRING
FUSE
POLARITY
PROTECTION
DIODE
KEYSWITCH POTBOX
FORWARD/REVERSE SWITCH
(SPDT, center off)
FR
FORWARD/REVERSE
CHANGEOVER CONTACTOR
(Albright DC182 shown)
MAIN
CONTACTOR
(Albright
SW180
shown)
A1 A2
S1
S2
SERIES
MOTOR
BATTERY
B-
B+
PRECHARGE RESISTOR, such as Curtis PMC p/n MP-2
COIL SUPPRESSION DIODE, such as Curtis PMC p/n MP-1
(250Ω, 5W)
FWD REV
A2M-
B- B+
BYPASS CONTACTOR
(
*
Pedal microswitch not used with SRO controllers.)
(
**
See Figure 10 for emergency reverse.)
COM.
N.C.
*
Bypass cont. output
REV input
Emergency reverse **
FWD input
F/R cont. output
KSI
OTHER HARDWARE
The recommended hardware for a typical 1204X/1205X/1209/1221 controller
installation is shown in Figure 7.
Contactors should be mounted in a clean, dry location. If such a location is
unavailable, a cover should be used to deflect dirt and water splash.
The precharge resistor connected to the main contactor, and the coil
suppression diodes connected to the main contactor and to the forward/reverse
contactors, are somewhat delicate components. Care should be taken to prevent
damage to them during installation.
Curtis PMC 1204X/1205X/1209/1221 Manual 9
HARDWARE INSTALLATION
Main Contactor
Most applications use a main contactor in series with the battery positive (B+)
cable to disconnect all power when the system is turned off, as shown in Figure
7. A heavy-duty single-pole, single-throw (SPST) contactor with silver-alloy
contacts is recommended, such as an Albright SW80 or SW180 (available from
Curtis).
A coil suppression diode, such as a Curtis PMC p/n MP-1 (which is rated at
100 volts, 3 amps), should be used on the contactor coil.
The rapid charging of the controller’s internal filter capacitors causes a high
inrush current to flow briefly when the contactor closes. To extend contact life,
a precharge resistor, such as Curtis PMC’s p/n MP-2 (rated at 250Ω, 5W), is
recommended; the resistor precharges the capacitors and reduces the inrush
current through the contacts. If an inexpensive “can”type solenoid is used, the
resistor is mandatory to prevent contact welding. For applications above 48V, a
precharge resistor with a power rating greater than 5W is recommended.
Forward/Reverse Contactors
The forward/reverse contactor coils must match the vehicle’s battery voltage. The
maximum allowed coil current for each contactor is 1 amp. Use of a changeover
contactor set—such as the Albright DC88 or DC182 (available from Curtis)—
is recommended. Alternatively, two single-pole, double-throw (2×SPDT) con-
tactors may be used. Although inexpensive “can”type solenoids may be used,
their ratings are typically not sufficient for long life.
A coil suppression diode, such as a Curtis PMC p/n MP-1 (which is rated at
100 volts, 3 amps) should be used on each of the forward/reverse contactor coils.
Forward/Reverse Switches
The forward/reverse contactor coils can be operated by any type of single-pole,
double-throw (SPDT) center-off switch capable of switching the coil current.
Toggle or rocker switches are generally used.
If your controller has the optional high pedal disable (HPD) feature and you
plan to wire it for freewheeling, the best switch to use is a double-pole, double-
throw (DPDT) “hesitation switch”—a toggle switch with a mechanism that
forces it to stop in the center (neutral) position before going into the opposite
direction. If a standard switch is moved quickly from one direction to the other,
it may not be in neutral long enough to actuate HPD, and the motor will plug
brake instead of freewheeling. The switch must be in neutral for several millisec-
onds to actuate HPD.
Bypass Contactor
A bypass contactor can be used with controllers that have the optional bypass
contactor output feature. The bypass option is available only on 12V and 24–36V
Curtis PMC 1204X/1205X/1209/1221 Manual 10
HARDWARE INSTALLATION
controllers. (NOTE: A bypass contactor should not be used with controllers that do
not have this feature, as the controller could be damaged when the system comes
out of bypass mode.)
The bypass contactor must be able to carry and to interrupt the maximum
motor current. A coil suppression diode should not be used on this contactor.
Refer to the controller specifications in Appendix C to determine the contact
current requirement for the bypass contactor. The maximum allowed coil
current for this contactor is 1 amp.
Emergency Reverse Relay
A small double-pole, double-throw relay must be installed to implement emer-
gency reverse. Its contact rating must be adequate to switch the current needed
by the forward/reverse contactor coils.
Keyswitch and Interlocks
The vehicle should have a master on/off switch to turn the system off when not
in use. A keyswitch is typically used for this purpose.
An interlock device is necessary for implementation of SRO. With the SRO
option, the vehicle cannot be started or operated without the designated SRO
interlock activated.
Various other safety and convenience interlocks may also be used to prevent
motor operation during certain conditions. For example, a battery charger
interlock can be used to prevent operation during charging. Similarly, a seat
switch can be used to turn the vehicle off when the operator gets up from the
driver’s seat. The contacts of these switches should be rated for the total coil
currents of all the contactors they operate.
Polarity Protection Diode
For polarity protection, a diode should be added to the control circuit. This diode
must be sized appropriately for the maximum total contactor coil currents.
Control Wiring Fuse
To protect the control circuitry from accidental shorts, a small fuse (typically 10
amps) connected in series with the B+ feed to the control circuitry wiring is
recommended.
Power Wiring Fuse
To protect the power wiring circuit, a fuse appropriate for the controller’s rated
current (see Appendix C) is recommended.
Curtis PMC 1204X/1205X/1209/1221 Manual 11
WIRING
WIRING
CONNECTIONS: Low Current
Two 1/4" push-on terminals are provided for the throttle inputs. If your
controller has a voltage throttle input, there will be only one throttle terminal.
A 6-pin low power connector molded into the right side of the controller
face provides the low power logic control connections—KSI input, forward/
reverse contactor output, bypass contactor output (optional), emergency reverse
(optional), and forward and reverse inputs.
Several manufacturers make mating connectors that fit this connector. The part
numbers listed are for the recommended 0.75 mm2(#18 AWG) vinyl insulated
stranded wire.
MFR PART NUMBER DESCRIPTION
AMP #640426-7 locking, insulation displacement terminals,
wires at right angle to connector
Methode #3300-107-218 locking, insulation displacement terminals
Molex #09-50-3071 locking, crimp terminals
Panduit #CE156F18-7 locking, insulation displacement terminals,
wires at right angle to connector
3
Throttle inputs 3
Keyswitch input (KSI)
F/R contactor output
Bypass contactor output
Emergency reverse input
Forward input
Reverse input
1
2
Curtis PMC 1204X/1205X/1209/1221 Manual 12
WIRING
A2
M-
B- B+
Positive connection to battery
and to motor armature
Plug diode to motor armature
Negative connection to battery
Output to motor field
CONNECTIONS: High Current
Four tin-plated solid copper bus bars are provided for the high current connec-
tions to the battery and motor.
The cables used for the battery and motor connections must be heavy enough to
carry the high current required. Rubber insulated welding cable is convenient to
work with because of its flexibility.
Connections to the controller bus bars should be made with lugs suitable for
the cable used, fastened by M8 (5/16") bolts and nuts. When tightening the
bolts, two opposing wrenches should be used. Failure to use the double-
wrench technique could cause undue strain to be placed on the internal connec-
tions, and could also result in cracked seals around the bus bars.
WIRING: TYPICAL INSTALLATION
Curtis PMC 1204X/1205X/1209/1221 controllers are designed to satisfy the
requirements of material handling applications using series motors. Figure 8 is a
schematic diagram of the installation shown in Figure 7. Wired this way, the
vehicle will plug brake if the direction is changed with the vehicle moving and the
throttle applied. Reversing is accomplished via a forward/reverse changeover
contactor or two single-pole, double-throw (2×SPDT) contactors. Coil suppres-
sion diodes should be used on the main and forward/reverse contactors.
KSI Wiring
The keyswitch input (KSI) circuit includes inputs from the keyswitch and from
the various interlocks. The controller KSI is used to turn the controller on and off.
KSI is turned on by connecting it to battery B+. Any positive voltage greater than
about 8 volts will turn on the controller, but usually the full vehicle battery voltage
is used.
In its simplest form, KSI is operated by a keyswitch that turns the vehicle off
and prevents unauthorized use. The keyswitch should also turn off the main
Curtis PMC 1204X/1205X/1209/1221 Manual 13
WIRING
Fig. 8 Basic wiring configuration, Curtis PMC 1204X/1205X/1209/1221 controllers.
A2M-
B- B+
+
–
FORWARD
REVERSE
MAIN
FR
S2
A2
S1
A1
FR
FR
POTBOX
MAIN
KEYSWITCH INTERLOCKS
PEDAL
MICROSWITCH
CONTROL WIRING
FUSE
POLARITY
PROTECTION
DIODE
PRECHARGE RESISTOR
(250 Ω, 5 W)
POWER WIRING
FUSE
1A BYPASS
1A BYPASS
*
(*not used with SRO controllers)
(**See Figure 10 for
emergency reverse.)
Bypass cont. output
REV input
Emergency reverse **
FWD input
F/R cont. output
KSI
contactor and the forward/reverse contactors. This will act as a safety feature by
removing power from the motor control system when the keyswitch is off.
Interlocks (seat switches, battery charger interlocks, etc.) should be wired in
series so that they turn off the controller KSI and the contactors. An SRO
interlock (a seat switch, for example) must be wired in order to implement the
optional SRO feature.
Forward/Reverse Wiring
The forward/reverse wiring schemes described here all assume the power wiring
shown by the heavy lines in Figure 8. Some vehicles, especially those previously
using older, resistor-type controllers, may reverse the motor armature rather than
the field winding. Be careful if you are replacing this type of controller. When
using the Curtis PMC controller it is essential that the field be reversed and
that the armature be connected directly to the controller’s B+ and A2
terminals, because the plug diode inside is connected to these terminals.
Curtis PMC 1204X/1205X/1209/1221 Manual 14
WIRING
Fig. 9 Control wiring for
inhibiting plug braking,
in order to allow
freewheeling.
A2M-
B- B+
FORWARD
REVERSE
MAIN
KEYSWITCH INTERLOCKS PEDAL
MICROSWITCH
FUSE
POLARITY
PROTECTION
DIODE F/R SWITCH
(DPDT, center off)
+
–
BYPASS
Bypass cont. output
REV input
Emergency reverse
(see Fig. 10)
FWD input
F/R cont. output
KSI
Plug Braking
The standard forward/reverse control wiring (as shown in Figure 8 by the thin
lines) provides plug braking. The forward/reverse switch should be in the positive
feed to the contactor coils, so that they can be turned off by the keyswitch,
interlocks, and pedal microswitch. The coil of one contactor or the other is
energized to select the direction desired. The contactor coils should have suppres-
sion diodes connected across them to improve switch contact life.
Freewheeling: Wiring to Inhibit Plug Braking
If a non-SRO controller has the HPD option, this feature can be used to inhibit
plug braking by briefly turning off the controller’s KSI input when the forward/
reverse switch goes through neutral. As shown in Figure 9, another set of contacts
is added on the forward/reverse switch. Therefore, a double-pole, double-throw
(DPDT) center-off switch must be used for this setup. A “hesitation switch”is
recommended, to ensure the switch is in neutral long enough to actuate HPD and
inhibit plug braking.
Plug braking can be reactivated during freewheeling by releasing the throttle and
reapplying it.
NOTE: Contact factory for information on wiring SRO controllers for
freewheeling.

This manual suits for next models

23

Other Curtis Controllers manuals

Curtis 1232E User manual

Curtis

Curtis 1232E User manual

Curtis 1226 User manual

Curtis

Curtis 1226 User manual

Curtis 1204 User manual

Curtis

Curtis 1204 User manual

Curtis 1297 User manual

Curtis

Curtis 1297 User manual

Curtis 1222 User manual

Curtis

Curtis 1222 User manual

Curtis 1310 User manual

Curtis

Curtis 1310 User manual

Curtis 1232E User manual

Curtis

Curtis 1232E User manual

Curtis 1268 User manual

Curtis

Curtis 1268 User manual

Curtis 1268-5403 User manual

Curtis

Curtis 1268-5403 User manual

Curtis 1232E User manual

Curtis

Curtis 1232E User manual

Curtis 1244 User manual

Curtis

Curtis 1244 User manual

Curtis 1220 User manual

Curtis

Curtis 1220 User manual

Curtis 1212 User manual

Curtis

Curtis 1212 User manual

Curtis 1204M User manual

Curtis

Curtis 1204M User manual

Curtis 1298 User manual

Curtis

Curtis 1298 User manual

Curtis 1232E User manual

Curtis

Curtis 1232E User manual

Curtis 1355 User manual

Curtis

Curtis 1355 User manual

Curtis 1253 User manual

Curtis

Curtis 1253 User manual

Curtis 1239E User manual

Curtis

Curtis 1239E User manual

Curtis MultiMode 1228 User manual

Curtis

Curtis MultiMode 1228 User manual

Curtis 1232E User manual

Curtis

Curtis 1232E User manual

Curtis 1268 User manual

Curtis

Curtis 1268 User manual

Curtis MultiMode 1207B User manual

Curtis

Curtis MultiMode 1207B User manual
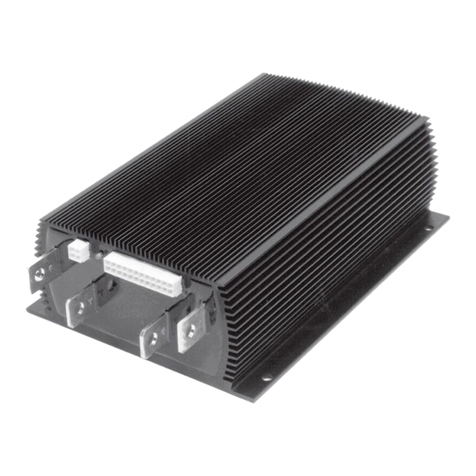
Curtis 1212S User manual

Curtis

Curtis 1212S User manual
Popular Controllers manuals by other brands

Mo-vis coot Control R-net installation manual

Mo-vis

Mo-vis coot Control R-net installation manual

SURAN ENDA EHTC7425A manual

SURAN

SURAN ENDA EHTC7425A manual

London Electronics INT2-AH manual

London Electronics

London Electronics INT2-AH manual

WOBIT SMC64 WP v2 manual

WOBIT

WOBIT SMC64 WP v2 manual

Sungrow BSC200 user manual

Sungrow

Sungrow BSC200 user manual

YASKAWA U1000 iQpump Drive user manual

YASKAWA

YASKAWA U1000 iQpump Drive user manual

Eaton ELC-PB Programming manual

Eaton

Eaton ELC-PB Programming manual

Blue Sky Energy SOLAR BOOST 3024iL Installation and operation manual

Blue Sky Energy

Blue Sky Energy SOLAR BOOST 3024iL Installation and operation manual

Fancom Aura 14 manual

Fancom

Fancom Aura 14 manual

Dometic GoPower! GP-MPPT-85/20 user manual

Dometic

Dometic GoPower! GP-MPPT-85/20 user manual

Festo CPX-FEC Brief description

Festo

Festo CPX-FEC Brief description

Siemens SINUMERIK 808D Diagnostic manual

Siemens

Siemens SINUMERIK 808D Diagnostic manual

Toshiba Vm Series instruction manual

Toshiba

Toshiba Vm Series instruction manual

Honeywell PRO22IC installation manual

Honeywell

Honeywell PRO22IC installation manual

Sailor N420 user manual

Sailor

Sailor N420 user manual

SYCLOPE INDIG'O Programming instructions

SYCLOPE

SYCLOPE INDIG'O Programming instructions

SMC Networks AR20MK Series Operation manual

SMC Networks

SMC Networks AR20MK Series Operation manual

RTK REact 15E Series Installation and operating instructions
RTK

RTK REact 15E Series Installation and operating instructions
manuals.online logo
manuals.online logoBrands
  • About & Mission
  • Contact us
  • Privacy Policy
  • Terms and Conditions

Copyright 2025 Manuals.Online. All Rights Reserved.