manuals.online logo
Brands
  1. Home
  2. •
  3. Brands
  4. •
  5. Da-Lite
  6. •
  7. Projection Screen
  8. •
  9. Da-Lite MULTI-MASK IMAGER User manual

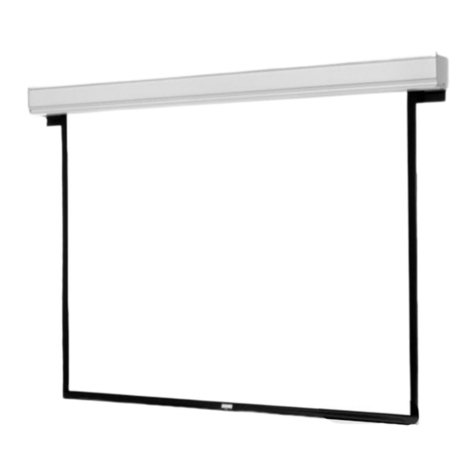
Da-Lite MULTI-MASK IMAGER User manual

DA-LITE SCREEN COMPANY, INC.
3100 North Detroit Street
Po t Office Box 137
War aw, Indiana 46581-0137
Phone: 574/267-8101
800-622-3737
Fax: 574/267-7804
http:// www.da-lite.com
e-mail: [email protected]
POWER
PRESENTATION PRODUCTS
The
In
Instruction Book for
MULTI-MASK IMAGER
1
IMPORTANT SAFETY INSTRUCTIONS
Wh n using your vid o quipm nt, basic saf ty pr cautions
should always b follow d, including th following:
1. R ad and und rstand all instructions b for using.
2. Position th cord so that it will not b tripp d ov r, pull d,
or contact hot surfac s.
3. If an xt nsion cord is n c ssary, a cord with a curr nt
rating at l ast qual to that of th applianc should b us d.
Cords rat d for l ss amp rag than th applianc may
ov rh at.
4. To r duc th risk of l ctric shock, do not disass mbl this
applianc . Contact an authoriz d s rvic d al r wh n r pair
work is r quir d. Incorr ct r ass mbly can caus l ctric
shock wh n th applianc is us d subs qu ntly.
5. Th us of an acc ssory attachm nt not r comm nd d by
th manufactur r may caus a risk of fir , l ctric shock, or
injury to p rsons.
SAVE THESE INSTRUCTIONS
2
Prof ssional mounting t chniqu s should b adh r d to. Da-Lit Scr n Company cannot b liabl for substandard or
faulty installations.
Frame Assembly
Ass mbly of th scr n should b in a cl an nvironm nt.
1. Conn ct th four fram pi c s by matching th color d tap s on th nds of th fram pi c s. S Figur 1.
2. S cur with th suppli d 5/16" s tscr ws.
MOUNTING THE FRAME
FIGURE 1
Positioning the rame on the wall
1. Without th scr n fabric attach d, position th fram on th wall at th location you d sir d.
2. Mak sur th unit is l v l and plumb. (You may n d to us shims b tw n th brack ts and th wall to achi v
v rtical plumb.)
3. Mark th position of th brack t hol s on th wall. S Figur 2.
CAUTION: I the screen is not mounted so that it is level and plumb, horizontal masking may jam on retraction.
▲
!
FIGURE 2
3
Unpacking and unrolling the screen
Th vi wing sid of th scr n surfac is roll d to th insid . Th scr n surfac is roll d l ngthwis .
1. R mov scr n from packaging.
2. On a cl an floor, unroll th scr n surfac vi wing sid up.
3. Allow th pap r to unroll b tw n backsid of th scr n surfac and floor. S Figur 3.
CAUTION:
• Be care ul not to touch or scratch the viewing side o the sur ace with ingernails and any sharp tools.
• Do not use any tools to asten the screen sur ace to the rame.
• Do not old or crease the screen.
▲
!
FIGURE 3
Attaching the screen sur ace to rame
1. Plac th fram ov r th scr n surfac .
2. Whil lifting th fram with on hand, snap th scr n surfac onto th fram . G ntly allow th scr n to str tch
onto snaps. S Figur 4. Attach th snaps on th top corn rs and top horizontal first, lift th fram to a v rtical
position to finish attaching th r st of th snaps.
FIGURE 4
4
FIGURE 5
ELECTRICAL WIRING
El ctrical wiring is r quir d for ach mask roll r motor. Th v rtical masking syst ms hav on motor at th fram top.
Horizontal masking syst ms hav on motor at th fram top and on at th bottom.
A motor r quir s standard 120V/220V input. All conn ctions ar mad to th l ctrical box on th audi nc l ft sid of
th unit.
FIGURE 6
SPRING TENSION CABLE
EYE SNAP
EYELET
HORIZONTAL MASK CONNECTION
VERTICAL MASK CONNECTION
HORIZONTAL MASK CONNECTION
SLAT
SURFACE
TAPE STRIP
Tensioning the bottom masking panel
1. Car fully r mov all tap strips s curing surfac s around roll rs. Slats should mov fr ly. S Figur 5.
2. Locat th spring t nsion cabl s on ith r sid of th unit.
3. Conn ct th y snap to th y l t on th bottom masking pan l bar. S Figur 5. You will n d to pull th cabl
slightly.
4. R p at for th oth r sid .
SLAT
5
MULTI-MASK IMAGER INSTALLATION
DOWN
RED
UP
BLACK
COMMON
WHITE
BLACK WITH
YELLOW
BLACK
WHITE
RED
UP
DOWN
ROCKER
SWITCH
AC COMMON
AC HOT
OPERATING SWITCH,
SWITCH BOX, AND
PLATE FURNISHED
WITH SCREEN. (SPDT
WITH CENTER OFF)
120V. 60-HZ 2.5 MAX. AMP
TO MOTOR
IN MULTIPLE CONTROL
INSTALLATIONS THIS SWITCH
IS REPLACED BY THE LOW
VOLTAGE CONTROL,
OPERATED FROM PUSH
BUTTON STATIONS.
THIS SWITCH CANNOT BE USED WITH LVC.
Not : A singl switch cannot b us d to op rat mor than
on scr n. Contact th factory for furth r information.
SIDE VIEW
OF SWITCH
AND BOX
120V WIRING DIAGRAM
OFF
Installing the high voltage switch control (standard)
Thr standard 3-position wall switch s ar suppli d. Th high-voltag control is conn ct d to th l ctrical sourc . It
alt rnat s dir ctions of mask motion by m ans of a hot l ad, using th 3-position switch s.
240 VOLT WIRING DIAGRAM
FOR STANDARD WALL SWITCH:
Da-Lit off rs two styl s of 240 volt
wall switch s for standard op ration.
Pl as s wiring diagram includ d in
wall switch box includ d with scr n.
6
HANGING THE SCREEN ON THE WALL
Attach th wall brack ts to th wall using appropriat fast n rs at pr viously mark d locations.
Attach th Sid Cov rs to th fram by sliding th Bolts on th Sid Cov r tub into th op nings on th top and bottom
brack ts. S Figur 7.
FIGURE 7
OPERATING THE MASK
Wh n you low r or r tract a mask, it will stop at its pr s nt limit. If an obstacl (such as a p rson or furnitur ) g ts in th
path of a mask as it is low r d, you should us th switch control to stop th mask’s motion; it will not automatically stop
if it hits an obstacl .
NOTE: The horizontal masking panels move more slowly than the vertical masking panels. The slower motion allows you to adjust
the image area with greater precision.
Wh n a mask is not in us , you should stor it in th fully r tract d position.
CAUTION: Do not operate the motor when any o the ollowing occurs:
• The unit emits any smoke, heat, abnormal noise or unusual odor.
• The unit is damaged in some way, such as damage rom a water leak.
I any o these situations occur, call a quali ied service person.
▲
!
ADJUSTING THE MASK EXTENSION
CAUTION: Improper adjustment o the limit switches can cause irreparable damage to a mask itsel , resulting in voiding the
actory warranty.
Th xt nsion and r traction limit switch s hav b n pr s t at th factory. In g n ral, w advis you to avoid
r adjusting th s switch s.
In som cas s, to nabl prop r alignm nt of th display d imag on th scr n, you may n d to adjust th xt nsion
of a mask. If adjustm nt to th xt nsion is n c ssary, car fully follow th s instructions.
WARNING! A mask is ully retracted when the batten is lush with the bottom o the case. Do not attempt adjustments with a
retraction (UP) limit switch that will urther retract a mask. Incorrect adjustment o that switch will cause severe mask damage.
Please consult the actory i you have any questions.
▲
!
SIDE
COVER
OPENING
SIDE
COVER
7
Modi ying the extension o the mask
You can incr as th xt nsion of a mask up to 3" past th factory pr s t stop, or you can d cr as th xt nsion by
approximat ly 4-6" from th factory pr s t stop. Do not att mpt to modify a mask xt nsion b yond th s r comm nd d
amounts.
Th limit switch s ar acc ss d through op nings locat d on th l ft sid of th fram as shown in Figur 8.
FIGURE 8
Horizontal mask units hav limit switch s at th top and bottom of th scr ns, a s t for ach roll r tub .
WARNING! The up limit switch(es) retract the batten urther into the unit. Adjusting it is not advised. Re er to 1, 3 or 5 as appropriated
in Figure 8.
To increase a mask’s ully extended (mask down) stop position:
1. Low r th mask to its curr nt stop position.
2. Locat th down limit switch( s) locat d on th l ft sid of th fram . R f r to 2, 4 or 6 as appropriat in Figur 8.
Us an All n wr nch to turn th switch in a count rclockwis dir ction. If th pow r is on, th mask will drop
incr m ntally as th switch is turn d. NOTE: One complete turn o the switch will make approximately a 1/2" change in the
mask’s stop position.
To decrease the screen extension:
1. Low r th mask until it is xt nd d about halfway down.
2. Locat th down limit switch( s) locat d on th l ft sid of th fram . R f r to 2, 4 or 6 as appropriat in Figur 8.
Us an All n wr nch to turn th switch in a clockwis dir ction. NOTE: One complete turn o the switch will make
approximately a 1/2" change in the mask’s stop position.
3. Activat th mask in th down dir ction until it r ach s th n wly r duc d stop position. R p at this proc dur
until th d sir d stop position is r ach d.
Onc you hav mad th adjustm nt, wh n v r you low r th mask, it will automatically stop at th n w position.
HORIZONTAL MASK
VERTICAL MASK
SCREEN
HORIZONTAL MASK
1
2
3
4
5
6
8
With r asonabl car , you xp ct many y ars of troubl -fr us of your Da-Lit proj ction scr n.
Wncourag you to k p your scr n cl an. Avoid g tting any for ign mat rial on th scr n. It may not b possibl to
r mov scratch s, paint, ink, tc.
General maintenance
Th scr n surfac on your Multi-Mask Imag r is d licat . Sp cial att ntion to th s instructions should b follow d
wh n cl aning.
• A draftsman-styl brush may b us d to lightly whisk away any loos dirt or dust particl s. (This typ of brush is
usually availabl at offic supply stor s.)
• For tough r spots, us a mild solution d t rg nt, wat r and a soft cloth. Rub lightly. Blot with a damp spong to
absorb xc ss wat r.
Do not us any oth r cl aning mat rials on th scr n.
Replacement parts and service
No us r-s rvic abl parts ar contain d within th unit. Contact your d al r or th factory if you r quir part r plac m nt
or s rvic .
SCREEN CARE AND CLEANING
9
R f r to th following guid lin s if you ncount r a difficulty in th op ration of your Da-Lit Multi-Mask Imag r scr n.
Probl ms r lat d to l ctrical or motor function may r quir a qualifi d s rvic p rson or l ctrician.
Should you hav a probl m that is not addr ss d h r , call th Da-Lit Scr n Company.
TROUBLESHOOTING
SYMPTOM
1. Mask won’t op rat .
2. Mask won’t roll up or down ( v n
though pow r is availabl .
3. Mask roll r chatt rs wh n pow r is
activat d.
4. Unit hums in up mod (Mask has
alr ady r tract d).
5. Mask drops wh n up dir ction is
activat d (grinding nois occurs).
6. Mask continu s past bottom stop
position.
7. Batt n r tracts too far into fram .
8. Dirt, fing rprints, marks, tc. on
scr n surfac .
9. Ind ntations app ar on scr n
surfac .
10. Horizontal mask jams upon
r traction.
CAUSE
(a) No 120V/220V pow r availabl .
(b) Outboard switching probl m.
(a) Bad conn ction at switch.
(a) Can b caus d by voltag drop, bad
conn ctions or a d f ctiv switch.
(a) Th mask batt n is r tracting too far
into th cas .
Failur to corr ct can damag motor.
Do not us th unit until this probl m
is r solv d.
(a) Drop in voltag .
(a) Whit limit switch is out of
adjustm nt.
(a) Y llow limit switch out of
adjustm nt.
Failur to corr ct can damag motor.
Do not us th unit until this probl m
is r solv d.
(a) Improp r handling of scr n.
(a) D bris or particl s adh ring to scr n
du to static cling.
(a) Th unit was not l v l and plumb
wh n mount d.
SOLUTION
(a) Ch ck to s if th circuit br ak r
has switch d off. R s t if n d d.
(b) Ch ck outboard switching apparatus.
Ch ck voltag availability
Contact an El ctrician.
(a) Hav an l ctrician or qualifi d
s rvic p rson ch ck th conn ction
as follows:
• If you hav a high voltag control
switch, ch ck switch lin
conn ctions.
• If you hav a low voltag control
unit, ch ck switch lin
conn ctions.
(a) Hav an l ctrician or qualifi d
s rvic p rson ch ck all hook-ups
including all outboard wiring.
(a) Hav a qualifi d s rvic p rson
adjust th UP limit switch. Turn th
adjusting scr w clockwis .
(a) Mask motor r quir s full voltag .
Hav an l ctrician or qualifi d
s rvic p rson ch ck th availabl
voltag .
(a) R adjust th DOWN limit switch.
S pp. 6-7 of this manual.
(a) Hav a qualifi d s rvic p rson
adjust th UP limit switch. S pp.
6-7 of this manual.
(a) Brush off or us a mild d t rg nt
solution with cl an rag or cotton
swab.
(a) Ch ck back of scr n; g ntly brush
d bris away by hand.
(a) R mount th unit making sur that it
is l v l and plumb.
10
Print d in U.S.A. 94727 Rev. 7/09

Other manuals for MULTI-MASK IMAGER

1

Other Da-Lite Projection Screen manuals
Da-Lite TENSIONED LARGE COSMOPOLITAN ELECTROL User manual

Da-Lite

Da-Lite TENSIONED LARGE COSMOPOLITAN ELECTROL User manual

Da-Lite Tensioned Cosmopolitan electrol User manual

Da-Lite

Da-Lite Tensioned Cosmopolitan electrol User manual

Da-Lite Senior Electrol User manual

Da-Lite

Da-Lite Senior Electrol User manual

Da-Lite Theater-lite User manual

Da-Lite

Da-Lite Theater-lite User manual

Da-Lite DescenderPro User manual

Da-Lite

Da-Lite DescenderPro User manual

Da-Lite ADVANTAGE ELECTROL User manual

Da-Lite

Da-Lite ADVANTAGE ELECTROL User manual

Da-Lite DESIGNER CONTOUR MANUAL User manual

Da-Lite

Da-Lite DESIGNER CONTOUR MANUAL User manual

Da-Lite HORIZON ELECTROL User manual

Da-Lite

Da-Lite HORIZON ELECTROL User manual

Da-Lite Contour Electrol User manual

Da-Lite

Da-Lite Contour Electrol User manual

Da-Lite TENSIONED LARGE ADVANTAGE ELECTROL User manual

Da-Lite

Da-Lite TENSIONED LARGE ADVANTAGE ELECTROL User manual

Da-Lite ADVANTAGE DELUXE ELECTROL User manual

Da-Lite

Da-Lite ADVANTAGE DELUXE ELECTROL User manual

Da-Lite ADVANTAGE DELUXE ELECTROL User manual

Da-Lite

Da-Lite ADVANTAGE DELUXE ELECTROL User manual

Da-Lite Perm Wall Frame User manual

Da-Lite

Da-Lite Perm Wall Frame User manual

Da-Lite Tensioned Contour Electrol 38798LC User manual

Da-Lite

Da-Lite Tensioned Contour Electrol 38798LC User manual

Da-Lite LARGE ADVANTAGE DELUXE ELECTROL User manual

Da-Lite

Da-Lite LARGE ADVANTAGE DELUXE ELECTROL User manual

Da-Lite Cosmopolitan Electrol User manual

Da-Lite

Da-Lite Cosmopolitan Electrol User manual

Da-Lite Tensioned Professional Electrol User manual

Da-Lite

Da-Lite Tensioned Professional Electrol User manual

Da-Lite Da-Snap Wrap Around Screen User manual

Da-Lite

Da-Lite Da-Snap Wrap Around Screen User manual

Da-Lite Viewshare Advantage Electrol User manual

Da-Lite

Da-Lite Viewshare Advantage Electrol User manual

Da-Lite Boardroom ElEctrol User manual

Da-Lite

Da-Lite Boardroom ElEctrol User manual

Da-Lite DESIGNER ELECTROL User manual

Da-Lite

Da-Lite DESIGNER ELECTROL User manual

Da-Lite ADVANTAGE ELECTROL User manual

Da-Lite

Da-Lite ADVANTAGE ELECTROL User manual

Da-Lite IDEA Screen User manual

Da-Lite

Da-Lite IDEA Screen User manual

Da-Lite PROFESSIONAL ELECTROL User manual
Da-Lite

Da-Lite PROFESSIONAL ELECTROL User manual

Popular Projection Screen manuals by other brands

AccuScreens WALL/PORTABLE PROJECTION SCREENS Assembly/mounting instructions

AccuScreens

AccuScreens WALL/PORTABLE PROJECTION SCREENS Assembly/mounting instructions

Enwork Skyline installation guide

Enwork

Enwork Skyline installation guide

Entdecker Easy-T Assembly instructions

Entdecker

Entdecker Easy-T Assembly instructions

Optoma Panoview GrayWolf II DP-GWII9092A Setup guide

Optoma

Optoma Panoview GrayWolf II DP-GWII9092A Setup guide

Elite Screens YARD MASTER MANUAL SERIES manual

Elite Screens

Elite Screens YARD MASTER MANUAL SERIES manual

Winsol SolFix 90 RE installation manual

Winsol

Winsol SolFix 90 RE installation manual

Sony KDP-51WS550 - 51" High Definition Projection... Service manual

Sony

Sony KDP-51WS550 - 51" High Definition Projection... Service manual

EPV PMX92HT2-E12 manual

EPV

EPV PMX92HT2-E12 manual

Grandview Large Sky-Show user manual

Grandview

Grandview Large Sky-Show user manual

Draper 220V Access Installation and operating instructions

Draper

Draper 220V Access Installation and operating instructions

Absen Absenicon3.0 Series user manual

Absen

Absen Absenicon3.0 Series user manual

Elite Screens Yard Master Pro B Series user guide

Elite Screens

Elite Screens Yard Master Pro B Series user guide

KwickScreen Kin V1 Assembly manual

KwickScreen

KwickScreen Kin V1 Assembly manual

JAROLIFT ROLLO Original instructions

JAROLIFT

JAROLIFT ROLLO Original instructions

Screen Innovations Transformer owner's manual

Screen Innovations

Screen Innovations Transformer owner's manual

Grandview CB-UMxx Series installation guide

Grandview

Grandview CB-UMxx Series installation guide

Vutec HOME THEATER Series installation instructions

Vutec

Vutec HOME THEATER Series installation instructions

Elite Prime Vision Peregrine A4k series user guide

Elite Prime Vision

Elite Prime Vision Peregrine A4k series user guide

manuals.online logo
manuals.online logoBrands
  • About & Mission
  • Contact us
  • Privacy Policy
  • Terms and Conditions

Copyright 2025 Manuals.Online. All Rights Reserved.