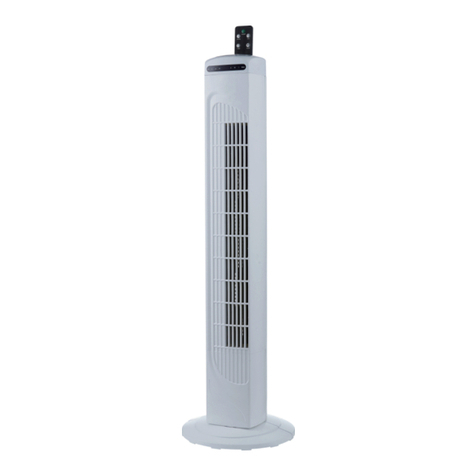
Daewoo DCool 3601TR-S User manual

PAGE 1/7
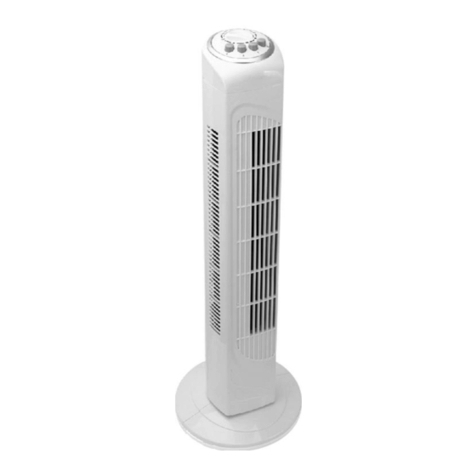
TOWER FAN
DCool 3601TR-S DCool 4601TR-S
Rating: 220-240V~50/60Hz 45W

PAGE 2/7
GB
READ CAREFULLY BEFORE ATTEMPTING TO ASSEMBLE, INSTALL,
OPERATE OR MAINTAIN THE PRODUCT DESCRIBED. PROTECT YOURSELF
AND.OTHER BY OBSERVING ALL SAFETY INFORMATION. FAILURE TO
COMPLY WITH INSTRUCTIONS COULD RESULT IN PERSONAL INJURY
AND/OR PROPERTY DAMAGE!
IMPORTANT SAFETY INFORMATION
1. Read all instructions carefully before using the FAN.
2. Use this FAN only as described in this manual. Any other use not
recommended by the manufacturer may cause fire, electrical shock, or
injury to persons.
3. Remove the package and ensure that the FAN is undamaged. In case of
doubt do not use FAN and contact with your supplier.
4. Don not let children play parts of package.
5. Before use the FAN, check if the voltage marked on the rating label
corresponds to the mains in your home.
6. Extreme caution is necessary when the FAN is used by or near children or
Invalids and whenever the FAN is left operating unattended.
7. Avoid using extension cord as the extension cord may overheat and
cause a risk of fire.
8. Do not pull the power cord to disconnect with power source.Always grasp
the plug to pull out.
9. Do not insert any objects into the FAN as it may cause an electric shock or
injure or damage to the FAN. Do not block or tamper with the FAN in any
manner while it is in operation.
10. Do not leave the FAN unattended.Always unplug FAN when not in use.
11. This FAN is not intended for use in wet or damp locations. Never locate a
FAN where it may fall into a bathtub or other water container.
12. Do not use FAN outdoors.
13. Disconnect the fan from the mains power when not in use, and before
servicing or performing any maintenance.

PAGE 3/7
14. Always disconnect the fan from the power supply when moving it from one
location to another.
15. Keep the fan clean and maintain in good condition (use an authorized
service agent).
16. Use recommended parts only (non genuine parts may be dangerous, and
will invalidate your warranty).
17. When not in use store in a safe, dry, childproof location.
18. This appliance can be used by children aged from 8 years and above and
persons with reduced physical, sensory or mental capabilities or lack of
experience and knowledge if they have been given supervision or
instruction concerning use of the appliance in a safe way and understand
the hazards involved. Children shall not play with the appliance. Cleaning
and user maintenance shall not be made by children without supervision.
WARNING :
To avoid danger of electric shock, unplug from outlet when
not in use and before cleaning. If the supply cord is
damaged, it must be replaced by the manufactory or it’s
service agent or a similarity qualified person in order to
avoid a hazard.
PARTS NAME
WARNING :
The Main Power Switch and the On/Off switch should not
be used as the sole means of disconnecting power. Always
unplug the power cord before servicing or moving the unit.
DCool 3601TR-S
DCool 4601TR-S

PAGE 4/7
ASSEMBLY
The base of the tower fan comes in two parts, which fit around the oscillation
base. Both parts fit easily together. The back half is the one with cut-outs for
the power supply cord.
1. First attach the front half of the base, aligning the holes in base with the
screw holes in the oscillation base, and leading the power cord through
the centre hole.
2. Then snap the back half of the base to the front half and secure with the
four screws (supplied)
(Figure 1)
3. Thread the power supply cord through the two cut-outs at the bottom of
the base.
REMOTE CONTROL
1. Install one ‘mercury’(not included) batteries.
2. The Remote Control Power button is labeled as such. All the functions
performed with the Remote Control work identically to the Manual Controls.
( shown in FIGURE 2).

PAGE 5/7
(FIGURE 2)
OPERATION
The FAN may be operated by the manual controls located on the FAN (as
shown in FIGURE 3) or by your remote control (shown in FIGURE 2) .
(FIGURE 3)
1. Place the FAN on a stable flat surface. Plug the cord set into a
220-240V~A.C. electrical outlet.

PAGE 6/7
2. POWER: Turn the FAN on by pressing the ‘POWER’button; Turn
the FAN off by pressing the ‘POWER’button again.
3. SPEED: You can adjust the fan speed to the desired level: low (I),
medium (II), or high (III) by pressing ’SPEED’. The speed setting
is displayed on the LED panel (shown in FIGURE 4) ..
4. MODE: Pressing the ’MODE’button will set the FAN into
NORMAL (NM), NATURAL (NT), and SLEEP (SL) mode .
5. TIMER: The fan is equipped with a timer that allows you to set it's
length of operation from 0.5 hour to 7.5 hours.
6. OSC: Pressing the ‘OSC’button will start and stop the oscillation
function. The symbol is displayed on the LED panel.
(FIGURE 4)
MAINTENANCE
1. This can only be done by an authorized service agent such as your local
Sealer dealer or any agent qualified to undertake electrical repairs.
3. If the unit requires external cleaning make sure it is switched off and
unplugged from the mains supply. Use a soft tissue or cloth for general

PAGE 7/7
cleaning. To remove more persistent dirt or grime wipe down with a
cloth that has been dampened with warm soapy water. Do not use any
solvents (such as thinners ) as these may damage the plastic casing.
This appliance is not intended for use by persons (including children)
with reduced physical, sensory or mental capabilities, or lack of
experience and knowledge, unless they have been given supervision or
instruction concerning use of the appliance by a person responsible for
their safety.
Children should be supervised to ensure that they do not play with the
appliance.
CONFORMITY WITH DIRECTIVES
This product is CE marked to denote conformity with Directives 2006/95/EC (Low
Voltage) and the EMC directive (2004/108/EC), as amended.
Correct Disposal of this product
This marking indicates that this product should not be disposed
with other household wastes throughout the EU. To prevent
possible harm to the environment or human health from
uncontrolled waste disposal, recycle it responsibly to promote
the sustainable reuse of material resources. To return your used
device, please use the return and collection systems or contact
the retailer where the product was purchased. They can take this
product for environmental safe recycling.

PAGE 1/8
Tour ventilateur
DCool 3601TR-S DCool 4601TR-S
Puissance : 220-240 V~50/60 Hz 45 W

PAGE 2/8
FR
LISEZ ATTENTIVEMENT AVANT DE TENTER D’ASSEMBLER,
D’INSTALLER, D’UTILISER OU DE MAINTENIR LE PRODUIT DÉCRIT.
PROTÉGEZ-VOUS ET LES AUTRES EN RESPECTANT TOUTES LES
INFORMATIONS DE SÉCURITÉ. LE NON-RESPECT DES INSTRUCTIONS
PEUT ENTRAÎNER DES BLESSURES CORPORELLES ET / OU DES
DOMMAGES MATÉRIELS !
INFORMATIONS DE SÉCURITÉ IMPORTANTES
1. Lisez attentivement toutes les instructions avant d’utiliser le
VENTILATEUR.
2. Utilisez ce VENTILATEUR uniquement comme décrit dans ce manuel.
L’utilisation des accessoires non recommandés par le fabricant de
l’appareil peut entraîner un incendie, un choc électrique ou des blessures
aux personnes.
3. Retirez l’emballage et assurez-vous que le VENTILATEUR n’est pas
endommagé. En cas de doute, n’utilisez pas le VENTILATEUR et
contactez votre fournisseur.
4. Ne laissez pas les enfants jouer avec des pièces de l’emballage.
5. Avant d'utiliser le VENTILATEUR, vérifiez si la tension indiquée sur
l'étiquette de cote énergétique correspond au secteur de votre maison.
6. Une extrême prudence est nécessaire lorsque le VENTILATEUR est
utilisé par ou près des enfants ou des invalides et chaque fois que le
VENTILATEUR est laissé en fonctionnement sans surveillance.
7. Évitez d’utiliser une rallonge car la rallonge pourrait surchauffer et
entraîner un risque d’incendie.
8. Ne tirez pas sur le cordon d'alimentation pour le débrancher de la source
d’alimentation. Saisissez toujours la prise pour la retirer.
9. N’insérez aucun objet dans le VENTILATEUR car cela pourrait provoquer
un choc électrique, blesser ou endommager le VENTILATEUR. Ne
bloquez ni ne touchez le VENTILATEUR de quelque manière que ce soit
pendant son fonctionnement.
10. Ne laissez pas le VENTILATEUR sans surveillance. Débranchez toujours
le VENTILATEUR lorsqu’il n'est pas utilisé.
PAGE 3/8
11. Ce VENTILATEUR n’est pas conçu pour être utilisé dans des endroits
humides. Ne placez jamais un VENTILATEUR dans endroit où il pourrait
tomber dans une baignoire ou un autre récipient d’eau.
12. N’utilisez pas le VENTILATEUR à l’extérieur.
13. Débranchez le ventilateur de l’alimentation secteur lorsqu’il n’est pas
utilisé et avant toute opération d’entretien ou maintenance.
14. Débranchez toujours le ventilateur de l’alimentation électrique lorsque
vous le déplacez d’un endroit à un autre.
15. Gardez le ventilateur propre et maintenez-le en bon état (utilisez un agent
de service autorisé).
16. N’utilisez que des pièces recommandées (des pièces non d’origine
peuvent être dangereuses et invalideront votre garantie).
17. Lorsque vous ne l’utilisez pas, rangez-le dans un endroit sûr, sec et
protégé des enfants.
18. Cet appareil peut être utilisé par des enfants de plus de 8 ans et des
personnes dont les capacités physiques, sensorielles ou mentales
réduites, ou n'ayant pas d'expérience et de connaissance si elles sont
supervisées ou ont été instruites concernant l'utilisation de l'appareil d'une
manière sûre et comprennent les risques encourus. Les enfants ne
doivent pas jouer avec l'appareil. Le nettoyage et la maintenance
utilisateur ne doivent pas être effectués par des enfants sans supervision.
AVERTISS
EMENT :
Pour éviter tout risque d'électrocution, débranchez-le de la
prise de courant lorsqu’il n'est pas utilisé et avant de le
nettoyer. Si le cordon d’alimentation est endommagé, il doit
être remplacé par le fabricant ou son agent de service ou
par une personne qualifiée afin d’éviter tout danger.
AVERTISS
EMENT :
L’interrupteur principal et l’interrupteur On / Off ne doivent
pas être utilisés comme seul moyen de couper
l’alimentation. Débranchez toujours le cordon
d'alimentation avant de réparer ou de déplacer l’appareil.

PAGE 4/8
DÉSIGNATION DES ÉLÉMENTS
MONTAGE
La base du ventilateur colonne se compose de deux parties qui s'adaptent
autour de la base d’oscillation. Les deux parties s’adaptent facilement
ensemble. La moitié arrière est celle avec des découpes pour le cordon
d’alimentation.
1. Fixez d’abord la moitié avant de la base, en alignant les trous dans la
base avec les trous de vis dans la base d’oscillation, et en dirigeant le
cordon d’alimentation à travers le trou central.
2. Ensuite, enclenchez la moitié arrière de la base sur la moitié avant et fixez
avec les quatre vis (fournies)
(Figure 1)
3. Enfilez le cordon d’alimentation à travers les deux découpes au bas de la
base.
DCool 3601TR-S
DCool 4601TR-S
Panneau de contrôle supérieur
Affichage LED
Affichage LED
Sortie d’air
Sortie d’air
Boîtier avant
Boîtier avant
Base
Base du ventilateur

PAGE 5/8
TÉLÉCOMMANDE
1. Installez une pile « mercure » (non incluse).
2. Le bouton d’alimentation de la télécommande est étiqueté comme tel.
Toutes les fonctions effectuées avec la télécommande fonctionnent de la
même manière que les commandes manuelles. (comme indiqué sur la
FIGURE 2).
(FIGURE 2)
FONCTIONNEMENT
Le VENTILATEUR peut être actionné par les commandes manuelles situées
sur le VENTILATEUR (comme indiqué sur la FIGURE 3) ou par votre
télécommande (indiqué sur la FIGURE 2).

PAGE 6/8
(FIGURE 3)
1. Placez le VENTILATEUR sur une surface plane stable. Branchez
le cordon dans une prise électrique de 220-240 V ~ A.C.
2. POWER : Allumez le VENTILATEUR en appuyant sur le bouton
« POWER ».Éteignez le VENTILATEUR en appuyant à nouveau
sur le bouton « POWER ».
3. SPEED : Vous pouvez régler la vitesse du ventilateur au niveau
souhaité : faible (I), moyen (II) ou élevé (III) en appuyant sur
« SPEED ». Le réglage de la vitesse est affiché sur le panneau
LED (indiqué sur la FIGURE 4).
4. MODE : En appuyant sur le bouton « MODE », le VENTILATEUR
passe en mode NORMAL (NM), NATUREL (NT), et mode de
REPOS (SL).
5. TIMER : Le ventilateur est équipé d une minuterie qui vous
permet de régler sa durée de fonctionnement de 0,5 heure à
7,5 heures.
6. OSC : En appuyant sur le bouton « OSC » démarrera et arrêtera
la fonction d’oscillation. Le symbole est affiché sur le panneau
LED.

PAGE 7/8
(FIGURE 4)
ENTRETIEN
1. Cela ne peut être effectué que par un agent de service autorisé tel que
votre revendeur local Sealer ou tout autre agent qualifié pour effectuer
des réparations électriques.
3. Si l’appareil nécessite un nettoyage externe, assurez-vous qu’il est
éteint et débranché du secteur. Utilisez un chiffon doux ou un chiffon
pour le nettoyage général. Pour enlever la saleté ou la crasse
persistante, essuyez avec un chiffon humidifié avec de l’eau chaude
savonneuse. N’utilisez pas de solvants (tels que des diluants) car ils
pourraient endommager le boîtier en plastique.
Cet appareil n'est pas destiné à être utilisé par des personnes (y compris
les enfants) ayant des capacités physiques, sensorielles ou mentales
réduites, ou sans expérience ou connaissances de l'appareil, à moins
qu'elles ne soient sous supervision ou instruites concernant l'utilisation
de l'appareil par une personne responsable de leur sécurité.

PAGE 8/8
Les enfants doivent être surveillés pour qu'ils ne jouent pas avec cet
appareil.
CONFORMITÉAUX DIRECTIVES
Ce produit est pourvu d'un marquage CE pour démontrer sa conformité à la directive
2006/95/CE (basse tension) et à la directive modifiée CEM (2004/108/CE).
Mise au rebut conforme du produit
Ce marquage indique que ce produit ne doit pas être mis au
rebut avec les déchets ménagers dans l'UE. Pour préserver
l'environnement et la santé de l'élimination incontrôlée des
déchets, recyclez cet appareil de manière responsable pour
contribuer à la réutilisation des ressources matérielles. Pour
retourner votre appareil usagé, utilisez les systèmes de retour et
de collecte ou contactez le revendeur du produit. Le revendeur
peut reprendre ce produit et le recycler pour préserver
l'environnement.

SEITE 1/8
TURMVENTILATOR
DCool 3601TR-S DCool 4601TR-S
Leistung: 220-240 V ~ 50/60 Hz 45 W

SEITE 2/8
DE
LESEN SIE FOLGENDE INFORMATIONEN SORGFÄLTIG DURCH, BEVOR
SIE DAS BESCHRIEBENE PRODUKT ZUSAMMENBAUEN, AUFSTELLEN, IN
BETRIEB NEHMEN ODER WARTEN: BEACHTEN SIE ALLE
SICHERHEITSINFORMATIONEN UND SCHÜTZEN SIE DAMIT SICH SELBST
UND ANDERE. DAS NICHTBEFOLGEN DER ANWEISUNGEN KANN ZU
PERSONEN- UND SACHSCHÄDEN FÜHREN!
WICHTIGE SICHERHEITSHINWEISE
1. Bitte lesen Sie sich vor Benutzung des VENTILATORS alle Anweisungen
sorgfältig durch.
2. Verwenden Sie den VENTILATOR ausschließlich auf die in dieser
Bedienungsanleitung beschriebenen Art und Weise. Jede anderweitige
Verwendung, die vom Hersteller nicht empfohlen wurde, kann zu
Bränden, elektrischen Schlägen oder Personenschäden führen.
3. Nehmen Sie den VENTILATOR aus der Verpackung und vergewissern
Sie sich, dass dieser unbeschädigt ist. Nehmen Sie den VENTILATOR im
Zweifelsfall nicht in Betrieb und wenden Sie sich an den Hersteller.
4. Lassen Sie Kinder nicht mit Teilen des Pakets spielen.
5. Überprüfen Sie vor dem Einschalten des VENTILATORS, ob die auf dem
Etikett angegebene Spannung mit der Netzspannung bei Ihnen zu Hause
übereinstimmt.
6. Größte Vorsicht ist geboten, wenn der VENTILATOR von oder in der Nähe
von Kindern oder Invaliden verwendet wird und sobald er unbeaufsichtigt
in Betrieb bleibt.
7. Vermeiden Sie die Benutzung eines Verlängerungskabels, da dieses
überhitzen und ein Brandrisiko darstellen könnte.
8. Ziehen Sie nicht am Netzkabel, um das Gerät von der Stromversorgung
zu trennen. Ziehen Sie stets am Stecker selbst.
9. Führen Sie keine Gegenstände in Ventilator ein, da das elektrische
Schläge, Verletzungen oder Schäden am VENTILATOR verursachen
könnte. Der VENTILATOR darf während des Betriebs nicht versperrt oder
blockiert werden.
10. Lassen Sie den VENTILATOR nicht unbeaufsichtigt. Trennen Sie den

SEITE 3/8
VENTILATOR bei Nichtbenutzung stets von der Stromversorgung.
11. Dieser VENTILATOR ist nicht für den Gebrauch an feuchten oder nassen
Orten vorgesehen. Stellen Sie den VENTILATOR niemals an einem Ort
auf, von dem aus er in eine Badewanne oder einen anderen Wasser
beinhaltenden Behälter fallen könnte.
12. Verwenden Sie den VENTILATOR nicht im Freien.
13. Trennen Sie den Ventilator nach jedem Gebrauch, und vor der
Durchführung von Wartungsarbeiten, von der Stromversorgung.
14. Trennen Sie den Ventilator stets von der Stromversorgung, wenn Sie ihn
von einem Ort zum anderen bewegen.
15. Halten Sie den Ventilator sauber und in gutem Zustand (nehmen Sie
einen autorisierten Service-Mitarbeiter in Anspruch).
16. Verwenden Sie ausschließlich die empfohlenen Teile (nicht originale
Ersatzteile könnten gefährlich sein und außerdem Ihren Garantieanspruch
ungültig machen).
17. Gerät bei Nichtgebrauch sicher, trocken und außer Reichweite von
Kindern aufbewahren.
18. Dieses Gerät kann von Kindern ab 8 Jahren und Personen mit
eingeschränktem physischen, sensorischen oder geistigen
Leistungsvermögen oder einem Mangel an Erfahrung und Fachkenntnis
verwendet werden, wenn sie unterAufsicht stehen oder Anweisungen
hinsichtlich der sicheren Verwendung des Geräts erhalten haben und die
damit verbundenen Gefahren kennen. Kinder dürfen nicht mit dem Gerät
spielen. Die Reinigung und Wartung sollte nicht von Kindern ohne
Beaufsichtigung vorgenommen werden.
WARNUNG:
Der Netzschalter und der An/Aus-Schalter sollten nicht
als einziges Mittel zur Trennung von der
Stromversorgung verwendet werden. Ziehen Sie stets
das Netzkabel, bevor Sie das Gerät bewegen oder warten.

SEITE 4/8
WARNUNG:
Ziehen Sie bei Nichtbenutzung oder vor der Reinigung
den Netzstecker aus der Netzsteckdose, um der Gefahr
von elektrischen Schlägen vorzubeugen. Ist das
Stromkabel beschädigt, muss es vom Hersteller oder
seinem Kundendienstvertreter oder einer ähnlich
qualifizierten Person ersetzt werden, um ein Risiko
auszuschließen.
TEILEBEZEICHNUNG
MONTAGE
Der Standfuß des Turmventilators besteht aus zwei Teilen, die den
Schwenksockel umgreifen. Beide Teile passen hervorragend zusammen. Die
hintere Hälfte ist mit Aussparungen für das Netzkabel versehen.
1. Bringen Sie zuerst die vordere Hälfte auf dem Standfuß an, richten Sie die
Löcher des Sockels an den Schraubenlöchern des Schwenksockels aus
und führen Sie dann das Netzkabel durch das Mittelloch.
2. Richten Sie nun die hintere Hälfte des Standfußes an der vorderen Hälfte
aus und befestigen Sie sie mit den vier (mitgelieferten) Schrauben
DCool 3601TR-S
DCool 4601TR-S
Oberes Bedienfeld
Oberes Bedienfeld
LED-Anzeige
LED-Anzeige
Luftaustritt
Luftaustritt
Frontgehäuse
Frontgehäuse
Träger
Ventilatorstandfuß

SEITE 5/8
(Abbildung 1)
3. Fädeln Sie das Netzkabel durch die zwei Aussparungen unten am
Standfuß.
FERNBDIENUNG
1. Legen Sie eine Quecksilberbatterie (nicht enthalten) ein.
2. Die Einschalttaste der Fernbedienung ist als solche gekennzeichnet. Alle
Funktionen, die mit der Fernbedienung ausgeführt werden, funktionieren
genauso wie die manuelle Steuerung. (inABBILDUNG 2 dargestellt).
(ABBILDUNG 2)
This manual suits for next models
1
Table of contents
Languages:
Other Daewoo Fan manuals

Daewoo
Daewoo BLADELESS FAN & HEATER User manual

Daewoo
Daewoo DI-40HVF-3P2 User manual

Daewoo
Daewoo DTF-2936 User manual

Daewoo
Daewoo Dcool 1203 User manual

Daewoo
Daewoo DI-9411 User manual

Daewoo
Daewoo COL1568 User manual

Daewoo
Daewoo COL1540 User manual

Daewoo
Daewoo Dcool 1607 User manual

Daewoo
Daewoo YF-40A User manual

Daewoo
Daewoo COL1063 User manual