Daewoo AVS1400 User manual

1
Internet & FM Radio

2
IMPORTANT SAFEGUARDS
When using electrical appliances, basic safety precautions should always
be followed. These instructions should be saved for future reference:
•Read and familiarise yourself with all operating instructions before
using this Internet & FM Radio.
•Before plugging your unit into the mains, visually check that the unit is
intact and has not suffered any transit damage.
•Check that the voltage indicated on the data plate corresponds with
that of the local network before connecting the appliance to the mains
power supply.
•Always use this appliance on a solid, level, non-flammable surface.
•Ensure that there is clearance of at least 100mm (4 Inches) minimum
around the Radio for sufficient ventilation.
•Ensure that the ventilation openings are not covered with items, such
as newspapers, table-cloths, curtains, etc.
•No naked flame sources, such as lighted candles, should be placed on
the Radio.
•Do not position the Radio close to sources of heat such as radiators,
heaters, other electronic equipment, etc.
•The Radio shall not be exposed to dripping or splashing and that no
objects filled with liquids, such as vases, shall be placed on the
apparatus.
•Do not immerse this appliance or its supply in water or any other
liquids.
•Do not leave the appliance unattended during use.
•Do not leave the appliance unattended whilst connected to the mains
supply.
•Always remove the mains supply from the mains socket when the
Radio is not in use, the mains supply must be accessible at all times.
•Close supervision is required when using this appliance near children.
•Never leave this appliance within reach of children.
•This appliance can be used by children aged from 8 years and above

3
and persons with reduced physical, sensory or mental capabilities or
lack of experience and knowledge if they have been given supervision
or instruction concerning use of the appliance in a safe way and
understand the hazards involved. Children shall not play with the
appliance. Cleaning and user maintenance shall not be made by
children without supervision.
•Children of less than 3 years should be kept away unless continuously
supervised.
•Do not use this appliance outdoors.
•It is imperative to unplug the power supply after the appliance has
been used, before it is cleaned and whilst being repaired.
•Unplug after each use. Grasp the supply, not the cord.
•Repairs to electrical appliances should only be performed by qualified
personnel. Improper repairs may place the user at serious risk.
•Do not operate this appliance with a damaged plug or cord, after a
malfunction or after being dropped or damaged in any way.
•Regular, periodic checks should be carried out on the mains supply to
ensure no damage is evident. Should there be any signs of damage the
product should not be used.
•If the power cable is damaged, it should only be replaced by the
manufacturer or a suitable qualified after-sales-service in order to
avoid a hazard
•Do not allow the power cable to hang over sharp edges or come in
contact with hot surfaces.
•Do not run the power cable under carpets, rugs, etc.
•This product is intended for household use only and should not be
used for industrial purposes.
•Do not use any accessories or attachments with this appliance other
than those supplied or recommended by supplier.
•Do not use this product for anything other than its intended use.
•Do not push objects into any openings as damage to the product
and/or electric shock may occur.

4
Description of Parts –Front Panel
1. Favourite Preset buttons (1 –5).
2. Back/Home button, press to return to a previous menu
3. Mode –Switch between Internet and FM radio.
4. Standby –Briefly press to power up the radio, briefly press again to put the radio in standby.
5. Info/Scan –Press to scroll through the radio station information or press and hold for radio
scan.
6. Left –Press to go down through the menus or tune down radio stations/frequencies/presets.
7. Loudspeaker.
8. Select –Press to select a station or option.
9. Right –Press to go up through the menus or tune up radio stations/frequencies/presets.
10. Sleep/Sound –Press to enter Sleep menu, press and hold for various sounds.
11. Preset –Briefly press to enter preset recall, press and hold to save stations into presets.
12. Local –Press to enter music by category.
13. LCD Display.
14. Volume/Snooze –Rotate for Volume +/-, press for Snooze.
15. Telescopic Aerial –Fully extend during use.
1
2
7
8
3
4
9
5
6
10
11
12
13
14
15

5
Description of Parts –Rear Panel
Before the first time you use your Internet/FM Radio
Please read these operating instructions thoroughly and keep them in a safe place for future reference.
Remove all packing materials and discard responsibly.
Using the Radio with Batteries
•Open the Battery Compartment (16) by pushing the Battery Compartment Cover (18) down and
remove (arrowed below).
•Insert four 1.5V AA Batteries (not supplied) into the battery compartment being careful to observe
the polarity markings inside.
•Replace the Battery Compartment Cover (18).
16.Battery compartment.
17.DC power input Jack.
18.Battery compartment cover.
19.Stereo Headphone Jack socket.
20.Telescopic Aerial (15) shown in the locked position.
21.Mains Adaptor.
22.Small DC Power Plug.
16
17
18
19
20
21
22

6
Battery Warnings
•Do not mix old and new batteries together.
•It is recommended that batteries are removed from the radio if it is not to be used for a long period of
time.
•CAUTION: There is a danger of explosion if the batteries are incorrectly fitted.
•Replace only with the same or equivalent battery type.
•Do not expose the radio to sunshine, fire, heat or similar.
WARNING
•Keep new and used batteries away from children.
•If the battery compartment does not latch securely, stop using the product and keep it away from
children.
Using the Internet/FM Radio with the Mains Adaptor
1. Insert the Small DC Power Plug (22) into the DC Power Input Jack (17) on the rear of the radio.
2. Insert the Mains Adaptor (21) into the nearest mains socket.
NB if the mains adaptor is being used rather than batteries, it is recommended that the batteries (if
fitted) are removed.
Operating Instructions
Setting up the Wi-Fi Network
1. Ensure that the Telescopic Aerial (15) is fully extended upright.
2. Either insert batteries or connect the Mains Adaptor (21) to power up the radio.
3. The LCD Display (13) will illuminate and show the ‘Welcome’ screen as below:
4. After the Welcome screen, (for the first time used) the radio will scan for available Wi-Fi networks then
the display will prompt you to setup the Wi-Fi [Y] (Manual setup), WPS (Setup using WPS) or [N]
(Bypass Setup):
Manual setup
1. Use the Left (6) and Right (9) buttons to select [Y] and press Select (8), the radio will scan for all
available Wi-Fi signals:
2. Once the scan is complete, the LCD Display (13) will show the Wi-Fi network names available.
3. Use the Left (6) and Right (9) buttons to select the Wi-Fi network name desired. Press the Select button
(8) to enter the Wi-Fi network required.
4. Once the Wi-Fi network has been selected, the Wi-Fi password will have to be inputted, the Wi-Fi
password input screen will be shown as below:
Welcome
……..
..
WiFi
Setup [Y] WPS N
..
WiFi
< Scanning … >
Password is shown here
Enter Password Icon
Delete Icon
Characters (Letters, Numbers & Symbols)

7
5. Once the password has been accepted the display will show ‘Connecting’ and connect to the Wi-Fi
network, after which, the radio will return to the initial menu as below:
6. After a few seconds the initial menu will show on the display, with one of the following 3 options:
Setting up the Wi-FI using WPS
1. After the Welcome screen, (for the first time used) the radio will scan for available Wi-Fi networks then
the display will prompt you to setup the Wi-Fi [Y] (Manual setup), WPS (Setup using WPS) or [N]
(Bypass Setup) as below:
2. Use the Left (6) and Right (9) buttons to select [WPS] and press Select (8) to enter. Follow the
instructions on the LCD Display (13) to connect using WPS.
3. Once connected, the initial menu will show on the display, with one of the following 3 options:
Listening to the Internet Radio
1. From the above menu, use the Left (6) and Right (9) buttons to select <Internet Radio>:
2. Press the Select button (8) to enter Internet Radio mode, press the Left (6) and Right (9) buttons to
highlight one of the following 5 options (a to e), press the Select button (8) to enter the desired option:
a. <My Favorite> - All saved preset stations are stored in the ‘My Favorite’option. Use the Left (6),
Right (9) and Select (8) buttons to retrieve stored radio stations. If a preset has no saved station in
it, it will show as “<X Empty >”on the LCD Display (13) (Note: the letter ‘X’ is the preset number).
However, a preset with a station already saved in it can be saved over with a new station.
NB the first 5 presets are accessible directly by pressing the Favorite Preset buttons (1) on the top of
the radio as below:
b. <Radio Station> - select from the following ‘Radio Station’options, press the Select button (8) to
enter the option:
1. Global Top 20.
2. Genre.
3. Country/Location.
4. Highlight.
< FM > or < Setting > or < Internet Radio >
Right: Any preset with no
station saved in it will
show as empty on the LCD
Display:
Menu
< Internet Radio >
WiFi
Setup [Y] WPS N
..
< FM > or < Setting > or < Internet Radio >

8
c. <Local Radio> - select from the following ‘Local Radio’station options, press the Select button (8)
to enter the option:
d. <Sleep Radio> - select from one of the following sleep radio stations, press the Select button (8) to
enter the option:
e. <History> - all radio stations that have been listened to previously will be saved in ‘History’, press
the Select button (8) to retrieve the History stations.
NB the above menus may vary according to the location of the radio and over time.
Saving up to 250 Internet radio stations using the preset function
1. First tune into the desired radio station in either b) <Radio Station> or c) <Local Radio> as described
above. Please note presets cannot be saved in options a) <My Favorite>, d) <Sleep radio> or e)
<History>.
2. Press and hold the Preset button (11) to enter Preset Store mode, below preset 12 is being used as an
example:
5. A heart symbol will show at the bottom of the display alongside the next available preset number and
will be flashing.
6. Press the Select (8) button to store the radio station in the current preset number or alternatively use
the Left button (6) to store the station in a lower preset number.
NB if a preset is stored in a lower number preset which has already been used, the preset will overwrite
the original saved preset station.
7. Repeat the above steps 1 to 4 to save more stations in the presets.
1. DAB (UK Stations)
2. Top10
3. United Kingdom/All
4. Adult Contemporary
5. Africa
6. Alternative
7. Ambient
8. Asia
9. Blues
10. Christian/Gospel
11. Classical
12. College
13. Comedy
14. Community
15. Country
16. Dance
17. Easy Listening
18. Electronic
19. Europe
20. Folk
21. Hip-Hop
22. Hits
23. Holiday
24. India
25. Indie
26. Jazz
27. Kids
28. Latin
29. Lounge
30. Metal
31. Middle East
32. New Age
33. News
34. Oldies
35. Pop
36. Public
37. R&B
38. Reggae
39. Religious
1. Birds
2. Piano
3. Rain
4. Spa
5. Space
6. Wave
40. Rock
41. Soundtrack
42. Sports
43. Talk
44. Tamil
45. Top 40
46. Variety
47. World
Right: Press and hold the
Preset button.
Next available preset number
will flash. Arrowed right.
Press Select button to store the
station in preset 12.
Radio Station to be saved.
Next available preset number flashing.
Preset heart icon.

9
Recalling a preset Internet radio station using the preset function –Please note that
presets are saved in the ‘My Favorite’option
•Press the Preset button (11) briefly to enter Preset recall mode.
•Press the Left (6) and Right (9) buttons to scroll through the saved presets in <My Favorites> press the
Select button (8) once the desired preset radio station has been found.
1. NB the first 5 presets are available as the Favorite Preset buttons (1) 1-5 along the top edge of the
Radio as shown below:
Using the FM Radio
1. Ensure that the Telescopic Aerial (15) is fully extended.
2. From the above menu, use the Left (6) and Right (9) buttons to highlight <FM >, press the Select
button (8) to enter the FM radio mode. Alternatively press the Mode button (3).
3. Press the Left (6) and Right (9) buttons to scroll through the FM radio frequencies once the desired
frequency is found, press the Select button (8) to tune into the radio station.
4. Alternatively, press the Info/Scan button (5) and the radio will scan and stop when it detects the next
FM station.
Saving up to 99 FM radio stations using the preset function
1. First tune the radio to the desired station as described above.
2. Press and hold the Preset button (11) to enter Preset Store mode as below:
3. A heart symbol will show at the bottom of the display alongside the next available preset number
which will be flashing.
4. Press the Select (8) button to store the radio station in the current preset number or alternatively use
the Left button (6) to store the station in a lower preset number.
NB if a preset is stored in a lower number preset which has already been used, the preset will overwrite
the original saved preset station.
5. Repeat the above steps 1 to 4 to save more stations in the presets.
NB the first 5 presets are available as the Favorite Preset buttons (1) 1-5 along the top edge of the
Radio as shown below:
< FM > or < Setting > or < Internet Radio >

10
Saving presets automatically using the Scan function.
Press and hold the Info/Scan button (5) for 2 seconds and the FM radio will automatically scan the
whole FM radio band.
The first 10 radio stations found during the scan will be stored into the presets which are recalled
normally as below.
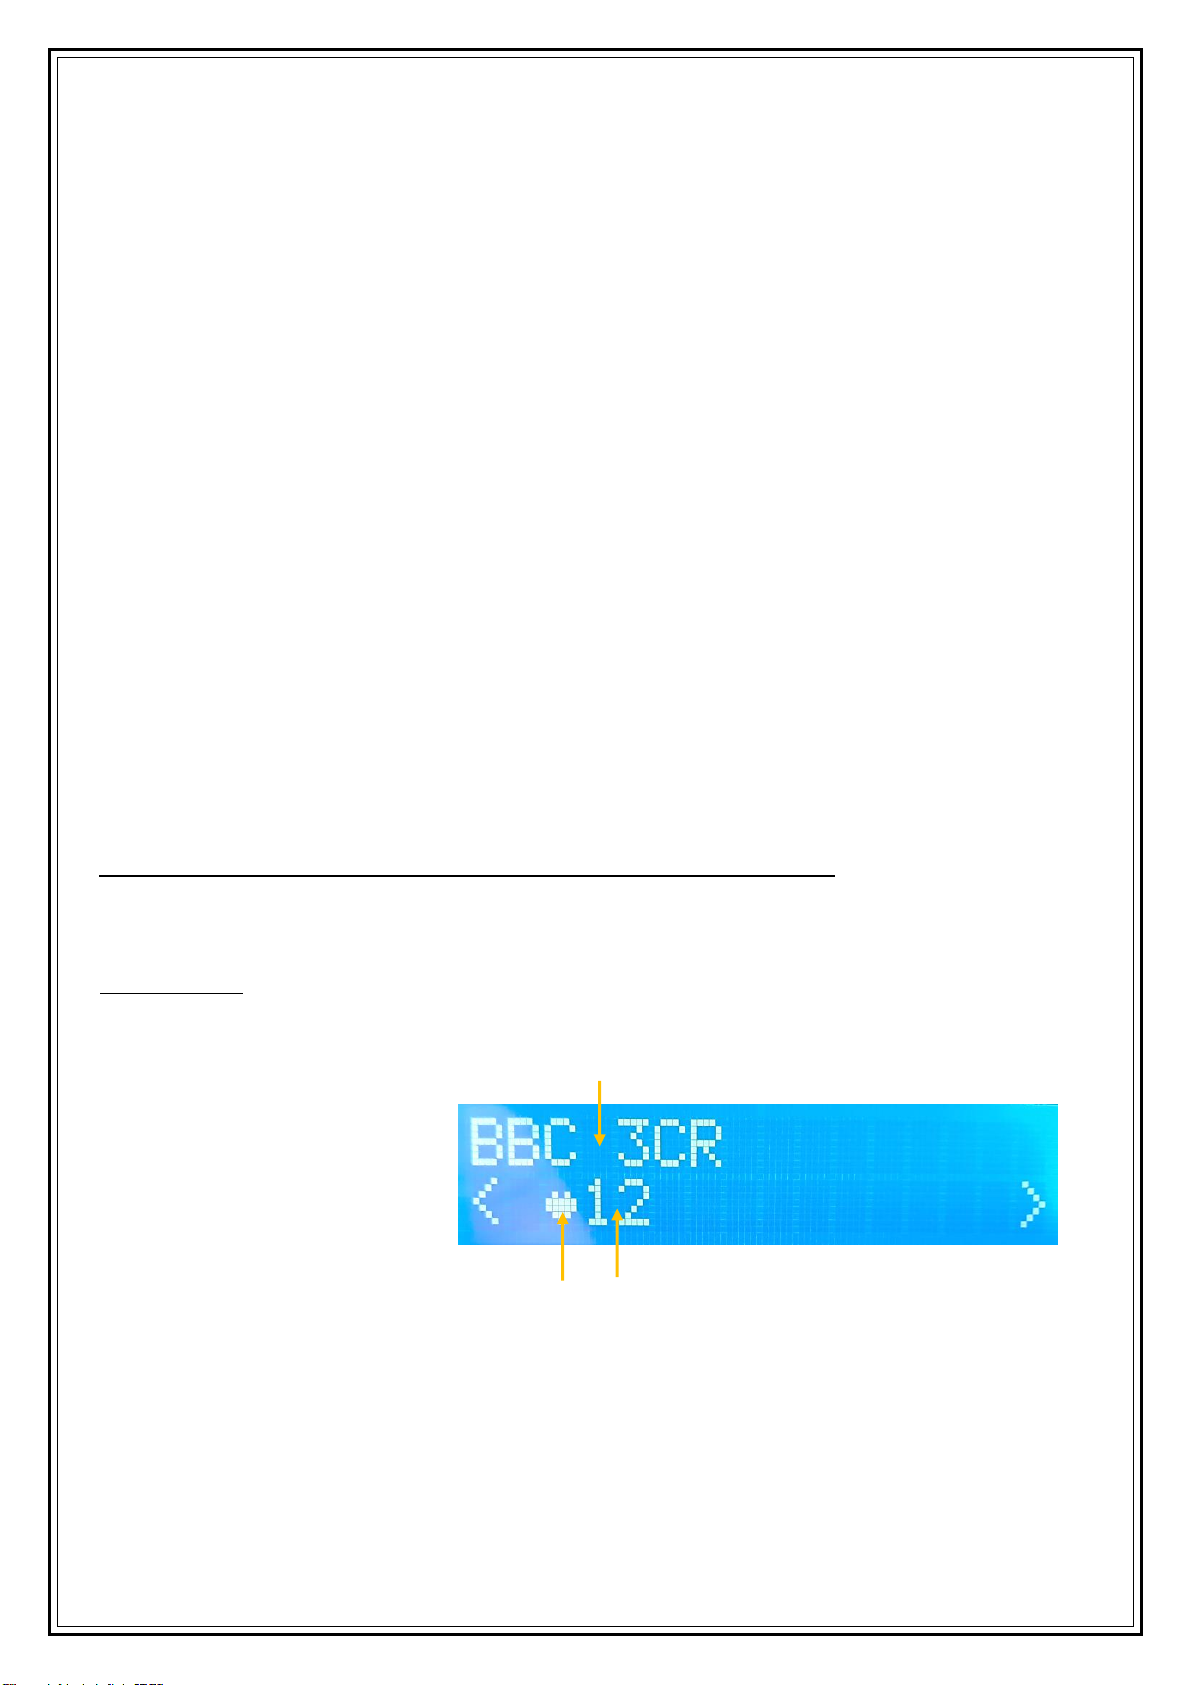
Recalling a preset FM radio station using the preset function
2. To recall a preset Radio Station, briefly press the Preset button (11) to enter the preset recall mode.
3. Press the Left (6) and Right (9) buttons to scroll through the stored presets.
NB if a preset is empty and there is no station saved the preset will show as ‘(Empty)’.
After finding the desired preset press the Select button (8) to select the saved radio station.
Radio Settings
1. The radio will power up in the initial menu, with the following 3 options:
NB if the above menu is not shown at power up, press and hold the Back/Home button (2) until the
first menu (above) is shown on the LCD display (13).
2. Press the Left (6) and Right (9) buttons to highlight < Setting > and press the Select button (8) to
enter Settings as below:
a. Network –Use this option to setup the Wi-Fi network –See above ‘Setting up the Wi-Fi Network’
above.
b. Date & Time –Use this option to:
i. Set the Date and Time –Select options Manual Setup or Auto Detect time and date.
ii. Set the Time Format –Select 12 Hour or 24 Hour mode.
iii. Set the Date Format –Select DD/MM/YYYY or MM/DD/YYYY or YYYY/MM/DD formats.
c. Alarm –Use this option to set the alarm, press the Select button (8) to enter Alarm setting:
i. Alarm 1 on or off –Press the Left (6) and Right (9) buttons to choose Alarm 1 on or off. Press
the Select button (8) to confirm.
a. Repeat –Once, Everyday, or select individual days of the week (Mon, Tue, Wed, Thu, Fri,
Sat or Sun). Press the Select button (8) to confirm and Back/Home button (2) to exit.
b. Time –Press the Select button (8) to enter set time, press the Left (6) and Right (9)
buttons to set the alarm on hours and minutes. Press the Select button (8) to confirm.
c. Sound –Press the Left (6) and Right (9) buttons to select from the various sounds to
wake up to Melody, Internet Radio, FM or Beep. Press the Select button (8) to confirm.
ii. Alarm 2 on or off –Press the Left (6) and Right (9) buttons to choose Alarm 2 on or off. Press
the Select button (8) to confirm.
d. Repeat –Once, Everyday, or select individual days of the week (Mon, Tue, Wed, Thu, Fri,
Sat or Sun). Press the Select button (8) to confirm and Back/Home button (2) to exit.
< FM > or < Setting > or < Internet Radio >
Menu
< Setting >

11
e. Time –Press the Left (6) and Right (9) buttons to set the alarm on hours and minutes.
Press the Select button (8) to confirm.
f. Sound –Press the Left (6) and Right (9) buttons to select from the various sounds to
wake up to Melody, Internet Radio, FM or Beep. Press the Select button (8) to confirm.
iii. Volume –Press the Left (6) and Right (9) buttons to adjust the volume of the alarm. Press the
Select button (8) to confirm.
NB after the alarm has sounded, press the Standby button once (4) to silence the alarm.
Alternatively press the Volume/Snooze button (14) on top of the radio to enter a 5-minute
snooze period.
d. Timer –Press the Left (6) and Right (9) buttons to set the time required, press the Select button (8) to
start the timer counting down. Once the timer has counted to zero, a beeper will sound, press the
Volume/Snooze control (14) on the top of the radio to silence and reset the timer.
e. Language –Press the Left (6) and Right (9) buttons to scroll through the operating languages: English,
Deutsch, Nederlands, Svenska, Norsk Bokmål, Dansk. Press the Select button (8) to select the language
required.
f. Dimmer –Press the Left (6) and Right (9) buttons and press the Select button (8) to select one of the
two dimmer modes:
i. Turn On –the LCD Display (13) will stay illuminated, press the Select button (8) to activate the
‘Turn On’ mode and press the Left (6) and Right (9) buttons to set the brightness level.
ii. Power Saving –the LCD Display (13) will dim after short period of time, press the Select button
(8) to activate the ‘Power Saving’ mode and press the Left (6) and Right (9) buttons to set the
brightness level before dimming.
g. Power Saver –This setting determines the time interval after which the radio powers down after no
playback of audio or no presses of the buttons on the front panel.
i. Press the Left (6) and Right (9) buttons to select 5, 15, 30 minutes or Turn Off (the power saver).
ii. Press the Select button (8) to enter the selection.
h. Sleep Timer –The sleep timer allows you to listen to music for a set time before the radio turns itself
off automatically:
i. Press the Left (6) and Right (9) buttons to select from Sleep Off, 15, 30, 60, 90, 120, 150, or 180
minutes
ii. Press the Select button (8) to confirm how many minutes the radio will be on for until it turns
off.
NB pressing the Sleep/Sound button (10) briefly once will also enter the sleep timer mode.
i. Weather –Set the location of where you are to get the latest weather in your area:
i. Press the Left (6) and Right (9) buttons to select the continent. Press the Select button (8) to
confirm.
ii. Press the Left (6) and Right (9) buttons to select the country. Press the Select button (8) to confirm.
iii. Press the Left (6) and Right (9) buttons to select the area of the country. Press the Select button
(8) to confirm.
iv. Finally press the Left and Right (9) buttons to select your town. Press the Select button (8) to
confirm.
NB The weather for your area will then be shown on the LCD Display (13) whilst the radio is in standby, it
will show current temperature and the likelihood of rain in percent alternating with the time and date.
Press the Left (6) and Right (9) buttons to show the forecast up to 4 days ahead.
j. FM Setup –Set the FM radio preferences.
i. Mode –Press the Left (6) and Right (9) buttons to set the FM radio sound to be in Stereo or
Mono (NB the headphone output is stereo). Press the Select button (8) to confirm.

12
ii. Threshold –
a. Stereo Threshold –Press the Left (6) and Right (9) buttons to set the level at which the
audio switches into stereo select from weak, strong or default. Press the Select button
(8) to confirm.
b. Seek Threshold –Press the Left (6) and Right (9) buttons to set the level at which the
strength of the stations are detected during an FM radio scan, select from weak, strong
or default. Press the Select button (8) to confirm.
k. Quality –Press the Left (6) and Right (9) buttons to select either Low or High quality. Press the Select
button (8) to confirm.
l. Local Setup –Press the Left (6) and Right (9) buttons to select Auto Detect, Setup Country, Setup State
(region) or Setup City. Press the Select button (8) to confirm.
m.Equaliser - Press the Left (6) and Right (9) buttons to select Normal, Flat, Jazz, Rock, Soundtracks,
Classical, Pop, News or My EQ select to enter your own EQ. Press the Select button (8) to confirm.
n. Device Update - Press the Select button (8) to check for an update for the radio’s software.
o. Information –Press the Select button (8) for various information about the radio.
p. Factory Reset –Restores the radio back to the original manufacturer’s settings. WARNING –after a
Factory Reset all saved stations and settings will be lost.
Detailed description of the Front Panel Buttons
Standby (4)
Press Standby to turn the radio on and off (standby)
Mode (3)
Press the Mode button to switch between FM and Internet radio modes.
Back/Home (2)
Press the Back/Home button briefly to go back to a previous menu. Press and hold the Back/Home
button to return to the main menu.
Local (12)
Press the Local button to skip to Internet Local Radio options (see ‘c) <Local>’ on page 8).
Preset (11)
Press the Preset button briefly to recalled stored presets, press and hold to save stations into presets.
Info/Scan (5)
Press the Info/Scan button (5) briefly once to show the radio station info on the LCD Display.
Press and hold the Info/Scan button (5) to enable the radio re-scan the airwaves for stations.
Left (6)
Press to go down through the menus or tune down radio stations/frequencies/presets.
Select (8)
Press to select a station or option.
Right (9)
Press to go up through the menus or tune up radio stations/frequencies/presets.

13
Sleep/Sound button (10)
a) Sleep: Press the Sleep/Sound button (10) briefly once will to enter the sleep timer mode –see
‘h. Sleep Timer’above on page 11.
b) Sound (Internet radio only): Press and hold the Sleep/Sound button (10) to enable the ‘Sounds’
sleep menu, use the Left (6) and Right (9) and Select (8) buttons to select from the various
sleep sounds as below:
i. Birds
ii. Piano
iii. Rain
iv. Spa
v. Space
vi. Wave
Operating Instructions –Using the Headphone Output
Insert the Headphones 3.5mm jack plug into the Stereo Headphone Jack Socket (19) on the rear of the
radio for private listening.
Adjust the volume level as desired using the Volume/Snooze control (14).
NB the Headphones audio output is in stereo.
Care and Use of your Internet/FM Radio
•Always disconnect the Radio from the power supply before cleaning.
•Clean outside of the Radio with a clean damp cloth. Never clean with harsh or abrasive cleaners.
•Do not submerge the Radio or its Power cord in water or any other liquids.

14
App control of your Internet Radio
The Internet Radio can be controlled remotely using your mobile phone, Tablet, etc.
NB Before proceeding ensure your Phone, Tablet, or other device is connected to the same Wi-Fi
network as the Internet Radio.
Next download the free App called ‘AirMusic Control’, this is available from Google Play for Android
and also for Apple on the App Store:
Run the App and the main page will open as the image below. Touch the options to select the desired
station and touch to Play, Stop, Mute and adjust the Volume level:
Main Page – Description of icons
Remote
Control Mode
Intercom Mode
Main Menu
Recall and Save
favourite Presets
Music Player
Android Icon Apple Icon

15
‘Local Radio’ Option Selected:
‘Internet Radio’ Option Selected:
‘FM Radio’ Option Selected:
1. The Main Page of the App
showing the options.
2. Page showing Local Radio
option Selected.
3. Page showing Local Radio
station playing.
1. The Main Page of
the App showing
the options.
2. Page showing the
Internet Radio
options.
3. Page showing the
‘Radio Station’
option selected and
the options.
4. Page showing the
‘Global Top 20’
option selected.
5. Page showing the
selected Radio
Station playing.
1.The Main Page of the
App showing the
options.
2. Page showing the tuned
FM Radio station playing.

16
Remote control of your Radio
Using the Intercom
1. Press the ‘Remote’ icon
(arrowed) on the Main Page of
the App.
2. Above: the remote page of the
App.
Power Off
Previous
Enter
Next
Mute
Volume+
Volume-
Internet/FM
radio mode
Back/Home
Favorites
Display Dimmer
Set Alarm
Set Sleep
Return to
Previous Page
Presets
1. Press the ‘Intercom’ icon
(arrowed) at the top of the
Main Page of the App. to enter
the Intercom mode.
2. Press and hold the microphone
icon (arrowed) to record the
massage. After speaking, let go
of the microphone icon and the
massage will be sent and played
back on the radio.

17
Technical Specification
Model Number
AVS1400
Power Supply
6V (4x 1.5V AA Batteries) or DC 5V @1A
Mains Adaptor
Input: AC 100-240V ~ 50/60Hz 0.15A.
Output: DC 5V @1A
Unpacked Weight
Approx. 595g (without batteries)
Dimensions (Approx.)
Approx. 95 (w) x 105 (d) x 155 (h) mm
Operating Temperature Range
0°C to + 40°C
No of Speaker Units
1
Audio Output Power
3W RMS
FM Frequency Range
87.5 - 108MHz
WLAN radio frequency
2,400-2,483.5 MHz
Max. Transmission power
19 dBm
This product conforms to:
Radio Equipment Directive (RED) 2014/53/EU
General Product Safety Directive 2014/35/EU
Electromagnetic Compatibility (EMC) 2014/30/EU

18
GUARANTEE
This product is guaranteed for twenty-four months from the date of original
purchase. If any defect should occur due to faulty materials or workmanship, please
return it to the store it was purchased from.
You will need to have your receipt of purchase to hand. The guarantee is subject to
the following provisions:
•
It is only valid within the boundaries of the country of purchase.
•
The product must be correctly installed and operated in accordance with the
instructions contained in the
User Manual.
•
The product must be used solely for domestic purposes.
•
The guarantee will berendered invalid if the product is re-sold or has been
damaged by inexpert repair.
•
The manufacturer disclaims any liability for incidental or consequential damages.
•
The guarantee is in addition to, anddoes not diminish, your statutory or legal
rights.
Daewoo Electricals is a registered trademark.
Produced and imported under licence by ESG Ltd
Manchester M3 1JS www.esgltd.com
Waste electrical products should not be disposed of with household waste. Please
recycle where facilities exist. Check with your Local Authority or retailer for recycling advice.
Table of contents
Other Daewoo Radio manuals

Daewoo
Daewoo DRP-140 User manual

Daewoo
Daewoo DRP-18 User manual

Daewoo
Daewoo AVS1324G User manual

Daewoo
Daewoo DRP-104 User manual

Daewoo
Daewoo AVS1322 User manual

Daewoo
Daewoo DCR-48 User manual

Daewoo
Daewoo AVS1401 User manual

Daewoo
Daewoo Compact Wooden User manual

Daewoo
Daewoo DRP-9 User manual

Daewoo
Daewoo AVS1323 User manual