manuals.online logo
Brands
  1. Home
  2. •
  3. Brands
  4. •
  5. Daikin
  6. •
  7. Remote Control
  8. •
  9. Daikin ARC447A3 Instruction manual

Daikin ARC447A3 Instruction manual

ARC447A3
1QUG-ARC447A3-09/09
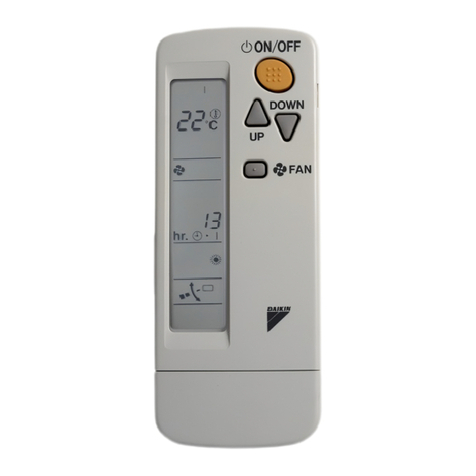
ARC447A3 Quaternity Controller Quick User Guide
FUNCTIONS
1. DISPLAY SCREEN: Displays current system settings and
setpoint temperature. The protection sheet is on the
display to protect it from scratches. Remove it before use.
2. ON/OFF: Press to stop operation. Pressing the
button again when the unit is off will restart the same
operation.
3. OFF TIMER: Pressing changes the displayed
time in half hour increments. The time from 0.5 to 9.5
hours can be set. Once selected the timer lamp will
illuminate. Set for ON TIMER or OFF TIMER. Check that
clock is correct and reset if not.
4. DIRECT OPERATION BUTTONS: Select COOL, HEAT
DRY, or AUTO.
COOL: Press for cooling. The multi-monitor lamp
will turn GREEN.
HEAT: Press for heating. The multi-monitor lamp
will turn RED.
DRY: Press to lower humidity and minimize
changes in room temperature.The multi-monitor lamp will
turn YELLOW.
AUTO: Pressing will automatically change the
system to operate in either cooling or heating, depending
on the controller setpoint and room conditions. To stop
any operation press .
5. TEMP: Press up/down arrows to adjust the
temperature higher or lower. Press SET UP, then use the
SELECT up/down arrows to change °F to °C, monitor
brightness, beep volume, or contrast.
6. CLEAN Flash Streamer Air Purifying: Cleans and
purifies the room air. Press and the display screen
reflects . This powerful function reduces
bad odors and viruses by absorbing and decomposing
them. The multi-monitor lamp turns white and illuminates
for the first 2 seconds of operation. The Air Purifying
function automatically cancels after 2 hours.
7. INFO: Press while pointing the controller at the air
conditioner for 2 seconds to display the indoor
temperature and humidity, and the outdoor temperature.
The display changes every time the INFO button is
pressed.
8. POWERFUL: Press to intensify cooling or heating
operation.
3. OFF TIMER
9. HUM
Humidity Button
7. INFO
1. Display
Screen
8. POWERFUL
Note: For effective operation, this controller should be
pointed at the infrared receiver on the indoor unit. The
maximum distance for communication is 23ft (7m).
Open Cover View:
11. COMFORT
4. Direct
Operation
10. BREEZE
14. CLOCK
button
5. TEMP
18. CHILD LOCK
16. SWING
15. FAN
6. CLEAN
Flash Streamer
Air Purifying
17. SET UP
20. RESET ALARM
19. C-SLEEP
13. TIMER
21. CANCEL
2. ON/OFF
%
Use this Controller with
Quaternity units:
FTXG_HVJU
RXG_HVJU
12. SELECT
QUG-ARC447A3-09/09
QUG-ARC447A3-09/09 2
9. HUM % : Press up/down arrows to change the
De-Humidification Control setting. To lower the space
temperature and humidity, select COOLING operation
with the required setpoint temperature. The
de-humidification setting can then be set as per the
following table. To lower the space humidity with a
minimal effect on the room temperature, select DRY
operation and the required de-humidification setting as per
the following table. The allowable temperature drift from
the current room temperature can also be set in the DRY
mode using the TEMP button.
FEATURES
10. BREEZE: Pressing activates rapid oscillation of
the airflow louvers, resulting in a naturally cooler
temperature, similar to fresh air. The Cooling Breeze
function is available in COOLING, DRY COOLING, DRY,
and FLASH STREAMER AIR PURIFYING operation.
11. COMFORT: Press to provide airflow rate and
direction to prevent air from blowing directly on room
occupants.
12. SELECT: Press up/down arrows to adjust the Timer
and the Set Up functions.
13. TIMER: Timer functions can automatically switch the unit
on or off at night or in the morning. Set the timer for each
use.
COUNTDOWN OFF TIMER operation: Use the select
button to choose a time for the timer to go OFF. The time
advances in half-hour increments and a range of 0.5 to 9.5
hours can be set. At the desired time, press .The
T I M E R l a m p l i g h t s .
ON/OFF TIMER operation:
Set the time for timer-ON or timer-OFF. Set the clock if the
displayed time is incorrect. Press the SELECT button to
set the time to be reserved. Holding down the button
advances the time faster. Press OFF for OFF TIMER and
ON for ON TIMER. Use Select arrows to set the time to be
reserved. The Timer lamp illuminates. Press Cancel and
the Timer lamp goes off.
Starting COUNTDOWN OFF TIMER and OFF TIMER
causes the unit to automatically change the setpoint
temperature 1 hour later to prevent the room from
becoming too cold or too hot. It goes up 1°F during
DRY COOLING and goes down 3.6°F during heating. The
setpoint programmed in the controller is reached. When
operating the unit via the COUNTDOWN OFF TIMER or
OFF TIMER, the actual length of operation may vary from
the time entered by the user. Once you set the on/off
timer, the time frame setting is kept in memory but the
COUNTDOWN OFF TIMER does not have this memory
function. The memory is cancelled when the remote
controller batteries are replaced. COUNTDOWN OFF
TIMER and OFF TIMER funcitons are not available if
POWERFUL or COMFORT SLEEP options are selected.
To combine ON TIMER and OFF TIMER:
Press and then to cancel the ON TIMER only.
Press and then to cancel the OFF TIMER only.
Press several times to reach 9.5 hours and then press
it once more to cancel COUNTDOWN OFF TIMER only
14. CLOCK button: Press to check that the time on the
Display Screen is correct.
15. FAN:Press for five levels of airflow available in
addition to Quiet and Automatic Operation. Each
pressing of the button advances the airflow setting.
NOTE: If set to Quiet ( displays on LCD screen), the
system capacity will reduce in additon to the sound level.
If set to Automatic , the airflow rate automatically
adjusts, depending on the difference between the
setpoint and the actual room temperature.
16. SWING buttons: Press to change vertical airflow
and press to change the horizontal airflow
direction.
17. SET UP: Press to set the unit operation and
remote controller display to your preference. The item
changes every time it is pressed. The settings change
every time the SELECT button is pressed respectively.
18. CHILD LOCK: Push button for 2 seconds to lock. Press
again for 2 seconds to release.
19. C-SLEEP: The C-SLEEP (Comfort Sleep) button
controls the room temperature to maintain a comfortable
sleeping environment.
20. RESET ALARM: Press for 2 seconds after
cleaning to reset alarm for next time to clean.
21. CANCEL: Press to cease prior Timer selections.
64°F – 90°F (18°C – 32°C) -5°F (-3°C )–STD
GREEN
YELLOW
COOLING DRY COOLING DRY
OFF HIGH STD LOWCONT HIGH STD LOWCONT
MULTI-MONITOR
ON/OFF
Other Daikin Remote Control manuals

Daikin BRC7GA53 User manual

Daikin

Daikin BRC7GA53 User manual

Daikin BRC52B61 User manual

Daikin

Daikin BRC52B61 User manual

Daikin WRC-COA User manual

Daikin

Daikin WRC-COA User manual

Daikin BRC1E73 User manual

Daikin

Daikin BRC1E73 User manual

Daikin VRVWII RWEYQ10MY1 User manual

Daikin

Daikin VRVWII RWEYQ10MY1 User manual

Daikin BRC52B61 User manual

Daikin

Daikin BRC52B61 User manual

Daikin BRC1H519K7 User guide

Daikin

Daikin BRC1H519K7 User guide

Daikin BRC1D71 User manual

Daikin

Daikin BRC1D71 User manual

Daikin G8 Installation manual

Daikin

Daikin G8 Installation manual

Daikin BRC7GA56 User manual

Daikin

Daikin BRC7GA56 User manual

Daikin BRC7E818 User manual

Daikin

Daikin BRC7E818 User manual

Daikin BRC7C812 User manual

Daikin

Daikin BRC7C812 User manual

Daikin Madoka BRC1HHDW User manual

Daikin

Daikin Madoka BRC1HHDW User manual

Daikin BRC1H81W User guide

Daikin

Daikin BRC1H81W User guide

Daikin BRC7M634F User manual

Daikin

Daikin BRC7M634F User manual

Daikin BRC7M530W User manual

Daikin

Daikin BRC7M530W User manual

Daikin BRC1E51 User manual

Daikin

Daikin BRC1E51 User manual

Daikin BRC7E61W User manual

Daikin

Daikin BRC7E61W User manual

Daikin BRC7EA530W User manual

Daikin

Daikin BRC7EA530W User manual

Daikin ARC433A51 Instruction manual

Daikin

Daikin ARC433A51 Instruction manual

Daikin BRC1H81W7 User guide

Daikin

Daikin BRC1H81W7 User guide

Daikin BRC7E530W7 User manual

Daikin

Daikin BRC7E530W7 User manual

Daikin BRC7F532F User manual

Daikin

Daikin BRC7F532F User manual

Daikin BRC1H81S7 Installation and operating manual

Daikin

Daikin BRC1H81S7 Installation and operating manual

Popular Remote Control manuals by other brands

One Forall URC6810 user manual

One Forall

One Forall URC6810 user manual

Satel abax 2 APT-200 manual

Satel

Satel abax 2 APT-200 manual

Sealey 39wireless user manual

Sealey

Sealey 39wireless user manual

WAREMA WMS Operating and installation instructions

WAREMA

WAREMA WMS Operating and installation instructions

Universal Remote Control Automator URC-200 owner's manual

Universal Remote Control

Universal Remote Control Automator URC-200 owner's manual

Miro MRH5 installation instructions

Miro

Miro MRH5 installation instructions

Chamberlain LiftMaster 973W Security+ owner's manual

Chamberlain

Chamberlain LiftMaster 973W Security+ owner's manual

Selve Commeo Multi Send Basis quick start guide

Selve

Selve Commeo Multi Send Basis quick start guide

Ergomotion RF392D Function Instruction

Ergomotion

Ergomotion RF392D Function Instruction

Dynamite 60A instruction manual

Dynamite

Dynamite 60A instruction manual

Keyspan TuneView using manual

Keyspan

Keyspan TuneView using manual

INVENTOR V7DI-12WiFiR/U7RS-12 user manual

INVENTOR

INVENTOR V7DI-12WiFiR/U7RS-12 user manual

Sony RM-IP10 operating instructions

Sony

Sony RM-IP10 operating instructions

Spektrum SLT3 3CH user guide

Spektrum

Spektrum SLT3 3CH user guide

Zengge ZJ-MWIR-RGB manual

Zengge

Zengge ZJ-MWIR-RGB manual

Omnitech 15331 instruction manual

Omnitech

Omnitech 15331 instruction manual

marklin toys 29411 manual

marklin toys

marklin toys 29411 manual

SenTech STC-HD133DV user guide

SenTech

SenTech STC-HD133DV user guide

manuals.online logo
manuals.online logoBrands
  • About & Mission
  • Contact us
  • Privacy Policy
  • Terms and Conditions

Copyright 2025 Manuals.Online. All Rights Reserved.