3 HOMEDEPOT.COM
Please contact 1-866-308-3976 for further assistance.
Pre-Installation
PLANNING INSTALLATION
Before installing the light xture, ensure that all parts are present.
Compare parts with the Hardware Included and Package Contents
sections. If any part is missing or damaged, do not attempt to
assemble, install, or operate this light xture.
Estimated installation time: 30 minutes
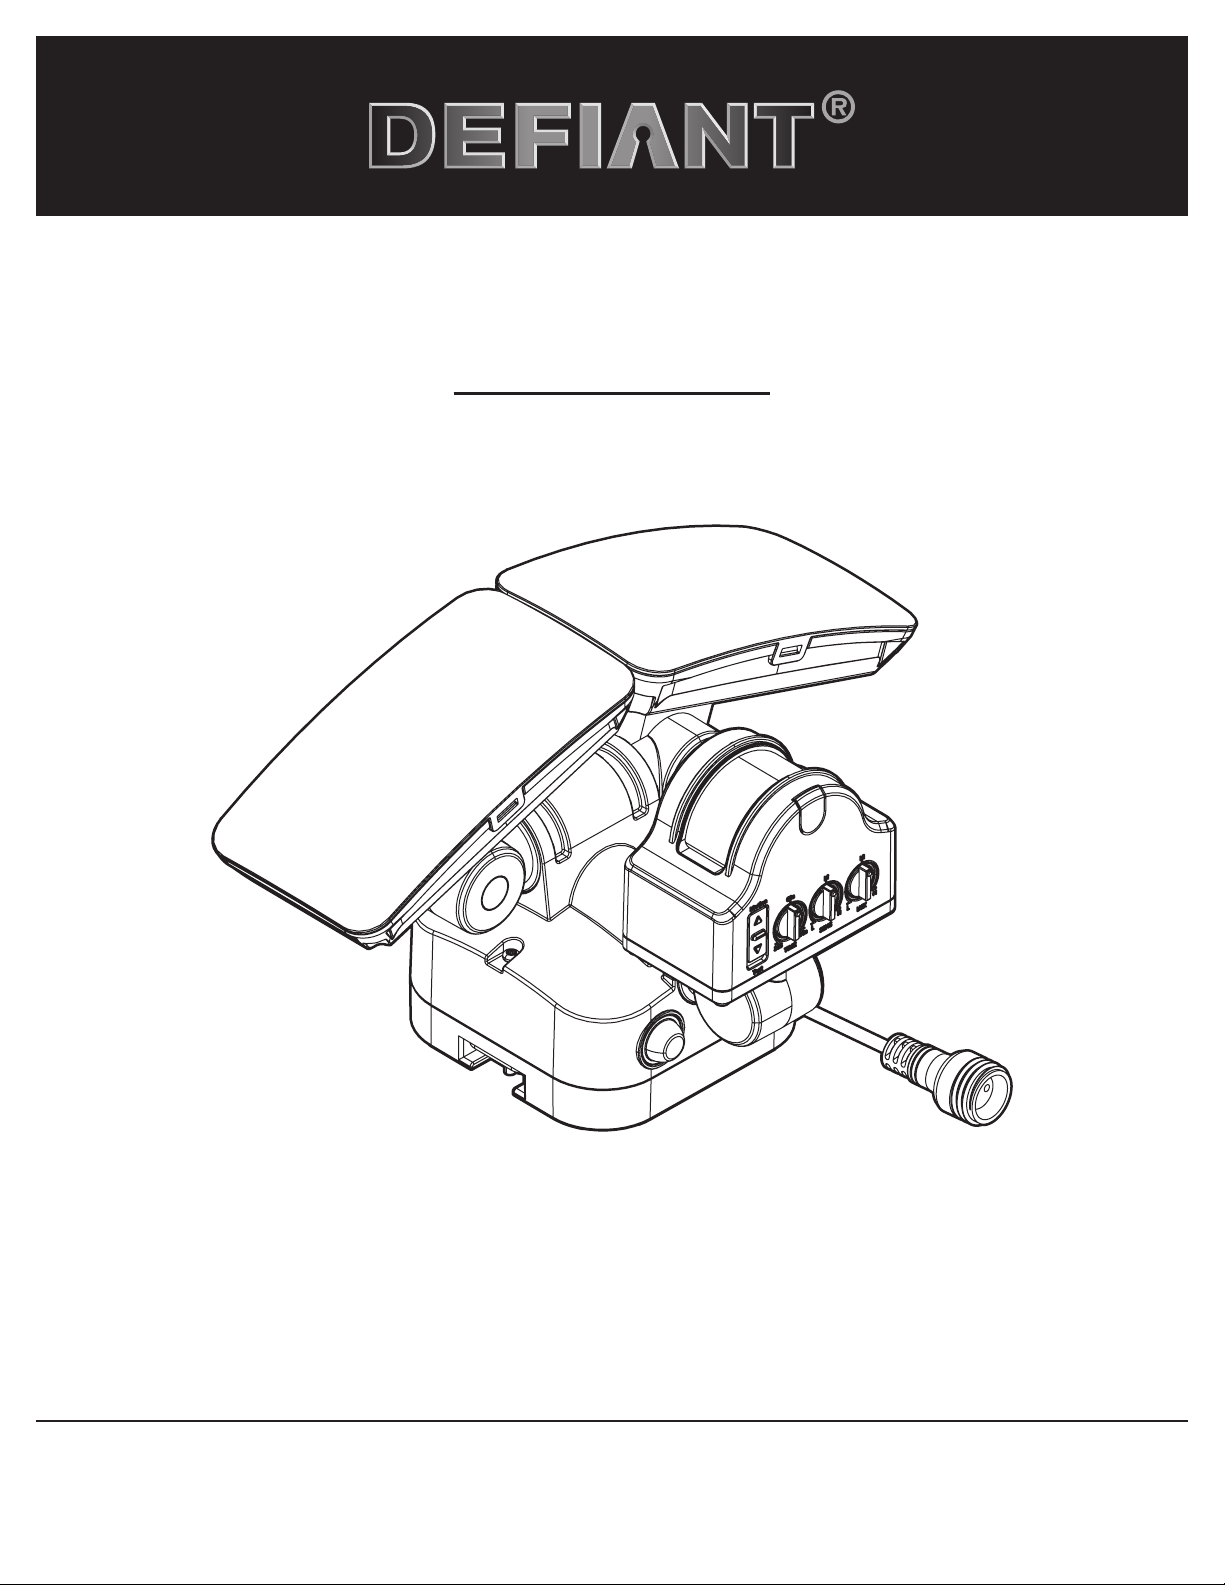
PRODUCT DESCRIPTION
This light operates from a battery charged from a solar panel. If
the Lithium Ion battery voltage runs down to 3.6V, the light will
automatically switch to ECO mode and dim down to reserve battery
for a longer run time. When the solar panel has recharged the
Lithium battery and voltage above 3.7V, the light will automatically
switch back to AUTO mode, and normal brightness.
INITIAL BATTERY CHARGE
IMPORTANT: Clouds, rain, snow, and other weather
conditions may not allow the solar panel to completely
recharge the battery. Other obstructions such as buildings or
trees may block the sun as well.
When installing the solar panel, make sure it is aimed as
described below with a minimum amount of obstructions.
Please mount the panel facing toward the southern sky. An
extended solar panel cord is available at Homedepot.com.
□PRIOR TO USE, the battery will require 2 to 3 days of full, direct
sunlight to completely charge with the switch in the OFF
position. Connect the solar panel cord plug with the connector
extending from the bottom of the light housing. If possible,
aim the solar panel toward the South and tilt it approximately
50° from horizontal. If the solar panel cannot be aimed toward
the South, then tilt the panel approximately 30°. Another
option is to add an extension cord (excluded in the package)
available at Homedepot.com.
□Actual operating time will vary depending upon how
frequently the light is turned on by the motion sensor.
□Solar lighting is not designed to equal standard 120V lighting.
The amount of light output is reduced to allow the sun time to
fully recharge the battery between lighting cycles.
□Solar collection is only effective in direct sunlight. Every hour
the light is on requires a minimum of 6 hours of sunlight
charging.
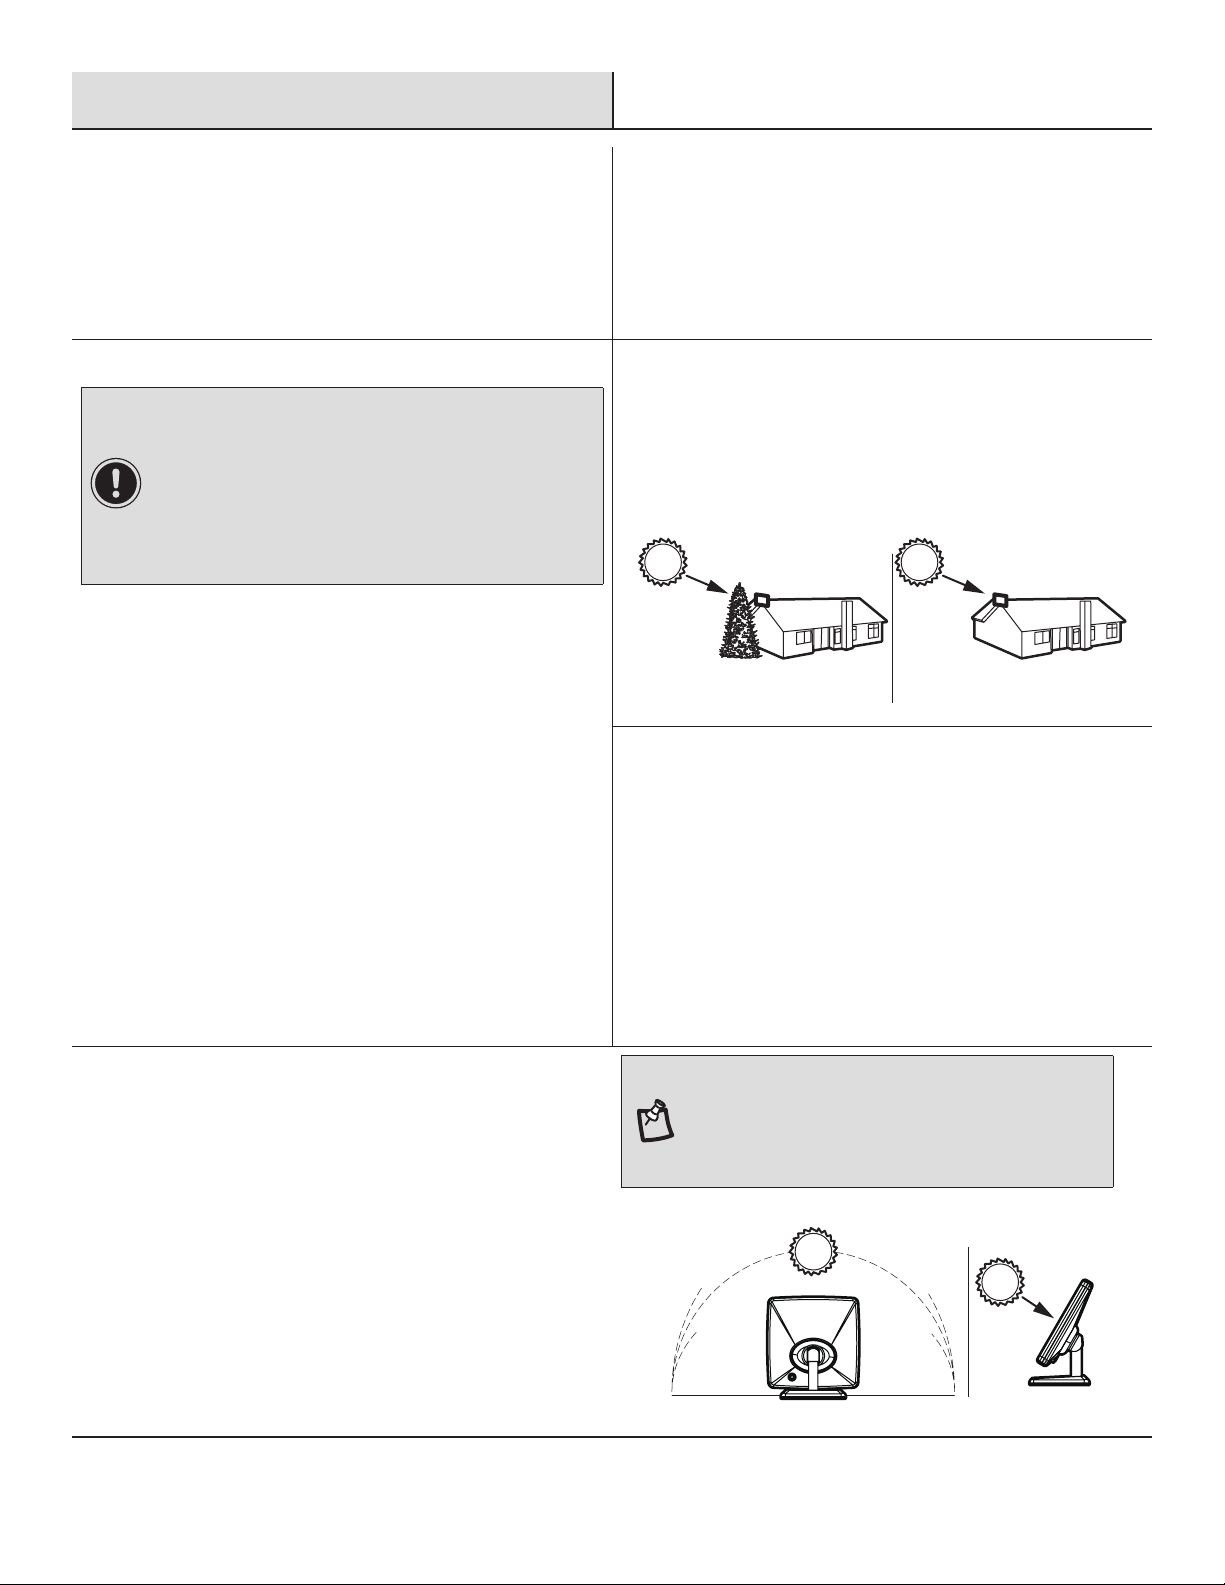
MOUNTING LOCATION
The most important thing to remember for the operation of your
solar powered motion sensing light is that it works from the power
received from direct sunlight. The solar panel works best when
placed on the southern-facing portion, or the highest point, of a
structure. The more direct sunlight the solar panel receives in a
day, the longer the light will operate.
Poor Position: Tree Blocks
Sunlgiht from Solar Panel
Good Position: Faces
south with no obstructions
South
South
SOLAR LIGHT FIXTURE
The main unit contains the LEDs, a motion sensor, and a
rechargeable Lithium battery. When deciding where to mount this
unit, keep in mind that the motion sensor that activates the light
has a “eld of vision” of 50 ft. (15 m) in front of the light and about
180° detection angle at a surrounding air temperature of 77°F
(25°C).
SOLAR PANEL
The solar panel converts the sun’s energy into electricity, thus
charging the battery stored in the solar light xture. The solar
panel requires direct sunlight falling onto the face of the solar
panel for as long as possible over the course of the day.
When choosing the location for the solar panel, make sure it is
aimed toward the South and is tilted to a suitable angle to allow as
much direct sunlight to fall upon it as possible. Make sure there is
a minimum amount of obstructions between the solar panel and
the sun.
Also, make sure your solar panel location is not too far away from
the solar light xture for the wires to reach and connect.
NOTE: At high noon, adjust the solar panel so that it
faces the sun. During any time of year, this adjustment will
provide optimal positioning for collecting solar energy.
You can also angle the panel up by 45°, which should
provide for adequate exposure.
W
i
n
t
e
r
p
a
t
h
o
f
t
h
e
s
u
n
-
L
o
w
i
n
t
h
e
s
o
u
t
h
e
r
n
s
k
y
S
u
m
m
e
r
p
a
t
h
o
f
t
h
e
s
u
n
-
H
i
g
h
i
n
t
h
e
s
o
u
t
h
e
r
n
s
k
y