2
Table of Contents
Table of Contents......................................2
Safety Information....................................2
Warranty ...................................................2
5-Year Limited Warranty ........................2
Pre-Installation.........................................3
Planning Installation ..............................3
........................................3
Tools Required .......................................3
Hardware Included.................................4
Package Contents ..................................4
Installation................................................5
Operation...................................................8
Care and Cleaning ..................................10
Troubleshooting ......................................10
Safety Information
PRECAUTIONS
□Please read and understand this entire manual
before attempting to assemble, install, or operate
□
source.
□
electrician.
□
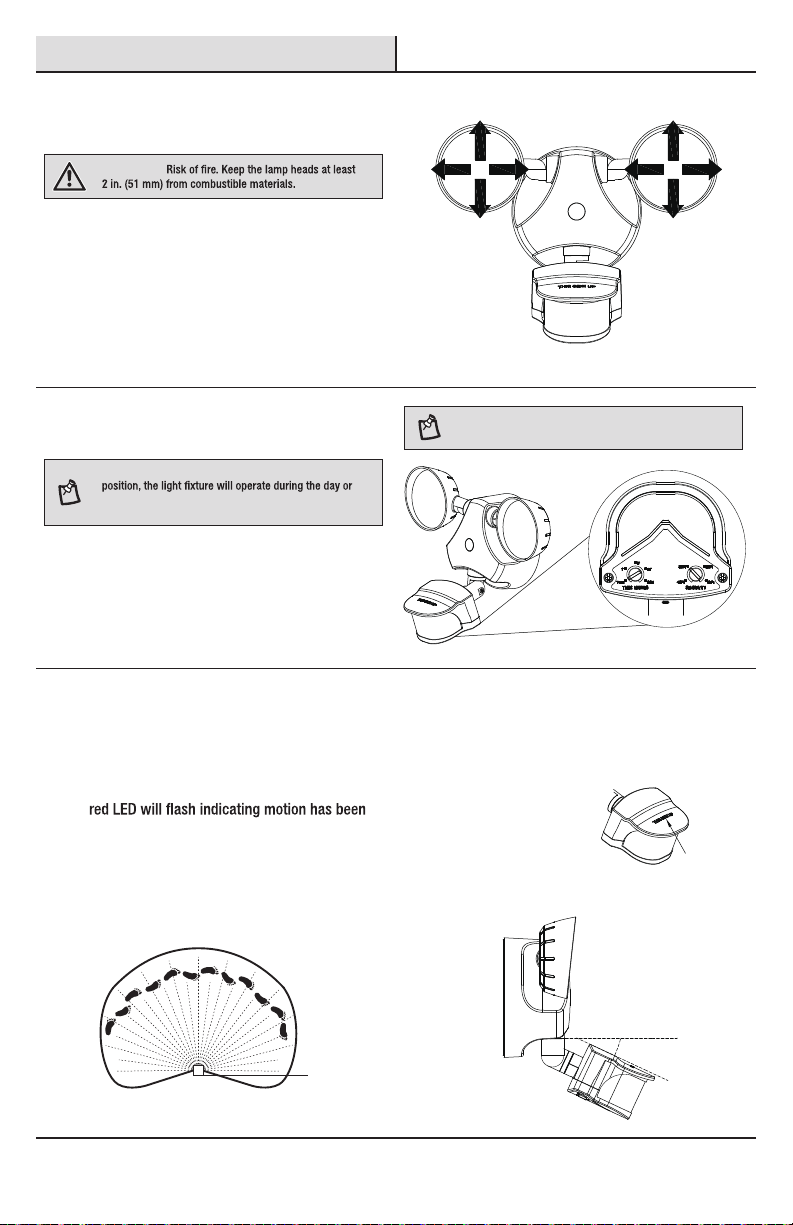
wall or eave.
□
is mounted higher than recommended, aiming the
sensor down will reduce the coverage area.
WARNING: Turn the power off at the circuit breaker or
fuse. Place tape over the circuit breaker switch and verify
WARNING:
CAUTION:
before touching.
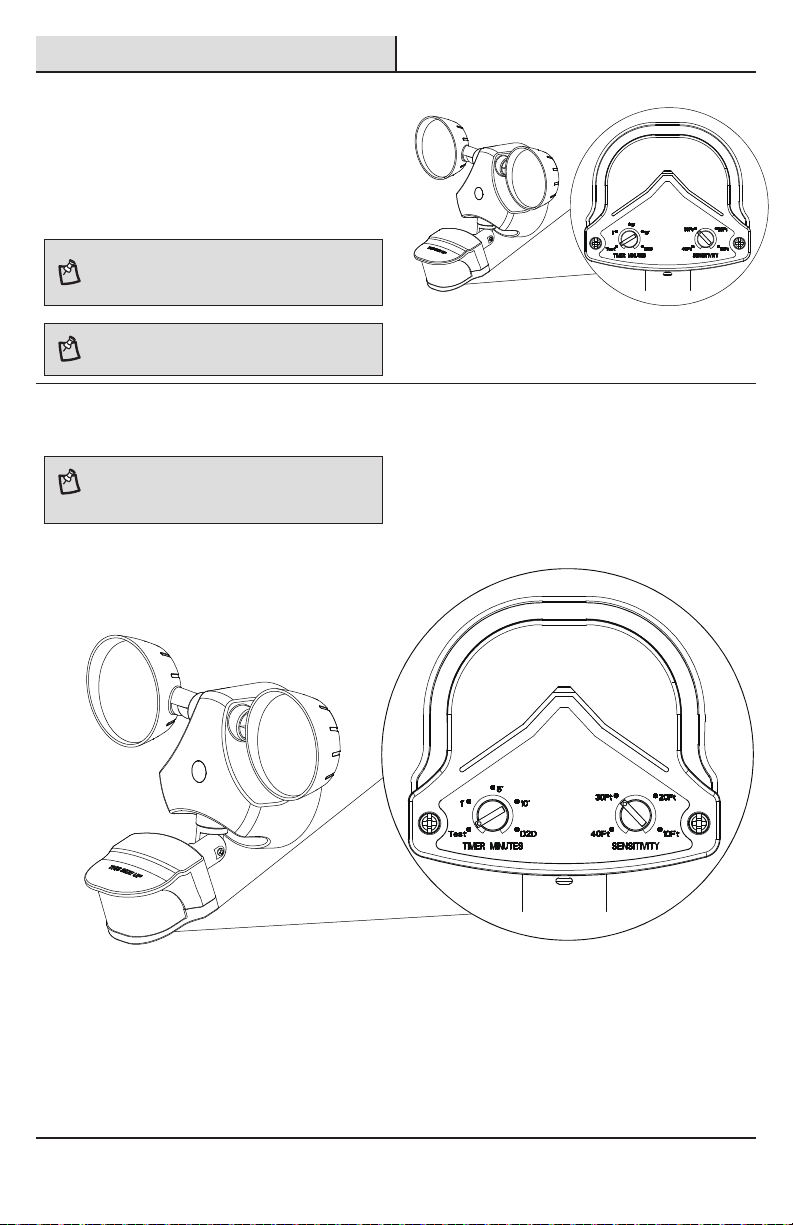
NOTICE:
timer.
□This device complies with Part 15 of the FCC Rules.
Operation is subject to the following two conditions:
(1) this device may not cause harmful interference,
and (2) this device must accept any interference
received, including interference that may cause
undesired operation.
□CAN ICES-005 (B)/NMB-005 (B)
Warranty
5-YEAR LIMITED WARRANTY
WHAT IS COVERED
This product is guaranteed to be free of factory defective parts and workmanship for a period of 5 years from date
of purchase. Purchase receipt is required for all warranty claims.
WHAT IS NOT COVERED
This guarantee does not include repair service, adjustment and calibration due to misuse, abuse or negligence, or
its entirety. This warranty does not include reimbursement for inconvenience, installation, setup time, loss of use,
unauthorized service, or return shipping charges. This warranty is not extended to other equipment and components
that a customer uses in conjunction with this product.
No service parts available for this product.
Contact the Customer Service Team at 1-866-308-3976 or visit www.homedepot.com.