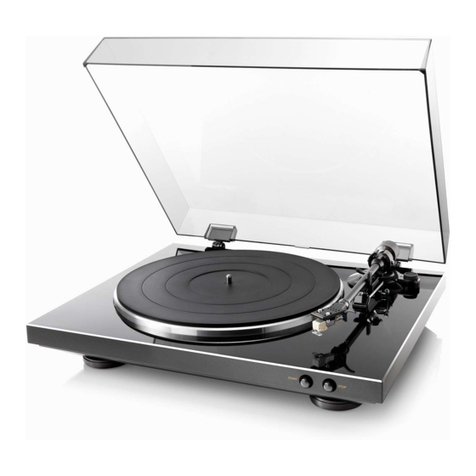
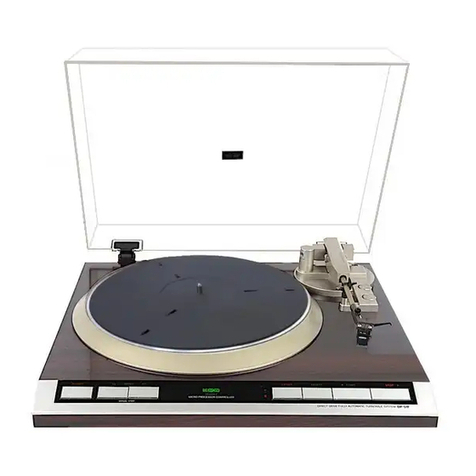
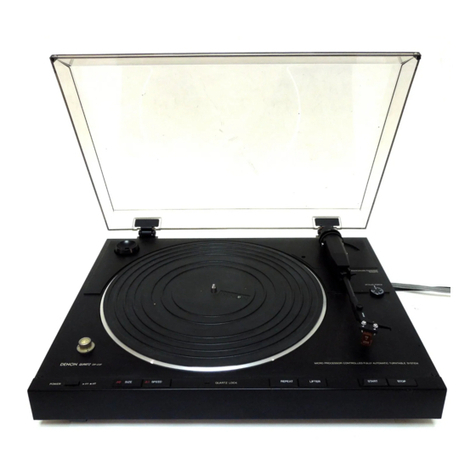
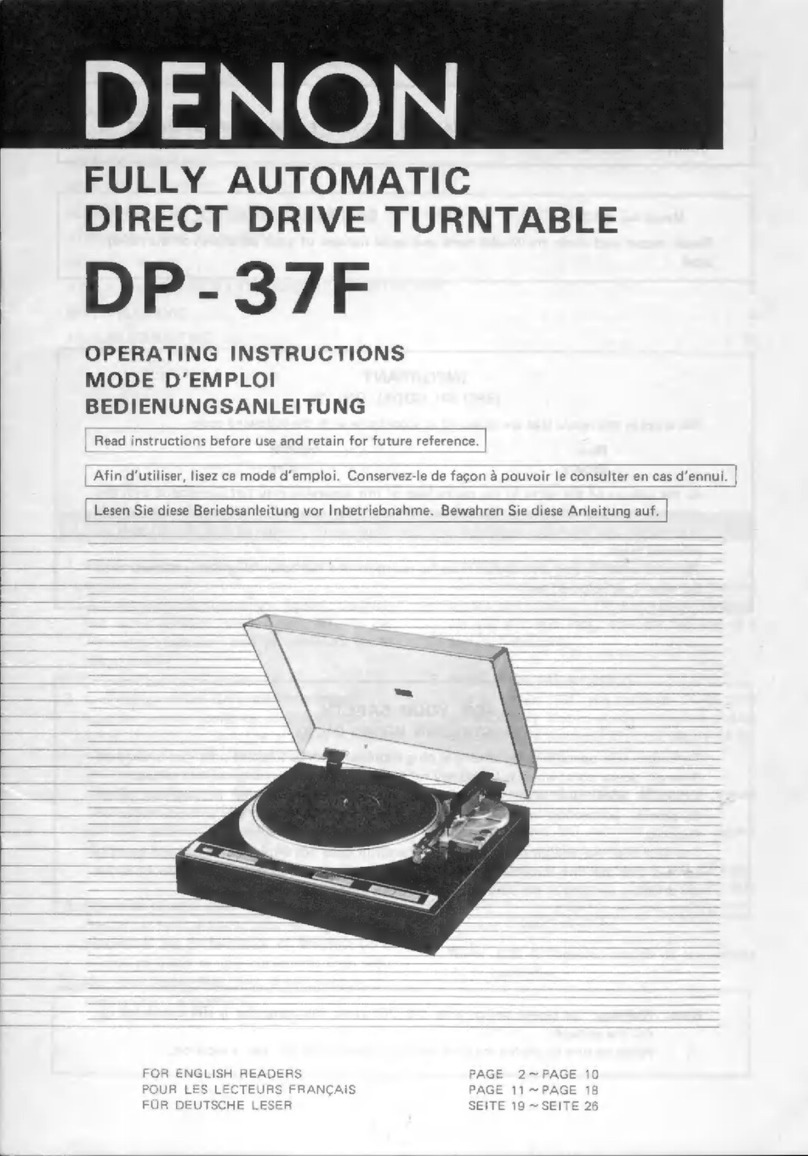
Denon DP-37F User manual

FULLY
AUTOMATIC
DIRECT
DRIVE
TURNTABLE
DP-37F
OPERATING
INSTRUCTIONS
MODE
D’EMPLOI
BEDIENUNGSANLEITUNG
Read
instructions
before
use
and
retain
for
future
reference.
|
FOR
ENGLISH
READERS
PAGE
2~
PAGE
10
POUR
LES
LECTEURS
FRANCAIS
PAGE
11
~
PAGE
18
FUR
DEUTSCHE
LESER
‘
SEITE
19
~
SEITE
26

IMPORTANT
TO
SAFETY
WARNING:
TO
PREVENT
FIRE
OR
SHOCK
HAZARD,
DO
NOT
EXPOSE
THIS
APPLIANCE
TO
RAIN
OR
MOISTURE.
Model
No.
DP-37F
Serial
No.
Please,
record
and
retain
the
Model
name
and
serial
number
of
your
set
shown
on
the
rating
label.
IMPORTANT
(BRITISH
MODEL
ONLY)
The
wires
in
this
mains
lead
are
coloured
in
accordance
with
the
following
code:
.
Blue:
Neutral
Brown:
Live
As
the
colours
of
the
wires
in
the
mains
lead
of
this
apparatus
may
not
correspond
with
the
coloured
markings
identifying
the
terminals
in
your
plug
proceed
as
follows.
The
wire
which
is
coloured
blue
must
be
connected
to
the
terminal
which
is
marked
with
the
letter
N
or
coloured
black.
The
wire
which
is
coloured
brown
must
be
connected
to
the
terminal
which
is
marked
with
the
letter
L
or
coloured
red.
FOR
YOUR
SAFETY
(AUSTRALIAN
MODEL
ONLY)
To
ensure
safe
operation,
the
three-pin
plug
supplied
must
be
inserted
only
into
a
standard
three-pin
power
point
which
is
effectively
earthed
through
the
normal
household
wiring.
Extension
cords
used
with
the
equipment
must
be
three-core
and
be
correctly
wired
to
provide
connection
to
earth.
Wrongly
wired
extension
cords
are
a
major
cause
of
fatalities.
.
The
fact
that
the
equipment
operates
satisfactorily
does
not
imply
that
the
power
point
is
earthed
and
that
the
installation
is
completely
safe.
For
your
safety,
if
in
any
doubt
about
the
effective
earthing
of
the
power
point,
coritact
a
qualified
electrician.
Note:
Whenever
the
power
switch
is
in
the
OFF-state,
the
apparatus
is
still
connected
on
AC
line
voltage.
Please
be
sure
to
unplug
the
cord
when
you
leave
home
for,
say,
a
vacation.

—
TABLE
OF
CONTENTS
—
PEA
TURES
cot
Millie
2
tO
eet
eet
aah
a
ln
oe
smh
ate
gts
een
meee
ews
3
PARTS
NOMENCLATURE
AND
FUNCTIONS........0000cc
cece
eeeee
ene
e
eee
eeeaee
4
HOW
TO
AGBEMBLE
sant
eater
Acme
es
ain
AON
es
cam
tonal
ioe
wetted
aha
5
HOW
*TO-CONNERT
cutee
2
cure
tee ure
edaree
erent
Unka
ae
asa
etamen
eae
5
ADJUSTING
THE
TRACKING
FORCE
AND
ANTI-SKATING
FORCE
..........---+000-
6
ADJUSTING
THE
O-DAMPING
ican)
s.2
su
ueien
ayes
d:
Ooeed
or
et
Sed
hate
ch
aces
6
HOW
FOVP
OAM
aun
tes
ete
eis
ere
Sad
ae
eters
aed,
2
7
REPLACEMENT
OF
PARTS
AND
READJUSTMENTS
......0.
0.00
ccc
cece
cece
eeeees
8
SPECIFICATIONS
naa
ducsi-ciu
ee
aeaw
ee
eee
ae
rie
eee
a
aaa
amon
ears
i
9
TROUBLESHOOTING
GUIDE~...<.acseiieaiiecp
in
oan
ab
oan
kaa
Pear
ek
eerees
10
.
Microprocessor
controlled,
contactless
servo
tonearm
A
unique
microprocessor
controlled,
contact-
less
servo
tonearm
ensures
safe,
easy
to
use
automatic
operation
with
no
deterioration
in
sound
auality:
F
O-damping
method
(Dynamic
servo
tracer)
Low
frequency
resonance
caused
by
the
car-
tridge
compliance
and
the
effective
tonearm
mass
is
electronically
damped
both
horizontally
and
vertically
to
effectively
suppress
crosstalk
and
inter-modulation
distortion.
The
dynamic
servo
tracer
maximizes
the
performance
of
the
low
mass
tonearm
and
results
in
a
record
repro-
duction
of
excellent
sound
image
with
mini-
mum
noise
and
distortion.
.
Low
mass
straight
arm
Having
an
outstanding
tracing
ability,
this
arm
maximizes
the
performance
of
the
high
com-
pliance
cartridge
to
the
full
extent.
Even
with
the
most
up-to-date
high
grade
records,
its
tracing
ability
is
excellent.
oF
>
.
DENON
quartz
on
bi-directional
servo
The
ultimate
in
rotational
accuracy
is
realized
by
the
combination
of
a
magnetic
pulse
detec-
tor
and
a
quartz
lock,
with
the
addition
of
a
bi-directional
servo.
Newly
developed
cartridge
The
low
mass
MM
type
cartridge
DL-65
with
an
elliptically
shaped
stylus
minimizes
tracing
distortion
and
contributes
to
the
clarity
of
the
reproduced
sound.
Newly
developed
cartridge
(European
model
only)
A
high
outout
MC
cartridge
with
an
Mg
Vutpur
wi
Ga
ose
output
voltage
comparable
to
MM
cartridges.
The
DL-110
is
a
high
output
MC
cartridge
which
can
be
connected
directly
to
the
MM
position
of
the
amplifier
without
step-up
trans-
formers
or
head
amplifiers.
Note:
U.S.
&
Canadian
models
do
not
include
cartridge.

Counter
weight
10)
9)
Tonearm
006
08
06000
EERE
Power
switch
EE
This
turns
the
power
supply
on
and
off.
Push
the
button
down
until
it
locks.
When
turning
the
power
off,
press
the
button
until
the
lock
is
disengaged.
Be
sure
to
return
the
tonearm
to
the
arm
rest
and
hold
it
in
with
the
clamp.
Before
playing
a
record,
press
the
button
corresponding
to
its
record
size.
For
30cm
(12
inch)
records,
the
(30)
indi-
cator
will
light.
_
For
17cm
(7
inch)
records,
the
(17)
indi-
cator
will
light.
Kis
Speed
button
Rigas)
Before
playing
a
record,
press
the
button
corresponding
to
its
record
speed.
The
(33)
indicator
will
light
for
33
1/3
rpm
records.
The
(45)
indicator
will
light
for
45
rpm
records,
4
LOCK
The
flock
indicator
will
light
when
the
turn-
table
speed
reaches
the
specified
phase-lock
state.
a
Aes
wa
«Arm
Lifter
button
BULA
Sia:
Press
this
button
to
raise
or
lower
the
tone-
arm
during
play,
or
when
playing
records
manually.
The
“UP”
indicator
will
light
up.
6
REPEAT
Press
this
button
for
playing
the
same
record
repeatedly:
the
“ON”
indicator
will
light
up.
7
START
Press
this
button
to
start
records
automati-
cally.
tl
«Stop
button
Rul
Press
this
button
to
stop
a
record
during
play.
Tracking
force
adjustment
knob
|
TRACKING
FORCE
This
is
used
to
adjust
the
tracking
force.
(Refer
to
page
6)
10
|
Q-damping
adjustment
knob
|
O-DAMPING
|
Refer
to
page
6.

.
Remove
the
packing
material
Remove
the
packing
material
(styrofoam)
attached
to
both
sides
of
the
cabinet.
.
Install
the
turntable
platter
and
the
turntable
mat
Insert
the
turntable.
platter
onto
the
motor
’
shaft.
.
Attaching
counterweight
Push
in
the
counterweight
at
the
rear
end
of
tonearm.
While
pushing
the
counterweight,
turn
it
in
the
arrow
direction.
After
attaching,
make
sure
that
it
moves
back
and
forth
by
turning
it.
|
Note:
Be
careful
not
to
scratch
the
magnetic
coating
on
the
inner
surface
of
the
turntable..
Further,
avoid
touching
the
diamond-cut
(shiny)
edge
of
the
turntable
platter
with
hands,
as
this
may
cause
cor-
rosion
of
the
surface.
Turntable
mat
Turntable
platter
Diamond-cut
.
Connect
the
left
(LL)
and
the
right
(R)
output
wires
to
the
respective
“PHONO”
input
termi-
nals
of
the
amplifier
to
be
used.
Further,
connect
the
ground
wire
(which
is
together
with
the
output
wires)
to
the
“GND”
terminal
of
the
amplifier.
Note:
As
the
supplied
DL-65
cartridge
is
of
the
MM
(moving
magnet)
type,
be
sure
to
connect
the
output
wires
of
the
turn-
table
to
the
“PHONO”
input
terminals
for
MM
type
cartridges.
U.S.
&
Canadian
models
do
not
include
car-
tridge.
See
page
8
for
mounting
cartridge.
.
Connect
the
AC
power
plug
to
an
AC
wall
out-
let.
i
Output
cord
iia
Power
cord
Ground
wire

MAKE
THE
FOLLOWING
ADJUSTMENT
WITH
THE
POWER
TURNED
OFF.
4.
Release
the
arm
clamp
Hold
the
tonearm
and
lower
the
arm
clamp
in
the
direction
of
the
arrow.
\
Armrest
Arm
clamp
2.
Move
the
tonearm
Take
the
tonearm
off
the
arm
rest
and
move
it
to.a
position
between
the
arm
rest
and
the
turn-
table.
Damping
adjustment
knob
Tracking
force/anti-skating
adjustment
knob
Armrest
3.
Balance
the
tonearm
horizontally
Rotate
the
counter
weight
knob
until
the
tone-
arm
remains
balanced
parallel
to
the
turntable
surface.
Counter
weight
knob
Make
parallel
Rotate
the
counter
weight
knob
in
the
direction
of
the
arrow.
4.
Return
the
tonearm
to
the
arm
rest
Return
the
tonearm
to
the
arm
rest
and
hold
it
in
place
with
the
clamp.
Arm
clamp
7
5.
Adjust
the
tracking
force
and
the
anti-skating
Since
the
cartridge
supplied
with
this
turntable
requires
a
stylus
force
of
1.8
g,
rotate
the
stylus
force
knob
and
align
the
number
1.8
with
the
reference
line.
The
anti-skating
is
automatically
adjusted
at
the
same
time.
TRACKING
FORCE
|
ANTI-SKATING
'
Reference
line
WHEN
ADJUSTING
THE
TRACKING
FORCE
AND
THE
ANTI-SKATING
When
using
a
cartridge
other
than
the
one
supplied
with
this
turntable,
apply
the
suitable
stylus
force
for
it
after
consulting
the
cartridge
instruction
manual.
The
anti-skating
is
automatically
adjusted
at
the
same
time.
Since
the
cartridge
supplied
with
this
turntable
requires
a
O-damping
value
of
1.8,
rotate
of
1.8,
rotate
the
Q-damping
knob
and
align
the
number
1.8
with
the
reference
line.
@
Although
the
optimum
Q-damping
value
varies
according
to
the
cartridge
compliance,
this
turntable
is
so
designed
that
the
optimum
amount
of
damping
can
be
obtained
by
setting
the
knob
to
the
same
value
as
that
for
the
tracking
force.
Q
DAMPING
Reference
line

BEFORE
PLAYING
~
1.
Turn
the
power
supply
of
the
amplifier
on,
and
set
the
selector
switch/knob
to
‘“PHONO”.
.
Place
a
record
on
the
turntable
and
raise
the
stylus
cover.
.
Turn
the
turntable
power
supply
on,
and
press
the
speed
selector
button
corresponding
to
the
record
speed.
33
1/3
rpm
records
the
(33)
indicator
will
light.
45
rpm
records
the
(45)
indicator
will
light.
.
Release
the
arm
clamp.
\
Arm
clamp
FOR
AUTOMATIC
PLAY
1.
Press
the
record
size
button
corresponding
to
the
record
size.
30cm
(12
inch)
records........
the
(30)
indicator
will
light.
17
cm
(7
inch)
records.........
the
(17)
indicator
will
light.
2.
Press
the
arm
lifter
button
and
lower
the
arm
(after
varifying
that
the
‘‘UP”
indicator
is
not
lit).
3.
Press
the
start
button.
The
tonearm
will
move
over
to
the
record
and.
play
will
begin.
.
When.the
play
finishes,
the
tonearm
will
return
to
the
arm
rest
and
the
turntable
will
stop.
(When
the
repeat
switch
is
off).
When
the
re-
peat
switch
is
on
(“ON”
is
lit),
the
record
will
be
played
again.
Repeat:
OFF
Repeat:
ON
FOR
MANUAL
PLAY
@
When
playing
records
from
the
middle
@
When
playing
non-standard
size
records
It
is
possible
to
play
the
records
by
the
follow-
ing
2
methods:
1st
method:
1.
Press
the
speed
selector
button
corresponding
to
the
record
speed.
2.
Set
the
arm
lifter
button
to
‘‘UP”
(“UP
will
be
lit).
3.
Manually
move
the
tonearm
to
the
desired
posi-
tion
above
the
record.
4,
The
turntable
will
start
to
rotate.
5.
By
pressing
the
arm
lifter
button,
the
tonearm
is
lowered
and
play
will
begin.
6.
When
play
finishes,
the
tonearm
will
return
automatically
as
in
the
automatic
play
mode.
.2nd
method:
1.
Press
the
speed
selector
button
corresponding
to
the
record
speed.
Manually
move
the
tonearm
towards
the
record
and
the
turntable
will
start
to
rotate.
2.
12)
3.
Set
the
stylus
down
on
the
record
at
the
desired
position
and
play
will
begin.
.
When
play
finishes,
the
tonearm
will
return
to
the
arm
rest
and
the
turntable
will
stop.

REPEATED
PLAY
Préss
the
repeat
button
(“ON”.
indicator
will
light).
The
same
record
will
be
played
repeatedly
until
the
repeat
is
cancelled.
To
cancel
the
repeat,
press
the
repeat
button
once
more.
@
When
stopping
during
play
1.
Press
the
stop
button
The
tonearm
will
return
to
the
arm
rest
and
the
turntable
will
stop.
2.
Or,
press
the
arm
lifter
button
to
the
““UP”
position.
The
tonearm
will
rise
at
the
posi-
tion,
while
the
turntable
will
keep
rotating.
Stylus
replacement
(Asian
model
only)
The
stylus
tip
life
of
the
attached
cartridge
is
ap-
proximately
500
hours.
Earlier
replacement
of
the
stylus
is
recommended,
as
a
worn
stylus
tip
may
cause
distorted
sounds
and
damage
to
the
records,
®
Be
sure
to
ask
for
‘““-DENON
DSN-65”
when
purchasing
a
replacement
stylus.
There
will
be
no
guarantee
on
the
performance
and
against
malfunctions
if
a
different
stylus
is
used.
@
How
to
replace
1.
Loosen
the
lock
screw
on
the
foremost
end
of
the
tonearm,
and
pull
the
head
shell
out
in
the
direction
of
the
arrow.
2:
Hold
the
stylus
assembly
and
gently
pull
it
out
diagonally.
3.
Insert
a
new
stylus
assembly
by
pushing
it
in
in
as
far
as
it
will
go.
re,
fo)
Lock
screw
Pull
out
|
Head
shell
/
Os
Styl
bi
Y_
Ae
4
tylus
assembly
Nae
A)
es
—
=f
—e
Cartridge
replacement
A
different
cartridge
with
a
weight
between
4
and
9g
(including
screws
and
nuts)
can
be
attached
to
the
head
shell
of
this
turntable
unit.
(When
pur-
chasing
only
the
head
shell,
ask
for
the
‘‘DENON
PCL-30BK”.)
@
The
color
designation
of
the
lead
wires
is
as
fol-
lows.
Be
careful
not
to
make
any
errors.
Red
.........
right
channel
(R)
White
........
left
channel
(L)
Green........
right
channel
ground
(RG)
Blue.........
left
channel
ground
(LG)
e@
Fit
the
attached
overhang
gauge
as
illustrated
and
bring
the
stylus
tip
on
the-cross
line
of
the
gauge.
Tighten
the
screws
making
sure
that
the
cartridge
is
parallel
to
the
head
shell.
The
prop-
er
overhang
is
thus
obtained.
is
Overhang
gauge
Note:
When
the
cartridge
has
been
replaced,
be
sure
to
readjust
the
horizontal
bal-
ance,
stylus
force
and
O-damping.
.

@
How
to
raise
the
stylus
cover
Stylus
tip
(For
attached
cartridge
DL-65
or
DL-110)
Attach
parallel
to
each
other
®@
To
protect
the
stylus
tip,
lower
the
stylus
cover
after
use.
35
mm
Head
shell
bottom
view
Stylus
cover
Attach
vertically
Before
playing,
raise
the
stylus
cover
in
the
direction
of
the
arrow.
Head
shell
front
view
MOTOR
Drive
System:
Servo
controlled
direct
dirve
Turntable
Speeds:
33-1/3,
45
rpm
Wow
&
Flutter:
Below
0.012%
wrms
(servo
system)
Below
0.020%
(JIS)
S/N
Ratio:
Over
78
dB
(DIN-B)
Rise
Time:
Nominal
speed
within
2
seconds
(at
33-1/3
rpm)
Turntable
Platter:
Aluminum
die-cast;
300
mm
diameter
Motor:
Linear
drive
motor
Speed
Control
System:
Speed
servo
by
frequency
detection,
phase
servo
control
Speed
deviation:
Below
0.01%
Load
characteristics:
0%
(80
g
tracking
force;
outermost
groove)
GENERAL
Power
Supply:
50/60
Hz,
Voltage
is
shown
on
rating
label
Power
Consumption:
Approx.
8
W
Dimensions:
434
x
145
x
410
mm
(WxHxD)
.
17
x
5.7
x
16.1
in
Weight:
Approximately
7
kg
(15
Ib)
TONEARM
SECTION
Arm
Type:
Dynamically
balanced,
straight
tube
tonearm
Effective
Length:
220
mm
Overhang:
16mm
:
Tracking
Error:
Within
3°
Automatic
Mechanism:
Electronically
controlled,
fully
automatic.
Adjustable
Tracking
Force
Range:
0
~
3.0g
(1
scale
=
0.1
g)
Suitable
Cartridge
Weight
Range:
Approximately
4.0
~
9.0
g
(including
screws,
nuts)
CARTRIDGE
DL-65
DL-110
(European
model
only)
Output
Voltage:
2:5mV
1.6
mV
Frequency
Response:
20
Hz
~
30
kHz
20 Hz
~
45
kHz
Tracking
Force:
1.8+0.3
g.
MM
type
1.8+0.3g,
MC
type
U.S.
and
Canadian
models
do
not
include
cartridge.
*
For
product
improvement
purposes,
the
specifications
are
subject
to
change
without
notice.
—9—

When
trouble
arises,
check
the
following
items
before
you
consider
any
problem
as
a
malfunction.
Turntable
does
not
operate
when
start
button
is
pressed.
The
tonearm
does
not
move:
@
Is
the
power
switched
on?
@
Isthe
armclamp
released?
..
10...
0...
cece
ee
eee
eee
Refer
to
page
6
The
stylus
does
not
lower
onto
the
record:
@
Isastylus
force
being
applied?
2.1...
.
ee
et
ee
ene
Refer
to
page
6
The
stylus
does
not
lower
on
the
desired
position:
@
ls
the
cartridge
properly
installed
on
the
head
shell?
...
0...
2...
ee
eee
eee
Refer
to
page
8
@
Is
the
turntable
unit
placed
horizontally?
No
sound
@
Are
the
cartridge
and
the
tonearm
connected
properly?
......
0...
e
eee
ee
ees
Refer
to
page
8
@
Are
the
output
wires
properly
connected
to
the
amplifier?
..........-22006-
Refer
to
page
5
@
Are
the
amplifier
knobs/switches
properly
set
for
record
reproduction?
Hum
noise
is
audible:
’
@
ts
the
ground
wire
of
the
output
wires
connected
to
the
amplifier?
...........
Refer
to
page
5
@
Are
the
output
wires
properly
connected?
@
ls
the
head
shell
secured
properly
with
the
lock
screw?
.........5.-5
wi
ceo
Bive
eis
Refer
to
page
8
The
stylus
skips/Jumps
@
Is
the
stylus
force
applied
properly?
...
ce
ee
ee
te
ene
Refer
to
page
6
@
Is
the
record
warped
or
scratched?
e@
Is
there
any
large
amount
of
dust
on
the
stylus?
The
arm
stops
moving
forward
during
play:
@
Is
the
record
scratched?
@
|s
something
touching
the
arm?
Sound
is
too
weak/strong:
@
Is
the
amplifier
switched
and
connected
properly
for
the
type
of
cartridge
(output)
being
used?
Noise
is
picked
up
by
the
tuner:
@
Should
the
tuner
pick
up
noise
while
the
turntable
unit
is
in
operation,
move
the
tuner
away
from
the
turntable,
or
relocate
the
tuner
antenna.
The
tonearm
moves
up
and
down
when
power
is
switched
on:
®@
The
up
and
down
movement
of
the
tonearm
when
the
power
is
switched
on/off
is
nota
defect.
—10—
Other manuals for DP-37F
2
Table of contents
Other Denon Turntable manuals

Denon
Denon DP-37F User manual

Denon
Denon DP-35F User manual

Denon
Denon DP-200USB User manual

Denon
Denon DP-300F Instructions and recipes

Denon
Denon DP-67L User manual

Denon
Denon DBT-3313UD User manual

Denon
Denon DP-29F User manual

Denon
Denon DP-300F Instruction Manual

Denon
Denon DP-200USB User manual

Denon
Denon DP DP-300F User manual

Denon
Denon DP400BK User manual

Denon
Denon DP-6700 User manual

Denon
Denon DP-200USB User manual

Denon
Denon DP-300F User manual

Denon
Denon DP-A100 User manual

Denon
Denon DP-500M User manual

Denon
Denon DP29F - DP 29F Turntable User manual

Denon
Denon SC5000M Prime User manual

Denon
Denon DN-C615 User manual

Denon
Denon DP-37F User manual