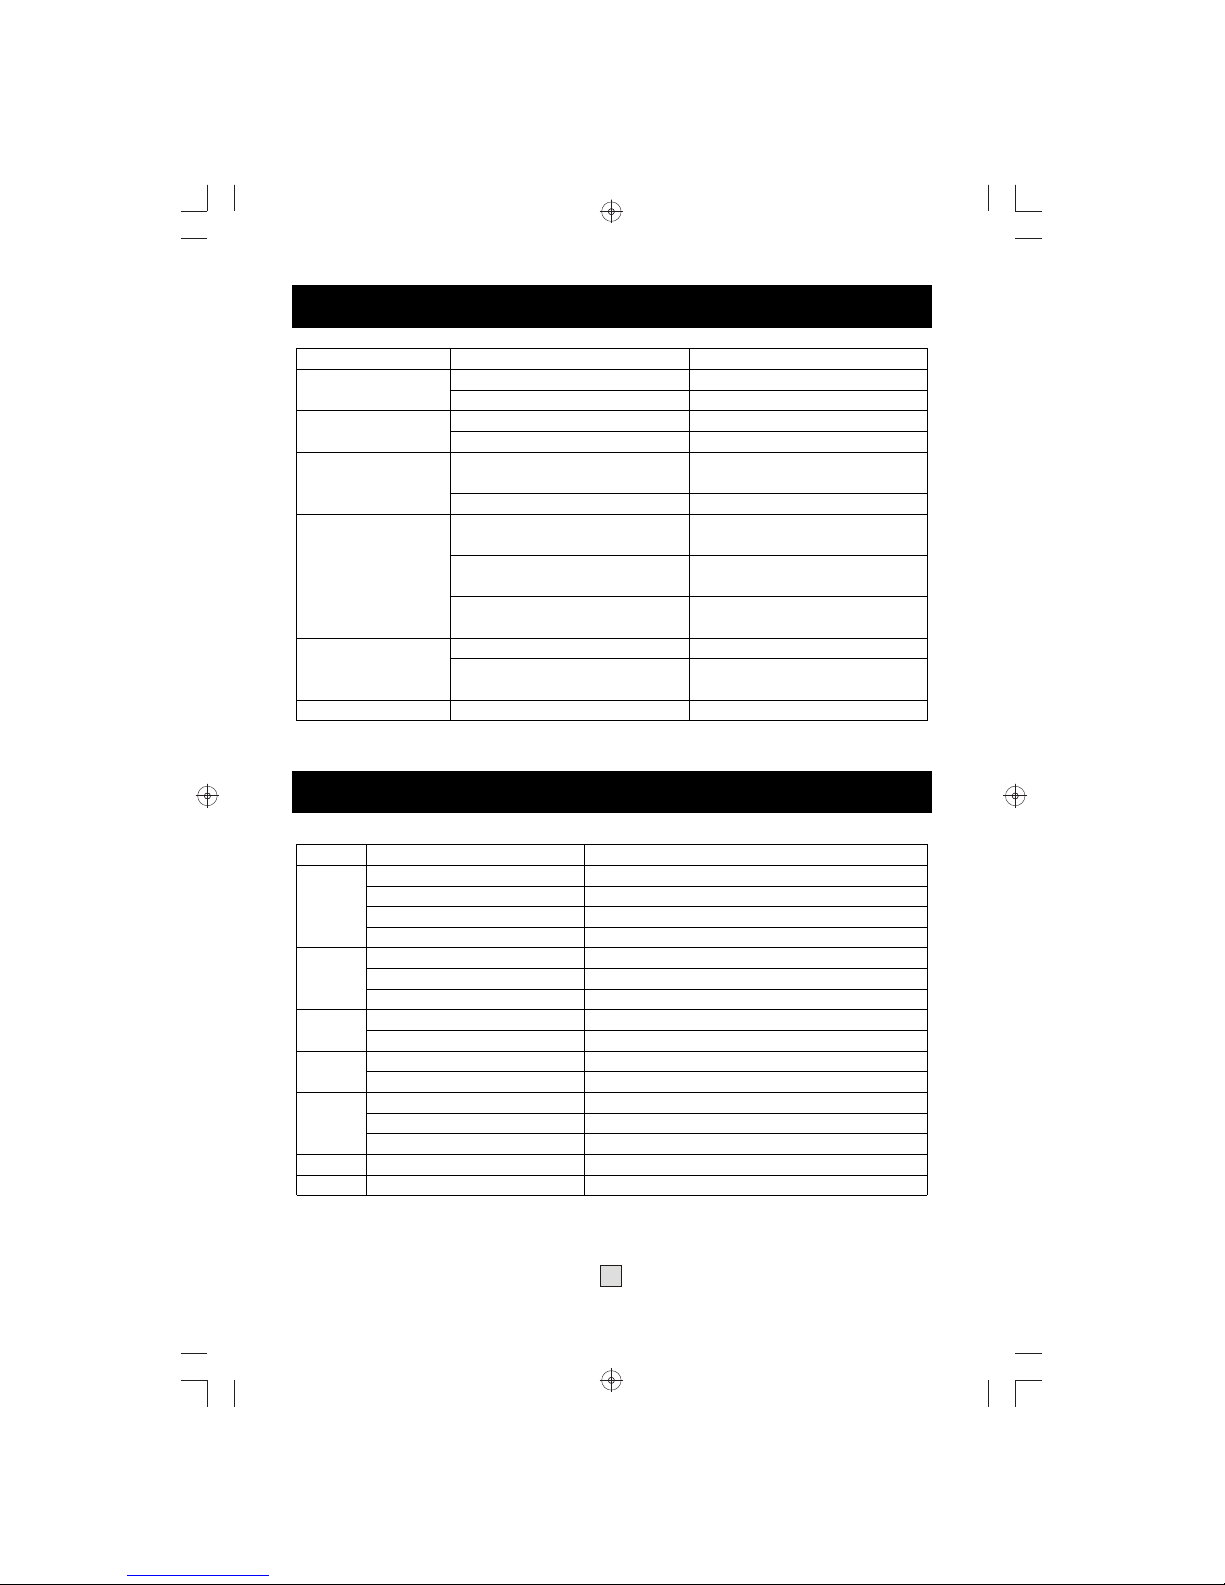
Denver DMB-118HDMK2 User manual

DMB-118HDMK2
High Definition Digital Receiver
English

Table of Contents
Safety Information....................................................................................1
System Connection..................................................................................1
Remote Control........................................................................................2
First Time Installation...............................................................................3
Basic Operation.......................................................................................3
...............................................................................3
...............................................................................3
....................................................................3
............................................................................................3
.........................................................................................4
.................................................................................4
........................................................................................................4
....................................................................................4
.................................................................................................4
..........................................................................................4
.............................................................................4
................................................................................................5
...............................................................................................5
.......................................................................................6
Specifications..........................................................................................6
Change Channel
Volume and Mute
Subtitle/Audio Language
Teletext
TV/Radio
EPG and Timer
USB
Media Player
PVR
Timeshift
Software Upgrade
Password
Main Menu
Troubleshooting

To reduce the risk of fire or electric shocks, do not expose this product to
rain or humidity. To avoid electric shocks, insert the plug firmly in the
electric socket. The equipment must not be exposed to spills or splashes
of liquid, and objects containing water, such as glasses, should not be
placed on top of it.
For a basic connection from you Set Top Box to your television set, you
can use SCART connection. For a higher quality connection, use a direct
HDMI connection, as shown below. Connect a audio amplifier use
coaxial is an optional.
Safety Information
System Connection
SPDIF

2
Remote Control

3
If youareusingtheunitforthefirsttimethe
installationGuideMenuwillappearonyour TV
screen.
PressLEFT/RIGHTkey to
select a OSD menu language.
PressLEFT/RIGHTkeytoselect
the country of your residence.
PressOKkeytobegin
automatically search.
Oncechannelsearching is complete,youcan
start watching TV programs.
Press [CH-/CH+] key to switch to previous/next channel.
Inputchannelnumber by numerickeyandthenpress[OK]keytoswitch to
desire channel.
OSDLanguage:
Country:
ChannelSearch:
1. Change Channel
Press[OK]keyfirst to display TV Listmenu,thenselectchannel by
[UP/DOWN] key and press [OK] key to switch to the channel.
Press [VOL-/VOL+] to decrease/increase volume.
Press[MUTE]keytoswitch off theaudiooutput,press[MUTE]keyagain to
restore normal audio output.
Press[SUB-T]keytoopenSubtitleLanguagemenu,press[UP/DOWN]key to
selectSubtitleLanguage or TTXsubtitle,press[OK]key to selectdesired
subtitle.
Press[LANG]keytoopenAudioChannelmenu,press[LEFT/RIGHT]key to
changeaudiochannel,press[OK]keytoconfirmandpress[EXIT]keytoexit
Audio Channel menu.
2. Volume and Mute
3. Subtitle/Audio Language
4. Teletext
Teletext is a televisioninformation retrieval service. Press TTX key to
access Teletext pages. Press the corresponding 3-digit pagenumber to
go toapagethatyouhave selected. [RED/YELLOW/GREEN/BLUE] are
[ ]
First Time Installation
Basic Operation

4
short cut keys thatallow you quickaccessaparticular page Press EXIT
key to return to TV program
to start Timeshift
. [ ]
.
5. TV/Radio
6. EPG and Timer
7. USB
7.1. Media Player
7.2. PVR
7.3. Timeshift
7.4. Software Upgrade
Press [TV/RADIO] key to switch between TV program and Radio program.
TheEPGisanon-screen TV guidethatshowsscheduledprograms.Press
[EPG] key to open EPG menu.
You canusethe[UP/DOWN]keytoselectthepreferredprogram.Ifthere is
morethanonepage of information,usethe[BLUE]keyforpage up andthe
[YELLOW]keyforpagedown. You canselectanotherchannel'sEPG by
[LEFT/RIGHT]keys,viewdetail of eachEPGevent by [INFO]key or schedule
a recording by [OK] key.
USBdevicecanbeusedformediaplayer, PVR,timeshiftandsoftware
upgrade.
PleaseuseaDC adaptorfortheUSBdevice if current
consumption of the USB device is larger than 500mA.
AccessMainMenu->USB->Multimediamenuyoucanplayback
Music/Photo/Movie/PVR on USB disk.
Press[REC]keytostartrecording,youcanplaybackrecordedfilebypress
[PVR] key or access Main Menu -> USB -> Multimedia -> PVR.
Press[TIMESHIFT]keyfirst , thenyoucanpress[PLAY]
key, the unit will start playing recorded program.
Press [GOTO] key to select playing time
Press [REW/FB] key to move through current recording.
Press [STOP] key to exit Timeshift.
Note: TimeshiftisonlyavailablewhenUSBHDD is connected to systemand
read/write speed is high enough to suport that.
You canupgradereceiversoftwarebyaccessMainMenu -> SystemSetting ->
Software Upgrade -> USB update.
Note:

5
8. Password
Someoperationneedpassword,thedefaultpassword is “000000”,youcan
change password by access Main Menu -> System -> Set Password.
If youforgetthepassword,youcanunlockthesystembymasterpassword
“888888”.
You canchangethesystemsettingbyaccessMainMenu.Press[MENU]key
to opentheMainMenu.Press[UP/DOWN/LEFT/RIGHT/OK] to navigateinside
themenus,press[MENU]keytoreturnpreviousmenu,press[EXIT]keytoexit
main menu.
Following is Main Menu and Sub Menu items:
Main Menu
egaugnaLDSOtidEmargorP
egaugnaLeltitbuSGPE
egaugnaLoiduAtroS
oiduAlatigiDNCL
ecnadiuGlatneraPoitaRtcepsA
drowssaPteSnoituloseR
TV Format
Restore Factory Default
noitamrofnItuptuOoediV
etadpUerawtfoShcraeSotuA
aidemitluMhcraeSlaunaM
erugifnoCotohPyrtnuoC
erugifnoCeivoMrewoPannetnA
erugifnoCRVPtesffOemiT
Country Region
Time Zone
Auto Standby
Power On/Off
Program
Picture
Channel
Search
Time
Option
System
USB

6
Troubleshooting
od ot tahWsnosaeR laitnetoPmelborP
Power isn't connectedConnect the power
The power switch is not on Switch on the power
DVB-Tcable not connectedPlug in the DVB-Tcable
Aerial cable is faultyCheck aerial cable and connections
No or incorrect connection with
audio cableConnect the audio cable correctly
Sound on mute Turn off mute function
Resolution not supported by TV
set
Press V-FORMAT button to
change resolution
No or incorrect connection with AV
cable
Make sure cables are connect
correctly
The program is a radio programPress [TV/RADIO] key to shift into
TV mode
The battery is exhaustedChange battery
Remote control is not facing or
close enough to the set top box
Adjust the position of the Remote
Control and move closer to the unit
Picture is breaking up The signal is too weakCheck aerial cable and connections
No Picture
Screen show "No
Signal"
No sound from
speakers
Only sound, no image
on the screen
Remote control is not
responding
Specifications
retemaraPmeti buSmetI
TunerInput Frequency170 ~ 230 MHz, 470 ~ 862 MHz
RF Input Level-78 ~ -20 dBm
zHM8dnazHM7htdiwdnaBFI
MAQ46,MAQ61,KSPQnoitaludoM
VideoDecoder FormatMPEG4 AVC/H.264 HP@L4, MPEG2 [email protected]L
Output Format480i/480p/576i/576p/720p/1080i/1080p
TRACS,IMDHtroPtuptuO
AudioDecoder FormatMPEG1 (Layer 1&2&3), WMA,AC3
R/L,laixaoCtuptuOoiduA
USB 2.0Supported Capacity500 GB
Supported Media WAV, WMA, JPEG, BMP, AVI, MKV
PowerSupply Voltage DC 5V 1.5A
Maxinum Power Comsumption < 6 W
Standby Power Comsumption < 0.5 W
Weight0.1 kg
Size155 x 80 x 30 mm

Notice about recycling
Electric and electronic equipment and included batteries contains materials, components and
substances that can be hazardous to your health and the environment, if the waste material
(discarded electric and electronic equipment and batteries) is not handled correctly.
Electric and electronic equipment and batteries is marked with the crossed out trash can symbol,
seen below. This symbol signifies that electric and electronic equipment and batteries should not be
disposed of with other household waste, but should be disposed of separately.
As the end user it is important that you submit your used batteries to the approriate and designated
facility. In this manner you make sure that the batteries are recycled in accordance with legislature
and will not harm the environment.
All cities have established collection points, where electric and electronic equipment and batteries
can either be submitted free of charge at recycling stations and other collection sites, or be collected
from the households. Additional information is available at the technical department of your city.
facebook address: www.facebook.com/denverelectronics
Copyright:
ALL RIGHTS RESERVED, COPYRIGHT DENVER ELECTRONICS A/S
www.denver-electronics.com
Imported by:
INTER SALES A/S
Stavneagervej 22
8250 Egaa
Denmark
Other manuals for DMB-118HDMK2
1
Table of contents
Other Denver TV Receiver manuals

Denver
Denver DTB-131 User manual

Denver
Denver DVBT-804 User manual

Denver
Denver DVBT-42 User manual

Denver
Denver PBA-2600 User manual

Denver
Denver DMB-118HDMK2 User manual

Denver
Denver DVBT-42 User manual

Denver
Denver DVBT-43MK2 User manual

Denver
Denver PBS-10007 User manual

Denver
Denver DVBS-201HD User manual

Denver
Denver PBS-5007 User manual