Denver DVBT-43MK2 User manual

DVBT-43MK2
USER MANUAL
Digital TV Receiver
ENGLISH

SAFETY INFORMATION
INTRODUCTION
USING THE SET TOP BOX
1
2
3
4
First Time Installation
Volume Control
Channel Scan
Setup Menu
Tools
EPG(Electronic Program Guide)
Media Player
Recording and Timeshifting
4
4
5
6
6
7
7
10
SPECIFICATIONS
CONTENTS

ENG-1

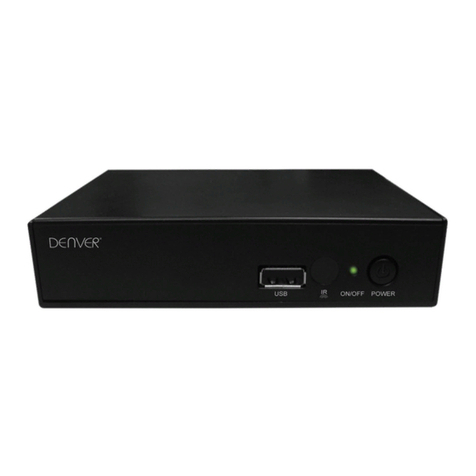
USB portPOWER
IR Receiver
FRONT PANEL:
ENG-2
INTRODUCTION

REMOTE CONTROL:
ENG-3
26.STOP
27.Blue Button/PVR Manage
28.Yellow Button
16.Stand-by on/off
17.MUTE
18.RECALL
19.EXIT
20.VOL+ or RIGHT
21.PAGE DOWN
22.FAV
23.EPG
24.TTX
25.REC
INTRODUCTION
1.
Numeric entry
2. MENU
3. CH+ or UP
4. VOL- or LEFT
5.OK (confirm)
6.PAGE UP
7.CH- or DOWN
8.TV/RADIO
9.INFO
10.AUDIO
11.SUB T
12.PLAY
13.PAUSE
14.Red Button/FB
15.Green Button/FF

1. First Time Installation
1. When the Set Top Box is switched on for the first time, a "Welcome
Page" will be displayed.
2. Use the arrow keys to select the "Region" and "OSD
Language".
3. Move highlight to "Search" button and press "OK" to begin the
channel scan.
2. Volume Control
Use the "VOL+" and "VOL-" keys to increase or decrease the volume.
By pressing the "Mute" key, the audio will be turned off.
Press the "Mute" again or press the Volume Keys to turn on the
audio.
In Main MenuInstallationChannel Scanset the appropriate
parameter. Move the highlight bar to "search"button. Press [OK] key to
scan Channels.
3. Channel Scan
There are two different ways to Scan Channels.
In the Main Menu
Installation
Auto Scan, Move the highlight bar to "search" button. Press [OK] key to scan
all the Channels.
ENG-4
USING THE SET TOP BOX

4. Setup Menu
Press the"MENU" key to activate the main menu. Select the "Setup" option and press the "OK" key to enter the
menu.
Change the OSD Language
Change the TV system: PAL/NTSC/AUTO. mode; 4:3 LB, 4:3 PS,
16:9PB , 16:9AUTO.
Timer Setting: for more information, refer to the next section.
Setting OSD attribute
Parent Lock Setting:
Channels or Menu operations can be locked using password. The
original password is "0000".
The universal password is "3330".
Tuner setting: choose off for home external antenna; choose on for
powered antenna.
USING THE SET TOP BOX
ENG-5

6. EPG(Electronic Program Guide)
Press the "EPG" key to display all the information of the Channels.
The following operations can be used in the EPG menu:
Switch List: Press "2" to switch between program list and event
list
Play Booking: Select the Event and Press "OK" to book for play
REC Booking: Select the Event and Press "REC" to book for
record.
Booking List: Press "1" to display the booking list
7. Media Player
USB port can play MPEG, JPEG, MP3 and WMA files USB flash disk 2.0 high speed/USB hard disk is
supported on this Set Top Box. But when a USB hard disk is used, please use a power adapter to
connect the hard disk driver.
1. When USB disk is mounted, you can enter Main MenuMedia+Media Player menu to play music, MP3
and WMA, video or browse pictures JPEG.
2. In Main MenuMedia+PVR Manage, the recorded video files are listed on the display. You can Lock,
Delete or Rename the files or press [OK] key to play.
5. Tools
Receiver info: technical data about the receiver
Game: there are two games (Snake, Othello)
Load default settings: insert the new password or default one and confirm to return to default settings.
Software Upgrade: the upgrade file will be available on New Majestic S.p.A. website only when the unit will
need it.
Upgrade setting: software upgrade and automatic channels upgrade
ENG-6
USING THE SET TOP BOX

8. Recording and Timeshifting
An USB disk is needed to record and to use the timeshifting function.
8.1. Recording
After pressing the [REC] key, the recording begins and a "REC" bar appears.
For the Recording or Time shift functions, a USB High
Speed disk is needed. 1 hour video recording will need
about 2Gbytes space. (The storage space is related to
the program content.)
ENG-7
USING THE SET TOP BOX

8.2 Timeshifting ( 512MB minimum free space)
If you set timeshift to "OFF" and you press pause button, the program will be paused only.
To activate the Timeshifting function, you need to confirm that the "TimeShift" in "Main MenuMedia+PVR
configurationis On.
The video data will be stored in the "Timeshift Buffer". When the Set Top Box is in timeshifting mode, you can
rewind and watch the program from the beginning while the unit is still recording, you just have to pause the
program and start watching again whenever you want pressing play button.
Using the "PLAY" "PAUSE" "FB" "FF" keys, you can watch/pause/fast backward/fast forward/ the program.
Pressing the"STOP" key, will exit the timeshifting mode and return to the to live program.
8.3 PVR Configuration
In the"Main MenuMedia+PVR configuration" menu, you can set the following functions:
The default recording duration is 3 hours. When "REC" bar is displayed, press "REC" key, and a "Record
Duration box" appears, press [OK] key and you can set the recording duration. Press [OK] key again to confirm
and then [EXIT] key to exit duration setup.
When "REC"Bar is displayed, press [EXIT] key then the "REC" bar will disappear. A "REC" icon is displayed on
the up-left corner.
While there is only one chanel recording, you can't watch another chanel by press " CH+/CH-" or numeric
key.
To stop the recording, Press [STOP] key and after you confirm, the recording will stop.
We advise to use USB high speed item(USB disk or HD) to record, the compatibility with all USB itehs in the
market is not warranted. The supported system files are FAT, FAT32, NTFS.
ENG-8
USING THE SET TOP BOX

1. Preferred Storage: USB partition (select the logic unit tostore the datas)
2. TimeShift Time (min): you can reserve the time of Timeshifting. From 10 to 60 minutes.
3. Record Type:
"TS"Transport Stream format(*.dvr). This format can only be played in Set Top Box.
"PS"Program Stream format(*.mpg). This format can be played in your computer.
4. Stand-by mode:After recording finished, if you want the decoder to be off, set this option to "ON"
5. TimeShift To Rec:
"On"When you press "REC" key, the data in timeshift buffer will be stored in the recorded file.
"Off"When you start to record, it just records from the current time.
6. TimeShift:
"On"enable the Timeshifting
"Off"disable the Timeshifting
Disc format: System file FAT or NTFS.
Note:
Please don't remove the recording device before it is unmounted.
ENG-9
USING THE SET TOP BOX
ENG-10

Recycling of electronic devices
Electric and electronic equipment and included batteries contains materials, components and substances that can be
hazardous to your health and the environment, if the waste material (discarded electric and electronic equipment and
batteries) is not handled correctly.
Electric and electronic equipment and batteries is marked with the crossed out trash can symbol, seen below. This
symbol signifies that electric and electronic equipment and batteries should not be disposed of with other household
waste, but should be disposed of separately.
As the end user it is important that you submit your used batteries to the approriate and designated facility. In this
manner you make sure that the batteries are recycled in accordance with legislature and will not harm the
environment.
All cities have established collection points, where electric and electronic equipment and batteries can either be
submitted free of charge at recycling stations and other collection sites, or be collected from the households.
Additional information is available at the technical department of your city.
www.facebook.com/denverelectronics
www.denver-electronics.com
Importer:
DENVER ELECTRONICS A/S
Stavneagervej 22 DK-8250 EGAA DENMARK

Digitalni TV risiver
KORISNIKO UPUTSTVO
DVBT-43MK2
SRPSKI

SADRŽAJ
BEZBEDNOSNE INFORMACIJE·············································································································· 1
UVOD ························································································································································ 2
KORIŠĆENJE SET TOP UREĐAJA·········································································································· 3
Prva instalacija··········································································································································· 4
Kontrola jačine zvuka································································································································· 4
Skeniranje kanala ······································································································································ 4
Meni za podešavanje································································································································· 5
Alatke························································································································································· 6
EPG (elektronski vodič kroz programe)····································································································· 6
Medijski plejer ············································································································································ 7
Snimanje i vremenski pomeraj ·················································································································· 7
SPECIFIKACIJE ······································································································································ 10

BEZBEDNOSNE INFORMACIJE
DA BISTE SMANJILI OPASNOST OD POŽARA I STRUJNOG UDARA, NE IZLAŽITE OVAJ UREĐAJ
KIŠI ILI VLAZI.
OPREZ˖
Da biste smanjili opasnost od požara i strujnog
udara, ne uklanjajte poklopac (ili zadnju stranu)
uređaja. Servisiranje poverite samo obučenim
serviserima.
Simbol munje sa strelicom, unutar jednakostraničnog trougla, namenjen
je da upozori korisnika na postojanje neizolovanog „opasnog napona“ u
kućištu uređaja koji može da ima dovoljnu vrednost da predstavlja
opasnost od strujnog udara.
UPOZORENJE: DA BISTE SMANJILI OPASNOST OD POŽARA ILI STRUJNOG
UDARA, NE IZLAŽITE UREĐAJ KIŠI ILI VLAZI. OPREZ: DA BISTE SPREČILI
STRUJNI UDAR, PORAVNAJTE ŠIROKI ZUBAC UTIKAČA SA ŠIROKIM
LEŽIŠTEM I UMETNITE GA DO KRAJA.
Uređaj ne treba izlagati kapanju ili prskanju i na njega ne treba postavljati nikakve
predmete napunjene tečnošću, kao što su vaze.
VAŽNE MERE ZAŠTITE:
Pored izuzetne pažnje koja se posvećuje standardima kvaliteta tokom
proizvodnje video proizvoda, bezbednost je glavni faktor projektovanja s
vakog instrumenta. Međutim, bezbednost je i vaša odgovornost. U
nastavku su navedene važne informacije koje će vam pomoći da obezbedite
ugodno i pravilno korišćenje video proizvoda i dodatne opreme. Pažljivo ih
pročitajte pre nego što započnete da koristite ovaj video proizvod.
• Ne preopterećujte zidne utičnice, produžne kablove ili razvodne kutije
preko njihovog kapaciteta, jer u suprotnom može da dođe do požara ili
strujnog udara.
Uzvičnik u jednakostraničnom trouglu namenjen je da upozori korisnika
na postojanje važnih uputstava za korišćenje i servisiranje u literaturi
koja se dobija sa uređajem.
•Ne koristite neodgovarajuće (nezaštićene) utičnice za napajanje, jer to može da
bude opasno.
•Redovno proveravajte veze. Ukoliko postoji bilo kakva pukotina ili oštećenje
izolacija kabla i uređaja, odmah raskinite sve veze i obezbedite da uređaj
pregleda kvalifikovani tehničar.
•Ne koristite vezu kabla za napajanje na bilo kom mestu blizu vode ili tečnosti,
kao što su kada, lavabo, bazen, kade za pranje rublja ili u mokrom/vlažnom
podrumu itd.
•Ne postavljajte uređaj na nestabilan objekat. Uređaj može da padne i izazove
ozbiljne povrede kod dece ili odraslih, kao i da dovede do ozbiljnog oštećenja
samog uređaja.
•Nikada ne postavljajte uređaj blizu ili na izvore toplote, kao što su grejalice,
pećnice, štednjaci, radijatori, klima uređaji, pojačavači itd. Takođe, nikada ne
izlažite uređaj direktnoj sunčevoj svetlosti jer uređaj može da se pregreje.
•Isključite uređaj iz zidne utičnice pre čišćenja ili poliranja. Ne koristite tečna ili
aerosolna sredstva za čišćenje, alkohol ili druge sprejeve za čišćenje! Koristite
suvu, meku krpu isključivo za čišćenje spoljašnjosti uređaja!
•Na uređaj nikada ne postavljajte teške predmete!
•Ne zaobilazite bezbednosnu ulogu utikača. Ukoliko obezbeđeni utikač ne
odgovara utičnici, posavetujte se sa električarem u vezi sa zamenom zastarele
utičnice. Nikada na silu ne umećite utikač u utičnicu!
•Zaštite kabl za napajanje od gaženja ili prikleštenja, posebno kod utikača,
razvodnih kutija i na mestu gde izlazi iz uređaja.
•Isključite ovaj uređaj tokom oluja sa grmljavinom ili kada se ne koristi duže vreme
•Svako servisiranje poverite obučenim serviserima. Servisiranje je obavezno
kada je uređaj oštećen na bilo koji način.
•Isključite glavno napajanje kada uređaj nije u upotrebi. (Isključite kabl za
napajanje iz zidne utičnice kada ne nameravate da duže vreme koristite uređaj.)
Uklonite disk pre premeštanja ili isključivanja uređaja.
•Ne pokrivajte i ne dodirujte nijednu komponentu unutar uređaja!
•Instalirajte uređaj na ravnu površinu sa dobrom ventilacijom. Uverite se da
otvori za ventilaciju nisu prekriveni. U suprotnom, može da dođe do pregrevanja
uređaja i kvara.
•Pročitajte ovo korisničko uputstvo pre instalacije i korišćenja uređaja.
SRB-1

UVOD
Infracrveni prijemnik
NAPAJANJE USB port
Antena
RF kabll
RF kabl
Fernseher
RF kabl
Scart kabl
SRB-2

1. Numeriki unos 16. Ukljui/iskljui im mirovanja
2. MENU 17. MUTE
3. CH+ ili UP 18. RECALL
4. VOL- ili LEFT 19. EXIT
5. OK (potvrda) 20. VOL+ ili RIGHT
6. PAGE UP 21. PAGE DOWN
7. CH- ili DOWN 22. FAV
8. TV/RADIO 23. EPG
9. INFO 24. TTX
10. AUDIO 25. REC
11. SUB T 26. STOP
12. PLAY 27. Plavi taster/PVR Manage
13. PAUSE 28. uti taster
14. Crveni taster/FB
15. Zeleni taster/FF
SRB-3

KORIŠĆENJE SET TOP UREĐAJA
1. Prva instalacija
1. Kada se Set Top uređaj uključi prvi put, pojaviće se stranica „
Welcome Page“.
2. Koristite tastere sa strelicama ▲▼◄► da biste izabrali „
Region“ i „OSD Language“.
3. Istaknite dugme „Search“ i pritisnite „OK“ da biste započeli
skeniranje kanala.
2. Kontrola jačine zvuka
Koristite tastere „VOL+“ i „VOL-“ da biste povećali ili smanjili jačinu zvuka.
Pritiskom na taster „Mute“ zvuk će se potpuno utišati.
Pritisnite taster „Mute“ ponovo ili pritisnite tastere Volume
da biste uključili zvuk.
3. Skeniranje kanala
Postoje dva različita načina za skeniranje kanala.
U delu Main Menu → Installation → Auto Scan (Glavni meni → Instalacija → Automatsko skeniranje),
pomerite traku za obeležavanje na dugme „Search“. Pritisnite [OK] da biste skenirali sve kanale.
U delu Main Menu → Installation → Channel Scan (Glavni meni
→ Instalacija → Skeniranje kanala), podesite odgovarajući
parametar. Pomerite traku za obeležavanje na dugme „Search“.
Pritisnite [OK] da biste skenirali kanale.
SRB-4

KORIŠĆENJE SET TOP UREĐAJA
Podešavanje tjunera: odaberite opciju off (isključeno) za kućnu
spoljnu antenu; odaberite on (uključeno) za antenu sa sopstvenim
napajanjem.
4. Meni za podešavanje
Pritisnite taster „MENU“ da biste aktivirali glavni meni. Izaberite opciju „Setup“ i pritisnite taster „
OK“ da biste ušli u meni.
Promena jezika prikaza na ekranu
Promena TV sistema: PAL/NTSC/AUTO. Režim: 4:3 LB, 4:3 PS,
16:9PB, 16:9AUTO.
Podešavanje tajmera: za više informacija, pogledajte sledeći odeljak.
Podešavanje atributa prikaza na ekranu
Podešavanje roditeljske kontrole:
Operacije promene kanala ili menija se mogu zaključati korišćenjem
lozinke. Originalna lozinka je „0000“.
Univerzalna lozinka je „3330“.
SRB-5
Other manuals for DVBT-43MK2
1
Table of contents
Other Denver TV Receiver manuals

Denver
Denver DVBT-43MK2 User manual

Denver
Denver DVBT-43 User manual

Denver
Denver PBS-10007 User manual

Denver
Denver DVBT-804 User manual

Denver
Denver DMB-114HD User manual

Denver
Denver DTB-131 User manual

Denver
Denver DVBT-42 User manual

Denver
Denver DVBT-42 User manual

Denver
Denver DMB-118HDMK3 User manual

Denver
Denver DMB-118HDMK2 User manual