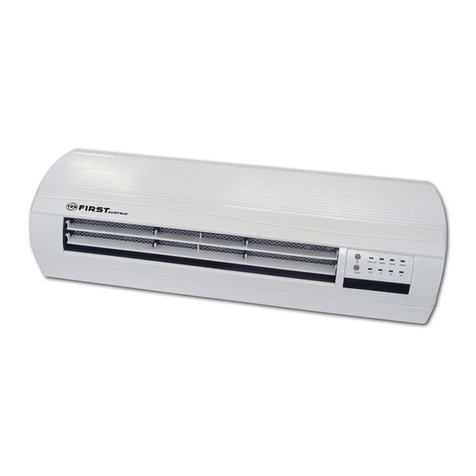
DEVOLA DVSH20GS User manual

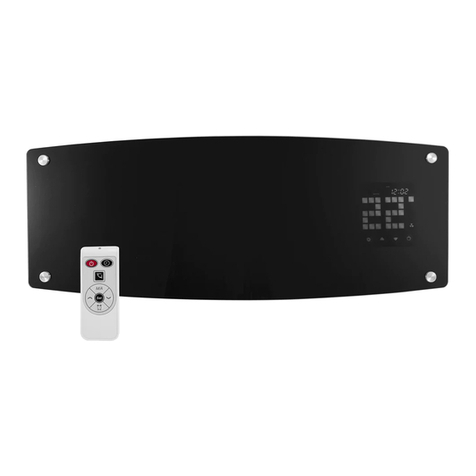
2000W GLASS PANEL AIR CURTAIN
INSTRUCTION MANUAL
MODEL NO.:DVSH20GS/ DVSH20GW/ DVSH20GB
Thank you for shopping with Devola. Please read the contents of this manual carefully before use.
INTRODUCTION
•Please retain this instruction manual for future reference.
•After removing the packaging, make sure that the appliance isin good
condition.
•The packaging materials may contain plastic, nails etc., which may be
hazardous and therefore should not be left within the reach of children.
IMPORTANT SAFETY INFORMATION
•The heater should be hung horizontally on the wall with the wind outlet
facing downwards.
•Please do not use the heater in combustible areas or where it could be
exposed to explosive gas. Do not cover the wind outlet.
•If the supply cord is damaged, it must be replaced by a qualified person
to avoid a hazard.
•The heater must not be located immediately below an electrical socket.
The electrical socket must be equipped with earth wire, its capacity
should be 250V~10A or exceed 250V~10A. The socket and the
power plug should be in good connecting condition.
•If the heater is not in use or being repaired, please remove the power
plug from the socket.
•Please do not touch the heater with wet hands.
•If the motor is not working properly, please switch off the power
immediately.
•When operating the heater, please do not leave doors or windows
continually open otherwise it will trigger the open window function.
•To shut down the heater, press the on/off button to switch it off, the fan
will continue working for a further 30 seconds until it is blowing out
cool wind. The heater will then stop working, and you may pull out
the plug.
•Please remove the plastic before using the remote control.
•If the remote control is being stored, please put the insulation paper
back into the remote control to ensure that the battery power remains
sufficient.
•The heater must be installed at least 2m above the floor.
•Please ensure any repairs are carried out by a qualified person.
•This appliance can be used by children aged from 8 years and above
and persons with reduced physical, sensory or mental capabilities or
lack of experience and knowledge if they have been given
supervision or instruction concerning use of the appliance in a safe
way and understand the hazards involved. Children should not play

with the appliance. Cleaning and user maintenance should not be
carried out by children without supervision.
•Children of less than 3 years should be kept away unless continuously
supervised.
•Children aged from 3 years and less than 8 years should only switch
the appliance on/off provided it has been placed or installed in its
intended normal operating position and they have been given
supervision or instruction concerning use of the appliance in a safe
way and understand the hazards involved. Children aged from 3
years and less than 8 years should not plug in, regulate, clean, or
perform user maintenance on the appliance.
•CAUTION —some parts of this product can become very hot and
cause burns. Particular attention must be given where children and
vulnerable people are present.
SPECIFICATIONS
Model names
Voltage/Frequency
Power
DVSH20GS/
DVSH20GW/DVSH20GB
AC220-240V,
50/60Hz
2000W
INSTALLING THE DEVICE
The heater should be installed and used in accordance with
the safety standards outlined in this manual.
To avoid all dangers, follow the safety instructions.
- The installation must be done by the service agent or similarly qualified
persons to avoid a hazard.
- Important! Make sure that there are no electric cables or other
installations (for example water pipes) near the drill holes. Make sure that
the appliance is securely horizontally fitted to the wall.
Drill two holes in the wall at least 2m above the floor and 25mm or more
from the corners of the room. Be sure to make the diameter just as same
as the expanding pipe. Fix two screws on the expanding pipe, keeping
10mm of the screw visible, and hang up the machine after the screws are
secure enough.
HEATING PREPARATIONS
Before inserting the plug into an electrical outlet, make sure that the
electrical supply in your area matches that on the rating label on the
unit.
1. Carefully remove the heater from the carton and plastic bag.
2. Place the heater on a firm level surface, ensuring the master button is
set to the “I” position. Put the power plug into an AC220-240V electrical
outlet, when the socket it switched on the device will make a beep
sound and the ‘Power Supply’ light will illuminate.
3. Turn the heater on by pressing the ON/OFF button on the remote
control, the default mode is set to blow out cold air.
330

Setting the Time
When the heater is switched on press set and the MO light will illuminate
to indicate that the current day is Monday. Press the set button repeatedly
until you find the actual day you want to setthe time for (the first two letters
of the 7 days of the week will illuminate to indicate what day you are
currently on, i.e. Su=Sunday). When the correct day is illuminated press
the set button and the hours LED display will blink 00, use the –and +
button to set the hour from 1-24 hours (01= 1am and 00=12am Midnight).
Then press set and the minute LED display will blink 00, use the –and +
button to set the minute from 00-59 minutes (01= 1 minute and 59= 59
minutes). Finally press the set button for a further time to confirm current
the time.
Note: After initially pressing the set button you must select the day of the
week within 5 seconds, otherwise the heater will revert to its normal
operating function. When the time is set, it will remain on the appliance
until the heater is switched off.
GENERAL OPERATION
The heater operates in three modes: Cold, Warm and Hot.
▪Cold Mode (Fan)
▪Warm Mode (1000W Output = I/W)
▪Hot Mode (2000W Output = II/W)
To cycle between the three modes, press the Mode button on the remote
control. Cold mode does not have a display light, the warm and hot mode
display lights are as above (they will illuminate when in operation).
When the heater is switched on the units default setting is to blow cold air
(operate in cold mode).
24-hour Timer Function
The 24-hour timer function is used to select a time within the next 24 hours
for the heater to shutdown (01= 1 hour until shutdown, 24= 24 hours until
shutdown. This function can be used in any of the operating modes. If a
timer is set from 1-24 hours the day timer display light will illuminate. The
timer can be set by pressing the set button when you reach the desired
hour or waiting 3 seconds whilst the desired hour is flashing for it to
automatically set.
Note: If the day timer display light is not on then no timer is currently set
(i.e. the timer is 00). You can only set shutdown times by the hour, not
minutes.
Thermostat Instructions
Youcanadjustthetemperatureby pressing the –or +buttonontheremote
control, whilst in any of the three modes. The temperature range can be
set between 10℃to 49℃.
When the ambient temperature falls 2 degrees below the set temperature,
the heater will begin to operate in warm mode.
When the ambient temperature falls 4 degrees below the set temperature,
the heater will begin to operate in hot mode.
When the ambient temperature is 1 degree or ≧than the set temperature,
the heater will blow out cold air.
Weekly Timer Function
The weekly timer function allows you to set a startup and shut down time
for each day of the week. This function can be used in all three modes and
can only be set up via the remote control.
P6 (press the –and + button at the same time) = Weekly timer set up mode
W.T= W.Timer button (Weekly Timer Button)
Press P6 to enter the weekly timer set up mode.
Weekday- Press the W.T button and the MO display light will illuminate to
indicate that you are on Monday, alternatively press the + or –button to
cycle between the 7 days. The ON display light will also illuminate to
indicate that you are setting a time for the heater to begin operating.
Start Up Hour- When you find the desired day press the W.T button to set
the hour that you want the heater to begin operating on your chosen day
from 01 to 00 (01=1am and 00=12am Midnight). Use the + and –buttons
to set the start-up hour.The hour display will blink 00 before a start-up time

is set.
Start Up Minute- Press the W.T button to set the minute that you want the
heater to begin operating between 00 to 59 minutes (01= 1 minute and
59= 59 minutes). Use the + and –buttons to set the start-up minute. The
minute display will blink 00 before a start-up time is set.
Shutdown Hour- Press the W.T button to set the hour that you want the
heater to shut down from 01 to 00 (01=1am and 00=12am Midnight). Use
the + and –buttons to select the shutdown hour.The hour display will blink
00 before a shut down time is set. The OFF LED display light will illuminate
to indicate that the shutdown timer is being set.
Shutdown minute- Press the W.T button to set the minute that you want
the heater to shut down between 00 to 59 minutes (01= 1 minute and 59=
59 minutes). Use the + and –buttons to select the shutdown minute. The
minute display will blink 00 before a shut down time is set.
Press the W.T button to confirm shutdown time, thiswill automatically take
you to the following day of the week. You must then press the W.T button
to set the timer function for this day or wait 5 seconds for the heater to
automatically revert to its normal operating mode.
When all desired timers are set press the Delay button on the remote
control. The MO display light will illuminate to indicate that you are setting
the time for Monday. Use the + and –buttons to select a temperature
between 10℃to 49℃or you can cycle between the days by pressing the
W.T button to set the time for a different day.
Open Window Detection Function
The open window detection function is an intelligent energy saving mode
that shuts down the heater if it detects a window is open if the function is
activated. This function can be used across all three modes by pressing
the AUTO button on the remote control. When the function is activated the
window open display light will illuminate. The heater detects the
environments ambient temperature and if it falls by 3℃≧ within 1 minute
the appliance will shut down. If the heater shuts down the user will need
to restart the appliance by pressing the ON/OFF button on the remote
control. When the open window detection function is inactive the display
light will switchoff (press the AUTO button twice to switch off this function).
▪Lock Function- Press the LOCK button on the remote control to
switch the LED display light off (the power supply switch will
remain illuminated to indicate that the heater is still in operation.
▪Swing Function- Press the Swing button on the remote control for
the louvers to automatically oscillate to direct the wind flow. Press
the Swing button for a further time to turn off this function.
CONTROL PANEL VIEW

HEATER REAR VIEW
One start button- Pressing the one start button forces the heater to start
operating at its highest heat setting (Hot Mode/2000W).
REMOTE CONTROL VIEW:
1.Please use a lithium battery CR2025 3V in the remote control.
2.The remote control function buttons are labelled below.
Note: When the heater is in operation, if it is in cooling mode it will shut
down immediately when the power supply button is pressed. If the heater
is in heating mode it will take 30 seconds for it to enter standby mode.
OVERHEAT PROTECTION
This heater is protected with an overheat protection that switches off the
appliance automatically in case of overheating. For example: due to the
total or partial obstruction of the vents. In this case, unplug the appliance,
wait about 30 seconds for it to cool and remove the object which is
obstructing the vents. Then switch it back on as described above. The
appliance should now operate normally. If the problem persists, please
contact retailer for assistance.
CLEANING & MAINTENANCE
•Before undertaking any cleaning or maintenance on the appliance,
disconnect it from the power supply.
•For cleaning it is recommended to use a soft moist cloth and neutral
detergent. Do not use an abrasive cloth or chemicals which could
affect the appearance of the appliance. Check that the hot air outlet
and the ventilation inlet are free of dust and dirt.
During cleaning, be careful not to touch the heating elements.
•To open the filter on the back for cleaning, press the top of plastic net
at back.
•In case of breakdown and/or poor functioning of the appliance,
disconnect the appliance from the power supply and contact an
authorised repair agent.
NOTE:Asa result of continual improvements,thedesign, and specifications of
the product within may differ slightly to the unit illustrated on the packaging.
Environment
Do not dispose of electrical appliances as unsorted municipal waste,
use separate collection facilities. Contact your local council for
information regarding the collection systems available.
If electrical appliances are disposed of in landfills or dumps, hazardous
substances can leak into the groundwater and get into the food chain,
damaging your health and well-being.
ON/OFF
Main Power Button
24H
Setting a Timer from 1-24 hours
Mode
Cycle between 3 Modes: Cold, Warm& Hot
Swing
Oscillating Louver Swing Up and Down
LOCK
Display Lock Function
AUTO
Open Window Detection Function
Delay
Adjust Temperature
W.Timer
Set Weekly Timers
+
Increase
-
Decrease
Set
Set Real Time

Warranty
Guarantee and service policy
This product is covered by a standard parts or replacement warranty for
a period of 12 months from the date of purchase.
Extend your warranty for 12 months for free by visiting
www.devola.co.uk/warranty.
Incorrect installation and failure to follow correct operating instructions
are excluded. Consequential costs such as labour charges or damage to
surroundings are expressly excluded.
Contact Us
If you experience a problem with this product you should first contact us
on 0121 250 2180 before taking any further action.
CLAIM YOUR EXCLUSIVE 5% OFF YOUR NEXT ONLINE ORDER
DISCOUNT CODE: DEV5
OFFER VALID FOR 21 DAYS. DON’T MISS OUT!
YOUR DISCOUNT CODE ALSO APPLIES TO OUR SISTER WEBSITES
Visit our websites:
www.devola.co.uk
www.energybulbs.co.uk
www.airconcentre.co.uk
www.ledbulbs.co.uk
This manual suits for next models
2
Table of contents
Other DEVOLA Heater manuals
DEVOLA
DEVOLA DVPH1200B User manual
DEVOLA
DEVOLA Platinum DVSH3000WHS User manual
DEVOLA
DEVOLA Core Mini User manual
DEVOLA
DEVOLA DVSOR5F15B User manual
DEVOLA
DEVOLA DVSH40WH User manual

DEVOLA
DEVOLA DVM1000W User manual
DEVOLA
DEVOLA DVC1500W User manual
DEVOLA
DEVOLA DVSH20MK2S User manual
DEVOLA
DEVOLA DVSH2000B User manual

DEVOLA
DEVOLA 1.5KW GLASS PANEL HEATER User manual
