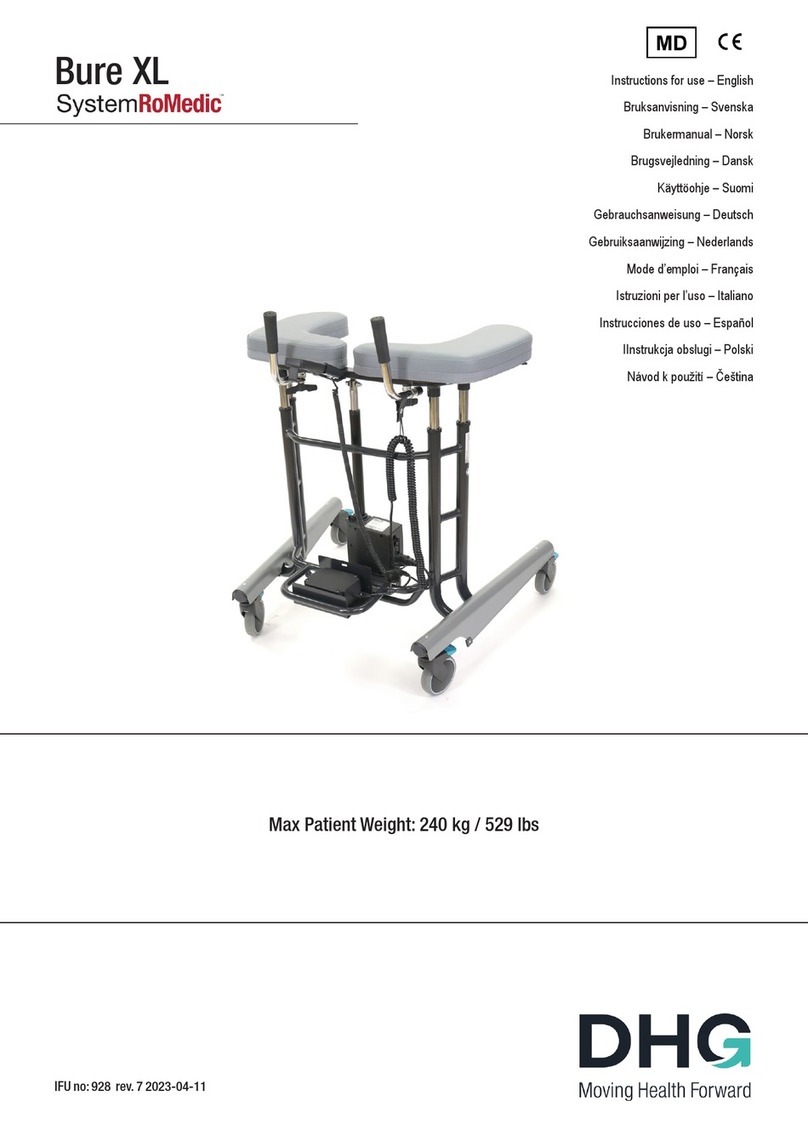
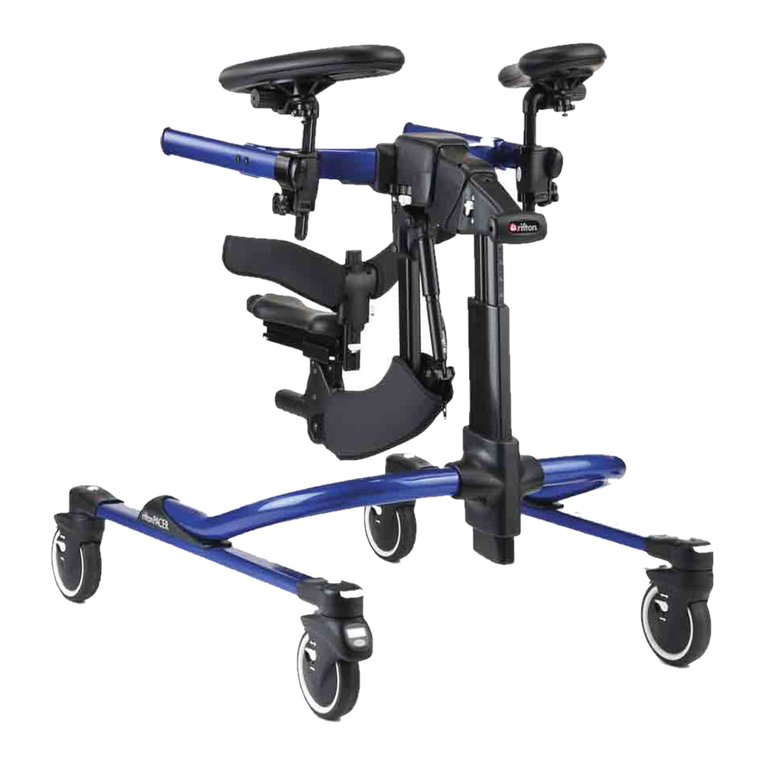
DHG SystemRoMedic BureDouble 2.0 User manual

IFU no: 924 rev. 5 2023-03-28
Max Patient Weight:150 kg / 330 lbs
Instructions for use – English
Bruksanvisning – Svenska
Bruksanvisning – Norsk
rugsvejledning - Dansk
Käyttöohjeet – Suomi
Gebrauchsanweisung - Deutsch
Gebruiksaanwijzing - Nederlands
Mode d’emploi - Français
BureDouble 2.0

Table of contents
English............................................................................................... 3
Svenska............................................................................................14
Norsk................................................................................................. 25
Danske.............................................................................................. 36
Suomi ............................................................................................... 47
Deutsch.............................................................................................58
Netherlands.................................................................................... 69
Français .......................................................................................... 80
EMC................................................................................................... 90
Dimensions .....................................................................................94
Parts list .......................................................................................... 96
Product overview.......................................................................... 100

Instructions for use - English
BureDouble 2.0
The Bure Double 2.0 is equipped with twin electric drives for raising and lowering the Walker and widening the
walking frame.
1. Intended use
Walkers are to be used as indoor, movable and portable assistive aids, which together with approved accessories
are intended to be used for transfer from sitting to standing positions, and walking training. Walkers are to be
used by persons with reduced muscular strength, who shall be able to stand and perform simple leg movements.
Walkers are to be used for leaning on when walking and standing during early mobilisation training. Walkers and
accessories are intended for indoor use only in Home Healthcare environment and Professional Healthcare facility
environment.
2. Contraindications, Precautions, Warnings
Contradictions
• The device may not be used by patients above the maximum weight indicated on the label of the device.
Precautions
• Check that the device is used on a dry and flat surface.
• Check the device is correctly mounted/assembled before its first use.
• Check the device after every folding/disassembly after any transport.
• Check height adjustment and leg spreading motions and inspect the actuators or gas pistons full ranges.
• Activate the brakes whenever the device is not in use.
• Check the function of the brakes before use.
• Inspect the device regularly to detect any signs of damage. If there are any visible signs of damage, contact
Direct Healthcare Group Customer Service.
• Check that the hand control does not show signs of wear before every use.
• Check that the hand control markings are in accordance with the lifting functions.
• Check the battery status of an electrically operated model before using the device.
• Warranty applies only if repairs or alterations are made by personnel who are authorized by Direct Healthcare
Group.
• Ensure that there are no obstacles or people in the way of the device, when moving.
• Handle batteries with care. Do not drop.
• Use only batteries and cables that are intended for the device as instructed by the manufacturer.
• Verify that potential accessories that might be used are properly attached to the device before use.
• Low speed is recommended when moving with the device.
• Take care not to drive the device over thresholds with high speed or force. Approach the threshold with lower
speed and communicate the coming threshold to the user.
• In case of an electrical model of the device, check that the hand control does not show signs of wear before
every use
• Keep the instructions for use together with the product so that it can be used as a reference if necessary.
3IFU

4IFU
• Beware of moving parts during usage.
• Peform a risk assessment on the user before using the Walker to ensure they can stand and peform simple
movements.
Warnings
• The device may not be used by infants, children or adults who are 146 cm or shorter.
• The caregiver must be able to read and understand the Manual/IFU of the product.
• Caregiver: Never use the device if you have not had a proper training on how to use the device including the
accessories.
• Maintenance/Service staff: Never maintain the device if you have not had a proper training on how to use and
maintain the device including the accessories.
• It is important to use only approved accessories to prevent unintended detachment of components and
subsequently a fall that may lead to patient injury.
• Use careful and gentle maneuvers when moving the device.
• Perform maintenance/service of the device, according to the instructions in the IFU (Instruction for use), at
least once every 12 months.
• No parts of the device shall be serviced, while the device is in use
• Accessories must be properly fitted and tested in relation to the user’s needs and functional ability.
• Special care must be taken when using strong electrical power sources such as diathermy and the like so
that diathermy cables are not placed on or near the device. In case of doubt consult with a Direct Healthcare
Group representative.
• When lifting the device, only use the denoted handholds. At least two people are required for lifting the
device.
• Do not leave a patient unattended when the device is being used.
• The device can not be used by patient alone.
• Never move the walker by pulling on the actuator device or gas piston.
• The device must not be lowered into water.
• The device must not be cleaned using steam.
• The device must not be left or stored in a damp or humid environment.
• The device must not be charged in a wet room.
• The device must not be used outdoors, only indoors.
• To avoid the risk of electric shock, this equipment must only be conected to a supply mains with protective
grounding.
• No modification of this equipment is allowed
• Do not modify this equipment without authorisation of the manufacturer.
• If this equipment is modified, appropriate inspection and testing must be conducted to ensure continued safe
use of this equipment.
• Do not use the device while it is charging.
• Do not use the device if any of the cables shows signs of wear and tear.
• Do not put the device in direct sunlight as it may get hot.
• Do not run over the cables with the walker or other devices.
Always make sure that you have the correct version of the manual. The most recent version of all manuals are
available for downloading at/from our website: www.directhealthcaregroup.com.
Always read the user manual

5IFU
3. Using Bure Walker
Standing up and walk training
1. Ask the user to sit on the edge of the bed or chair. Bring out the walking table and place it in front of the user.
Lock the brakes on the wheels.
2. Ask the user to place their arms on the armrests. If necessary, ask the user to move forward on the seat base
so that the user reaches the handles.
3. Ask the user to lean forward. To start raising the walking table, press the UP button on the controller. Raise
the walking table to a desired height.
4. Unlock the brakes. Adjust the height of the walking table to a desired position
5. Assist the user while walk training.
Before first use:
• Inspect the packaging for any damage.
• Check for correct product being delivered.
• Check to ensure that the device is free from damage.
• Check if all the parts/components are included in the package.
• Check if all approved accessories are included in the package.
• Check if Product Quality Approval document is included in the packaging. Save this document for future
contact with manufacturer.
• Make certain the device is properly assembled.
• Check lifting function and bottom-frame adjustment function.
• Check if it is possible to move the device in all directions.
4. Using Bure Walker with Gait Training Kit 56-388
• The support harness has four blue straps with a plastic
buckle allowing for adjustments in length, having steel
carabiner clips at the ends to be fasten to the gait walker.
The carabiner clips on to the metal mounts placed under
the table of the Gait walker.
• Apply the walker support harness by clipping on the two
front carabiners to the front mounters, one on each side
of the table.
• Place the user standing up in the walker. Pull back the
harness in between the legs and clip on the carabiners to
the back mounters, one on each side of the table. Adjust
the harness to the user by pulling in the back strap loops.
• Observe! Intended use of the trainer support harness is to
practise walking. It is not a sitting or lifting aid.
Standing Plate
Attach standing plate by hooks on the main frame of the walker.

6IFU
The desired height is adjusted with Arrow <UP> or Arrow <DOWN>. Adjust bottom frame
using <WIDER> arrow or <NARROWER> arrow
Handset Plus has charge indicator / battery (low, medium, high) and Service indicator (see fur-
ther under “Hand Control Plus”).
Adjusting the Handles
To adjust handles to the desired position; loosen screw, adjust handle, tighten screw.
Left and Right Adjustment of Armrests
The armrests can be adjusted sideways for optimal support; loosen screw, adjust armrest,
tighten screw.
NOTE: The rear attachments on the frame/armrest are interchangeable (left with right and vice
versa) to provide different widths. The locating pins on the cushion’s underside/rear can also be
moved. These adjustment capabilities make customisation possible.
Raising/Lowering the Frame
Hand Control Plus
**1. Service indicator – flashes red after 11 months’ operation.
Constant light (red) after 12 months’ operation.
The indicator is a reminder to review the maintenance instruction (see Maintenance
Instructions). This should be done at least once every 12 months.
Reset: hold down buttons <2a> + <2b> for at least 30 seconds. **The indicator will go out
around 30 seconds after the hand control is activated (battery conservation function).
Using the Parking Brakes on Castor Wheels
When parking the device, activate the parking brake on the lockable castor wheels.
Lock the wheels by pressing the green pedal brake down with your foot. To release the
brake, press the green protruding part with your foot. The caregiver should assist the
patient in activating the parking brake in case the patient cannot activate them him or
herself.
Using Hand Brakes
Running brakes: Pull the brake levers towards you to reduce speed.
You will brake the rear wheel that is located on the same side as the brake lever.
If you apply only one of the brakes, the walker will turn to that side. When the lever is
released, the braking will stop. Do not use the brakes continuously while the walker is
in motion.
Parking brakes: Push the brake levers forwards from you to activate the parking brakes.
Be aware that the lever has some resistance before it stops and locks the rear wheel.
Pull the brake levers back towards you to release the parking brakes.
1
2a 2b

Battery Charging
Battery charging must take place when the device is not in use.
Charging starts automatically when power plug is connected to 230V wall socket. Green light on the control box will
turn on, once the power plug is connected.
• The LED flashes green during charging.
• ON/OFF: To use the product, press ON.
• The green lamp will begin to flash.
• Use the OFF button (hold down for 5s) to switch off the battery if the product
• will not be used for an extended period.
• The LED will shows a constant green light when the battery is fully charged.
• When the battery is in normal state/in operation, the LED flashes green at REGULAR intervals, namely 0.5s
ON, 4s OFF.
• When the battery requires charging (remaining charge <25%) the LED will flash orange/red at REGULAR
intervals, namely 0.5s ON, 4s OFF.
NOTE: The battery has an in-built device that automatically switches it off when remaining charge is <20%. The
LED is then extinguished. The battery must now be fully charged before the electronics can be used again.
Trouble shooting
If the lifting function cannot be activated, check the following:
• That all cables are properly and securely connected, pull out the
contact and plug it in again firmly.
• That battery charging is not in progress.
• That the battery is charged.
If the device is not working properly, contact your distributor.
If the device makes unusual noises:
• Try to determine the source of the sound. Take the device out of operation and contact your distributor.
Control box
The control box cover can be opened by using a screwdriver or similar;
refer to the intstructions which are sitting on the control box.
NOTE: Make sure that plugs are connected to the correct sockets
otherwise the actuators can be damaged.
1. Socket for the height adjustment actuator.
2. Socket for the width adjustment actuator.
3. Hand control socket.
4. Battery terminal socket.
5. Plug socket (NOTE: Plugs must ALWAYS be connected to the control
box for IP classification to be valid).
1 2
3
4
5
7IFU

Accessories
8IFU
Art. No. DESCRIPTION
58-328-1 Heel strap Standing plate
56-336-4 Oxygen holder
56-338 Drip rod complete with attachment
56-337 Side support, adjustable
56-337-PU Side support, adjustable PUR
56-352 Lower Leg Support
56-388 Gait training belt
57-368 Guide handle
56-389 Soft basket with attachment
56-333-DB Standing plate Short Bure DB, Rise DB
56-333/SW-DB Standing plate Short, SW, Bure DB, Rise DB
56-383-DB Standing plate Long Bure DB, Rise DB
56-383/SW-DB Standing plate Long, SW, Bure DB, Rise DB
56-339/75-2-0 Manual brake, 75mm wheel, 2 handles
56-339/75-2-1 Manual brake, 75mm wheel, 1 handle
56-339-2-0 Manual brake, 2 handles
56-339-2-1 Manual brake, 1 handle
56-305 Touch-up paint Bure, Silver 8
56-306 Touch-up paint Bure, Dark grey RAL 7021
58-375-X2 Hand control PLUS TiMotion TH10

9IFU
5. Maintenance
The device must undergo thorough inspection at least once per year. Inspection must be performed by authorised
personnel and in accordance with Direct Healthcare Group’s instructions.
Repairs and maintenance may only be done by authorised personnel using original spare parts.
Check that Action if a problem is noticed
General
The Walker feels firm/free from play.
The Walker does not rattle during manoeuvres.
The Walker is level and all of its castors are in
contact with the floor.
The Walker is not dirty.
Clean with lukewarm soap solution or alcohol-based cleaning
agent (no petroleum products).
Armrests
Armrests are intact and clean.
Armrest widening is functional. Clean; replace if damaged.
Replace lock knob.
Fit lock screws/plates as required.
Handle
Grips are not damaged/dirty.
Handle adjustment is functional. Clean with lukewarm soap solution (no petroleum products).
Replace handle grips.
Fit lock screws/plates as required.
Electronics
Check that the charging cable is connected to
the control box.
Check that the hand control is connected to
the control box.
Check that the battery, actuators and control
box are not loose.
If any part needs to be replaced refer to the wiring diagram in
the control box wiring section.
Fit new charging cable; this must always be connected to the
control box.
Connect or fit new hand control as required.
Tighten; replace with new fasteners as required.
Height adjustment
Raising and lowering are functional.
The Walker feels stable at maximum settings.
There is no play between the vertical frame
and bottom frame.
Height adjustment clamps lock.
The electric actuator fitting must be free from
play.
Height adjustment via hand control is
functional. The electric actuator must run
smoothly at a constant speed.
Fit new guide sleeves (in frame) or end plugs (in chrome
tubes) as required.
Tighten all lock bolts.
Replace clamps.
Tighten the attachment fitting concerned; replace bolts/lock
nuts as necessary.
Check that the battery/hand control/ actuator are connected in
accordance as in the control box wiring section.
Charge the battery.
The part list shows the design and which fasteners must be
checked.
Frame parts
There is no mechanical damage.
There are no scratches.
End plugs/lower frame fitted
If mechanical damage is present, contact DHG Customer
Services.
Touch up as necessary.
Fit new end plugs.
Castors/brakes
Castors roll easily/tread not damaged.
The castors are firmly fastened to the lower
frame.
Castor brakes functional on all castors.
Handbrake functional.
Clean or replace castors.
NOTE! Castors are always fixed to the lower frame with thread
locker or lock nuts. The castors are sealed and we do not
recommend their dismantling; instead, replace the whole
castor assembly.
Tighten the castor bolt and fit locking nut or use thread locker
(depends on model).
Replace castor assembly.
Adjust the brake or fit new castors.
Power cord may only be replaced by DHG service personnel or technical personnel trained by DHG.
DHG can provide upon request neccessary technical information in order to assist maintenace and repair of the
device.

Storage and transportation
The walker should be transported and stored in 5°C to 50°C and in normal humidity, 20% to 80% non-condensing.
The air pressure should be between 700 and 1060 hPa. Leftmost symbol indicates storage and transportation. Let
the walker reach room temperature before the batteries are charged or the walker is used. The walker should not
be stored so that it is exposed to dust, or so that the battery or gas piston is exposed to direct sunlight.
Operation
The operating environment should be 5°C to 40°C, relative humidity 20% to 80% non-condensing, and atmo-
spheric pressure 700 to 1060 hPa. See also Technical specification below. Leftmost symbol indicates operating
condition.
Cleaning and disinfection
After every use:
Clean the walker armrests and handles. Wipe using a mild soap solution/surface disinfectant. However, the product
is not corrosion proof.
Weekly and possibly more often depending on frequency of use:
If necessary, clean the whole walker with a cloth with warm water or a soap solution and check that the castors
are free from dirt and hair. The electronic components (battery, control box, hand control, actuators, cables) should
be cleaned with a damp cloth only. To avoid degreasing of the piston rods, the actuators should be retracted to
minimum stroke and without load before cleaning. Ensure that the device is dried thoroughly after cleaning.
If disinfection is needed:
70% ethanol, 45% isopropanol or similar should be used.
Do not steam clean due to risk of corrosion.
Do not use cleaning agents containing phenol or chlorine, as this could damage the materials.
With enviroments with high risk of infections use the walker with PU-cushions (Accessory number 57-361-L
and 57-361-R)
General Maintence for gait training Sling:
Read the product label.
Recycling/Disposal
When the product is no longer usable it should be recycled in accordance with legislation and regulations in the
country concerned. All electrical parts including batteries must be removed and recycled as electrical components.
Ask your local recycling station for further information about how the different materials in the product (metals,
plastics, electronics) should be recycled. Used batteries can also be returned to Direct Healthcare Group or a Direct
Healthcare Group distributor for recycling.
40°C
5°C
50°C
-10°C
1060
hPa
700
hPa
1060
hPa
700
hPa
%
80%
20%
%
80%
20%
Do not use rinsing agent.
To prolong product life, avoid tumble-drying.
10 IFU

6. Technical Specifications
xP - patient, X C - caregiver
Control box TiMotion Voltage in 220V-240VAC, Voltage out 24V, 50Hz, 1250mA, 70VA, Encapsu-
lation IP66, Electrical safety Class II (Double insulated) Duty cycle: 10%, Max. 2min.
ON/18 min./OFF
Batteries TiMotion Rechargeable Li-Ion Battery, 24 V - 4A, 96Wh, Encapsulation IP66, Capacity
4,0Ah, Cable length 600mm. Duty cycle: 10%, Max. 2min. ON/18 min./OFF
Lifting Actuator TiMotion 24VDC, Max 8,0A, Push: 2000N, Pull: 2000N, Self-locking capacity (min):
1000N, Current: 6.6 (+/-1,0)A, Stroke 400mm +/-2mm, Mounting dim. 605mm,
Encapsulation IP66. Duty cycle: 10%, Max. 2min. ON/18min. OFF
Widening Actuator TiMotion 24 VDC, Max 8,0A, Push: 1000N, Pull: 1000N Self-locking capacity (min):
1000N, Current: 2.6 (+/-0,4)A, Stroke 55mm +/-2 mm, Mounting dim. 167mm,
Encapsulation UIP.
Duty cycle: 10%, Max. 2min.ON/18min. OFF
Hand Control Cable length straight 300mm + coiled 400 mm, IP66
IP class IPX5
Material Steel
Castors 125/100/75mm
Weight 33kg
Expected Service life 8 years
Max patient weight 150 kg / 330 Ibs
Operating environment 5 °C to 40°C, relative humidity 20% to 80% non-condensing, and atmospheric
pressure 700 to 1060 hPa.
Storage and transportation
environment
5 °C to 50 °C, relative humidity 20% to 80% non-condensing, and atmospheric.
Environment pressure 700 to 1060 hPa.
Materials in contact with
human skin
Materials that user and operator/caregiver are exposed to during usage of the pro-
duct for prolonged time:
Poroflex (synthetic leather cushions) Px
Polyurethane (on PU cushions) P
Dryflex (handles) P
PA6 + 20% GF (brake lever) P
Hand control C X
Applied parts: Armrest P
Handles P
Knee pad P
Foot rest support P
Foot rest support clamps C
Handles adjusting knobs C
Hand controller and its holder. C
Handles to adjust the armrest width. C
Hand control C
Charger C
Charger cable C
Footplate
11IFU

12 IFU
7. Product label
UDI (Unique Device Identification) can be
found within the barcode human readable
text. It contains.
(01) EAN code
(11) Date of Manufacture. The date is in the
format YYMMDD
Y = Year, M = Month and D = Date.
(21) Serial Number displayed as five digit
code.
Product label

13IFU
This product complies with the
requirements of the Medical Device
Regulation 2017/745
Visual Inspection
Medical Device Read the manual
Caution Product Code
Legal manufacturer
Direct Healthcare Group
Sverige AB
Batch Code
Type BF applied parts, according to the
degree of protection against electric shock
The device is intended for indoor use
WEEE Symbol
May not be discarded in domestic waste
Class II Equipment
Duty Cycle:
2 min in active (ON) mode.
18 min in rest (OFF) mode.
Maximum patient weight
Walker Height Walker Width
Do not step on the device Refer to instruction manual (IFU)
KG
33 150183
Weight (mass) of the device, the Maximum Patient
Weight, and total sum. All in kg.
8. Table of Symbols
9. How to report a serious incident
Any serious incident that has occurred in relation to the device should be reported to the manufacturer and the
MHRA or another competent authority of the country in which the user and/or patient is established.
UK
info@directhealthcaregroup.com
T: +44 (0) 800 043 0881
F: +44 (0) 845 459 9832
Other:
info.export@directhealthcaregroup.com

Bruksanvisning - Svenska
BureDouble 2.0
Bure Double 2.0 är utrustad med dubbel eldrift, dels med eldriven höj- och sänkning och dels med eldriven bredd-
ning av benstativen.
1. Avsedd användning
Gåbord ska enbart användas inomhus och på plant underlag. Gåbord är ett hjälpmedel, som tillsammans med
godkända tillbehör är avsedda att användas för förflyttning från sittande till stående positioner och gångträning.
Gåbord ska användas av personer med nedsatt muskelstyrka, som ska kunna stå och utföra enkla benrörelser.
Gåbord ska användas för att luta sig mot när brukaren går och står under tidig mobiliseringsträning. Gåbord och
tillbehör är avsedda att användas i hemsjukvårdsmiljö och professionell vårdinrättning.
2. Kontraindikationer, försiktighetsåtgärder och varningar
Kontraindikationer
• Produkten får inte användas av en brukare vars vikt överstiger den maximala brukarvikt som anges på
produktens etikett
Försiktighetsåtgärder
• Kontrollera att produkten används på en torr och plan yta.
• Kontrollera att produkten är korrekt monterad/ihopsatt före den första användningen.
• Kontrollera produkten efter att den har varit ihopfälld /demonterad efter transport.
• Kontrollera höjdjustering och benspridningsrörelser och inspektera ställdonens eller gasfjäderns fulla
rörelseomfång.
• Aktivera bromsarna när produkten inte används.
• Kontrollera bromsarna före användning.
• Inspektera produkten regelbundet för att upptäcka tecken på skada. Om det finns några synliga tecken på
skada, kontakta Direct Healthcare Groups kundtjänst.
• Före varje användning av en elektrisk modell av produkten, kontrollera att handkontrollen inte visar tecken på
slitage.
• Kontrollera att markeringarna på handkontrollen överensstämmer med lyftfunktionerna.
• Före varje användning av en elektrisk modell av produkten; kontrollera batteristatus.
• Garantin gäller endast om reparationer eller ändringar görs av personal som är auktoriserad av Direct
Healthcare Group.
• Se till att det inte finns några hinder eller människor i vägen för produkten när brukaren förflyttar sig med hjälp
av produkten.
• Hantera batterier varsamt. Tappa inte.
• Använd endast batterier och kablar som är avsedda för produkten enligt tillverkarens anvisningar.
14 IFU

15IFU
• Kontrollera att potentiella tillbehör som kan användas är korrekt anslutna till enheten före användning.
• Låg hastighet rekommenderas när du använder produkten.
• Var försiktig så att du inte kör produkten över en tröskel med hög hastighet eller kraft. Närma dig trösklar med
lägre hastighet och uppmärksamma brukaren när ni närmar er en tröskel.
• Förvara bruksanvisningen tillsammans med produkten så att den kan användas som referens vid behov
• Vid en elektrisk modell av enheten, kontrollera att handkontrollen inte visar tecken på slitage före varje använd-
ning. Förvara bruksanvisningen tillsammans med produkten så att den kan användas som referens vid behov.
• Se upp för rörliga delar under anvädning.
• Genomför en riskbedömning med en brukare innan ni använder ett gåbord. Säkerställ att brukaren kan stå
och göra enkla rörelser med ben.
Varningar
• Enheten får inte användas av spädbarn, barn eller vuxna som är 146cm eller kortare.
• Vårdgivaren måste kunna läsa och förstå produktens bruksanvisning och användarinstruktioner.
• Vårdgivare: Använd aldrig enheten om du inte har fått ordentlig utbildning i hur du använder enheten inklusive
tillbehören.
• Service- och underhållspersonal: Underhåll eller modifiera aldrig enheten om du inte har fått ordentlig
utbildning i hur du använder och underhåller enheten inklusive tillbehör.
• Det är viktigt att endast använda godkända tillbehör listade i bruksanvisningen för att förhindra att
komponenter lossnar oavsiktligt, då detta medföra ett fall och patientskada.
• Manövrera mjukt och försiktigt när du jobbar med produkten.
• Utför underhåll/service av enheten, enligt instruktionerna i bruksanvisningen (bruksanvisning), minst en gång
var 12:e månad.
• Inga delar av enheten ska servas när enheten är i bruk
• Tillbehören måste vara ordentligt fastsatta. De bör testas i förhållande till användarens behov och
funktionsnivå.
• Särskild försiktighet måste vidtas vid användning av starka elektriska kraftkällor som används vid till exempel
diatermi och liknande så att diatermikablar inte placeras på eller i närheten av enheten. Vid tvivel, rådgör med
en representant för Direct Healthcare Group.
• När du lyfter produkten ska du endast använda de angivna handfästena. Minst två personer krävs för att lyfta
enhet.
• Lämna inte en patient utan uppsikt när enheten används.
• Enheten kan inte användas enbart av patienten.
• Flytta aldrig lyften genom att dra i ställdonet eller gaskolven.
• Produkten får inte sänkas ner i vatten.
• Produkten får inte lämnas eller förvaras i miljö med hög luftfuktighet.
• Produkten får inte rengöras med ånga.
• Produkten får inte laddas i ett våtrum
• Produkten får inte användas utomhus, endast inomhus.
• För att undvika risk av en elektrisk chock, gåbord kan endast kopplas mot elektrisk källa med jord.
• Ingen modifiering av denna utrustning är tillåten.
• Modifiera inte den här utrustningen utan tillverkarens godkännande
• Om denna utrustning modifieras måste lämplig inspektion och testning utföras för att säkerställa fortsatt säker
användning av denna utrustning.
• Använd inte enheten under laddning.
• Använd inte enheten om någon av kablarna visar tecken på slitage.
• Utsätt inte enheten för direkt solljus då den kan bli upphettad
• Kör inte över kablar med gåbordet eller annan utrustning.

16 IFU
4. Användning Bure Walker med Gåträningskit 56-388
• Gångstödsselen har fyra blå remmar med plastspänne
som möjliggör längdjusteringar. Karbinhakar av stål ska
fästas på i metallfästena vid ändarna av gåbordet.
• Sätt fast gåträningsele med två karabinhakar mot främre
delen av gåbordet, en på varje sida.
• Placera användaren stående i gåbordet. Dra tillbaka selen
mellan benen och sätt fast de bakre karabinhakar mot de
bakre metallfästena, en på varje sida av bordet. Justera
selen till användaren genom att dra in remsorna.
• Observera! Den avsedda anvädningen av gåträningsselen är
att träna gå. Detta är inte ett sitt- eller lyfthjälpmedel.
Ståplatta
Fäst ståplatta med krokar på rollatorns huvudram.
Se alltid till att du har rätt version av manualen. Den senaste versionen av alla manualer finns att ladda ner på/från
vår webbplats: www.directhealthcaregroup.com.
Läs alltid bruksanvisningen
Före användning
• Inspektera förpackningen för att upptäcka eventuella skador.
• Kontrollera att rätt produkt har levererats.
• Kontrollera att materialet är fritt från skador.
• Kontrollera att alla delar/komponenter finns med i förpackningen.
• Kontrollera att alla godkända tillbehör finns med i förpackningen.
• Kontrollera att kvalitetsgarantidokumentet finns med i förpackningen. Spara det här dokumentet för eventuella
framtida kontakter med tillverkaren.
• Kontrollera att gåbordet är korrekt monterat.
• Kontrollera lyftfunktionen och funktionen för att justera benbreddningen.
• Kontrollera körfunktionen i alla riktningar.
3. Användning av Bure Gåbord
Stå upp- och gåträning
1. Be brukaren att sitta på kanten av sängen eller stolen. För fram gåbordet och ställ det framför brukaren. Lås
bromsarna på hjulen.
2. Be brukaren placera armarna på armstöden. Eventuellt be brukaren flytta fram på sittunderlaget så brukaren
når handtagen.
3. Be brukaren att luta sig framåt. Börja höja gåbordet genom att trycka på UPP-knappen på handkontrollen.
Höj gåbordet till en lämplig höjd
4. Lås upp bromsarna. Justera gåbordet till en önskad höjd
5. Assistera brukaren vid gång.

17IFU
Önskad höjd justeras med Pil <UPP> eller Pil <NED>. Breddning av bottenstativen
justeras genom Pil <BREDARE> eller Pil <SMALARE>.
Handset Plus har laddningsindikator / batteri (lågt, medium, högt) och serviceindikator (se
vidare under “Hand Control Plus”).
Justering av Handtag
För att justera handtagen till önskat läge; lossa skruven, justera handtaget, dra åt skruven.
Vänster och höger justering av armstöd
Armstöden kan justeras i sidled för optimalt stöd; lossa skruven, justera armstödet, dra åt skru-
ven.
OBS: De bakre fästena på ramen/armstödet är utbytbara (vänster med höger och vice versa)
för att ge olika bredder. Lokaliseringsstiften på dynans undersida/baksida kan också flyttas.
Dessa justeringsmöjligheter gör anpassning möjlig.
Höjning/sänkning av ramen
Handkontroll Plus
**1. Serviceindikator – blinkar rött efter 11 månaders drift.
Konstant ljus (rött) efter 12 månaders drift.
Indikatorn är en påminnelse om att granska underhållsinstruktionen (se Underhållsinstruk-
tioner). Detta bör göras minst en gång var 12:e månad.
Återställ: håll ned knapparna <2a> + <2b> i minst 30 sekunder. **Indikatorn slocknar
cirka 30 sekunder efter att handkontrollen har aktiverats (batterisparfunktion).
Att använda parkeringsbromsarna på de låsbara hjulen
När du parkerar enheten, aktivera parkeringsbromsen på de låsbara hjulen. Lås hjulen
genom att trycka ner den gröna pedalen med din fot. För att släppa bromsen, tryck
ner den gröna utskjutande delen med din fot. Vårdgivaren bör assistera patienten vid
aktivering av parkeringsbromsen i händelse av att patienten inte själv kan aktivera den.
Att använda handbromsarna
Broms under rörelse: Dra bromshandtagen mot dig för att reducera hastigheten. Du
kommer att bromsa det bakhjul som är lokaliserat på samma sida som bromshandtaget.
Om du bara använder en av bromsarna kommer bordet att svänga åt det hållet. När
handtaget släpps kommer bromsen att släppas. Använd inte bromsarna kontinuerligt när
bordet är i rörelse.
Parkeringsbromsar: Skjut bromshandtagen ifrån dig för att aktivera parkeringsbromsarna.
Var uppmärksam på att handtaget ger ett visst motstånd innan det stannar och låser
bakhjulet. Dra bromshandtagen mot dig för att släppa parkeringsbromsarna.
1
2a 2b

Batteriladdning
Batteriladdning måste ske när enheten inte används.
Laddningen startar automatiskt när nätkontakten ansluts till 230V vägguttag. Grön lampa på kontrollboxen tänds
när strömkontakten är ansluten.
• Lysdioden blinkar grönt under laddning.
• PÅ/AV: För att använda produkten, tryck ON.
• Den gröna lampan börjar blinka.
• Använd OFF-knappen (håll ned i 5s) för att stänga av batteriet om produkten
• kommer inte att användas under en längre period.
• LED-lampan visar ett konstant grönt sken när batteriet är fulladdat.
• När batteriet är i normalt tillstånd/i drift blinkar lysdioden grönt med regelbundna intervall, nämligen 0,5s ON,
4s OFF.
• När batteriet behöver laddas (återstående laddning <25%) kommer lysdioden att blinka orange/rött med
regelbundna intervall, nämligen 0,5s PÅ, 4s AV.
OBS: Batteriet har en inbyggd funktion som automatiskt stänger av batteriet då kvarvarande kapacitet <20%. LED
är då släckt. Batteriet måste nu laddas fullt innan elektroniken på nytt kan användas.
1 2
3
4
5
Felsökning
Om lyftfunktion eller justering av basbredden inte kan aktiveras, kontrollera följande:
• Att alla kablar är korrekt och säkert anslutna.
Dra ut kontakten och tryck tillbaka den ordentligt.
• Att batteriet inte laddas.
• Att batteriet är laddat.
Om enheten inte fungerar korrekt, kontakta din återförsäljare.
Om enheten gör ovanliga ljud:
• Försök avgöra varifrån ljudet kommer. Tag enheten ur drift och kontakta din återförsäljare.
Styrbox
Kontrollboxens lock kan öppnas med en skruvmejsel eller liknande,
se instruktionerna som finns på kontrollboxen.
OBS: Se till att pluggarna är anslutna till rätt uttag annars kan
ställdonen skadas.
1. Uttag för ställdon - höj/sänk.
2. Uttag för ställdon - breddning.
3. Uttag för fjärrkontroll.
4. Uttag för batterikontakt.
5. Uttag för stickpropp. (OBS! För att IP-klassning ska gälla så
ska stickpropp alltid vara ansluten till styrbox)
18 IFU

Tillbehör
19IFU
Art. Nr. Beskrivning
58-328-1 Hälband till ståplatta
56-336-4 Syrgastubshållare
56-338 Droppstång, Bure
56-337 Sidostöd (4-knt), Bure
56-337-PU Sidostöd (4-knt) PUR-kudde, Bure
56-352 Underbensstöd, Bure
56-388 Gåträningssele Sadel inkl. fästen (4st), Bure Std
57-368 Körhandtag
56-389 Mjukkorg m fäste Bure
56-333-DB Ståplatta Kort/2015 Bure DB, Rise DB
56-333/SW-DB Ståplatta Kort/2015, SW, Bure DB, Rise DB
56-383-DB Ståplatta Lång/2015 Bure DB, Rise DB
56-383/SW-DB Ståplatta Lång/2015, SW, Bure DB, Rise DB
56-339/75-2-0 Handbromstillsats, 75mm hjul, 2 handtag
56-339/75-2-1 Handbromstillsats, 75mm hjul, 1 handtag
56-339-2-0 Handbromstillsats, 2 handtag
56-339-2-1 Handbromstillsats, 1 handtag
56-305 Färg Bure, Silver 8
56-306 Färg Bure, Mörkgrå RAL 7021

20 IFU
5. Underhåll
Enheten ska genomgå noggrann kontroll minst en gång per år. Kontrollen ska utföras av auktoriserad personal i
enlighet med Direct Healthcare Groups instruktioner.
Reparationer och underhåll får endast utföras av auktoriserad personal som använder originalreservdelar.
Kontrollera att Åtgärd vid problem
Allmänt
Bordet känns stadigt/glappfritt
Bordet inte skramlar vid manövrering. Bordet
är plant och alla hjul är i kontakt med golvet.
Bordet ej är smutsigt.
Rengör med ljum såplösning eller alkoholbaserat rengörings-
medel (ej petroleumprodukter).
Armstöd
Armstöden är hela och rena. Armstödens
breddning fungerar. Rengör med ljum såplösning (ej petroleumprodukter).
Ersätt handtagsgrepp.
Fäst låsskruvar/-brickor.
Handtag
Grepp ej är skadade/smutsiga. Handtagsin-
ställningarna fungerar.Rengör med ljum såplösning (ej petroleumprodukter). Ersätt
handtagsgrepp.
Fäst låsskruvar/-brickor.
Elektronik
Kontrollera att laddkabel är ansluten till
styrbox.
Kontrollera att handkontrollen är ansluten till
styrbox.
Kontrollera att batteri, ställdon och styrbox ej
hänger löst.
Om någon komponent behöver bytas ut, se kopplingsschema
i avsnittet för styrboxen.
Komplettera med ny laddkabel, denna ska alltid vara ansluten
till styrbox.
Anslut eller komplettera med ny handkontroll. Spänn, ersätt
med nya skruvförband.
Höjdjustering
Höjning och sänkning fungerar.
Bordet känns stabilt vid maxinställning. Inget
glapp finns mellan vertikalt stativ och botten-
stativ.
Klämmor för höjdjustering låser.
Infästning av elställdon ska vara glappfri.
Höjdjustering med handkontroll fungerar.
Elställdonet ska fungera problemfritt i en
konstant hastighet.
Komplettera med nya styrhylsor (i stativ) eller ändskydd ( i
kromade rör).
Spänn alla låsbultar. Ersätt klämmor.
Spänn det aktuella infästningsbandet och ersätt bultar/lås-
bultar om nödvändigt.
Kontrollera att batteriet/handkontrollen/ställdonet är anslutet
enligt avsnittet för styrboxen.
Ladda batteriet.
Komponentlistan visar designen och vilka fästen som ska
kontrolleras.
Stativdelar
Inga mekaniska skador finns. Inga skrapmärk-
en finns.
Ändskydd/bottenstativ sitter på
Om det finns mekaniska skador, kontakta DHG kundtjänst.
Gör enklare reparationer vid behov. Komplettera med nya
ändskydd.
Hjul/bromsar
Hjul rullar lätt/slitbana ej är skadad.
Hjulen är ordentligt fästa i bottenstativet.
Hjulbromsar fungerar på alla hjul. Handbrom-
sen fungerar.
Rengör eller ersätt hjul.
OBSERVERA! Hjul är alltid fästa till bottenstativet med gänglås
eller låsmutter. Hjulen är kapslade och vi rekommenderar inte
att de demonteras; ersätt istället hela hjulpaketet.
Skruva åt hjulbult och komplettera med låsmutter eller använd
gänglås (beroende på modell).
Ersätt hjulpaket.
Justera bromsen eller komplettera med nya hjul.
Strömkabeln ska endast ersättas av DHG-servicepersonal eller teknisk personal som utbildats av DHG.
DHG kan på begäran tillhandahålla nödvändig teknisk information för att hjälpa till med underhåll och reparation av
enhet.
Table of contents
Languages:
Other DHG Mobility Aid manuals

DHG
DHG RoMedic Mover Plus User manual

DHG
DHG SystemRoMedic Mover Aqua User manual

DHG
DHG Raizer II User manual

DHG
DHG TurningSling User manual

DHG
DHG SystemRoMedic Helena User manual

DHG
DHG SystemRoMedic EasySlide 1420 User manual

DHG
DHG SystemRoMedic LiftSeat User manual

DHG
DHG SystemRoMedic 56-304 User manual

DHG
DHG RoMedic EasyGlide User manual

DHG
DHG VENDLET V5S User manual