Dietz tauron dts User manual

IT
NL
FR
EN
Heavy-duty shower commode chair
User manual version 1.0 EN
Standard side element
Abduction side element
with standing aid
Swivelling side element

Record of product identication data: We recommend making a note of your product iden-
tication data below so that you have these to hand if you have any queries about your product. All
the data can be found on the product label. (See Chapter 5.6 “Product labelling”, Fig. 31.)*
Type/model:
Item no. /REF:
Serial number (21):
Date of manufacture:
Other information/notes:
* The identication data or product label may differ on custom-made devices.

3
DE
EN
NL
FR
IT
ES
SE
FI
DK
FOREWORD
Thank you for purchasing the tauron|dts
shower commode chair from DIETZ.
This product is a medical aid. In order to use it
properly and avoid possible risks due to improp-
er use, you must familiarise yourself thoroughly
with its operation.
Read this user manual carefully before you begin
using your product. It contains important notes
and information that will enable you to enjoy
the full technical benets. In addition, it will pro-
vide you with information to help keep your
product in safe working order while ensuring it
retains its value for as long as possible.
If you have any questions or require additional
information, please contact the specialist retail-
er which supplied the product to you.
You can always nd the latest information about
your product on our website. For information or
queries concerning product safety and on re-
calls, please contact DIETZ in writing or by tele-
phone. You will nd our contact information on
the back of this user manual.
NOTE
A large-print version of the
user manual is available for vi-
sually impaired persons at
shop.dietz-group.de in PDF
format.

4
DIETZ GmbH // User manual, XXL products / tauron|dts // Version 1.0 EN
1 Important information
1.1 General information . . . . . . . . . . . . . . . . .6
1.2 Intended purpose . . . . . . . . . . . . . . . . . . .6
1.3 Indications . . . . . . . . . . . . . . . . . . . . . . . .6
1.4 Contraindications . . . . . . . . . . . . . . . . . . .7
1.5 Symbols . . . . . . . . . . . . . . . . . . . . . . . . . .7
2 Product description
2.1 Scope of delivery . . . . . . . . . . . . . . . . . . .8
2.2 Accessories . . . . . . . . . . . . . . . . . . . . . . . .8
2.3 Structure of the tauron|dts
standard side element . . . . . . . . . . . . . . . .9
2.4 Structure of the tauron|dts abduction
side element with standing aid . . . . . . . . .9
2.5 Structure of the tauron|dts
swivelling side element . . . . . . . . . . . . . . .9
3 Preparing the product for use
3.1 Assembly instructions . . . . . . . . . . . . . . .10
3.2 Tools. . . . . . . . . . . . . . . . . . . . . . . . . . . .10
3.3 Seat width . . . . . . . . . . . . . . . . . . . . . . .10
3.4 Backrest height . . . . . . . . . . . . . . . . . . . .12
3.5 Seat depth . . . . . . . . . . . . . . . . . . . . . . .12
3.6 Seat height . . . . . . . . . . . . . . . . . . . . . . .14
CONTENTS

5
DE
EN
NL
FR
IT
ES
SE
FI
DK
4 Using the product
4.1 tauron|dts standard side element. . . . . . .15
4.2 tauron|dts abduction side element
with standing aid . . . . . . . . . . . . . . . . . .15
4.3 tauron|dts swivelling side element . . . . . .15
4.4 Getting in and out. . . . . . . . . . . . . . . . . .16
4.5 Sideways transfers (optional) . . . . . . . . . .16
4.6 Using the product as a commode chair . .17
4.7 Using the product as a shower chair . . . .18
4.8 Rotating the seat surface. . . . . . . . . . . . .18
4.9 Adjusting the backrest cushion . . . . . . . .19
4.10 Folding the product . . . . . . . . . . . . . . . .19
4.11 Transport. . . . . . . . . . . . . . . . . . . . . . . .20
4.12 Accessories and add-ons
from external suppliers . . . . . . . . . . . . .20
5 Technical specications
5.1 DIETZ's measurement system. . . . . . . . . .21
5.2 Dimensions and technical information . . .22
5.3 Product tests. . . . . . . . . . . . . . . . . . . . . .22
5.4 Further information . . . . . . . . . . . . . . . . .23
5.5 Materials . . . . . . . . . . . . . . . . . . . . . . . .23
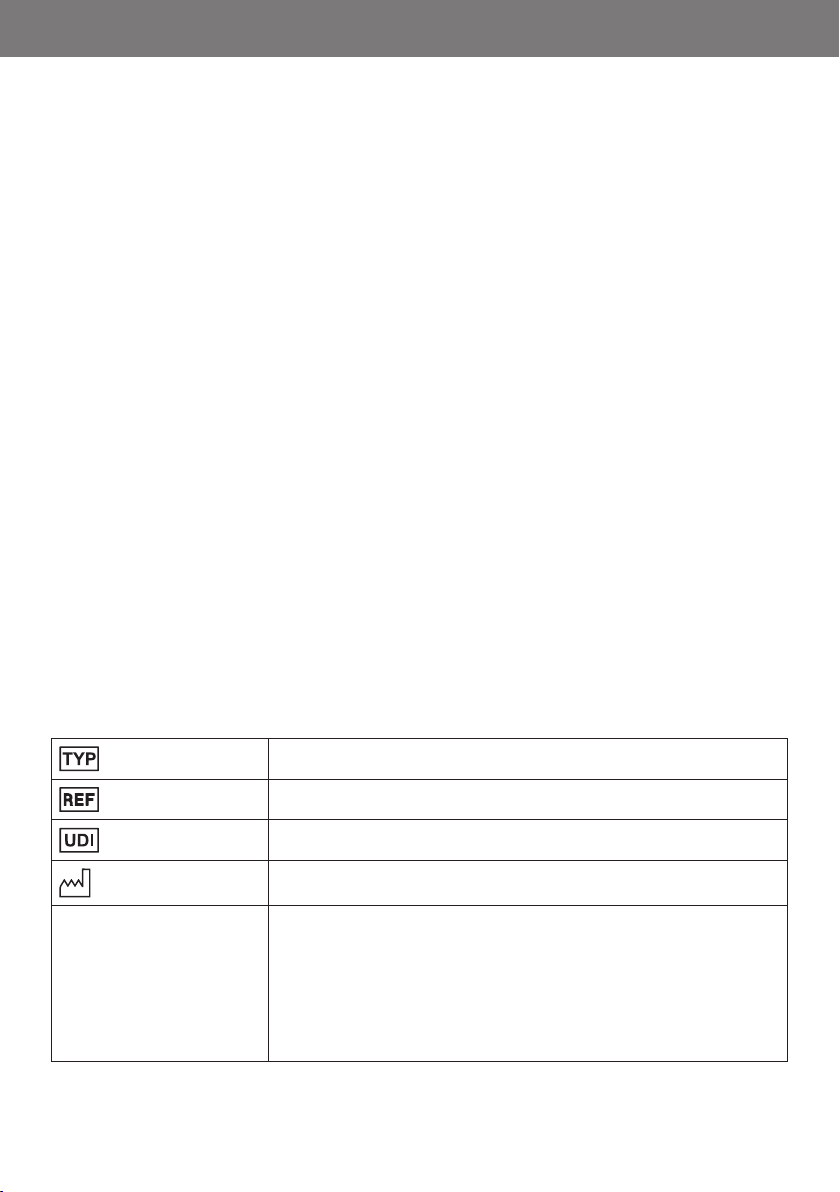
5.6 Product labelling . . . . . . . . . . . . . . . . . . .24
CONTENTS
6 Safety instructions
6.1 Safety instructions. . . . . . . . . . . . . . . . . .25
7 Care and maintenance
7.1 Maintenance/servicing. . . . . . . . . . . . . . .26
7.2 Maintenance schedule . . . . . . . . . . . . . .27
7.3 Troubleshooting. . . . . . . . . . . . . . . . . . . .28
7.4 Cleaning . . . . . . . . . . . . . . . . . . . . . . . . .29
7.5 Disinfection. . . . . . . . . . . . . . . . . . . . . . .29
7.6 Disposal . . . . . . . . . . . . . . . . . . . . . . . . .29
7.7 Passing on the product for reuse . . . . . . .30
7.8 Storage. . . . . . . . . . . . . . . . . . . . . . . . . .30
8 Manufacturer's declarations
8.1 Warranty . . . . . . . . . . . . . . . . . . . . . . . .31
8.2 Service life . . . . . . . . . . . . . . . . . . . . . . .31
8.3 Liability. . . . . . . . . . . . . . . . . . . . . . . . . .31

6
DIETZ GmbH // User manual, XXL products / tauron|dts // Version 1.0 EN
1 IMPORTANT INFORMATION
1.1 GENERAL INFORMATION
This user manual is included in the scope of de-
livery and forms an integral part of the product.
The user should keep this manual to hand at all
times and it must remain with the product if
passed on to a third party for reuse. To check
that you are in possession of the latest version
of the user manual, please contact DIETZ GmbH.
Read the user manual before assembling and
using the product.
1.2 INTENDED PURPOSE
The tauron|dts shower commode chair (max.
user weight 250 kg) has been specially designed
for people who are obese and have trouble
showering and going to the toilet due to re-
stricted mobility. The product is intended exclu-
sively for use indoors on a rm and level surface.
The product is suitable for use in old-age and
nursing homes, hospitals, rehabilitation centres,
day care centres and in private households.
It is not intended to serve as permanent seating
and must not be used for this purpose.
If you have a custom-made device it will have
been labelled as such. In this case, the intended
purpose may differ from the one specied in this
manual and you should refer to the documenta-
tion supplied with the product.
1.3 INDICATIONS
The use of this product is indicated in cases
where persons with a physical disability cannot
use or cannot easily access the existing shower
or toilet facilities due to:
tParalysis
tLoss of limb(s)/limb defects/limb deformities
tJoint contracture/joint damage
tVarious illnesses/diseases

7
DE
EN
NL
FR
IT
ES
SE
FI
DK
1 IMPORTANT INFORMATION
1.4 CONTRAINDICATIONS
The product must not be used in the case of:
tPerception disorders
tSevere balance disorders
tInability to sit
tA user weight exceeding 250 kg
tNor must it be used by children or anyone
who is less than 146 cm tall and/or who
weighs less than 40 kg (BMI < 17)
1.5 SYMBOLS
These symbols draw attention to passages of
text that contain helpful advice for using and
operating the product in everyday life.
WARNING
It is mandatory to observe and comply with
warnings. They draw your attention to the fact
that failure to comply may result in injury and/or
damage to the product or the environment.
NOTE
Tips and advice which make it easier to use the
various functions.

8
DIETZ GmbH // User manual, XXL products / tauron|dts // Version 1.0 EN
2 PRODUCT DESCRIPTION
The product is partially pre-assembled at the
factory and delivered inside a cardboard box. If
possible, please keep the packaging in case you
need to store the product inside it at a later
date.
If the contents are noticeably damaged, inform
the shipper immediately.
WARNING
Risk of poisoning: When burnt, packaging
lms can release toxic gases.
Risk of suffocation: Keep plastic bags out of
the reach of children.
2.1 SCOPE OF DELIVERY
Upon receipt of the goods, please check imme-
diately that the contents are complete and un-
damaged. The contents consist of:
t2 side elements incl. 4 telescopic legs and 4
rubber feet
t1 backrest incl. backrest cushion
t1 seat cushion incl. 2 plug-in tubes,
4 tube linch pins
t1 bolt set: 2 size M6 x 50 mm hexagon
socket head bolts, 2 knurled nuts
t1 user manual
2.2 ACCESSORIES
tToilet pan retaining rail
tRound toilet pan incl. lid
tRectangular toilet pan incl. lid

9
DE
EN
NL
FR
IT
ES
SE
FI
DK
2 PRODUCT DESCRIPTION
Abb. 1
Backrest cushion
2 PRODUCT DESCRIPTION
2.3 STRUCTURE OF THE tauron|dts STANDARD SIDE ELEMENT
Standard side element
Backrest
Rubber foot
Telescopic leg
Seat cushion
Toilet pan (optional)
Cover for hygiene opening
2.4 STRUCTURE OF THE tauron|dts ABDUCTION SIDE ELEMENT WITH STANDING AID
Abb. 2
2.5 STRUCTURE OF THE tauron|dts FEATURING SWIVELLING SIDE ELEMENT
Abb. 3
Backrest cushion Backrest
Rubber foot
Telescopic leg
Seat cushion
Toilet pan (optional)
Cover for hygiene opening
Backrest cushion
Swivelling side element
Backrest
Rubber foot
Telescopic leg
Locking lever
Toilet pan (optional)
Cover for hygiene opening
Seat cushion
Abduction side element
with standing aid

10
DIETZ GmbH // User manual, XXL products / tauron|dts // Version 1.0 EN
3 PREPARING THE PRODUCT FOR USE
3.1 ASSEMBLY INSTRUCTIONS
The assembly process and functional check are
to be performed by the specialist retailer. The
specialist retailer's technician will adjust the
product as appropriate for the respective user.
NOTE
Initial set-up should be carried out by trained
personnel of the specialist retailer
3.2 TOOLS
t6 mm Allen key
3.3 SEAT WIDTH
1. Remove the parts and bolt set from the
cardboard packaging and place them all on
a level, clean, sturdy surface (the oor or a
table).
2. The seat can be set to one of three widths
(560/630/700 mm). The backrest is pre-as-
sembled for a seat width of 560 mm.
3. The rst step is to slot the backrest into the
side elements (1, Fig. 4). During assembly,
take care to ensure that the parts are all
aligned correctly and facing the right way.
The side element sockets for the plug-in
tubes should be pointing inwards. When
slotting the backrest into the side elements,
make sure that the backrest cushion is
facing forwards.
WARNING
Risk of trapping: Be careful of your hands/
ngers during assembly to avoid getting them
trapped in moving parts.
1 1
Abb. 4

11
DE
EN
NL
FR
IT
ES
SE
FI
DK
3 PREPARING THE PRODUCT FOR USE 3 PREPARING THE PRODUCT FOR USE
4. Align the side elements so that they are
parallel with each other (Fig. 5). Working
from the front, insert a bolt (M6 x 50 mm)
into each side element on the left and right
(1, Fig. 5). Then secure them rmly with the
knurled nuts on the rear of the product
(2, Fig. 5).
5. To adjust the seat width so that it is right for
you, proceed as follows: Loosen the knurled
nuts on the rear of the backrest cushion
(1, Fig. 6). Tilt the backrest cushion down
towards the oor (2, Fig. 6).
6. The bolts on the rear of the cushion are now
readily accessible and can be easily pulled
out of the cushion (1, Fig. 7).
7. The middle section inside the backrest is
now free to move. There are three holes on
each side for setting the required seat width
(560/630/700 mm). To adjust the width, pull
the side elements outwards (1, Fig. 8). When
adjusting the seat width, make sure that the
backrest remains centrally aligned.
8. Once you have selected the required seat
width, reinsert the bolts and secure them
with the knurled nuts.
2
2
1
1
Abb. 5
1
2
Abb. 6
1
Abb. 7
1
Abb. 8

12
DIETZ GmbH // User manual, XXL products / tauron|dts // Version 1.0 EN
3.4 BACKREST HEIGHT
1. To adjust the backrest height, loosen the
knurled nuts on the side elements and pull
out the bolts (1, Fig. 9).
2. There are three holes for adjusting the
height of the backrest (410/435/460 mm).
To adjust the height, pull both sides of the
backrest up evenly (2, Fig. 9).
3. Once you have set it to the required height,
secure the backrest again with the bolts
and knurled nuts. Make sure you insert the
bolts from the front (1, Fig. 10) and that you
fasten the knurled nuts securely on the rear
of the product (2, Fig. 10).
WARNING
Risk of trapping: Be careful of your hands/n-
gers during assembly.
Risk of accident: The product is only to be
used with the backrest securely attached.
22
1
Abb. 9
2
2
1
1
Abb. 10
3.5 SEAT DEPTH
You can mount the seat surface in one of two
positions (450/510 mm). The seat depth is mea-
sured from the backrest tube to the front edge
of the seat surface (see Chapter 5.1).
1. Select the seat depth that is right for you
(Fig. 11, 12). Please note that the select-
ed seat depth also determines where the
hygiene opening is located with the cover
attached to the seat surface.
WARNING
Risk of trapping: Be careful of your hands/n-
gers during assembly to avoid getting them
trapped in moving parts.
Risk of accident: If you are able to lift the seat
surface up at either the front or the back follow-
ing assembly, it means that the plug-in tubes
have not been assembled correctly.
Risk of accident: The plug-in tubes must be
fully inserted and locked with the tube linch pins
before using the product. If thetube linch pins are
inserted from below, they will not lock properly.
3 PREPARING THE PRODUCT FOR USE

13
DE
EN
NL
FR
IT
ES
SE
FI
DK
3 PREPARING THE PRODUCT FOR USE3 PREPARING THE PRODUCT FOR USE
2. Place the seat surface centrally on the tube
sockets between the side elements, ensuring
that it is lying straight (1, Fig. 13). To check
that it is tted correctly, shake the seat
surface gently. If the seat surface no longer
moves, it means that the locating bracket
underneath the seat surface has been posi-
tioned correctly.
3. Working from the side (left or right), insert
both plug-in tubes into the sockets under-
neath the seat surface (if necessary, gently
twist the plug-in tubes to make them slide
in more easily). Please ensure that the plug-
in tubes are fully inserted.
4. Try lifting up the seat surface to check that it
has been securely mounted. You should not
be able to lift it off the tube sockets at either
the front or the back.
5. Twist the plug-in tubes so that the openings
of the holes are pointing forwards and back-
wards. Insert the four tube linch pins from
the front and back (1, Fig. 14).
6. Finally, lock the tube linch pins around the
plug-in tubes (2, Fig. 14).
NOTE
If the plug-in tubes cannot be fully inserted, pro-
ceed as follows: Loosen all four knurled nuts on
the backrest and gently shake the side elements.
You should now nd that the plug-in tubes can
be inserted with ease. Finally, retighten all the
knurled nuts.
Seat depth of 510 mm
Seat depth of 510 mm, hygiene opening at the front Abb. 11
Seat depth of 450 mm
Seat depth of 450 mm, hygiene opening at the rear Abb. 12
2
2
1
Abb. 13
1 1
1
2
22
2
Abb. 14

14
DIETZ GmbH // User manual, XXL products / tauron|dts // Version 1.0 EN
3 PREPARING THE PRODUCT FOR USE
3.6 SEAT HEIGHT
1. To adjust the telescopic legs, undo and
remove the bolts (1, Fig. 15).
2. You can now set the telescopic legs to the
required length (2, Fig. 15), ensuring that
the holes of the inner and outer tubes are
aligned with each other.
3. Finally, reinsert the bolts, attach the nuts
externally and tighten them.
WARNING
Risk of trapping: Be careful of your ngers
when adjusting the telescopic legs.
Risk of tipping: Set all 4 telescopic legs to the
same length.
Risk of accident: Make sure the bolts are rm-
ly seated.
2
1
Abb. 15

15
DE
EN
NL
FR
IT
ES
SE
FI
DK
4 USING THE PRODUCT
4.1 TAURON|DTS STANDARD SIDE ELEMENT
These side elements (Fig. 16) are designed to
meet the general requirements of everyday care
settings.
Abb. 16
4.2 TAURON|DTS ABDUCTION SIDE ELEMENT WITH STANDING AID
The abduction side elements (Fig. 17) add an
extra 150 mm onto the seat width so that those
who need considerably more space towards the
front can sit comfortably on the chair.
The side elements curve up and round at the end
closest to the user's hands for greater security
when getting in and out of the chair.
+ 130 mm
+ 150 mm
Abb. 17
4.3 TAURON|DTS SWIVELLING SIDE ELEMENT
The swivelling side elements on both sides (Fig.
18) enable easy transfer, e.g. from a wheelchair
into the shower commode chair, and vice versa.
Abb. 18

16
DIETZ GmbH // User manual, XXL products / tauron|dts // Version 1.0 EN
4 USING THE PRODUCT
4.4 GETTING IN AND OUT
To get in and out of the chair as safely and eas-
ily as possible, please proceed as follows.
Getting into your chair:
1. Position the product with all four legs stand-
ing securely on the oor and make sure
there is nothing to hinder its use.
2. Position yourself in front of the chair,
standing as close as possible to it. Turn
around (Fig. 19) and carefully move back-
wards until you feel your legs touch the
edge of the seat surface.
3. Grasp the side elements with both hands
and use them to support yourself
4. as you safely and slowly lower yourself
into the shower commode chair.
Getting out of your chair:
To get back out of the shower commode chair,
follow the above steps in reverse.
WARNING
Risk of trapping! When inserting the cover for
the hygiene opening, make sure it is inserted so
that it lies straight.
Risk of tipping: Please note that body move-
ments shift the centre of gravity and can increase
the risk of the product tipping over.
Risk of tipping: Support yourself vertically on
both armrests and not in any other way.
Risk of accident: Do not stand with your feet
on the seat surface.
Risk of slipping: Do not allow any oily or high-
ly soapy substances to come into contact with
the rubber feet.
Abb. 19
4.5 SIDEWAYS TRANSFERS (OPTIONAL)
Sideways transfers are only possible if you have
opted for the swivelling side element model.
1. Position the shower commode chair at the
point where you want to transfer yourself
into or out of it.
2. To swivel the side element, release the
locking lever by pulling it towards you (1,
Fig. 20).
WARNING
Risk of accident: The armrest must always be
swivelled down for transfers. Following transfer, lock
the armrest again. Never lean on the side element
or use it to support yourself while it is unlocked.
Risk of trapping: Be careful of your legs, n-
gers, hands and – where applicable – your cloth-
ing when swivelling the side element.

17
DE
EN
NL
FR
IT
ES
SE
FI
DK
3. Release the side element from its fastener
by lifting it up and to the side (2, Fig. 20).
4. The side element can now be swivelled
down (3, Fig. 20).
5. You can now transfer yourself into or out of
the chair by moving sideways.
6. After the sideways transfer, lock the side
element again by following the above steps
in reverse. The side element audibly clicks
into place.
We recommend that you get an assistant to help
you when transferring yourself out of the chair.
2
1
3
Abb. 20
4.6 USING THE PRODUCT AS A COMMODE CHAIR
Before use:
1. Without putting the lid on, slide the toilet
pan over the guide rail under the seat
from the rear/front so that it is positioned
between the plug-in tubes (1, Fig. 21).
2. Remove the cover from the hygiene opening
(2, Fig. 21).
After use:
1. To empty the pan, carefully pull it out
towards the rear/front (1, Fig. 21).
2. After emptying it, clean/disinfect the pan
and seat surface in accordance with the
instructions.
3. Then reinsert the cover for the hygiene
opening, ensuring that it is lying straight.
WARNING
Risk of trapping: Do not insert the pan or pull
it out while a person is still sitting on the chair.
Risk of infection: The pan must be emptied
and cleaned after use.
1 1
2
Abb. 21
4 USING THE PRODUCT4 USING THE PRODUCT

18
DIETZ GmbH // User manual, XXL products / tauron|dts // Version 1.0 EN
4 USING THE PRODUCT
4.7 USING THE PRODUCT AS A SHOWER CHAIR
Before use:
1. The toilet pan should not be inserted when
using the product to take a shower. If nec-
essary, carefully remove it by pulling it out
towards the rear/front (1, Fig. 21).
2. It is entirely up to you whether you insert
the cover for the hygiene opening into the
seat surface or remove it (2, Fig. 21).
After use:
1. Always clean/disinfect the product in accor-
dance with the instructions.
WARNING
Risk of trapping! Do not insert the pan or pull
it out while a person is still sitting on the chair.
Risk of trapping! When inserting the cover for
the hygiene opening, make sure it is inserted so
that it lies straight.
4.8 ROTATING THE SEAT SURFACE
1. Release the four tube linch pins (1, Fig. 22)
attached to the plug-in tubes and pull out
the tube linch pins (2, Fig. 22).
2. Next, push the plug-in tubes out sideways
(left or right) by pressing the end caps (1,
Fig. 23) so that the tubes protrude on the
opposite side. You can now pull out the
plug-in tubes (1, Fig. 23.)
WARNING
Risk of trapping: Be careful of your hands/n-
gers when assembling the seat surface, and when
pushing in and pulling out the plug-in tubes.
Risk of accident: The tube linch pins must be
locked before the product is used. Make sure that
the tube linch pins are not pointing downwards;
otherwise, they may become detached.
11
1
1
2
2
2
Abb. 22

19
DE
EN
NL
FR
IT
ES
SE
FI
DK
3. The seat surface is now free to move and
can be raised (2, Fig. 23) and rotated 180°
(3, Fig. 23).
4.
To secure the seat surface, please follow the
instructions in Chapter 3.5, starting from no. 2.
1
2
31
Abb. 23
4.9 ADJUSTING THE BACKREST CUSHION
The backrest cushion can be rotated 360°. It au-
tomatically adapts to your individual sitting po-
sition (Fig. 24).
NOTE
Positioning: Always align the backrest cushion
to match how you are seated.
Abb. 24
4.10 FOLDING THE PRODUCT
1. Release the seat surface (Chapter 4.8, nos.
1. and 2.) and remove it from the product.
2. Undo the knurled nuts on the rear of the
backrest and remove the bolts (1, 2, Fig.
25). Keep the bolts somewhere safe until
you are ready to reassemble the product.
WARNING
Risk of trapping: Be careful of your hands/
ngers when folding the product.
1
1
2
2
Abb. 25
4 USING THE PRODUCT4 USING THE PRODUCT

20
DIETZ GmbH // User manual, XXL products / tauron|dts // Version 1.0 EN
4 USING THE PRODUCT
3. You can now fold the product easily (1, 2,
Fig. 26) by swivelling one of the side ele-
ments inwards and the other one outwards.
4. If you want to start using the product again,
unfold it by performing the above steps in
reverse and then follow the instructions in
Chapter 3.3, starting from no. 4.
1
2
Abb. 26
4.11 TRANSPORT
The shower commode chair is not designed for
frequent transport. Should it be necessary to
transport the chair, we recommend folding it
rst (Chapter 4.10). The chair should be packed
so that it is standing in a stable position and
there is no danger of the means of transport
performing sudden and dangerous movements.
If you need to carry the product, we recommend
lifting the chair by both side elements.
4.12 ACCESSORIES AND ADD-ONS FROM EXTERNAL SUPPLIERS
As a general principle, only original accessories
from DIETZ GmbH are to be used. If third-party
products are installed on the product, responsi-
bility for the safety of the product passes to the
person who installs the accessories or ts the
add-on. In this case, the installer or tter must
issue a new declaration of conformity for the
combination of accessories and product or add-
on and product. The conformity declared by DI-
ETZ GmbH according to MDR 2017/745, Annex
II is rendered null and void.
WARNING
Safety hazard: The safety of the product can-
not be guaranteed if add-ons/accessories are
sourced from anyone other than DIETZ.
If accessories or add-ons are tted to the prod-
uct, then the safety instructions in the user man-
ual for the accessories or add-ons must always
be observed.
Table of contents
Other Dietz Mobility Aid manuals

Dietz
Dietz TAIMA User manual

Dietz
Dietz TAIMA User manual

Dietz
Dietz TAIMA User manual

Dietz
Dietz Tomtar FAKTO+ Arthritis User manual

Dietz
Dietz 750_12 User manual

Dietz
Dietz Ligero User manual

Dietz
Dietz Rollator XXL User manual

Dietz
Dietz Tomtar TSU-2 User manual

Dietz
Dietz TAiMA M GT User manual

Dietz
Dietz Taima M User manual