manuals.online logo
Brands
  1. Home
  2. •
  3. Brands
  4. •
  5. Herdegen
  6. •
  7. Mobility Aid
  8. •
  9. Herdegen 255618 User manual

Herdegen 255618 User manual

HERDEGEN SNC 2, Rue Freyssinet 77500 CHELLES-FRANCE
User’s Manual : Ref. 25061*,25561*,25562*,25081*,255 81*,255 82*
ME 2CALU01 11/07/2016
Lire
attentivement le mode d’emploi avant utilisation. Suivre
les indications et les conserver précieusement ! Si cette
aide est utilisée par d’autres personnes, celles-ci doivent être bien
informées sur les conseils suivants avant toute utilisation.
1. Consignes de sécurité
 Toujours consulter votre revendeur spécialisé pour régler l’appareil
et pour apprendre à l’utiliser de manière appropriée.
 Ne pas stocker dehors, ne pas laisser au soleil (Attention à ne pas
laisser à l’intérieur d’une voiture en plein soleil !!).
 Ne pas utiliser lors de températures extrêmes (supérieures à
environ 38°C ou 100°F ou inférieures à 0°C ou 32°F).
 Vérier régulièrement l’ensemble des parties composant cet article
(clips, tubes, embouts, poignées..).
 Vérier si tous les raccords sont serrés correctement.
 Tenez fermement le produit lors de son utilisation.
 En cas de chute, lâchez le produit an de ne pas tomber dessus.
 Déplacez vous toujours lentement et en faisant de petits pas pour
vous assurer que la répartition de votre poids est régulière et votre
position stable et sécurisée.
 Ne pas utiliser sur des surfaces glissantes (sol mouillé, neige,
glace..) ni dans les escaliers!!
 Ne pas utiliser dans un autre but que celui pour lequel ce produit
est prévu : ne pas soulever ou déplacer des meubles par exemple!!
 Respectez TOUJOURS les limitations de poids qui gurent sur
l’étiquette ou la notice.
 Vérier la stabilité du produit avant utilisation.
 Ne pas modier cet article. En cas de nécessité, n’utiliser que des
pièces originales pour le réparer. Seul un personnel qualié est
habilité à réparer cet article.
 Ne suspendez RIEN à l’avant du produit. Ceci pourrait vous
déséquilibrer et vous faire chuter.
 En cas de non utilisation prolongée, faites vérier votre appareil par
votre revendeur spécialisé.
 Attention aux trous, déformations dans le sol et grilles de protection
d’arbres qui peuvent vous déséquilibrer et vous faire chuter.
 Vérier le degré d’usure de l’embout et le remplacer si nécessaire.
2. Installation
La mise en service de ce produit ne doit être réalisée que par du
personnel qualié. Un mauvais réglage peut conduire à une mauvaise
utilisation et à des risques d’accident. Il est donc indispensable que
le produit soit adapté de manière individuelle à chaque patient par un
personnel qualié. N’hésitez pas à questionner votre revendeur en cas
de doute.
Références : 250 811-13-17, 255 811-13-17-19-20-23-24-25, 255 618
Réglage de la hauteur : désserrer la bague de serrage. Appuyer sur le
bouton poussoir puis faire coulisser le tube jusqu’au trou de réglage
souhaité. Laisser le bouton poussoir reprendre sa position initiale. Serrer
la bague de serrage.
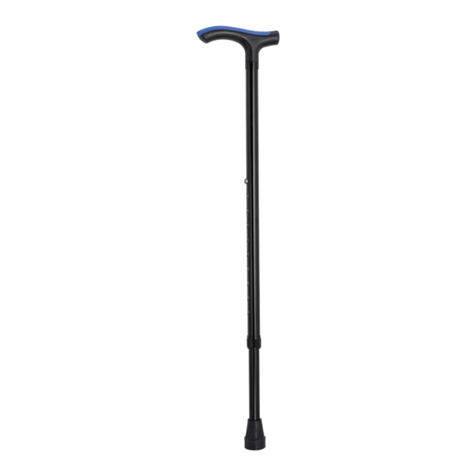
La canne a 1 trou de réglage sur le tube extérieur et 10 trous sur le tube
intérieur, soit 10 possibilités de réglage, tous les 2 cm.
Références : 250 611-13-17, 255 611-13-17-19-20-23-24-25, 255 819
Réglage de la hauteur : désserrer la bague de serrage. Appuyer sur le
bouton poussoir puis faire coulisser le tube jusqu’au trou de réglage
souhaité. Laisser le bouton poussoir reprendre sa position initiale. Serrer
la bague de serrage.
La canne a 1 trou de réglage sur le tube extérieur et 5 trous sur le tube
intérieur, soit 5 possibilités de réglage, tous les 2 cm.
La canne est pliante en 4 éléments. Pour la plier, déboiter les tubes les
uns des autres. Vérier que les éléments soient bien emboîtés avant
d’utiliser la canne. Ranger dans l’étui lorsque la canne est pliée.
Pour se déplacer, s’appuyer sur la canne et avancer.
Gardez la canne proche du corps lors de vos déplacements an de ne
pas tomber.
Location: Si le produit a été entretenu régulièrement et correctement et
après un nettoyage complet et une désinfection, il peut à nouveau être
mis en location. Attention, le mode d‘emploi est partie intégrante de cet
article et doit être livré lors de la nouvelle location.
3. Entretien
Le produit doit être nettoyé régulièrement avec un chiffon propre et sec.
Les poignées doivent être nettoyées avec un nettoyant crème non abrasif
pour éviter qu’elles ne se salissent. Ne pas graisser, ne pas lubrier !!
Risque de chute !!
Les embouts, doivent être contrôlés et changés régulièrement, n’hésitez
pas à demander à votre revendeur.
4. Matériaux
Tubes en aluminium anodisés et poignées en polypropylene.
5. Traitement de déchets
Veuillez mettre au rebut ce produit en conformité avec vos directives
régionales.
6. Caractéristiques techniques
Vous référez au tableau général en n de manuel.
Ce produit est garanti 24 mois, à partir de la date d’achat, contre tout
vice de fabrication. Répond aux normes: DIN-EN-12182: 1999, EN-ISO
11334-1, DIN-EN-ISO 10993-1. Biocompatible
Please
read these notes carefully before use. Make sure to
follow the instructions and keep them in a safe place
! If this aid is to be used by other persons, they must be fully informed of
these safety warnings before use.
1. Safety indications
ALWAYS consult with your physician or supplier to determine
proper adjustment and use of the device.
Don’t store outside and don’t let under the sun (Beware: don’t let
the product in a car in case of high outside temperature !!).
Don’t use in extreme temperature (above 38°C or 100°F or below
0° or 32°F).
Check carefully all parts of this item (screws, tubes, tips, grips...).
Check regularly if all parts are tightened (clips, handle, rubber tip..).
Hold rmly and completely the handle when using.
In case of falling : let the product fall down on the side, so that you
don’t fall on it.
Always move forward quietly and with short steps to ensure a good
Ref
255618-255811-255813-255820-255817-255824-
255825-255823 74.5-97.5cm
Ø 20mm Ø 17mm 110kg
0.38kg
255613-255611-255619-255617-255623-255819-
255624-255620-255625 82.5-92.5cm 0.36kg
250817-250813-250811 74.5-97.5cm 0.4kg
250617-250611 82.5-92.5cm 0.4kg
HERDEGEN SNC 2, Rue Freyssinet 77500 CHELLES-FRANCE
User’s Manual : Ref. 25061*,25561*,25562*,25081*,255 81*,255 82*
ME 2CALU01 11/07/2016
regulations.
6. Technical specications
Check the table at the end of the user’s manual.
This product has a 24 months warranty, from the date of purchase,
against any manufacturing defect.
Standards: DIN-EN-12182: 1999, EN-ISO 11334-1, DIN-EN-ISO 10993-
1. Biocompatible.
Bitte
lesen Sie aufmerksam die Bedienungsanleitung
vor Benutzung. Sichern Sie sich, dass Sie diese
Anweisungen befolgen und behalten Sie die in einer sicheren Stelle.
Wenn dieses Produkt von anderen Leute benutzt werden soll, sollen sie
sich völlig über diese Sicherheitsanweisungen informieren.
1. Sicherheitsanweisungen
Lassen Sie sich von Ihrem Fachhändler oder Krankenpersonal, in
die Benutzung und Pege einweisen.
Nicht draußen lagern und nicht in die Sonne lassen (Vorsicht :
nicht im Auto lassen bei hohen Temperaturen!!)
Nicht bei extremen Temperaturen benutzen (> 38°C / 100°F oder
< 0°C / 32°F).
Alle mechanischen Teilen regelmäßig überprüfen (Schraube,
Rohre, Griffe..).
Überprüfen Sie regelmäßig, ob alle Verschraubungen fest
angezogen sind.
Bei Benutzung halten Sie die Griffe fest.
Bei Stürzung, lassen Sie möglichst die Gehhilfe seitlich fallen,
damit Sie nicht darauf fallen.
Bei der Benutzung, machen Sie kleine Schritte, so dass die
Verteilung Ihres Körpergewichtes gleichmäßig ist.
Benutzen Sie nicht das Produkt auf rutschigen Flächen (Eis,
Schnee, Wasser.. ) RUTSCHGEFAHR !!
Nicht in die Treppe benutzen. !!
Nicht benutzen für andere Zwecke als eine Gehhilfe: z.b. nicht
Möbel versetzen oder heben!!
Respektieren Sie das Maximalgewicht.
Es dürfen keine Veränderungen auf dem Produkt vorgenommen
werden. Verwenden Sie nur Originalersatzteile und lassen Sie die
Reparatur durch Fachpersonal realisiert.
Hängen Sie nichts an Ihrer Gehhilfe.
Wenn Sie Ihre Gehhilfen lang nicht verwendet haben, lassen Sie
die erst von Fachpersonal geprüft werden.
Beim Gehen achten Sie auf die Löcher, Unebenheiten des Bodens
und Baumschutzgitter : Sturzgefahr!!
Die Kappe soll nicht zu viel abgenutzt werden. Wenn eine wichtige
Erschöpfung erscheint, wenden Sie sich an Ihren speziellen
Einzelhändler oder an das medizinische Personal, damit sie die
Kappe ersetzen können.
Seien Sie äußerst vorsichtig auf einem angefeuchteten oder
eingefrorenen Boden; ebenfalls sind die feuchten Fliesenbeläge
sehr gefährlich.
2. Installation
Dieses Produkt darf nur vom Fachpersonal eingestellt werden. Wenn das
Produkt falsch eingestellt wird, kann das zu Überlastungen des Patienten
und des Produktes führen. Das Produkt muss vom Fachpersonal
individuell eingestellt werden und Benutzbereit sein. Wenn Sie Zweifel
haben, wenden Sie sich an das zuständige Fachpersonal.
Artikel Nummer :250 811-13-17, 255 811-13-17-19-20-23-24-25, 255 618
Verstellung der Höhe: Nehmen Sie den Clip raus, und verstellen Sie die
Rohre bis zur gewünschten Höhe. Die Stabilität kontrollieren.
Die Stöcke sind mit 1 Loch auf dem aussen Rohr und 10 auf dem innen
Rohr ausgerüstet. Sie sind 10 mal verstellbar, jede 2 cm.
Vorsicht, bevor Benutzung, prüfen Sie, dass die Metalstange vom Clip
komplett durch die beiden eingestellt ist.
Artikel Nummer :250 611-13-17, 255 611-13-17-19-20-23-24-25, 255 819
Verstellung der Höhe : Lösen Sie den Feststellring.Drücken Sie den
Druckknopf nach innen und schieben Sie das untere Rohr nach oben
oder unten, bis die gewünschte Länge erreicht ist.Lassen Sie den
Druckknopf bei dem entsprechenden Loch einrasten. Prüfen Sie, dass
der Druckknopf fest eingerastet ist.Drehen Sie den Feststellring am
oberen Rohr wieder fest.
Die Stöcke sind mit 1 Loch auf dem aussen Rohr und 5 auf dem innen
Rohr ausgerüstet. Sie sind 5 mal verstellbar, jede 2 cm und faltbar in 4
Elementen. Durch den Gummizug entfaltet sich dieser selbsttätig. Achten
Sie auf den Festsitz der einzelnen Rohrelemente in einander. Der Stock
wird mit einer Tasche geliefert.
balance of your weight and to avoid losing your balance.
Don’t use on wet or icy surfaces. (snow, ice, water..)!!
Don’t use in stairs, severe risk of injuries!!
Use only as a walking aid and in proper way : don’t use as a lever
or to move furniture.
ALWAYS observe the weight limit on the labelling of your stick.
No modication must be made on this device. Use only original
parts to replace the broken or defect one and let this be done by
the technical staff.
After assembling the walking aid, make sure that it is securely
locked in OPEN position and level to the ground before using.
ALWAYS test to see that the walking aid and attachments are
properly and securely locked in place before using.
DO NOT hang anything on the Walking aid.
In case you didn’t use your walking aid for a long time, let it checked
by the technical staff, before using.
B e c a r e f u l w h e n u s i n g : b e w a r e h o l e s a n d d e f o r m a t i o n s i n t h e  o o r .
The suction cap must not be too worn down. If the cap shows
considerable wear, ask your supplier or nursing staff to replace it.
2. Installation
Only specialists can adjust the product and teach you how to use it. A
wrong use or adjustment could lead to overstress of the device or of the
patient.
The device must be adjusted individually by the technical staff to suit
your needs.
Ask the technical staff how to use this product and make sure that you
understood clearly their explanation.
In case of doubt, don’t hesitate to ask again.
Références : 250 811-13-17, 255 811-13-17-19-20-23-24-25, 255 618
Height Adjustment : For height adjustment, loose locking ring, grip stick
shaft with one hand whilst pushing the metal locking pin down with
the other hand so the locking pin retracts fully into the shaft. Select
required height by adjusting the top section of the shaft in an upwards
or downwards motion and release the metal locking pin in front of the
required hole position and tighten locking ring. The sticks have 1 adjusting
hole on the outside pipe and 10 holes on the inside pipe, what means 10
adjusting positions.
The stick can be adjusted every 2 cm.
Références : 250 611-13-17, 255 611-13-17-19-20-23-24-25, 255 819
For height adjustment, loose locking ring, grip stick shaft with one hand
whilst pushing the metal locking pin down with the other hand so the
locking pin retracts fully into the shaft. Select required height by adjusting
the top section of the shaft in an upwards or downwards motion and
release the metal locking pin in front of the required hole position and
tighten locking ring. Prior to use always ensure that the locking pin fully
protrudes from the
selected hole position and by applying downward pressure on the handle
of the walking stick test that the walking stick has been assembled
correctly.
The stick folds in 4 elements. Prior to use always ensure that the locking
ring is tightly secured in place and that, following height adjustment of
the stick, the metal locking pin is always fully engaged in the selected
hole position.
To unfold, release one tube at a time, guide them onto the handle tube
until all tubes are connected together. Check that all tubes are seated in
place.
To fold, pull the bottom two tubes apart and fold onto each other. Repeat
this operation with the remaining tubes. Place into the bag when folded.
Keep the sticks close to your body while going to avoid accidents.
Rental: this product can be rented under the condition that it was
correctly cleaned. This user‘s manual belongs to that product and must
be delivered to each new user.
3. Cleaning
The stick has to be cleaned regularly with a mild cleaning agent and a
soft cloth.
NEVER use OILY substances!! Slip hazard!!
Ask your retailer or the technical staff to check the walking aid regularly.
The rubber tips must be checked and changed regularly.
4. Materials
Tube in anodised aluminium and polypropylen handle.
5. Disposal
Dispose of this product in accordance with your regional waste disposal
HERDEGEN SNC 2, Rue Freyssinet 77500 CHELLES-FRANCE
User’s Manual : Ref. 25061*,25561*,25562*,25081*,255 81*,255 82*
ME 2CALU01 11/07/2016
el siguiente agujero de bloqueo. El bastón tiene un agujero en el tubo
exterior y 10 en el tubo inferior, son 10 posibilidades, cada 2 centímetros.
Referencias : 250 611-13-17, 255 611-13-17-19-20-23-24-25, 255 819
Para regular la altura: aojar el anillo de sujeción. Presionar el botón de
bloqueo situado en la parte inferior del tubo telescópico y deslizar hasta
el siguiente agujero de bloqueo. Apretar el anillo de sujeción. El bastón
plegable tiene un agujero de ajuste en el tubo exterior y 5 agujeros en
el tubo interior, son 5 posibilidades de ajuste, cada 2 centímetros. El
bastón es plegable en 4 partes. Para plegarlo, separar los diferentes
tubos. Vericar que las cuatro partes sean bien jadas juntas antes de
utilizar el bastón. Colocar en su funda cuando no sirve.
Para desplazarse, apoyarse en la bastón y avanzar. Guardar el bastón
cerca del cuerpo durante los desplazamientos para no caer.
Alquiler: Esa muleta se puede alquilar, pero tiene que ser limpiada y
desinfectada antes de cada alquiler. Este manual del usuario pertenece
a ese producto y debe ser entregado a cada nuevo usuario con la muleta.
3. Entretenimiento
Limpiar el producto con un trapo limpio y seco.
La empuñadura debe ser limpiada con productos de limpieza para el
hogar, no abrasivos, para que no se ensucien.
¡No ponga grasa, no aceite! ¡Riesgo de caída!
La contera debe ser controlada y cambiada regularmente.
4. Materiales
Tubos de aluminio anodizado y empuñadura de polipropileno.
5. Tratamiento de los residuos
Dispone de este producto de acuerdo a su norma regional sobre
tratamiento y disposición nal de los residuos.
6. Características técnicas
Mirar la tabla de abajo (al n de las instrucciones).
Su producto está garantizado 24 meses de no tener defectos en los
materiales y la fabricación, desde la fecha de compra.
Norma: DIN EN-ISO 12182: 1999, EN ISO 1134-1, DIN EN-ISO 10993-1
Este producto está biocompatible.
Kérjük
gyelmesen olvassa el a biztonsági előírásokat
mielőtt használná a terméket.
1. Biztonsági gyelmeztetések MAGYAR
Mindig kérje az orvosa vagy az eladó segítségét a megfelelő
beállítások és a termék használatával kapcsolatban.
Tilos a termék szabadban tárolása, ne hagyja a terméket a
napon (Vigyázat: ne hagyja a terméket a kocsiban, magas külső
hőmérséklet esetében)!
Ne használja extrém időjárási körülmények esetében (38°C felett
vagy 0° C alatt)!
Használat előtt mindig ellenőrizze a terméket (csavarok
rögzítése,váz, markolat, stb…)!
A markolatot mindig erősen, megfelelően fogjuk használat közben!
Esés esetében: engedjük el, ügyeljünk arra, hogy ne essünk rá a
termékre!
Mindig lassan, kis léptékkel haladjunk előre a súly megfelelő
elosztása és az egyensúly megtartása miatt.
Ne használjuk esős vagy jeges, csúszós felszínen illetve
lépcsőn(hó, jég, víz…)!
Terméket CSAK a rendeltetésének megfelelően használjuk: ne
használjuk emelőnek vagy bútor szállítására!
Mindig tartsuk be a maximális súlyhatárt!
A termék kinyitása vagy összeszerelése után mindig
bizonyosodjunk meg a termék megfelelő stabilitásáról.
Ne akasszunk semmit sem a termékre.
Semmilyen átalakítás sem szükséges a terméken. Csak eredeti
alkatrészeket használjon a törött vagy meghibásodott részek
cseréjére, melyet szakértővel végeztessen el.
Ha sokáig nem használja a terméket, akkor használat előtt
ellenőrizze a terméket.
Legyen óvatos mikor használja: vigyázzon a lyukakra és a burkolat
egyenetlenségeire.
2. Üzembe helyezés
Vigyázat!
Csak szakember állíthatja be a terméket és mutathatja meg a helyes
használatát. Nem megfelelő használat vagy beállítás sérülést okozhat.
A terméket mindig egyénileg, a beteg igényeinek megfelelően kell
Behalten Sie den Stock nah vom Körper beim Gehen.
Wiedereinsatz: Nach einer gründlichen Reinigung und regelmäßiger
Wartung kann die Gehstütze weitergegeben werden. Die
Gebrauchsanweisung muss beim Wiedereinsatz unbedingt
weitergegeben werden.
3. Reinigung
Die Gehhilfe soll mit einem sauberen und trocknen Lappen regelmäßig
gereinigt werden. Die Kappen/Rädern sollen regelmäßig ersetzt/
überprüft werden.
Keine öligen Substanzen benutzen!! Rutschgefahr !!
4. Material
Das Produkt besteht aus einem Kunststoffgriff, 2 verstellbaren
Aluminiumrohren, einem Clip/Druckknopf, und einer Gummikappe.
5. Entsorgung
Erkündigen Sie sich bei Ihrem Fachhändler nach den regionalen
Entsorgungsvorschriften.
6. Technische Daten
Schauen Sie sich den Tabel am Ende dieser Gebrauchsanweisung.
Dieses Produkt wird 24 Monate, ab Kaufdatum, gegen jeden
Fabrikationsfehler garantiert.
Dieses Produkt ist biokompatibel.
Norm: DIN-EN-12182: 1999, EN-ISO 11334-1, DIN-EN-ISO 10993-1
Por favor
leer estas instrucciones antes de utilizar
el producto, y guardarlas para posibles
preguntas en el futuro. Si el producto está utilizado por otras personas,
tienen que estar avisadas de los consejos de seguridad aquí abajo antes
de cada uso.
1. Consignas de seguridad
Siempre consultar su vendedor especializado para instalar el
producto y para aprender cómo utilizarlo de manera adaptada.
El producto nos debe guardar fuera. No dejar el producto al sol
durante mucho tiempo (Cuidado: ¡no dejar el producto en un
coche al sol!).
No utilizar el producto con temperaturas extremas (superiores a
38°C o 100°F e inferiores a 0°C o 32°F).
Compruebe las diferentes partes del producto regularmente (clips,
tubos, contera, empuñadura…)
Compruebe si todas las conexiones están apretadas rmemente.
Tenga rmemente el producto durante la utilización.
En caso de caída, liberar el bastón para no caer sobre el producto.
Siempre moverse lentamente y haciendo pasos pequeños para
asegurarse que la distribución de su peso sea constante y para
asegurar que su posición sea estable.
No utilizar el bastón en suelos deslizantes (suelo mojado, nieve,
hielo…).
¡¡No usar en las escaleras!!
El producto no debe usarse con otro objetivo que el por cual el
producto está hecho: ¡no mover muebles por ejemplo!
Respete SIEMPRE el peso máximo escrito en la etiqueta, las
instrucciones de uso o en el embalaje du su producto.
Vericar la estabilidad de su bastón antes de utilizarlo.
Usted no debe modicar este producto. Si está necesario, solo
utilice piezas de recambio originales para repararlo. Solo el
personal calicado está autorizado para reparar este producto.
No colocar nada en la parte frontal del producto. Eso le podría
desequilibrar y provocar una caída.
Si usted no utiliza el producto durante mucho tiempo, procede a la
vericación del producto por un personal calicado.
Cuidado a los agujeros, deformaciones en el suelo y a las grillas de
protección de los arboles que pueden desequilibrarle y provocar
una caída.
Compruebe el estado de la contera regularmente y cámbiela si
está necesario.
2. Instrucciones de instalación
Solo personas calicadas pueden instalar el producto y enseñarle como
utilizarlo. Un establecimiento malo puede generar una mala utilización
y un riesgo de accidente. Por esta razón es muy importante que el
producto sea adaptado al usador, por un personal calicado.
Por cualquier duda no vacila a preguntar su vendedor.
Referencias : 250 811-13-17, 255 811-13-17-19-20-23-24-25, 255 618
Para regular la altura: aojar el anillo de sujeción. Presionar el botón de
bloqueo situado en la parte inferior del tubo telescópico y deslizar hasta
HERDEGEN SNC 2, Rue Freyssinet 77500 CHELLES-FRANCE
User’s Manual : Ref. 25061*,25561*,25562*,25081*,255 81*,255 82*
ME 2CALU01 11/07/2016
beállítani.
Kérje az eladó vagy szakember segítségét a termék használatával
kapcsolatban, győződjön meg arról, hogy minden egyértelmű a termék
használatával kapcsolatban.
Referencia számok: 250 811-13-17, 255 811-13-17-19-20-23-24-25,255
618
A megfelelő magasság beállításához lazítsa meg a záró gyűrűt, nyomja
be a fém rögzítő gombot, csúsztassa a kívánt magasságnak megfelelő
tengelyen található lyukba, ügyeljen arra, hogy a rögzítő gomb teljesen
átmenjen a csövön (egy kattanást hall), majd rögzítse a záró gyűrűt.
Minden használat előtt győződjön meg, hogy a rögzítő gomb a kívánt
pozícióban van és a bot megfelelő stabilitást biztosít.
Ezen referenciaszámú botoknak 1 állítási lyuk van kívül és 10 állítási lyuk
belül, ami összesen 10 állítási lehetőséget biztosít, a magasság 2cm-
enként állítható.
Referencia számok: 250 611-13-17, 255 611-13-17-19-20-23-24-25, 255
819
A megfelelő magasság beállításához lazítsa meg a záró gyűrűt, nyomja
be a fém rögzítő gombot, csúsztassa a kívánt magasságnak megfelelő
tengelyen található lyukba, ügyeljen arra, hogy a rögzítő gomb teljesen
átmenjen a csövön (egy kattanást hall), majd rögzítse a záró gyűrűt.
Minden használat előtt győződjön meg, hogy a rögzítő gomb a kívánt
pozícióban van és a bot megfelelő stabilitást biztosít.
Bot összecsukása: húzza szét az alsó két csövet egymásból, hajtsa
egymásra, majd ismételje meg ezt a műveletet a további részekkel is.
Ezáltal a bot 4 részre összecsukható, kis helyen elfér.
Bot összeszerelése: fogja meg a bot markolatát függőleges helyzetben,
markolattal felfele és várja meg, amíg teljesen a helyére, egymásba
kerülnek a csövek. 1-2 másodperc után ellenőrizze, hogy minden cső a
helyén van-e.
Használat közben tartsa a botot a testéhez közel a balesetek elkerülése
végett.
3. Tisztítás
A terméket rendszeresen tisztítsuk száraz tiszta anyaggal. A markolat
tisztításához karcmentes folyékony tisztítószer ajánlott a szennyeződés
elkerülése érdekében. Sose használjon olajos szereket, sérülésveszélyt
okozhat!
A botvéggumikat rendszeresen kell cserélni és ellenőrizni.
4. Anyaga
Anyaga dúralumínium, polipropilén markolattal.
5. Hulladék
A terméktől való megszabadulás esetén tartsuk be a helyi hulladékkezelési
szabályokat.
6. Műszaki leírás
Különböző termékek leírásához lásd a használati útmutató végén
található táblázatot.
Garancia 2 év a vásárlás napjától számítva, gyártási hibák esetén.
A termék biokompatibilis.
Szabvány: DIN-EN-12182: 1999, EN-ISO 11334-1, DIN-EN-ISO 10993-1
Baston Kullanma Kılavuzu
Lütfen
kullanmadan önce talimatları okuyun. Yönergeleri
takip edin ve kılavuzu iyi saklayın! Ürün diğer bir kişi
tarafından kullanılacaksa önce aşağıdaki tavsiyeler hakkında bilgi
sahibi olmalıdır.
1. Güvenlik Bilgileri
Doğru şekilde kullanmak ve ayarlamak için her zaman satıcınıza
danışın.
Ürün açık havada muhafaza edilmemelidir ve doğrudan güneş
ışığı alan yerlerde bırakılmamalıdır (güneş ışığına maruz kalan
arabada bırakılmamalıdır).
38 ° C veya 100 ° F’den yüksek ısı kaynaklarından uzak ve 0 ° C
veya 32 ° F altında soğukluktan uzak tutulmalıdır.
Düzenli olarak bu üründe bulunan tüm parçaları kontrol ediniz.
(Klipsler, boru, lastik uç, kollar...).
Tüm bağlantıların doğru sıkılıkta olduğundan emin olun.
Kullandığınızda ürünü sıkı tutun.
Düşme durumunda ürünün üstüne düşmemek veya ürünün
üstünüze düşmesini engellemek için ürünü bırakın.
Ağırlığın iyi bir dağılımı ve güvenli bir yürüyüş için, yavaş ve küçük
adımlarla hareket edin.
Kaygan yüzeylerden uzak durun: ıslak, karlı veya buzlu
yüzeylerden uzak durun. Merdivenleri baston ile çıkmayın!
Satıcınızın ve tıbbi personelin belirttiği kullanım koşullarının dışında
bu ürünü kullanmayın, misal koltuk kaldırma veya yük taşıma aleti
olarak.
Belirtilen maksimum kullanıcı ağırlığını geçmeyin.
Kullanmadan önce ürünün sabitliğini kontrol edin.
Bu yazıya düzenleme yapmayın. Gerekirse, onarımı için sadece
orijinal parçalar kullanın. Yalnızca yetkili personel bu ürünü onarabilir.
Ürünün ön tarafına bir şey asmayın, dengenizi bozabilir ve
düşmenize neden olabilir.
Uzun süre kullanılmadıysa, yetkili kişiler tarafından cihazı kontrol
ettirin.
Deliklere dikkat edin, zeminde oluşan çukurlara, ağaçlara, yeşil
alanları çeviren tellere dikkat ediniz, dengenizi bozabilir.
Lastik ucun aşınmasını kontrol edin ve gerekirse değiştirin.
2. Kurulum
Ürün yetkili personel tarafından kullanılabilir hale getirilmelidir. Yanlış
ayarlama, kötü kullanıma ve kazaya yol açabilir, bu nedenle ürün yetkili
personel tarafından her hastaya özel şekilde ayarlanmalıdır. Herhangi bir
şüphe halinde yetkili satıcınıza danışın.
Referans: 250 811-13-17, 255 811-13-17-19-20-23-24-25, 255 618
Yükseklik ayarı: sıkma yüzüğünü gevşetin. Düğmeye basın, boruyu
istediğiniz yüksekliğe gelinceye kadar kaydırın ve ayar deliğine yerleştirin.
Başlangıç şeklini alması için düğmeyi bırakın. Sıkma yüzüğünü sıkın.
Borunun dış kısmında 1 ayar deliği, iç kısmında 10 deliği, toplam her 2
cm’de, 10 ayar seçeneği vardır.
Referans: 250 611-13-17, 255 611-13-17-19-20-23-24-25, 255 819
Yükseklik ayarı: sıkma yüzüğünü gevşetin. Düğmeye basın, boruyu
istediğiniz yüksekliğe gelinceye kadar kaydırın ve ayar deliğine yerleştirin.
Başlangıç şeklini alması için düğmeyi bırakın. Sıkma yüzüğünü sıkın.
Borunun dış kısmında 1 ayar deliği, iç kısmında 5 deliği, toplam her 2
cm’de, 5 ayar seçeneği vardır.
Baston 4’e katlanabilir. Katlamak için, boruları birbirlerinden çıkarın.
Bastonu kullanmadan önce boruların birbirlerini takılı olduğunu kontrol
edin. Baston katlıyken kılıfa yerleştirin.
Bastonu kullanırken, kulpundan ve borusundan destek alarak yürüyün.
Düşmenizi engellemek için, yürürken ürünü kendinize yakın tutun.
3. Bakım
Ürün temiz ve kuru bir bezle düzenli olarak temizlenmelidir. Kulpun kirli
olmaması için, aşındırmayan temizleyici krem ile temizleyin. Yağlı ve
parlatan ilaç/ krem kullanmayın! Düşme tehlikesi olabilir!
Lastik ucu kontrol edilmeli ve düzenli olarak değiştirilmeli, yetkili satıcınıza
danışın.
4. Malzemeler
Anodize alüminyum boru ve polipropilen kulp.
5. Atık Arıtma
Şehrinizin talimatları doğrultusunda bu ürünü imha edin.
6. Teknik Özellikler
Kitapçığın sonunda bulunan genel tabloya bakınız.
İmalat hatalarına karşı, satın alma tarihinden itibaren, ürün 24 ay
garantilidir. DIN-EN-12182: 1999, EN-ISO 11334-1, DIN-EN-ISO 10993-
1 standartlarına uygundur. Biyouyumludur.
Leggere
attentamente le istruzioni prima dell’uso. Seguire
le indicazioni e tenerle al sicuro! Se questo
aiuto viene usato da altre persone, le stesse devono essere ben informate
sui seguenti suggerimenti prima dell‘uso.
1. Norme di sicurezza
Rivolgersi sempre al proprio rivenditore specializzato per regolare
l’apparecchio e per imparare ad usarlo in modo adeguato.
Non conservare all’esterno, non lasciare al sole (Attenzione a non
lasciare all‘interno di una macchina sotto il sole!!).
Non usare con temperature estreme (superiori a circa 38°C o 100°F
o inferiori a 0°C o 32°F).
Controllare regolarmente tutti i componenti di questo articolo (clip,
tubi, estremità, impugnatura...).
Vericare se tutti i collegamenti sono serrati correttamente.
Reggere saldamente il prodotto durante l’uso.
In caso di caduta, lasciar cadere il prodotto per non cadervi sopra.
Spostarsi sempre lentamente facendo piccoli passi per fare in modo
che la distribuzione del peso sia regolare e la posizione sia stabile
HERDEGEN SNC 2, Rue Freyssinet 77500 CHELLES-FRANCE
User’s Manual : Ref. 25061*,25561*,25562*,25081*,255 81*,255 82*
ME 2CALU01 11/07/2016
e sicura.
Non usare su superci scivolose (pavimento bagnato, neve,
ghiaccio..) né sulle scale!!
Non usare per scopi diversi da quello per cui questo prodotto è
destinato: ad esempio, non alzare o spostare mobili!!
Osservare SEMPRE i limiti di peso indicati sull’etichetta o nelle
istruzioni.
Controllare la stabilità del prodotto prima dell’uso.
Non modicare questo articolo. Se necessario, usare solo parti
originali per le riparazioni. Solo personale qualicato è autorizzato
a riparare questo articolo.
Non appendere NIENTE nella parte anteriore del prodotto.
Potrebbe causare sbilanciamenti e conseguenti cadute.
In caso di lungo inutilizzo, far controllare l’apparecchio dal proprio
rivenditore specializzato.
Attenzione ai buchi, alle deformazioni nel terreno e alle griglie
di protezione degli alberi che possono causare sbilanciamenti e
conseguenti cadute.
Controllare l’usura dell’estremità e sostituirla se necessario.
2. Installazione
La messa in servizio di questo prodotto deve essere effettuata solo
da personale qualicato. Un’errata regolazione potrebbe comportare
un uso errato e un rischio di incidenti. Il prodotto deve pertanto essere
adattato individualmente ad ogni paziente da personale qualicato.
Non esitare a chiedere al rivenditore in caso di dubbio.
Riferimenti: 250 811-13-17, 255 811-13-17-19-20-23-24-25, 255 618
Regolazione dell’altezza: allentare l’anello di serraggio. Premere il
pulsante e far scivolare il tubo no al foro di regolazione desiderato.
Far tornare il pulsante tornare in posizione di partenza. Avvitare l’anello
di serraggio.
Il bastone ha 1 foro di regolazione sul tubo esterno e 10 fori sul tubo
interno, ossia 10 possibilità di regolazione, ogni 2 cm.
Riferimenti: 250 611-13-17, 255 611-13-17-19-20-23-24-25, 255 819
Regolazione dell’altezza: allentare l’anello di serraggio. Premere il
pulsante e far scivolare il tubo no al foro di regolazione desiderato.
Far tornare il pulsante in posizione di partenza. Avvitare l’anello di
serraggio.
Il bastone ha 1 foro di regolazione sul tubo esterno e 5 fori sul tubo
interno, ossia 5 possibilità di regolazione, ogni 2 cm.
Il bastone è pieghevole in 4 elementi. Per piegarlo, sganciare i tubi tra
loro. Controllare che gli elementi siano incastrati correttamente prima
di usare il bastone. Riporre nella custodia quando il bastone è piegato.
Per spostarsi, appoggiarsi sul bastone e andare avanti.
Mantenere il bastone vicino al corpo durante gli spostamenti per non
cadere.
Noleggio: Se il prodotto è stato sottoposto a regolare e corretta
manutenzione e dopo un‘accurata pulizia e disinfezione, può essere
di nuovo noleggiato. Attenzione, le istruzioni sono parte integrante di
questo articolo e devono essere consegnate con il nuovo noleggio.
3.Manutenzione
Il prodotto deve essere pulito regolarmente con uno straccio pulito e
asciutto. L‘ impugnatura deve essere pulita con un detersivo in crema
non abrasivo. Non lubricare!! Rischio di caduta!!
Le estremità devono essere controllate e cambiate regolarmente; non
esitare a chiedere al proprio rivenditore.
4. Materiali
Tubi in alluminio anodizzato e impugnatura in polipropilene.
5.Trattamento dei riuti
Si prega di smaltire questo prodotto ai sensi delle direttive regionali.
6. Caratteristiche tecniche
Riferirsi alla tabella generale alla ne del manuale.
Questo prodotto è garantito per 24 mesi dalla data di acquisto, contro
eventuali difetti di fabbricazione. Conforme alle norme: DIN-EN-12182:
1999, EN-ISO 11334-1, DIN-EN-ISO 10993-1. Biocompatibile

Other manuals for 255618

1

This manual suits for next models

21

Other Herdegen Mobility Aid manuals

Herdegen 221000 User manual

Herdegen

Herdegen 221000 User manual

Herdegen Simply Roll» User manual

Herdegen

Herdegen Simply Roll» User manual

Herdegen 220 000 User manual

Herdegen

Herdegen 220 000 User manual

Herdegen 430920 User manual

Herdegen

Herdegen 430920 User manual

Herdegen 250 700 User manual

Herdegen

Herdegen 250 700 User manual

Herdegen 243800 User manual

Herdegen

Herdegen 243800 User manual

Herdegen Clipper I 500400 User manual

Herdegen

Herdegen Clipper I 500400 User manual

Herdegen 221000 User manual

Herdegen

Herdegen 221000 User manual

Herdegen 430920 User manual

Herdegen

Herdegen 430920 User manual

Herdegen 243865 User manual

Herdegen

Herdegen 243865 User manual

Herdegen 255618 User manual

Herdegen

Herdegen 255618 User manual

Herdegen 222850 User manual

Herdegen

Herdegen 222850 User manual

Herdegen 221800 User manual

Herdegen

Herdegen 221800 User manual

Popular Mobility Aid manuals by other brands

Ossenberg 940P Instructions for use

Ossenberg

Ossenberg 940P Instructions for use

Vermeiren Eco-Light instruction manual

Vermeiren

Vermeiren Eco-Light instruction manual

Medline SwivAssist Bar user guide

Medline

Medline SwivAssist Bar user guide

Drive NIMBO POSTERIOR user manual

Drive

Drive NIMBO POSTERIOR user manual

Guardian Sidestepper User Instructions & Warranty

Guardian

Guardian Sidestepper User Instructions & Warranty

Featherweight Scooter owner's manual

Featherweight

Featherweight Scooter owner's manual

Joerns Oxford UniFit Deluxe Leg Sling User instruction manual

Joerns

Joerns Oxford UniFit Deluxe Leg Sling User instruction manual

TOPRO OLYMPOS M user manual

TOPRO

TOPRO OLYMPOS M user manual

Hoggi BINGO user manual

Hoggi

Hoggi BINGO user manual

Timago TGR-R RS 8811 user manual

Timago

Timago TGR-R RS 8811 user manual

RoMedic BariBar user manual

RoMedic

RoMedic BariBar user manual

HT Systems KERA80 Technical manual

HT Systems

HT Systems KERA80 Technical manual

Thomashilfen tGo Instructions for use

Thomashilfen

Thomashilfen tGo Instructions for use

Malmsten AUTOLIFT i-swim2 instruction manual

Malmsten

Malmsten AUTOLIFT i-swim2 instruction manual

human care 90706 user manual

human care

human care 90706 user manual

panthera Bambino 3 Assembly instructions

panthera

panthera Bambino 3 Assembly instructions

human care Carl-Oskar Accessory manual

human care

human care Carl-Oskar Accessory manual

TOPRO TROJA NEURO user manual

TOPRO

TOPRO TROJA NEURO user manual

manuals.online logo
manuals.online logoBrands
  • About & Mission
  • Contact us
  • Privacy Policy
  • Terms and Conditions

Copyright 2025 Manuals.Online. All Rights Reserved.