5IP1730 - PasA
GB
GENERAL SAFETY PRECAUTIONS
This installation manual is intended for professionally compe-
tent personnel only.
Read the instructions carefully before beginning to install the
product. Incorrect installation may be a source of danger.
Packaging materials (plastic, polystyrene, etc.) must not be
allowed to litter the environment and must be kept out of the
reach of children for whom they may be a source of danger.
Before beginning the installation check that the product is in
perfect condition.
For repairs or replacements of product only original spare parts
must be used. These instruction must be kept and forwarded to
all possible future user of the system.
1. Reference
[1] Warning LED
[2] Sensitivity adjustment DIP
[3] Adjustment DIP
[4] Adjustment of the detection angle
[5] Adjustment of the detection width
[6] Adjusting key
[7] Power supply wiring
2. Installation and functioning
Firmly secure the radar as indicated in fig. 3 so that it can pro-
perly scan the entire area in front of the passageway. Never
place in the detection area any objects which may move such
as shades, signs or plants.
N.B.: The values of the table in fig. 3 must change depending
on the environment light, the colour of the floor as well as the
detected object color and speed.
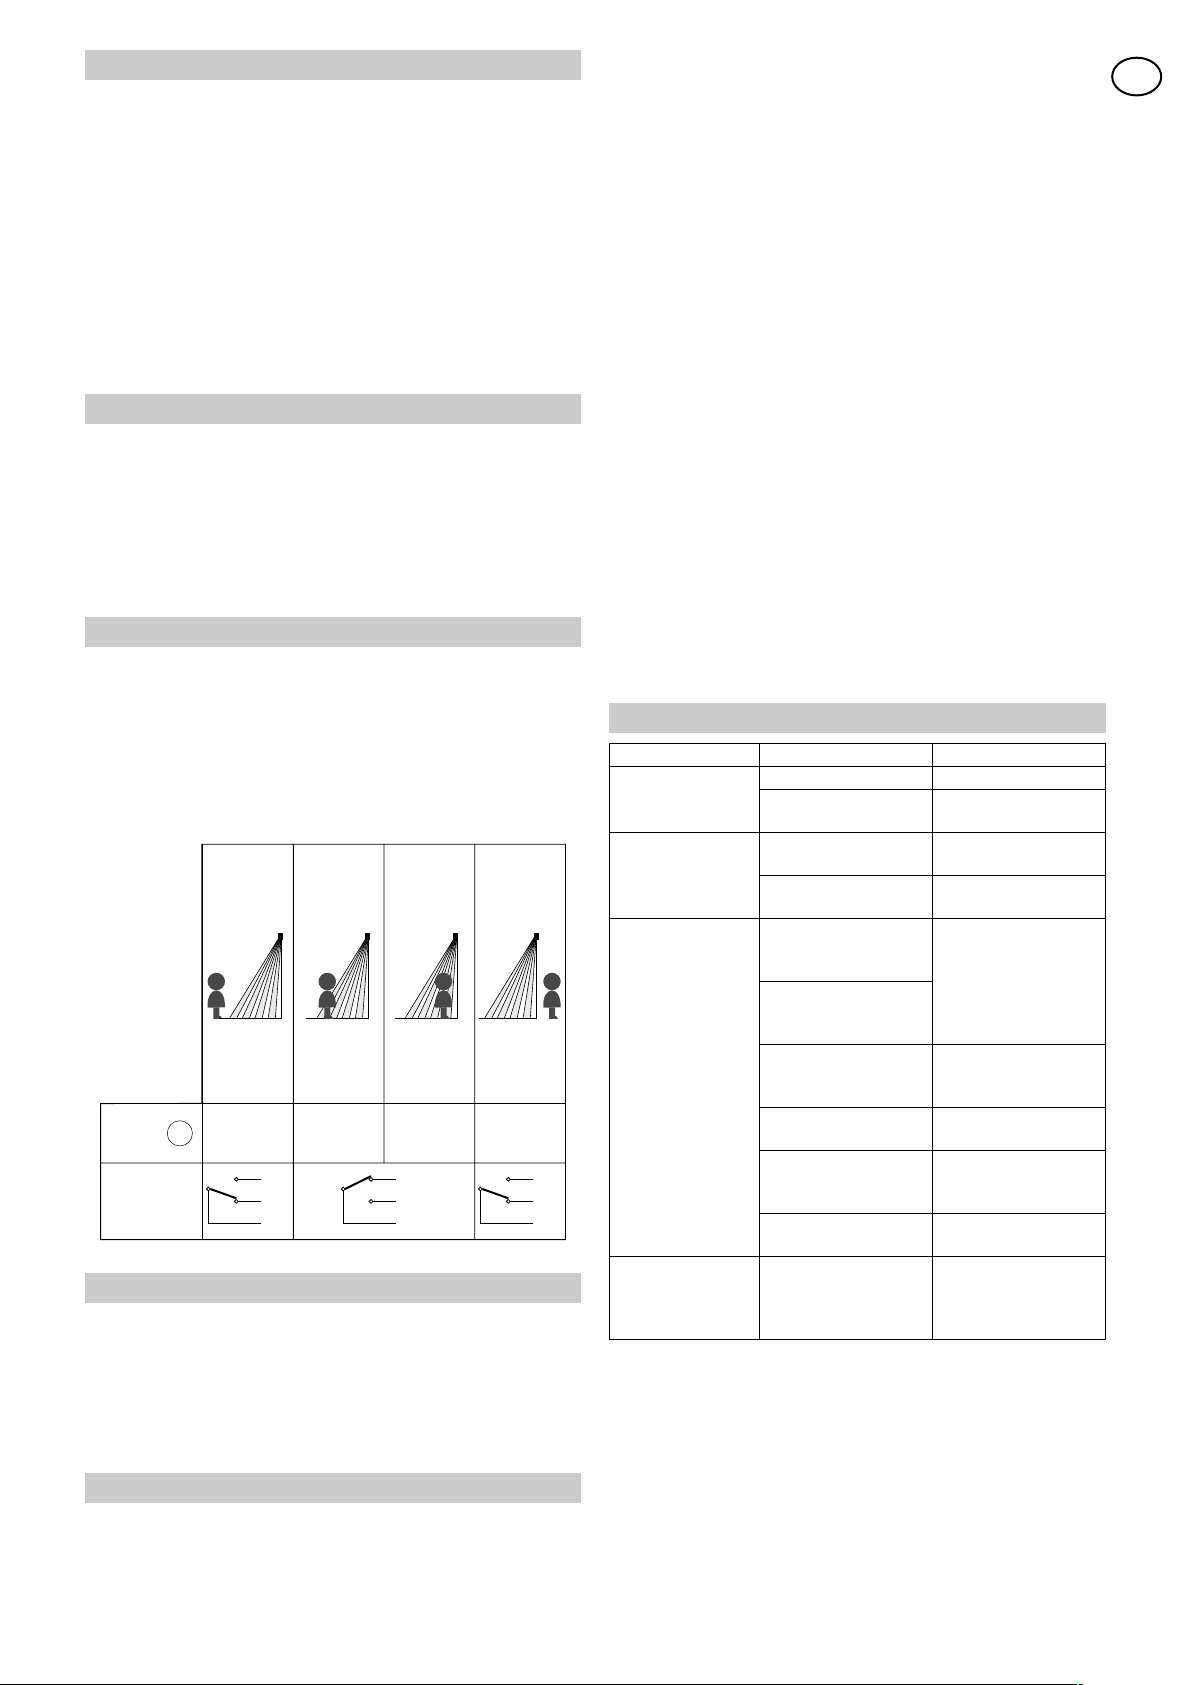
Output contact
Outside the
detection area
Inside the
motion detection
area
Inside the
presence
detection area
Outside the
detection area
Stand by Stand b y
Motion detection Motion/presence
detection
Led
GreenGreen Orange Red
Yellow
Green
White
Yellow
Green
White
Yellow
Green
White
1
3. Electrical connections
Pas A is able to detect persons moving as well as any presence
in area [B]. Connect as shown in Figure 4. When activated, the
radar performs the opening command ([*] fig. 4).
Connection of the NC contact (green) to terminal 8 of the
electronic board causes the radar, once activated, to perform
the safety re-opening command.
4. Detection area adjustment
4.1 (Fig. 5) Depth adjustment:
Regulate this range by adjusting the detection angle [4] using
the adjusting key [6]. In order to eliminate the detection areas,
position the Dips 7-8 [3] as shown in figure 5.
4.2 (Fig. 6) Adjustment of the area’s width:
The detecting width may either be moved sideways using the
key [6] or eliminated by turning the adjusting screws [5].
4.3 (Fig. 7) Adjustment of the detecting time:
You may adjust the time for detecting the presence inside the
area [B] by using Dips1-2 [3].
Attention: The radar does not detect the presence of any object
in area B for the first 10 s after powering. The detection area
must be clear from people and/or things.
Warning: It is advisable not to use the infinite time [ ∞] setting.
4.4 (Fig. 8) Frequency adjustment:
Change the frequency when the detection area overlaps the
area of another sensor. Range may be adjusted by about 4
degrees by acting on the Dips 3-4 [3].
4.5 (Fig. 9) Adjustment of the snow mode:
You may adjust the snow mode using Dips 5-6 [3].
4.6 (Fig. 10) Sensitivity adjustment:
[L] = Low
[M] = Average
[H] = High
5. Troubleshooting
Trouble Cause Solution
Does not operate Supply voltage Adjust the rated voltage.
Snapping, connection
failure
Check the wiring and
connector
Does not operate
from time to time
Stained detection
windows
Clean the detection
windows
Sensitivity is low Set the Sensitivity
Switch H.
Operates itself There is a moving
object in the detection
area
Check the installation
condition
There was a sudden
condition change in the
detection area
Radar is subject to
vibration
Secure the sensor
or set the Sensitivity
Switch “L.”
Sensitivity is high Set the Sensitivity
Switch “L.”
Other sensor’s detec-
tion area is overlapping
Change the frequency
switch setting with
DIP3-4
Waterdrops on
detection windows
Clean the detection
windows
Is continually in
operation
Presence timer is Infin-
ity. There was an abrupt
condition change in the
detection area
Turn the power off and
on again.
All right reserved
All data and specifications have been drawn up and checked
with the greatest care. The manufacturer cannot however take
any responsibility for eventual errors, ommisions or incomplete
data due to technical or illustrative purposes.