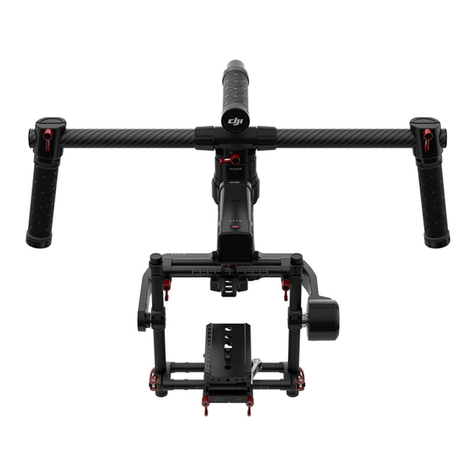
dji RONIN 2 User manual

Quick Start Guide
V1.0
RONIN 2
快速入门指南

1
Contents
Quick Start Guide 2
快速入门指南 9
EN
CH

EN
RONIN 2 Quick Start Guide
2
©2017 DJI OSMO All Rights Reserved.
Ronin 2 Diagram
1. Gimbal Dovetail Mount
2. RONINTM 2 Grip
3. SDI-Out Port
4. Power Button
5. 14.4 V Accessory Power Port
6. Pan Motor
7. Camera Top Cross Bar
8. Built-in GPS
9. SDI-In Port
10. 15 mm Rod and Focus Rod Mount
11. Camera Base Plate
12. Power Hub
13. Tilt Motor
14. Roll Motor
15. USB Type-C Port
16. Safety Hole
17. Battery Mount/Intelligent Battery
18. Battery Mount Release Button
19. Secondary Power Button
20. Battery Eject Buttons
21. 14.4 V P-Tap Port
22. 22.8 V DC-Out Port
23. Built-in Touch Panel
24. Built-in Antennas
25. D-Bus Port
26. 14.4 V Accessory Power Port
27. DC-In Port
28. 14.4 V Accessory Power Port
1
2
3
4
5
6
7
23
18
19
20
21
22
26
27
28
8
9
10
11
24
25
12
13
15
17
16
14

EN
RONIN 2 Quick Start Guide
©2017 DJI OSMO All Rights Reserved.
3
2
3
3
1
Remote Controller
Getting Started
A. Download the Ronin 2 App and Watch the Tutorials.
Search for “Ronin 2” in the App Store or Google Play and follow the instructions
for installation. Watch the tutorial on the ocial DJI website.
http://www.dji.com/ronin-2
1. Built-in Antenna
2. Pan Axis Speed Control Knob
3. Tilt Axis Speed Control Knob
4. Roll Axis Speed Control Knob
5. Power Button
6. Status LED
7. Mode Switch
8. Roll Knob
9. Control Joystick
10. Neck Strap Attachment
11. Prole Switch
12. C2 Button
13. Record Button
14. USB Type-C Port
15. Battery Level Indicators
16. Handle
17. Accessory Mounting Port
(1/4”-20)
18. CAN Port
19. C1 Button
Ronin 2 App
B. Charge the Batteries
Use the provided Charging Hub to fully charge the Ronin 2 Intelligent Batteries before first time use.
a. Press the Release button and open the corresponding charging port cover.
b. Insert the Intelligent Battery into the charging port to begin charging.
Charge the Remote Controller using a USB charger via the USB Type-C port.
Charging Time: 1.5 hours
Press the Battery Level button once to check
the battery level.
Charging Time: 2 hours (when charging at 2 A)
Press the Power button once to check the
battery level. Press and hold to turn on/off.
Power Outlet
100 - 240 V
Low
Low
High
High
1
2
3
5
6
7
8
9
10
11
12
17
19
18
13
15
14
16
4

EN
RONIN 2 Quick Start Guide
4
©2017 DJI OSMO All Rights Reserved.
2
4
3
11
Assembling the Ronin 2
A. Press the button on the Grip Feet and extend them outwards. Attach the upper and lower parts of the
Grip and then tighten them.
Mounting the Camera
A. Attach the Camera Top Cross Bar to the camera.
B. Attach the 15 mm Rod and the Focus Rod Mount to the camera.
C. Attach the Camera Base Plate to the camera.
When charging is complete, the battery level indicators will turn off and the Charging Hub’s LED will turn
green, sounding a signal.
Be sure to press the Release button on top of the Charging Hub when removing the battery.
2
3
1
B. The pan, tilt, and roll axis are locked by default. Unlock the tilt and roll axis to adjust their positions as
shown, then lock the tilt and roll axis again.
C. Toggle the lever 1 to the unlocked position. Next, attach the gimbal to the Grip 2 until the safety lock
engages. Now lock the lever.
D. Unlock the levers 3and remove the upper crossbar 4.
Pan Axis Lock
Roll Axis Lock
Tilt Axis Lock

EN
RONIN 2 Quick Start Guide
©2017 DJI OSMO All Rights Reserved.
5
D. Slide the camera 1 into the mounting plate until the safety lock engages, then lock the lever 2.
E. Attach the upper crossbar and tighten the securing knob 3 to the camera, then lock the levers 4.
Balancing
A. Balancing the Vertical Tilt
a. Unlock the tilt axis. Rotate the tilt axis so that the camera lens is pointing up.
b. Push up on the side levers 1to their unlocked position. Then adjust the camera's balance by
turning the adjustment knob 2. Make adjustments until the camera appears balanced without
tilting up or down.
c. Tighten the levers 3.
B. Balancing Depth for the Tilt Axis
a. Rotate the tilt axis so that the camera lens is pointing forward.
b. Toggle the lever 1to the unlocked position and then loosen the top securing knob 2. Adjust the
camera's balance by turning the adjusting knob 3 until the camera remains still when rotating the tilt axis
45 degrees upwards or downwards.
c. Tighten the securing knob 4and toggle the lever 5to the lock position.
d. Lock the tilt axis.
2
5
4
3
1
The roll axis arm can be extended if there isn't sucient mounting space for a large camera. Loosen the screws
on both sides of the roll axis to pull out the arm.
Before balancing the camera, connect the SDI cable and the camera's power cable, and install a Focus system.
3
4
2
1
2
3
1

EN
RONIN 2 Quick Start Guide
6
©2017 DJI OSMO All Rights Reserved.
C. Balancing the Roll Axis
a. Unlock the roll axis.
b. Toggle the lever 1to the unlocked position, then loosen the top securing knob 2. Adjust the
camera's position by turning the adjusting knob 3 until the camera remains still when rotating the
tilt axis 45 degrees to the left or right.
c. Tighten the securing knob 4and toggle the lever 5to the lock position.
d. Lock the roll axis.
Recheck the tilt axis balance. Loosen the securing knob and adjust the camera's position if the tilt axis
is not balanced.
D. Balancing the Pan Axis
* It is recommended to mount the provided MotionBlock before balancing the pan axis when shooting in
a high-speed situation for increased gimbal performance. Attach the MotionBlock to the pan axis and
tighten the screws as shown.
a. Unlock the pan axis. Lift up one side of the Grip.
b. Toggle the lever 1 to the unlocked position, then adjust the camera's position by turning the
adjustment knob 2until the camera remains still when rotating the pan axis 45 degrees while
lifting up one side of the Grip.
c. Tighten the lever 3.
*
3
24
5
1
1
2
13

EN
RONIN 2 Quick Start Guide
©2017 DJI OSMO All Rights Reserved.
7
1
2
13
Powering on and Activating the Ronin 2
A. Insert the Intelligent Batteries into the battery mount until the battery's Eject buttons are engaged.
B. Attach the battery mount to the gimbal until the Release button is engaged.
C. Make sure you unlock the pan, tilt, and roll axis before powering on the Ronin 2. Press and hold the
Power button on the gimbal or battery mount to turn on the Ronin 2.
D. On your mobile device, switch on Bluetooth and launch the Ronin App. With a secure internet
connection, follow the onscreen instructions to activate Ronin 2 for the rst time.
Built-in Touch Panel Settings
A. Press the Mounting Mode Button to select a mounting mode. The
screen will display Handheld , Car Mount , Aerial or
Tripod mode .
B. Press the Follow Mode Button to select a follow mode. The screen
will display Lock , Follow , FPV or Recenter mode 0º .
C. Enter the Motor settings page and select Auto Tune. You can also
manually adjust the Stiness. Strength, Filter, and Control values
are advanced settings and should only be adjusted with proper
knowledge.
D. Enter the SmoothTrack settings page to adjust Speed, Deadband,
and Acceleration values for the pan, tilt, and roll axes separately.
E. Enter the Remote settings page to adjust Deadband, Max Speed,
and Smoothing values, for the pan, tilt, and roll axes individually
and assign them to the remote controller.
F. Enter the Settings page to adjust Bind Remote, Remote Frequency
Band, Speaker, and Axis Mode. The Bluetooth password is
available via the "More" tab.
1. Mounting Mode Button
2. Follow Mode Button
3. Back Button
4. Toggle Button
5. Jog Wheel
6. OK Button
7. Lock Button
8. Motor Pause Button
Pan
Tilt
Roll
SmoothTrack
Push Pan
OFF
SmoothTrack
ON
20
Speed
5
Deadband
20
Accel
60%
212
0º
Motion
Channel
Remote
0
0
Left
Right
60%
212
0º
Deadband
10
Max Speed
50
Smoothing
15
Pan
Test Endpoint
Profile
General
More
Settings
Remote Freq.
Bind Remote
2.4HzStart
ON
Axis Mode
3-axis
Calibrate System
60%
212
0º
Motor
0
Power
-6
-2
1.9
Atti Err
0.6
0.1
0.02
Atti
-0.66
-0.15
Stiffness
Tilt
6
Roll
10
Pan
60%
212 0º
Basic
More
Auto tune
10
Speaker
: Bluetooth Connection Status
: Remote Controller Signal
Strength
: GPS Signal
: Motor Pause Mode
: Axis Mode
: Working Battery Number
: Battery Level
12
1 2
3 4
56
7 8
EN
RONIN 2 Quick Start Guide
8
©2017 DJI OSMO All Rights Reserved.
Mechanical & Electrical Characteristics
Weight Including Grip: 14 lb (6.3 kg)
Excluding Grip:11 lb (4.9 kg)
Dimensions Excluding Grip: 350 mm (W) × 416 mm (D) × 530 mm (H)
Including Grip: 630 mm (W) × 416 mm (D) × 720 mm (H)
Input Power Intelligent Battery: 4280 mAh-22.8 V
Working Current Static current: ≈300 mA (@22.8 V)
Dynamic current: ≈500 mA (@22.8 V)
Locked motor current: Max 15 A (@22.8 V)
Operating Frequency 2.4-2.4835 GHz; 5.725-5.850 GHz
Transmitter Power (EIRP) 2.4 GHz
FCC: ≤25 dBm; CE: ≤20 dBm; SRRC: ≤20 dBm
5.8 GHz
FCC: ≤25 dBm; CE: ≤14 dBm; SRRC: ≤14 dBm
Operating Temperature -4° to 122° F (-20° to 50° C)
For more information, read the User Manual:
http://www.dji.com/ronin-2
※This content is subject to change without prior notice.
Remote Controller Operation
A. Press and hold the power button to turn on the remote controller. The status LED will glow solid green,
indicating that it is connected to the gimbal.
B. Sets the control speed for each axis.
C. Toggles through the various operation modes.
D. Toggles the Prole switch to select preset parameters.
E. Turn the Roll Knob to control roll axis movement. Push the Control Joystick up or down to control tilt axis
movement. Push the Control Joystick left or right to control pan axis movement.
The status LED of the remote controller is disconnected from the gimbal when it glows solid red which will
require a re-binding. Enter the Settings page via the built-in touch panel and select “Bind Device.” Within
the duration of 30 seconds, press C1+C2, and the Record Button simultaneously on the remote controller
until you hear a continuous beep. The status LED will glow solid green once a successful connection is
established.
+
-
PAN
+-
ROLL
REC
ROLL
MODE
RONIN
POWERED BY
Free
Follow
Recenter
+
-
TILT
PROFILE
Default
User 1
User 2
A
C
E
D
B

©2017 大疆灵眸 版权所有
9
CH
RONIN 2 快速入门指南
认识 Ronin 2
1. 云台快拆接口
2. 手持环
3. SDI-OUT 输出接口
4. 电源按键 1
5. 14.4 V 电源 /配件输出接口
6. 平移轴电机
7. 摄影机顶部固定板
8. 内置 GPS
9. SDI-IN 输入接口
10. 15 mm 导管及固定组件
11. 摄影机底部固定板
12. 电源分配模块
13. 俯仰轴电机
14. 横滚轴电机
15. USB Type-C 接口
16. 安全绳挂孔
17. 电池仓 /智能电池
18. 电池仓锁紧按键
19. 电源按键 2
20. 电池锁紧按键
21. 14.4 V P-Tap 接口
22. 22.8 V 直流输出接口
23. 云台控制面板
24. 内置天线
25. D-Bus 接口
26. 14.4 V 电源 /配件输出接口
27. DC-IN 直流输入接口
28. 14.4 V 电源 /配件输出接口
1
2
3
4
5
6
7
23
18
19
20
21
22
26
27
28
8
9
10
11
24
25
12
13
15
17
16
14

10
©2017 大疆灵眸 版权所有
CH
RONIN 2 快速入门指南
2
3
3
1
认识遥控器
准备
A. 下载 RONINTM 2 App 和观看教学视频
请在软件商店或使用移动设备扫描二维码下载 Ronin 2 App。
请在 DJI 官网观看 Ronin 2 教学视频
http://www.dji.com/cn/ronin-2
1. 内置天线
2. 平移轴速度控制旋钮
3. 俯仰轴速度控制旋钮
4. 横滚轴速度控制旋钮
5. 电源按键
6. 状态指示灯
7. 跟随模式切换开关
8. 横滚轴旋钮
9. 摇杆
10. 吊带挂钩
11. 配置切换开关
12. C2 按键
13. 录影按键
14. USB Type-C 接口
15. 电池电量指示灯
16. 提手
17. 配件安装接口(1/4”-20)
18. CAN 接口
19. C1 按键
B. 充电
使用标配充电管家给智能电池充电。
a. 按下充电管家顶部按键,打开充电接口保护盖。
b. 对准电池与充电管家的电池导轨,插入电池。
使用 USB 充电器,通过遥控器 USB Type-C 接口给遥控器充电。
完全充满两块电池约需 1.5 小时。
短按一次电池电量开关查看电池电量。
完全充满约需 2小时(充电电流为 2 A 时)。
短按一次电源按键查看电量,长按电源按键开启遥控器。
1
2
3
5
6
7
8
9
10
11
12
17
19
18
13
15
14
16
4
交流电源
100~240 V
低
低
高
高
Ronin 2 App

©2017 大疆灵眸 版权所有
11
CH
RONIN 2 快速入门指南
2
4
3
11
完全充满约需 2小时(充电电流为 2 A 时)。
短按一次电源按键查看电量,长按电源按键开启遥控器。
安装云台主体与手持环
A. 按压手持环脚架圆形按钮,同时展开脚架;将手持环上下两部分衔接,旋转拧紧。
安装摄影机
A. 安装摄影机顶部固定板。
B. 安装 15 mm 导管及固定组件。
C. 安装摄影机底部固定板。
智能电池电量指示灯全部熄灭且充电管家顶部的指示灯绿灯常亮表示电已充满,同时伴随声音提示。遥
控器电量指示灯熄灭表示电已充满。
充电完成后,按住充电管家顶部,然后移除电池。
B. 云台主体出厂时平移、横滚、俯仰轴均为锁定状态,安装之前可先将横滚轴和俯仰轴解锁并调整图示
状态,再分别锁住横滚轴和俯仰轴。
C. 打开锁扣 1,按图示方向将云台主体水平嵌入手持环 2。当安全锁弹起锁紧,扣紧锁扣。
D. 打开锁扣 3,拆下上部横杆 4,方便安装摄影机。
平移轴机械锁
横滚轴机械锁
俯仰轴机械锁
2
3
1

12
©2017 大疆灵眸 版权所有
CH
RONIN 2 快速入门指南
D. 将摄影机嵌入安装底座 1,当安全锁弹起锁紧,扣紧锁扣 2。
E. 安装横杆,拧紧旋钮 3,扣紧锁扣 4,使其与摄影机顶部固定板固定。
平衡调节
A. 俯仰轴的垂直平衡调节
a. 解锁俯仰轴。翻转摄影机使得镜头垂直朝上。
b. 打开锁扣 1,旋转左右微调旋钮 2调整摄影机位置。
c. 锁紧锁扣 3。摄影机镜头垂直朝上时能稳定停留代表已调节平衡。
B. 俯仰轴的前后平衡调节
a. 翻转摄影机使镜头朝前。
b. 打开锁扣 1,拧松固定旋钮 2。旋转微调旋钮 3调整摄影机位置。
c. 拧紧固定旋钮 4,锁紧锁扣 5。使摄影机向上或向下倾斜 45°,若摄影机能稳定停留,表示已调
节平衡。
d. 锁定俯仰轴。
2
5
4
3
1
2
3
1
横滚轴力臂可伸缩,若发现摄影机安装空间不足,可拧松力臂两侧螺丝后伸长力臂。
摄影机安装完成后,请先连接 SDI 视频线与摄影机供电线,安装跟焦器并连接供电接口后再进行平衡调节。
3
4
2
1

©2017 大疆灵眸 版权所有
13
CH
RONIN 2 快速入门指南
C. 横滚轴的平衡调节
a. 解锁横滚轴。
b. 打开锁扣 1,拧松固定旋钮 2。旋转微调旋钮 3调整摄影机位置。
c. 拧紧固定旋钮 4,锁紧锁扣 5。使摄影机向左或向右倾斜45°,若摄影机能稳定停留,表示已调
节平衡。
d. 锁定横滚轴。
横滚轴调平过程中,拧松固定旋钮的时候可能由于重力原因造成摄影机前后位移,此时需检查俯仰轴平
衡状态。若不平衡,拧松固定旋钮,修正产生的位移即可。
D. 平移轴的平衡调节
* 在车载或航拍等高速场景拍摄时,建议先安装高速拍摄吸振器,再调节平移轴平衡。按图示套入吸振
器,拧紧螺丝即可。
a. 解锁平移轴。抬起手持环一侧,观察摄影机倾斜方向。
b. 打开锁扣 1,旋转平移轴微调旋钮 2调整摄影机位置。
c. 锁紧锁扣 3。抬起手持环一侧,旋转云台 45°,若云台平移轴静止不动,表示已调节平衡。
*
3
24
5
1
1
2
13

14
©2017 大疆灵眸 版权所有
CH
RONIN 2 快速入门指南
安装电池与激活
A. 将智能电池嵌入电池仓导轨后推到底,直至电池锁紧按键弹起锁紧。
B. 将电池仓推入云台电池接口,直至电池仓锁紧按键弹起锁紧。
C. 开启云台电源之前,分别将云台三轴解锁。长按电池仓电源按键或 Ronin 2 电源按键,开启云台。
D. 开启移动设备上的蓝牙功能。
E. 运行 Ronin 2 App,按提示激活 Ronin 2。激活过程中需连接互联网。
云台控制面板参数设置
A. 选择挂载模式,屏幕显示为 手持、 车载、 飞行或 三脚架模式。
B. 选择跟随模式,屏幕显示为 锁定、 跟随、 FPV 或0º 回中模式。
C. 进入电机 (Motor) 设置,选择自动校准 (Auto Tune)。可以
手动设置力度 (Stiffness) 值,其它参数如强度 (Strength) 、
滤波 (Filter) 、超前控制 (Control) 不建议调整。
D. 设置 SmoothTrack 参数,包括速度 (Speed) 、死区
(Deadband) 及加速度 (Accel) 。
E. 设置遥控器 (Remote) 参数,包括死区 (Deadband) 、最
大速度 (Max Speed) 和平滑度 (Smoothing) ;映射三轴
通道。
F. 进入设置 (Settings) 页面。在通用界面 (General) 设置对
频 (Bind Remote) 、工作频率 (Remote Freq.) 、扬声器
(Speaker) 及轴模式 (Axis Mode) ;在更多界面 (More)
查看蓝牙密码等。
Pan
Tilt
Roll
SmoothTrack
Push Pan
OFF
SmoothTrack
ON
20
Speed
5
Deadband
20
Accel
60%
212
0º
Motion
Channel
Remote
0
0
Left
Right
60%
212
0º
Deadband
10
Max Speed
50
Smoothing
15
Pan
Test Endpoint
Profile
General
More
Settings
Remote Freq.
Bind Remote
2.4HzStart
ON
Axis Mode
3-axis
Calibrate System
60%
212
0º
Motor
0
Power
-6
-2
1.9
Atti Err
0.6
0.1
0.02
Atti
-0.66
-0.15
Stiffness
Tilt
6
Roll
10
Pan
60%
212 0º
Basic
More
Auto tune
10
Speaker
:蓝牙连接状态
:遥控器信号强度
:卫星数
:电机关闭模式
:轴模式
:工作电池数量
:电池电量
12
1. 挂载模式按键
2. 跟随模式按键
3. 返回按键
4. 切换按键
5. 转盘
6. 确认按键
7. 锁定按键
8. 电机关闭按键
1 2
3 4
56
7 8
©2017 大疆灵眸 版权所有
15
CH
RONIN 2 快速入门指南
遥控器操作
A. 长按电源按键开启遥控器电源,遥控器状态指示灯绿灯常亮表示连接正常。
B. 设置摇杆控制速度。
C. 选择跟随模式。
D. 选择配置参数。
E. 上下推动摇杆控制俯仰轴转动,左右推动摇杆控制平移轴转动。旋转横滚轴旋钮控制横滚轴转动。
机械 & 电子特性
重量 含云台手持环:6.3 kg
云台主体:4.9 kg
尺寸 云台主体:350 mm (W)×416 mm (D)×530 mm (H)
含云台手持环:630 mm (W)×416 mm (D)×720 mm (H)
云台输入电源 智能电池 4280 mAh-22.8 V
工作电流 静态电流:约 300 mA (@22.8 V)
动态电流:约 500 mA (@22.8 V)
堵转电流:最大 15 A (@22.8 V)
工作频率 2.4-2.4835 GHz; 5.725-5.850 GHz
发射功率 2.4 GHz
FCC: ≤25 dBm; CE: ≤20 dBm; SRRC: ≤20 dBm
5.8 GHz
FCC: ≤25 dBm; CE: ≤14 dBm; SRRC: ≤14 dBm
工作环境温度 -20℃至 50℃
若遥控器状态指示灯红灯常亮,表示未与云台连接,需要与云台对频。对频步骤:在云台控制面板设置
界面选择对频,于 30 秒内同时按下 C1、C2 和录影按键直至发出“嘀 - 嘀- 嘀”提示音后松手,等待状
态指示灯变为绿灯常亮表示对频成功。
了解产品详细信息,请访问以下网址下载 《用户手册》
http://www.dji.com/cn/ronin-2
※ 内容如有更新,恕不另行通知。
+
-
PAN
+-
ROLL
REC
ROLL
MODE
RONIN
POWERED BY
Free
Follow
Recenter
+
-
TILT
PROFILE
Default
User 1
User 2
A
C
E
D
B


DJI Support
DJI 技术支持
http://www.dji.com/support
RONIN is a trademark of DJI OSMO.
Copyright © 2017 DJI OSMO All Rights Reserved. Printed in China.
YC.BZ.SS000070.01
Other manuals for RONIN 2
7
Table of contents
Other dji Camera Accessories manuals
Popular Camera Accessories manuals by other brands

Big Game Treestands
Big Game Treestands THE DELTA instruction manual

Sunlight
Sunlight Lion ESS 48V/100 installation manual

Platinum
Platinum PT-TRP542CL Quick setup guide

Rollei
Rollei Mark III T2S user guide

Aquatec Equipment
Aquatec Equipment PondMax PS3500 instruction manual

Okina USA
Okina USA SIR-754AILP-IO Operation & installation manual

Flyability
Flyability Elios 3 Safety Guidelines

Basler
Basler slA750-60fm user manual

EnerSys
EnerSys Nexsys 12NXS26 Operation and maintenance instructions

Nauticam
Nauticam NA-R7 user manual

Gates Underwater Products
Gates Underwater Products XA25 Setup, use and care guide

Philips
Philips PowerLife LR14PS6C Specifications