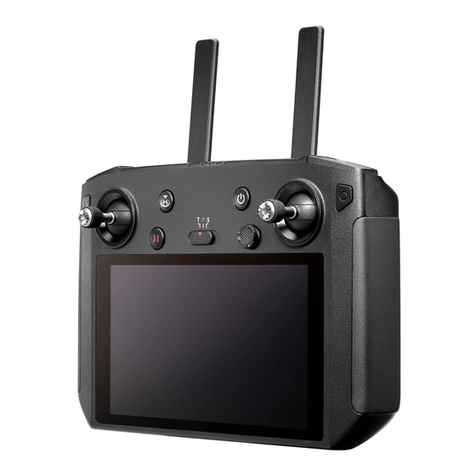
dji RM500 User manual

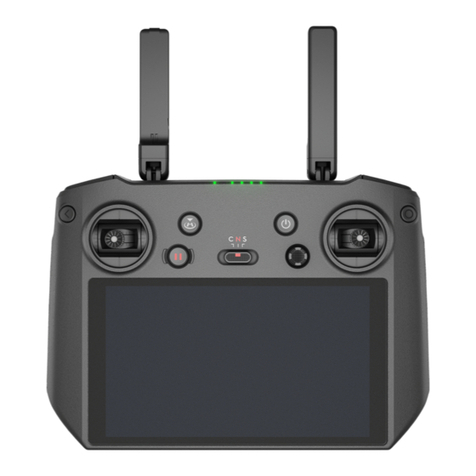
DJI Smart Controller
Quick Start Guide
快速入门指南
快速入門指南
クイックスタートガイド
퀵스타트 가이드
Kurzanleitung
Guía de inicio rápido
Guide de démarrage rapide
Guida di avvio rapido
Snelstartgids
Guia de início rápido
Guia de Início Rápido
Краткое руководство пользователя
v1.0


2
EN
Disclaimer
Congratulations on purchasing your new DJI™ product. The information in this document
affects your safety and your legal rights and responsibilities. Read this entire document
carefully to ensure proper conguration before use. Failure to read and follow instructions
and warnings in this document may result in serious injury to yourself or others, damage
to your DJI product, or damage to other objects in the vicinity. This document and all other
collateral documents are subject to change at the sole discretion of DJI. Visit www.dji.com
for the latest information for this product.
By using this product, you hereby signify that you have read this disclaimer and warning
carefully and that you understand and agree to abide by the terms and conditions herein.
You agree that you are solely responsible for your own conduct while using this product,
and for any consequences thereof. You agree to use this product only for purposes
that are proper and in accordance with all applicable laws, rules, and regulations, and
all terms, precautions, practices, policies and guidelines DJI has made and may make
available. DJI accepts no liability for damage, injury or any legal responsibility incurred
directly or indirectly from the use of this product. The user shall observe safe and lawful
practices including, but not limited to, those set forth in this document.
Notwithstanding above, your statutory rights under applicable national legislation are not
affected by this disclaimer.
DJI is a trademark of SZ DJI TECHNOLOGY CO., LTD. (abbreviated as “DJI”) and its
afliated companies. Names of products, brands, etc., appearing in this document are
trademarks or registered trademarks of their respective owner companies. This product
and document are copyrighted by DJI with all rights reserved. No part of this product or
document shall be reproduced in any form without prior written consent of or authorization
from DJI.
Warning
Always stay alert when using the DJI Smart Controller (hereinafter referred as “Smart
Controller”) to control an Unmanned Aerial Vehicle (UAV). Carelessness may result in
serious harm to yourself and others. Always download and read the Disclaimer and Safety
Guidelines of the aircraft and the Smart Controller’s User Manual before use.
1. Fully charge the Smart Controller before each ight.

3
EN
2. If the Smart Controller is powered on and has not been used for ve minutes, it will
sound an alert. After six minutes, it will automatically power off. Move the sticks or
perform some other action to cancel the alert.
3. Ensure the antennas are unfolded and adjusted to the proper position to achieve the
optimal transmission quality.
4. Contact DJI support to repair or replace the antennas if they are damaged. Damaged
antennas will greatly decrease performance.
5. Link the Smart Controller and the aircraft again if you change the aircraft.
6. Ensure to power off the aircraft before the Smart Controller.
7. Fully charge the Smart Controller every three months.
8. Immediately charge the Smart Controller when its power level decreases to 0% to
prevent the Smart Controller from damage due to over discharge for an extended
period. Discharge the Smart Controller to a power level between 40% and 60% if
stored for an extended period.
9. DO NOT cover the air vent or the air intake on the Smart Controller. Otherwise, the
Smart Controller may become too hot, which could affect its performance.
10. DO NOT disassemble the Smart Controller without the assistance of a DJI authorized
dealer. Always contact DJI or a DJI authorized dealer to replace the Smart Controller’s
components.
Introduction
The DJI Smart Controller features OCUSYNC™ 2.0 technology, capable of controlling
aircraft that support the technology, and providing a live HD view from the aircraft's
camera. It can transmit image data at distances of up to 8 km and comes with a number
of aircraft and gimbal controls as well as some customizable buttons.
The built-in 5.5-inch high brightness 1000 cd/m² screen has a resolution of 1920×1080
pixels, featuring an Android system with multiple functions such as Bluetooth and GNSS. It
supports to connect to the Internet via Wi-Fi.
The Smart Controller has a maximum working time of 2.5 hours .

4
EN
Overview
1. Antennas
2. Back Button / Function Button
3. Sticks
4. RTH Button
5. Flight Pause Button
6. Flight Mode Switch
7. Status LED
8. Battery Level LEDs
9. 5D Button
10. Power Button
11. Conrm Button / Customizable Button C3
12. Touch Screen
13. USB-C Port
14. Microphone
15. Gimbal Dial
16. Record Button
17. HDMI Port
18. MicroSD Card Slot
19. USB-A Port
20. Focus / Shutter Button
21. Camera Setting Dial
22. Air Vent
23. Sticks Storage Slot
24. Customizable Button C2
25. Speaker
26. Customizable Button C1
27. Air Intake
1
69999
1010101010101010101010101010
10
12
10
13
77 8
11
3
24
14
5
15
16
17 18 19
20
21
22
26
27
25
23
24

5
EN
①Please refer to the Specications for details on supported aircraft.
②The Smart Controller can reach its maximum transmission distance (FCC) in a wide open area with
no electromagnetic interference using a MAVICTM 2 at an altitude of about 100 meters.
③The maximum working time was tested in a lab environment and is for reference only.
④A pair of sticks are stocked in the Sticks Storage Slot before delivery. In the illustrations used in the
overview section, the sticks have already been mounted on the Smart Controller.
1. Battery Level and Charging
Press the power button once to check
the battery level.
Press and hold for two seconds or
press for a few seconds to power on
the Smart Controller.
Low
It takes about two hours to fully charge the Smart
Controller using the standard USB power adapter.
• Please use the ofcial USB power adapter to charge the Smart Controller. When a
standard USB power adapter is not available, it is recommended to use an FCC/
CE certied USB power adapter rated 12V/2A.
• Please recharge the battery at least every three months to prevent over
discharging - the battery will deplete when stored for an extended period.
Power Outlet
100~240 V
USB
Power Adapter
USB-C Cable
HighBattery

6
EN
2. Preparing the Smart Controller
The optimal transmission range is shown above. Ensure the antennas are facing
towards the aircraft. When the angle between the antennas and the back of the Smart
Controller is 80° or 180°, the connection between the Smart Controller and the aircraft
can reach its optimal performance.
The illustrations above show situations where the operator and aircraft are far away.
Lift the antennas Remove the sticks Rotate to attach the sticks
•Ensure the control sticks are rmly mounted.
•In real operation, the DJI GOTM 4 app will prompt to warn that the transmission
signal is weak, and please adjust the antennas to ensure that the aircraft is back
to the optimal transmission range.
80°

7
EN
3. Activating your Smart Controller
4. Linking
Please check the internet connection if activation fails. If the internet connection is normal,
please retry to activate the Smart Controller. Contact DJI if activation fails several times over.
Internet
A brand new Smart Controller needs to be activated rst. Activation requires
an Internet connection.
When the Smart Controller is purchased together with an aircraft as a combo, it is
already linked to the aircraft. If not, please follow the steps below to link the Smart
Controller and the aircraft after successful activation.
1. Power on the Smart Controller and the aircraft.
2. Press down the customizable buttons C1, C2, and the record button simultaneously.
The status LED will blink blue and the Smart Controller will sound a double beep to
indicate that linking starts.
3. Press the aircraft’s linking button and then release. The Smart Controller’s status
LED will be solid green if linking is successful.
Power on the
Smart Controller
Select a
Preferable Language
Follow the
Prompts to Activate
Hello
Next
Welcome
Start
Please refer to the DJI Smart Controller User Manual for more linking methods.
To download the manual, please visit http://www.dji.com/dji-smart-controller.

8
EN
• Manual Takeoff/Landing
Combination stick command
to start/stop the motors.
5. Flight
Before taking off, make sure the Aircraft Status Bar in the DJI
GO 4 app displays “Ready to Go (GPS)”. Ready to Go (GPS)
• Auto Takeoff/Landing
Tap “Auto Takeoff”/ “Auto Landing” in DJI GO 4 to start/stop the motors.
Auto Takeoff
OR
Slowly push the left
stick up to take off.
Slowly push the left stick down until
the aircraft lands. Hold for a few
seconds to stop the motors.
Auto Landing
The default flight control is known as Mode 2. The left stick controls the aircraft’s
altitude and heading, while the right stick controls its forward, backward, and left and
right movements. The gimbal dial controls the camera’s tilt.
Left Stick
Up
Down
Turn Left Turn Right
Right Stick Forward
Backward
Left
Right

9
EN
Specications
Ocusync 2.0
Operation Frequency Range 2.400-2.4835 GHz; 5.725-5.850 GHz*
Max Transmission Distance
(Unobstructed, free of interference)
2.400-2.4835 GHz:
8 km (FCC); 4 km (CE); 4 km (SRRC); 4 km (MIC)
5.725-5.850 GHz:
8 km (FCC); 2 km (CE); 5 km (SRRC)
Transmitter Power (EIRP)
2.400-2.4835 GHz:
25.5 dBm (FCC); 18.5 dBm (CE)
19 dBm (SRRC); 18.5 dBm (MIC)
5.725-5.850 GHz:
25.5 dBm (FCC); 12.5 dBm (CE); 18.5 dBm (SRRC)
Wi-Fi
Protocol WiFi Direct, Wi-Fi Display, 802.11a/g/n/ac, WiFi
with 2×2 MIMO is supported
Operation Frequency Range 2.400-2.4835 GHz; 5.150-5.250 GHz*
5.725-5.850 GHz*
Transmitter Power (EIRP)
2.400-2.4835 GHz:
21.5 dBm (FCC); 18.5 dBm (CE)
18.5 dBm (SRRC); 20.5 dBm (MIC)
5.150-5.250 GHz:
19 dBm (FCC); 19 dBm (CE)
19 dBm (SRRC); 19 dBm (MIC)
5.725-5.850 GHz:
21 dBm (FCC); 13 dBm (CE); 21 dBm (SRRC)
• The motors can only be stopped mid-ight when the ight controller detects a
critical error.
• Be sure the Smart Controller is linked to the aircraft.

10
EN
Bluetooth
Protocol Bluetooth 4.2
Operation Frequency Range 2.400-2.4835 GHz
Transmitter Power (EIRP) 4 dBm (FCC); 4 dBm (CE); 4 dBm (SRRC); 4 dBm
(MIC)
General
Battery 18650 Li-ion (5000 mAh @ 7.2 V)
Charge Type Supports USB power adapters rated 12V/2A
Rated Power 15 W
Storage Capacity ROM 16 GB + Scalable (MicroSD)
Charge Time 2 hours (Using a USB power adapter rated 12V/2V)
Working Time 2.5 hours
Video Output Port HDMI Port
Power Supply Current / Voltage
(USB-A port) 5 V/ 900 mA
Operation Temperature Range -4° to 104° F (-20° to 40° C)
Storage Temperature Range
Less than one month: -22° to 140° F (-30° to 60° C)
One month to three months: -22° to 113° F (-30° to
45° C)
Three months to six months: -22° to 95° F (-30° to
35° C)
More than six months: -22° to 77° F (-30° to 25° C)
Charging Temperature Range 41° to 104° F (5°~40° C)
Supported Aircraft Models** Mavic 2 Pro; Mavic 2 Zoom
GNSS GPS+GLONASS
Weight Approx. 630 g
Model RM500
* Local regulations in some countries prohibit the use of the 5.8 GHz and 5.2 GHz frequencies and in
some regions the 5.2 GHz frequency band is only allowed for indoor use.
** The Smart Controller will support more DJI aircrafts in future. Please visit the ofcial website for the
latest information.
Other manuals for RM500
1
Table of contents
Other dji Controllers manuals
Popular Controllers manuals by other brands

process-informatik
process-informatik CONNECT-CONTROL-EUROPE Operation Quick Start Guide

Chauvet
Chauvet Obey 40 user manual

Epson
Epson S1C17M03 Software setup guide

LiquoSystems
LiquoSystems iFerm Nano Tank operating instructions

Lynxspring
Lynxspring ONYXX LX BZ424-LX Installation and wiring guide

rotork
rotork CK Series installation manual

Trox
Trox EASYLAB TCU3 Series Installation and operating manual

Enttec
Enttec PIXELATOR MINI Application guide

Samson
Samson 43-6 Mounting and operating instructions

Klutch
Klutch 57392 owner's manual

AL-KO
AL-KO UP4 Translation of the original installation instructions

Schischek
Schischek ExMax CTM Series manual