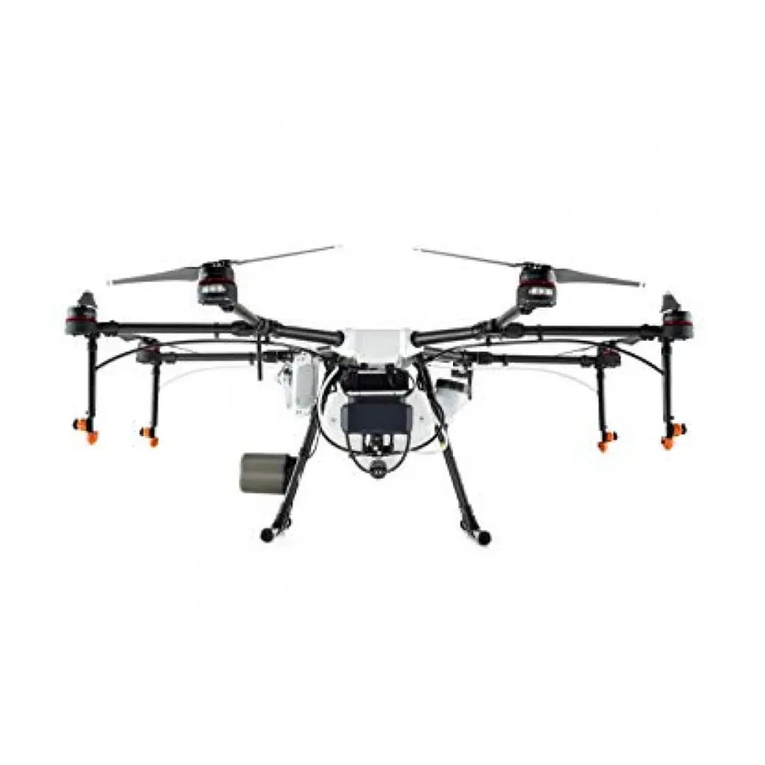
dji AGRAS MG-1 User manual

AGRAS MG-1
User Manual
V1.0 2016.02

AGRAS MG-1 User Manual
© 2016 DJI. All Rights Reserved. 2
Contents
Installation ................................................................................................................................................................ 3
Mounting the Landing Gear .............................................................................................................................. 3
Mounting the Liquid Tank.................................................................................................................................. 4
Unfolding the Frame Arms ................................................................................................................................ 5
Mounting the Sprinklers.................................................................................................................................... 5
Mounting the Radar-Assisting Altitude Stabilization System ............................................................................. 7
Connecting the Batteries................................................................................................................................... 7
Remote Controller..................................................................................................................................................... 9
Profile................................................................................................................................................................ 9
Prepare the Remote Controller ......................................................................................................................... 9
Remote Controller Diagram............................................................................................................................. 10
Using the Remote Controller ........................................................................................................................... 10
Turning the Remote Controller On and Off...................................................................................................... 10
Remote Controller LED .................................................................................................................................... 14
Operation Status Display Panel ....................................................................................................................... 15
Aircraft .................................................................................................................................................................... 18
Profile.............................................................................................................................................................. 18
Operation Mode.............................................................................................................................................. 18
Radar Assisted Altitude Stabilization System ................................................................................................... 22
No Liquid Warning........................................................................................................................................... 23
Return-to-Home (RTH) .................................................................................................................................... 24
Low Battery Level Warning.............................................................................................................................. 25
Flight ....................................................................................................................................................................... 26
Starting and Stopping the Motors ................................................................................................................... 26
Appendix................................................................................................................................................................. 27
Specifications .................................................................................................................................................. 27
Aircraft Status Indicator Description................................................................................................................ 28
AGRAS MG-1 User Manual
© 2016 DJI. All Rights Reserved. 3
Installation
Mounting the Landing Gear
The structures of the two landing gear legs are different. The one with a compass cable should be
mounted to the right side of the aircraft (with its tail facing you).
1. Mounting the right landing gear leg
There is a compass cable in the landing gear leg. Connect the compass cable before mounting the landing gear leg.
Connect the compass cable to the compass port in the landing gear mount on the right side of the center frame.
Use tools such as tweezers if needed.
Mount the landing gear leg to the center frame. DO NOT damage the compass cable.
Insert and tighten M3x10 screws.
2. Follow the step 2 and 3 above to mount the left landing gear leg.
Aircraft’s Tail
Compass Cable
(For the right landing gear leg only)
Compass Port
Compass Cable
Hose Bracket

AGRAS MG-1 User Manual
© 2016 DJI. All Rights Reserved. 4
Mounting the Liquid Tank
1. Insert the four liquid tank plugs into the mounting holes on the liquid tank.
2. Hold up the liuid tak to the loe positio of the ete fae ith the liuid pup faig the aiaft’s tail.
3. Align the mounting holes on the liquid tank and landing gear. Tighten the four M5x18 screws on the two sides.
4. Align the fin on the motor cable connector and the slot on the motor port. Then plug the motor cable.
Battery Mounting Position
Battery Lock
Mounting Holes
Liquid Pump
Fittings
Motor Cable

AGRAS MG-1 User Manual
© 2016 DJI. All Rights Reserved. 5
Unfolding the Frame Arms
1. Unfold the frame arms totally. Tighten each sleeve at the eight junctions.
2. Double check the positions of the frame arms. Frame arms M1 and M2 form the front of the aircraft, while frame
arms M5 and M6 form its rear. Seen from the top, motors on frame arms M1, M3 and M5 should rotate counter
clockwise, while motors on frame arms M2, M4 and M6 should rotate clockwise.
Mounting the Sprinklers
1. Thee ae spikle outig positios o the otto of the fou otos o the aiaft’s left and right side
(motors on frame arms M3, M4, M7 and M8). Tighten the two M3x6 screws to mount the sprinklers.
Motor Port
Motor Cable

AGRAS MG-1 User Manual
© 2016 DJI. All Rights Reserved. 6
2. Prepare hose clamps A. Tools such as pincers may be required. Follow the instructions below to connect the other
end of the hose to the liquid pump.
Pull the hose through the hose clamp A and then connect it to the fitting of the liquid pump.
Open the hose clamp A by tools such as pincers. Move it to the fitting and release the hose clamp A to grip the
hose.
3. Prepare hose clamps B and M3x6 screws to fix the hoses to the arms and landing gear.
Open the hose clamp B to an appropriate angle to hold the hose. DO NOT damage the clamps.
Tighten one M3x6 screw to the hose bracket on the landing gear.
Tighten one M3x6 screw to the mounting hole on the bottom of the frame arm junction.

AGRAS MG-1 User Manual
© 2016 DJI. All Rights Reserved. 7
Mounting the Radar-Assisting Altitude Stabilization System
1. Arrange the side with a DJI logo outwards.
2. Align the mounting holes on the liquid tank and altitude stabilization system. Then tighten two M3x8 screws.
3. Align the slot inside the radar cable connector and fin of the radar port on the center frame. Plug the cable and
then rotate the upper part of the cable to the left to insert it into the slot on the cable port.
Connecting the Batteries
There are two XT90 ports on the aircraft. The allowable voltage is 22.2 V for every XT90 port. Connect two 6S
batteries in series to get a maximum power supply of 50.4 V.
Battery Use Requirement:
1. Be sure to use two 6S LiPo batteries of the same model. 6S LiPo batteries of 12000 mAh capacity and 10C
continuous discharging rate are recommended.
2. Ensure that the voltage of the two batteries used is the same.
3. The two batteries must be used together all the time. Replace the two batteries together for safe use, if one of
them is damaged.
Batteries are required but not included with the MG-1.
The batteries for the MG-1 are of high voltage and energy. Use them in accordance with their
instructions and make safety your top priority. DJI assumes no liability for damage(s) or injuries
incurred from using batteries.
Radar Cable
Radar Port

AGRAS MG-1 User Manual
© 2016 DJI. All Rights Reserved. 8
Place your batteries to the battery position on the liquid tank. Pull the Velcro through the battery lock and bind the
batteries as shown below.

AGRAS MG-1 User Manual
© 2016 DJI. All Rights Reserved. 9
Remote Controller
Profile
The aircraft remote control system operates at 2.4 GHz and the maximum transmission distance is 5 km. The remote
controller features a number of spray system control functions to help complete operation mission. Users can switch
between different operation modes via the remote controller.
Compliance Version: The remote controller is compliant with both CE and FCC regulations.
Operating Mode: Control can be set to Mode 1 or Mode 2, or to a custom mode.
Mode 1: The right stick serves as the throttle.
Mode 2: The left stick serves as the throttle.
To prevent transmission interference, do not operate more than three aircrafts in the same area.
Prepare the Remote Controller
Mounting the Operation Status Display Panel
1. Unfold the Operation Status Display Panel. Remove the screw using the slotted screwdriver coming with the
MG-1.
2. Plug the panel into the remote controller and tighten the screw lock.
3. Line up the hole on the panel with the metal loop on the remote controller. Insert and tighten the screw.
Adjusting the Antenna and Connecting the Panel
1. Tilt the Panel to the desired position. Adjust the antenna as shown.
2. Plug the cable of the panel into the CAN port on back of the remote controller.

AGRAS MG-1 User Manual
© 2016 DJI. All Rights Reserved. 10
Remote Controller Diagram
Using the Remote Controller
Turning the Remote Controller On and Off
The remote controller is powered by a 2S rechargeable battery that has a capacity
of 6000 mAh. The battery level is indicated via the Battery Level LEDs on the front
panel. Follow the steps below to turn on your remote controller:
1. When the remote controller is turned off, press the Power Button once. The
Battery Level LEDs will display the current battery level.
2. Press the Power Button once. Then press again and hold the Power Button to turn on the remote controller.
3. The remote controller will beep when it is turned on. The Status LED will rapidly blink green, indicating that the
[1] Antennas
Relays the aircraft control signals.
[2] Operation Status Display Panel
Displays the operation status.
[3] Control Stick
Controls the aircraft movement.
[4] Operation Mode Switch
Used to switch between Smart, Assisted and
Manual Operation Mode.
[5] Return-to-Home (RTH) Button
Press and hold this button to initiate Return-to-
Home (RTH).
[6] Battery Level LEDs
Display the current battery level.
[7] Status LED
Indicates whether the remote controller is linked
to the aircraft.
[8] Power Button
Used to power on/off the remote controller.
[9] RTH LED
Circular LED around the RTH button which displays
the RTH status.
[10] Flying Speed Dial
In Smart Operation Mode, turn and press the dial
to adjust the flying speed.
[11] Button A
Records the A Point of the operation route.
[12] Button B
Records the B Point of the operation route.
[13] Flight Mode Switch
Used to switch between G-Mode (GPS), A-Mode (Attitude) and M-
Mode (Manual).
[14] Spray Button
In MO-Mode, press to start / stop spraying.
[15] Spray Speed Dial
In MO-Mode, turn the dial to adjust the spray speed.
[16] Mini HDMI Port
Reserved.
[17] Micro USB Port
Reserved.
[18] CAN Port
Connects to the operation status display panel.
[19] USB Port
To update the firmware.
[20] GPS Module
Used to pinpoint the location of the remote controller.
[21] Back Left Button C1
Press to choose left as the direction of the operation route in SO-
Mode. In AO-Mode, press to fly the aircraft left by one operation
width.
[22] Power Port
Coets to a poe soue to hage the eote otolle’s
internal battery.
[23] Back Right Button C2
Press to choose right as the direction of the operation route in
Smart Operation Mode. In AO-Mode, press to fly the aircraft right
by one operation width.
[2]
[10]
[3]
[4]
[5]
[6]
[7]
[8]
[9]
[11]
[12]
[13]
[14]
[15]
[16]
[17]
[18]
[19]
[21]
[22]
[23]
[20]
[1]

AGRAS MG-1 User Manual
© 2016 DJI. All Rights Reserved. 11
remote controller is linking to the aircraft. The Status LEDs will glow solid green when linking is complete.
4. Repeat Step 2 to turn off the remote controller.
Charging the Remote Controller
Charge the remote controller using the included charger. Refer to the figure below for more details.
Controlling the Spray System
Adjust the flying speed, record Point A and B, start or stop spraying, adjust spray speed, choose the route direction
via the Flying Speed Dial, Button A / B, Spray Button, Spray Speed Dial, Button C1 / C2.
[1] Flying Speed Dial
In Smart Operation Mode, turn and press the dial to adjust the flying speed. You can set four speed gears in the A2-
AG Assistant. The four speed gears are set to 3, 4, 5, 6 m/s by default, and the initial flying speed is the speed of the
first gear. Move the dial to the left and press the dial to change to the previous speed. Move the dial to the right
and press the dial to change to the next speed. The operation status display panel will indicate the current speed
gear.
The final movement of the dial before you press the dial will be used to set the flying speed.
[2] Button A
Press the button to record Point A of the Smart Operation route.
[3] Button B
Press the button to record Point B after Point A recorded.
[4] Spray Button
In Manual Operation Mode, press the button to start or stop spraying.
[5] Spray Speed Dial
In Manual Operation Mode, turn the dial to adjust the spray speed. Move the dial to the left to reduce the spray
speed. Move the dial to the right to increase the spray speed. The speed range is 40% - 100%*. The Operation Status
Display Panel will indicate the current spray speed. Refer to Operation Status Display Panel for detail. The spray
[1]
[2]
[5]
[4]
[3]
[6]
[7]
Charger
Power Outlet

AGRAS MG-1 User Manual
© 2016 DJI. All Rights Reserved. 12
speed is the value for the last Manual Operation Mode when you restart the remote controller or the aircraft is in
Smart Operation Mode.
* We use a percentage for the spray speed due to the various thickness of liquid. The percentage is the ratio of the current speed to the maximum speed. For
water, 100% means 1.25 L/min with four TXVK-04 nozzles and 1.7 L/min with four XR11001 nozzles.
[6] Back Left Button C1
Press the button to choose the left direction for the Smart Operation route after Point A and B recorded.
[7] Back Right Button C2
Press the button to choose the right direction for the Smart Operation route after Point A and B recorded.
In Smart Operation Mode, when the aircraft is hovering at the key point, press Button C1 and C2 together and then
the aircraft will fly to the next key point and hover. Press and hold Button C1 and C2 together for more than 2
seconds until there is a beep emitted from the remote controller, and the aircraft will enter or quit from Continuous
Smart Operation Status. Refer to Smart Operation Mode for more details.
Controlling the Aircraft
The Remote Control is set to Mode 2 by default.
Stick Neutral/Mid-Point: Control sticks are placed at the central position.
Moving the Control Stick: The control stick is pushed away from the center position.
Remote Controller
(Mode2)
Aircraft
( Indicates Nose Direction)
Remarks
Vertical movement of the left stick controls
the aiaft’s eleatio. Push up to ased and
press down to descend. Use the left stick to
take off when the motors are spinning at idle
speed. The aircraft will hover in place if the
stick is in the central position.
The more the stick is pushed away from the
central position, the faster the aircraft will
change elevation.
Horizontal movement of the left stick controls
the aircraft's heading. Move left to rotate the
aircraft anticlockwise and move right to rotate
the aircraft clockwise. The aircraft will hover
in place if the stick is in the central position.
The more the stick is pushed away from the
central position, the faster the aircraft will
rotate.

AGRAS MG-1 User Manual
© 2016 DJI. All Rights Reserved. 13
Vertical movement of the right stick controls
the aiaft’s pith. Push up to fl foads
and press down to fly backwards. The aircraft
will hover in place if the stick is in the central
position.
Move the stick further for a larger pitch angle
and faster flight.
Horizontal movement of the right stick
otols the aiaft’s oll. Moe the stik left
to fly left and right to fly right.
The aircraft will hover in place if the stick is in
the central position.
Move the stick further for a larger roll angle
and faster flight.
The description above is only for the G-Mode and A-Mode.
Flight Modes
Toggle the Flight Mode Switch on the remote controller to one of the three
modes.
Figure
Flight Mode
G
G-Mode (GPS)
A
A-Mode (Attitude)
M
M-Mode (Manual)
G-Mode (GPS): The aircraft uses GPS for positioning. Only in G-Mode and when the GPS signal is strong, users can
start the motors.
A-Mode (Attitude): GPS is not used for positioning, and the aircraft only uses its barometer to maintain altitude. If
a GPS signal is present, the aircraft will still return to the last recorded Home Point if the remote controller signal is
lost.
M-Mode (Manual): Set as Manual or Attitude in the A2-AG Assistant. It is set to Attitude by default. Beginners do
NOT set it to Manual. In Manual Mode, GPS and the attitude stabilization are not used. Control the aircraft by
yourself totally.
Operation Mode Switch
Toggle the Operation Mode Switch on the remote controller to one of the three modes.
Smart Operation Mode Manual Operation Mode Assisted Operation Mode
M
A
G

AGRAS MG-1 User Manual
© 2016 DJI. All Rights Reserved. 14
1. Smart Operation Mode: When the aircraft is in G-Mode and the GPS signal is strong, toggle the switch to this
mode and the aircraft will fly and spray liquid in a certain route after Point A and B recorded.
2. Manual Operation Mode: In Manual Operation Mode, users can control the whole movement of the aircraft and
spray liquid via the Spray Button.
3. Assisted Operation Mode: In Assisted Operation Mode, the flying speed is restricted and the aiaft’s headig is
locked. Users can control the movement of the aircraft except the heading. Press Button C1 or C2 and the aircraft
ill fl oe opeatio idth to the left o ight. It spas liuid he flig foads ad akads. It does’t spas
liquid when flying left and right.
RTH Button
Press and hold the RTH Button to bring the aircraft back to the last recorded Home Point. The
LED around the RTH Button will blink white during the RTH procedure. Users can control the
aircraft during the procedure. Regain control manually to cancel the RTH procedure. Refer to
How to Regain Control for details.
Optimal Transmission Range
The signal transmission between the aircraft and the remote controller performs best when the aircraft is within
the optimal transmission range. Open up the antennas on the remote controller to optimize transmission range.
Ideally, the flat surface of the antenna should be facing the aircraft. If the signal is weak, fly the aircraft closer to
you.
Optimal Transmission Range
Strong Weak
Remote Controller LED
The Status LED indicates the connection status between the remote controller and the aircraft. The RTH LED
indicates the Return-to-Home status of the aircraft. See the table below for details on these indicators.
Status LED
Sound
Remote Controller Status
—Solid Red
The remote controller is not connected to the aircraft.
—Solid Green
The remote controller is connected to the aircraft.
Blinks Red
D-D-D......
Remote controller error.
Status LED
RTH LED

AGRAS MG-1 User Manual
© 2016 DJI. All Rights Reserved. 15
RTH LED
Sound
Aircraft Status
—Solid White
chime
Return-to-Home procedure is initiated.
Blinks White
D . . .
Sending Return-to-Home command to the aircraft.
Blinks White
DD .. .. ..
The aircraft is returning to the Home Point.
Operation Status Display Panel
[1] Battery Level
Displays the current battery level.
[2] Point A LED
The LED is on after Point A recorded.
[3] Point B LED
The LED is on after Point B recorded.
[4] Orientation LED
In Smart Operation Mode, indicates the current flying orientation.
[5] Spray Speed
Displays the current spray speed. The range is 40% - 100%. See the table below for details. (The bottom is LED1 and
the top is LED4.)
LED is on. LED is blinking. LED is off.
LED1
LED2
LED3
LED4
Spray Speed
x1 ……
40%~45%
……
45%~50%
50%~55%
x1 ……
55%~60%
……
60%~65%
65%~70%
[1]
[2]
[4]
[3]
[5]
[6]
[7]
[9]
[8]
[10]
[11]
[12]

AGRAS MG-1 User Manual
© 2016 DJI. All Rights Reserved. 16
x1 ……
70%~75%
……
75%~80%
80%~85%
x1 ……
85%~90%
x2 ……
90%~95%
95%~100%
[6] Relative Altitude
Display the relative altitude between the aircraft and the crops (or the surface under the aircraft). See the table
below for details. (The bottom is LED1 and the top is LED4.)
LED is on. LED is blinking. LED is off.
LED1
LED2
LED3
LED4
Relative Altitude
< 2 m
2 m
2.5 m
3 m
3.5 m
4 m
> 4 m
[7] Flying Speed
In Smart Operation Mode, displays the current speed gear. You can set four speed gears in the A2-AG Assistant.
Select the speed gear via the Flying Speed Dial on the remote controller. The number (1 to 4) of the LED(s) that is
(are) on indicates the current speed gear (the first to the fourth gear).
[8] Return LED
In Smart Operation Mode, if the task resumption function is initiated, the flight controller will record a breaking
point. After breaking, the aircraft will return to the point and the Return LED will be on during the procedure.
[9] Continuous Smart Operation LED
In Smart Operation Mode, when the aircraft is hovering at the key point, press and hold Button C1 and C2 together
for more than 2 seconds until there is a beep emitted from the remote controller, and the aircraft will enter
Continuous Smart Operation Status. This LED will be on. Refer to Smart Operation Mode for more details.
[10] Spray LED
The LED is on when the aircraft is spraying liquid.
[11] Liquid Level
The LED is solid green when there is liquid in the liquid tank. The LED is blinking red when there is no liquid in the
liquid tank.

AGRAS MG-1 User Manual
© 2016 DJI. All Rights Reserved. 17
[12] Brightness Setting Button
Press to adjust the LED brightness of the panel. The left part is to reduce the brightness and the right part is to
increase the brightness.

AGRAS MG-1 User Manual
© 2016 DJI. All Rights Reserved. 18
Aircraft
Profile
The MG-1 has Smart Operation Mode, Manual Operation Mode and Assisted Operation Mode. Switch to one of the
three modes via the Operation Mode Switch on the remote controller. In Smart Operation Mode, the aircraft will
fly in a certain route and spray liquid automatically. In the Assisted Operation Mode, the flying speed and the
aiaft’s headig ill e estited. The aiaft ill spa liuid autoatiall ad uses a otol the aiaft to
fly a certain width in the left or right direction via the buttons on the remote controller. In Manual Operation Mode,
users can control the aircraft and spray liquid via the button on the remote controller.
The effect of the pesticides is related to the pesticide density, spray speed, flying speed, altitude above
the crops, wind direction and wind speed. Consider all the factors for optimal effect when using the
pesticides.
Fly the aircraft above the crops at a proper height to avoid damage to the crops.
Operation Mode
Smart Operation Mode
In Smart Operation Mode, the aircraft will fly in a certain route and spray liquid automatically. Flight task resumption,
data protection, and altitude stabilization system are available in this mode. It is recommended to fly in Smart
Operation Mode when the spray area is large and approximately rectangular.
Operation Route
The aircraft will fly in snakelike operation route 1 or 2 as shown below and spray liquid for the whole area after
Point A and B recorded. The description in this manual is based on the directions in the illustrator. Points like C and
D are called key point. Distances like AB and CD are called operation length. Distances like BC and DE are called
operation width. All the corners in the illustrator are right angles.
Operation Procedure
Maintain line of sight of the aircraft at all times.
Ensure that the Flight Mode Switch is toggled to GPS Flight Mode and the GPS signal is strong (the
number of GPS ≥6). Otherwise, Smart Operation may be difficult.
It’s eoeded to pla the opeatio oute fo effiiet operation.

AGRAS MG-1 User Manual
© 2016 DJI. All Rights Reserved. 19
Instructions
Ensure that the Operation Mode Switch is toggled to Manual Operation Mode, and then follow the instructions
below:
1. Recording Point A and B
Switch to the Smart Operation Mode only after Point A and B recorded.
Recording Point A First:
Fly the aircraft to the planning Point A and hover. Press Button A on the remote controller. The Point A LED on the
Operation Status Display Panel glows solid green and the Aircraft Status Indicator flashes red for eight times indicate
that Point A is recorded successfully.
Recording Point B Secondly:
Fly the aircraft to the planning Point B and hover. Press Button B on the remote controller. The Point B LED on the
Operation Status Display Panel glows solid green and the Aircraft Status Indicator flashes green for eight times
indicate that Point A is recorded successfully.
If you want to update Point B after Point A and B recorded, fly the aircraft to the new Point B and record it.
If you want to update Point A after Point A and B recorded, record the new Point A and then record Point
B again.
It’s recommended to keep the direction of Point A to B parallel to the long side of the rectangular spray
area for optimal effect.
2. Selecting the Orientation of Point C
Press Back Left Button C1 or Back Right Button C2 on the remote controller to select the orientation of Point C, C1
for left and C2 for right. The corresponding Orientation LED on the Operation Status Display Panel will be blinking
afte seletio. The oietatio of Poit C ill e ight if ou did’t pess a of the C ad C uttos.
3. Enabling Smart Operation Mode
Ensure that the Flight Mode Switch is toggled to GPS Flight Mode and the GPS signal is strong (the number of GPS
≥6). Then toggle the Operation Mode Switch to Smart Operation Mode. The aircraft enters Smart Operation Mode
and hovers at Point B. The aiaft’s ose direction points to the direction of Point A to B automatically. The left and
right Orientation LED on the Operation Status Display Panel blinks.
The aircraft’s ose dietio ill poit to the dietion of Point A to B at all times without change by
the flying direction.
4. Starting Operation
The context below takes a right direction of Point C for example.
1) Press the Back Left Button C1 and Back Right Button C2 on the remote controller at the same time. The Aircraft
Status Indicator will flash blue for four times. The aircraft will fly from Point B to C and then hover at Point C. The

AGRAS MG-1 User Manual
© 2016 DJI. All Rights Reserved. 20
right Orientation LED on the Operation Status Display Panel will glow when flying from Point B to C. The four
Orientation LEDs on the Operation Status Display Panel will blink when hovering at Point C.
2) Re-do Step 1) and the aircraft will fly to the next key point along the snakelike route 1 and hover.
3) Press the Back Left Button C1 and Back Right Button C2 and hold for more than two seconds when the aircraft is
hovering at any key point. The aircraft enters Continuous Smart Operation Status. The Continuous Smart Operation
Status LED will glow and the Aircraft Status Indicator will glow solid purple for one second. The aircraft will fly along
the snakelike route 1 continuously.
4) Press the Back Left Button C1 and Back Right Button C2 and hold for more than two seconds in Continuous Smart
Operation Status. The aircraft will quit from the status. The Continuous Smart Operation Status LED will be off. The
aircraft will fly to the next key point and hover.
Only if the aircraft is hovering at a key point, the action of pressing button C1 and C2 in Step 1) to 3)
will be available.
If the GPS signal is weak (the number of GPS < 6) in operation, the Flight Mode will switch to Attitude
Flight Mode automatically, and you can spray liquid via the Spray Button on the remote controller. If
the MG-1 regains GPS signal afterwards, it will fly to the next key point automatically.
The distance of BC is called operation width. It is set to 5 m by default. You can customize it from 3 to
10 m in the A2-AG Assistant.
You can control the left, right, forward, backward directions and the throttle of the aircraft to avoid
obstacles when in operation, but the heading of the aircraft cannot be controlled. The aircraft will fly
back to the operation route automatically and continue operation when releasing the control sticks.
Release the control sticks only after avoiding the obstacles totally. Otherwise, it may cause aircraft
collision on the way back to the operation route.
The aircraft sprays liquid automatically when flying in the forward and backward direction, but it
does’t spas liuid he flig i the left ad ight dietio.
The spray speed cannot be adjusted in Smart Operation Mode. It will be set to a value the same as it
in Manual Operation Mode. You can enter Manual Operation Mode to adjust the desired spray speed
(refer to Controlling the Spray System for details) and then return to Smart Operation Mode.
The flying speed can be adjusted via the remote controller in Smart Operation Mode. Refer to
Controlling the Spray System for details.
Flight Task Resumption
Toggle the Operation Mode Switch to quit from Smart Operation Mode or initial the Failsafe RTH or Smart RTH
procedure, and then the aircraft will record the breaking point if the GPS signal is strong (the number of GPS ≥6).
Return to Smart Operation Mode after other actions, the aircraft will return to the recorded breaking point
Other manuals for AGRAS MG-1
3
Table of contents
Other dji Drone manuals

dji
dji Phantom 3 Advanced User manual

dji
dji PHANTOM 4 Technical specifications

dji
dji RM33022 User manual

dji
dji Phantom 3 Standard User manual

dji
dji INSPIRE 2 User manual

dji
dji PHANTOM 4 User manual

dji
dji PHANTOM 3 PROFESSIONAL User manual

dji
dji PHANTOM 4 PRO+ User manual

dji
dji MINI 4 PRO User manual

dji
dji SPARK User manual

dji
dji SPARK User manual

dji
dji OSMO ACTION 4 User manual

dji
dji PHANTOM 3 PROFESSIONAL User manual

dji
dji GOGGLES 2 MOTION COMBO User manual

dji
dji Matrice 600 Pro User manual

dji
dji AGRAS MG-1S User manual

dji
dji AVATA User manual

dji
dji Phantom 3 Advanced User manual

dji
dji Agras T25 User manual

dji
dji Phantom 2 Vision + User manual