manuals.online logo
Brands
  1. Home
  2. •
  3. Brands
  4. •
  5. dji
  6. •
  7. Drone
  8. •
  9. dji Matrice 600 Pro User manual

dji Matrice 600 Pro User manual

DJI Matrice 600 Pro
Quick Reference Guide
Revised07/20/21
ZM / CW
Pre-Departure Prepand Packing List
IN LAB
Environment Checks
1. Determine location and duration of flight
2. Determine altitude and overlap settings of flight
3. Assess weather for flight location –IF POOR CONDITIONS, DO NOT FLY
4. Check TFRs and NOTAMs.
5. File LAANC (if needed)
Battery Checks
6. Ensure M600 battery sets are fully charged
a. Minimum one set per flight, plus ≥ 1 backup set
NOTE: DO NOTMix Battery Sets
7. Ensure PPK batteries are fully charged
a. 2 blue LiPOs needed
b. Minimum charge of 11.9 volts (fully charged: 12.6 v), with no more than 0.2
voltage difference between cells
8. Ensure M600 iPad battery is charged to ≥ 60% (iPad PW: 1-0-1-5-7-5)
9. Ensure both ‘Master’ and ‘Assistant’ controllers are charged to ≥ 75%
SD Card Checks
10. Sony A6000 SD Card
a. Delete all files
11. PPK MicroSD Card
a. Open CONFIG.html file and
ensure the following settings:
-Trigger Mode: Overlap
-Overlap: 80%
-Altitude: *Set to flight height*
-Focal Length: 21mm
-Height: 15.52mm
-Length: 23.28mm
-Trigger Control: Auto-Start
-Camera Offsets:
oX: 0.12m
oY: -0.121m
oZ: 0.256m
-Atlas Global GNSS: Disabled
-Did you review settings? Yes
b. Right click and save as CONFIG.html
-Overwrite existing file in SD Card
Firmware version: 1.7.21 –07/19/21
12. BothZenmuse XT2 MicroSD Cards cleared
a. Do Not Delete XT2_UPGRADE_LOG.txt
13. Return all SD Cards to respective sensors/case
Vehicle Readiness Checks
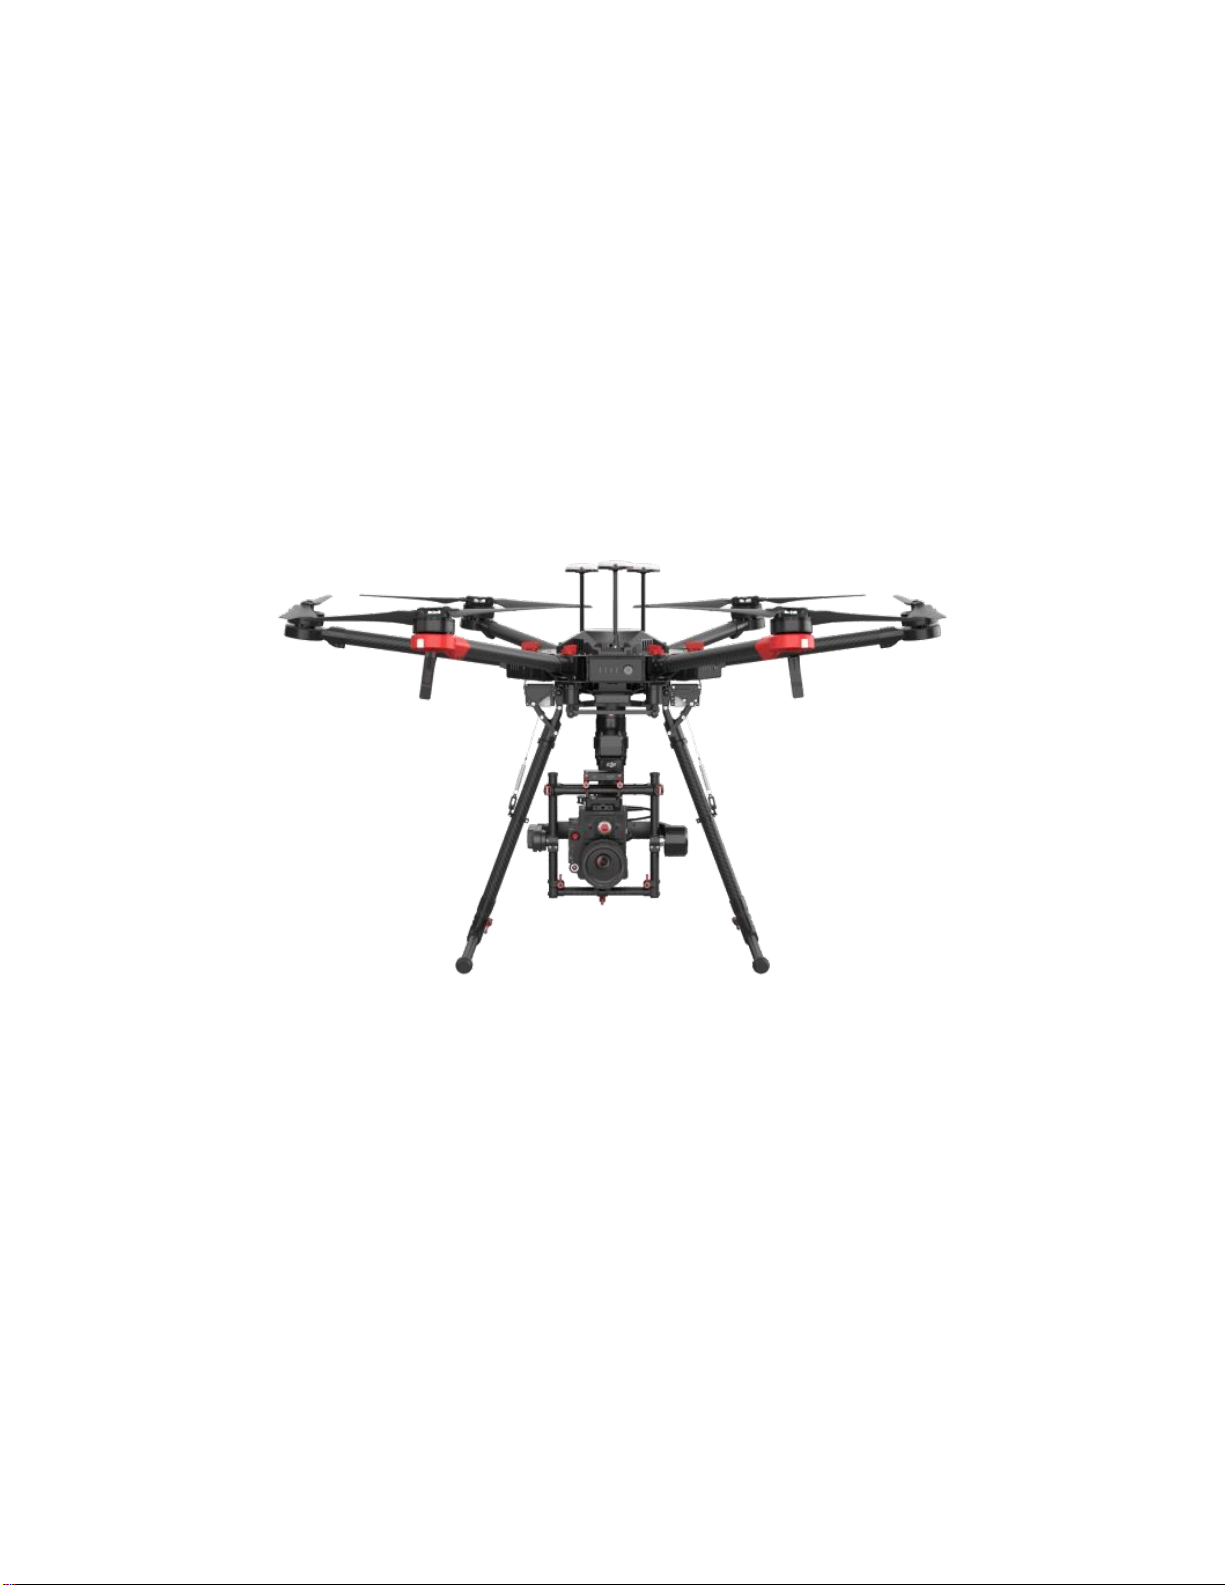
14. Visually and tactilely inspect for any abnormalities to platform
a. Take M600 out of case
-Extend and lock top antennae, remove landing gear, remove top foam layer, pick
up M600 by rotor arm base, stand on motor bells (BE CAREFUL)
b. Check GPS antennae for damage
c. Ensure GPS antennae stand up and lock into place
-Ensure arrows are facing the same direction
d. Check that all four pieces of the landing gear are present and free of damage
e. Ensure that all screws on M600 are tight and in place
-Use green driver to tighten
f. Check that arms and red locking mechanisms are securely attached and free of
damage (e.g. Scratches, cracks, chips, missing components, etc)
-All locks should click into place
g. Check that motors are secure and rotate freely
-Wiggle motor bells to ensure there is no play in bearing
oSpin motor to ensure smooth rotation
NOTE: If rotation is not smooth DO NOT FLY
h. Check that Sony A6000 housing is secure and free of damage
-All mounting bolts are tight, 3D-printed housing is uncompromised, camera is
secure
i. All cables are secure (not dangling, no fraying,
etc)
j. Sensor mounting plate and gimbal mount secure
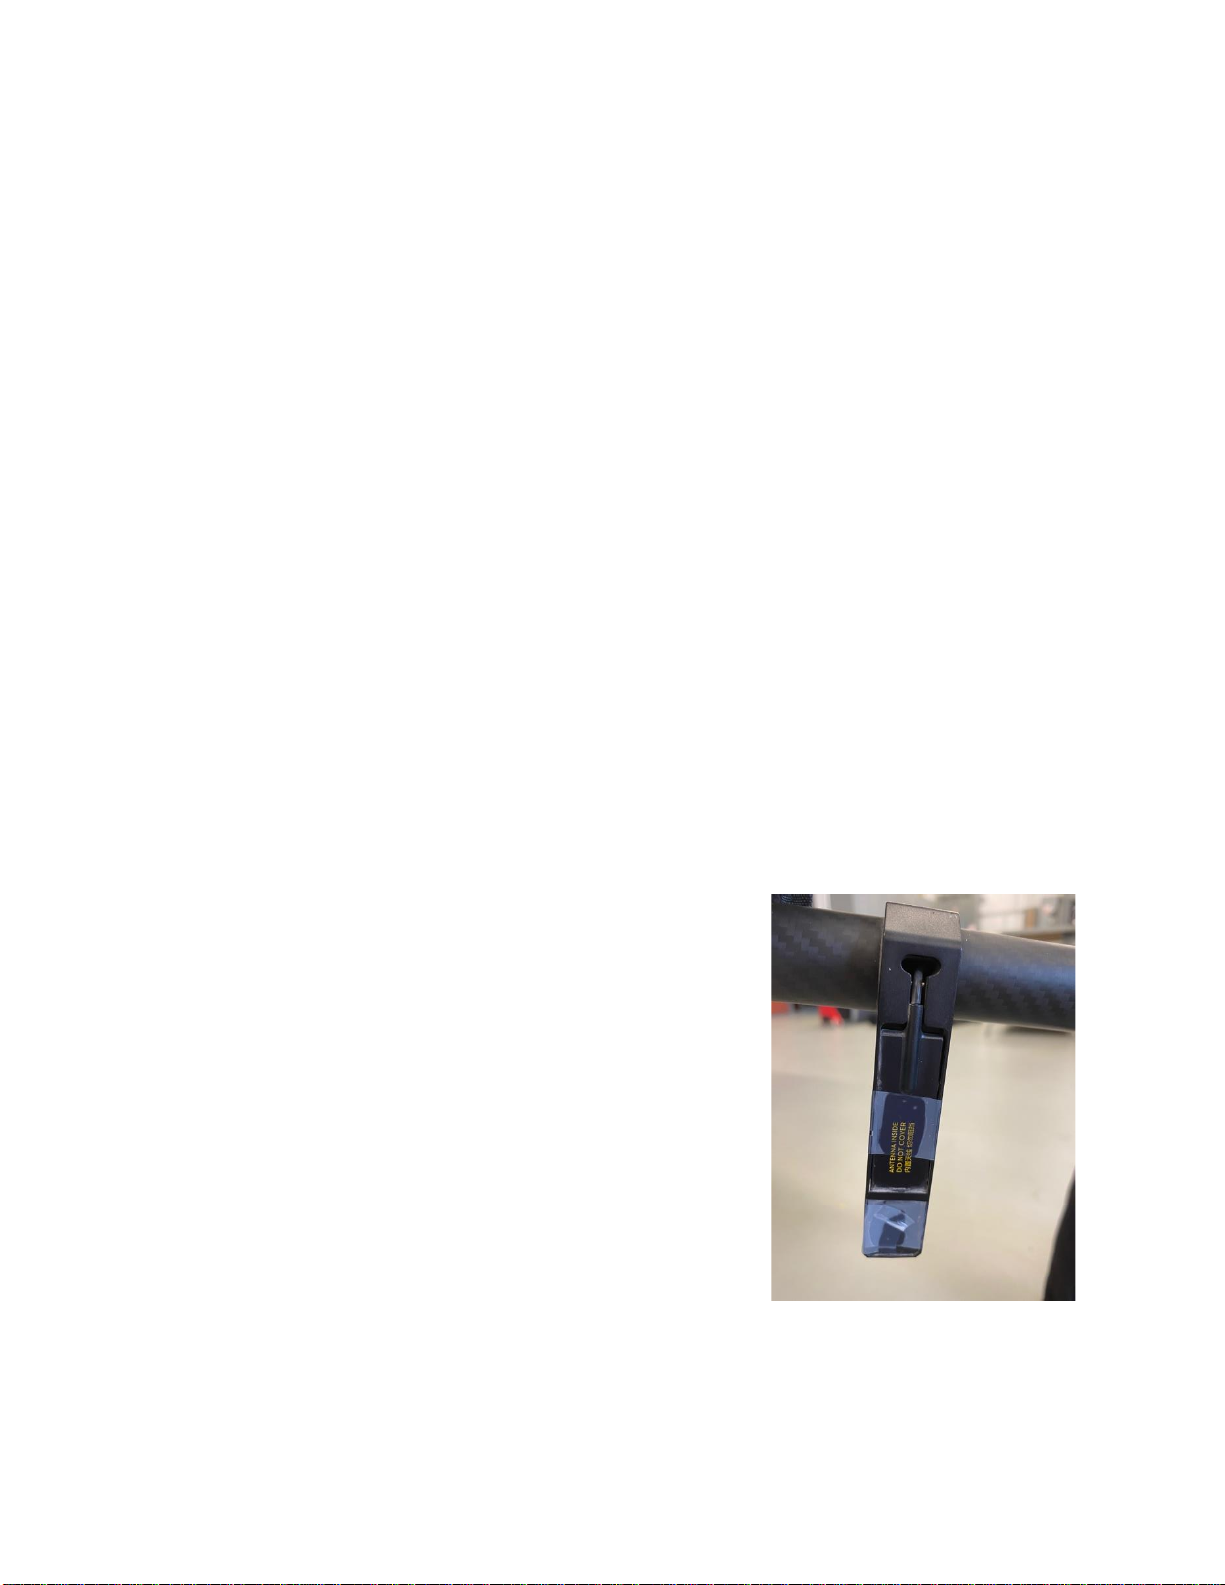
k. Check downward facing antennae on rotor arms
-Currently taped on, but should not dangle away
from housing
Packing List
M600 Battery Case
15. Proper number of battery sets in case
16. Ensure all batteries are shut off
17. Charger packed if needed (will need generator as well)
18. CLOSE M600 BATTERY CASE TO SIGNIFY THATCASE IS PACKED AND
READY
Taped-on downward facing antenna
M600 Case
19. Fold all rotor arms down and place in case with Sony A6000 facing rear
20. Replace top roam layer
21. Replace all landing gear
22. Fold GPS antennae down
23. Ensure top foam layer contains the following:
a. Sony A6000 SD Card and backup
b. Both Master and Assistant controllers
c. M600 iPad (iPad PW: 1-0-1-5-7-5)
d. iPad lightning cable
e. iPad sun shade
f. Checklist
g. Phillips-head, flat-head, and green hex-driver
h. Kestrel weather station (check batteries)
i. Lens cleaners
j. Spare parts INCLUDING SPARE PPK MOUNTING BOLTS
24. Print out Metadata sheet (Teams>Sharepoint Docs>03_Fleet>Dispatch>01_SOP>Forms)
25. CLOSE CASE TO SIGNIFY THAT M600 CASE IS PACKED AND READY
PPK Case
26. MicroSD Cardinserted into PPK
27. Two blue LiPO batteries
28. Battery voltage checker
29. Power cable
30. PPK settings sheet
31. SD Card adapter and case
32. Two mounting bolts secured in PPK
33. CLOSE CASE TO SIGNIFY THAT PPK CASE IS PACKED AND READY
XT2 Case
34. BothXT2 MicroSD cards installed
35. Gimbal capsecure
36. User manual
37. CLOSE CASE TO SIGNIFY THAT XT2 CASE IS PACKED AND READY
MissionDispatchCheck
*Fill out Squawk Sheet as applicable*
Matrice 600 ppk
❖-Data out
❖-Time out
❖-PIC Name
❖-Equip and Flight Location;
➢Location
➢M600
➢Sony A6000
➢XT2
➢PPK
➢Launch pad
FINAL DEPARTURE PACKINGLIST
- DO NOT LEAVE CAMPUS WITHOUT THE FOLLOWING:
•Metadata Sheet and field notepad
•Battery Case (Charger and Generator if needed)
•M600 Case
•PPK Case
•XT2 Case
•Landing Pad
•Computer with SD Card Reader
•High-Visibility Vest(s)
•Chairs and Tent if needed
•Water, sunblock, sunglasses, and bug spray
Pre-Flight
AT LOCATION
1. Assign PIC and VOs
2. Perform assigned responsibilities simultaneously
PIC Checklist/Responsibilities
VO Checklist/Responsibilities
3. Perform risk assessment of area
a. Hazards, weather, obstacles,
vehicles, trees,cell towers,
3. Remove landing gear from case and
assemble
a. Warning label on legs must face up
people, etc and modify
mission plan accordingly.
4. Flight altitude is higher than
highest object
5. Flight will not operate over people,
moving vehicles, interfere with first
responders, operate in restricted or
prohibited airspace
6. Mount iPad on controller and
connect cable between iPad and
controller
7. Turn on controller
8. Connect iPad to hotspot
9. Plan mission (in Pix4D Capture)
a. Set flight area
b. Set sensor type to DJI
Zenmuse XT2 13mm
c. Frontlap/Sidelap set to same
settings as PPK SD Card
d. Altitude set to same settings
as PPK SD Card
e. Speed of mission set
f. Set failsafes
g. Total mission time no more
than 26 minutes
10. Preflight briefing (Performed by
PIC)
a. Flight area,altitude,
expected flight time
b. Failsafes
c. Emergency action and
communications between
crew
b. Ensure landing gear foot is
attached to leg and hand-tightened
with red lever
4. Erect all 3 RTK-GNSS receivers on top of
platform
5. Remove M600 from case and install
landing gear
a. Ensure landing gear spring is
attached to leg hook
6. Place M600 on a solid flat surface (use
launch pad) at takeoff location
7. Open propeller arms and lock into place
with red locking mechanisms (should
“click” into place)
8. Check PPK battery voltage with voltage-
checker (12-12.6v) and strap PPK battery
on PPK body
9. Mount PPK toplatform
a. Screw in bolts to hand-tightness
b. Bolts screw in on camera
connection cord side
c. Attach cable from Sony A6000 to
PPK
d. Plug in power cable and allow PPK
to get fixed GPS + GNSS location
10. Ensure Sony A6000 lens cover is removed
and place in M600 top foam layer
11. Install XT2 sensor and ensure it is locked
in place
12. Install batteries into appropriate battery
slots
a. Make sure batteries click and lock
into place
13. DO NOT TURN ON M600 UNTIL
CREW IS READY TO FLY
14. Fill in metadata (only one VO if multiple)
15. Remove propeller covers and place back into M600 case as to not misplace them
16. Check propellers are securedto motors and that propeller screws have not loosened
17. Check for propeller damage i.e. nicks, cracks, gouges, scratches
18. Turn on batteries and move awayfrom the aircraft
19. SO check that Sony A6000 is set to following specifications:
a. Dial is set to “S” for shutter priority
b. Shutter speed is set to 1/2500 sec or faster
c. Aperture is set to F/3.5
d. Zoom set to ∞
e. ISO is set to AUTO NOT ISO MULTI NR
f. Format SD Card on first flight
g. Reset numbering system on first flight
20. Plug in PPK topower source and wait for solid green light (GPS triangulation)
NOTE: White log light will also flash when log file has started
21. Turn on strobe if needed
a. Overcast, low visibility, or within Civil Twilight
22. Ensure crew is at least 10 ft awayfrom aircraft
23. Put ‘er up!
During Flight
1. PIC notifies launch to crew (via Zello if necessary)
a. VO notes takeoff time in metadata
2. PIC arms aircraft
a. Manually fly platform to at least 30 ft AGL, and perform control check
-Pitch, roll, and yaw with transmitter
-Land aircraft
3. PIC starts mission and notifies crew when platform has taken autonomous flight
4. PIC monitors systems
5. VO(s) maintain VLOS and notifies crew of hazards
a. If VO(s) and PIC are spreadout farther than reasonable talking distance, use Zello
for communications
6. PIC notifies crew of landing and VOs can return to landing site
7. When mission is complete and aircraft is below treeline, PIC assumes control of aircraft
for landing
a. Ensure platform is stable
b. Lower landing gear
c. Gingerly bring platform to the landing pad
8. Once landed
a. VO notes landing time in metadata
b. PIC disarms aircraft
c. ONCE AIRCRAFT IS DISARMED, PIC ANNOUNCES “SAFE TO
APPROACH AIRCRAFT”
d. SO stops PPK log
e. VO turns off batteries
Post Flight
AT LOCATION
1. Fold in propeller blades and replace prop covers
a. Ensure zipper is on the bottom side of propeller arms as to not damage propellers
2. Unplug and remove PPK
a. Put back into case
b. Remove MicroSD Card and check contents
-Open log file and note number of events
-Replace MicroSD Card into PPK
3. Remove Sony A6000 SD Card and check contents
a. Note quality and number of images
-IF POOR QUALITY RE-FLY WITH ADJUSTED CAMERA SETTINGS
-Number of images must match number of trigger events in PPK Log
-If good, place SD Cardinto protective case (NOT BACK IN CAMERA) and
place into top foam layer
4. Replace lens cap on Sony A6000
5. Remove XT2, replace gimbal cap, and return to case
6. Remove landing gear and disassemble (PLACE IN SAFE LOCATION, e.g. NOT ON
GROUND WHERE IT COULD BE STEPPED ON OR TRIPPED OVER)
7. Unlock and fold rotor arms down
8. Return platform to case (with A6000 facing rear)
9. Replace top foam layer
10. Replace disassembled landing gear
11. Fold down GPS antennae
12. Return all SD Cards, cables, controllers, iPad, and other gear to case
13. Ensure GPS antennae are folded down
14. Close lid and latches
FINAL RETURN PACKINGLIST
- DO NOT LEAVE THE FIELD WITHOUT THE FOLLOWING:
•Completed Metadata Sheet and field notepad
•Battery Case (Charger and Generator if needed)
•M600 Case
•PPK Case
•XT2 Case
•Landing Pad
•Computer with SD Card Reader
•High-Visibility Vest(s)
•Chairs and Tent if needed
•Water, sunblock, sunglasses, and bug spray
-LEAVE NO TRACE -
BACK IN LAB
PIC Responsibilities
VOs Responsibilities
1. Put all M600 batteries
without a full charge
back on charger
2. Recharge transmitter if
below 75%
3. Recharge iPad if below
85%
4. Check PPK battery
voltage.
a. Charge if below
11.9 v
1. VOs pull all SD cards
a. Take note of which SD cardgoes where
2. Upload the data to “M600_PPK” folder
following the “0_Templates” folder (located in
the “Research > UAS_Data >
UAS_Platforms_Sensors” folder)
3. Delete all contents from Sony A6000 SD Card
4. Delete .log file from Field-of-View PPK
MicroSD CardONLY
a. Do not delete CONFIG file
5. Delete files from Zenmuse XT2 MicroSD Cards
except for “XT2_UPGRADE_LOG.txt”
Begin post-flight processing

Other manuals for Matrice 600 Pro

6

Other dji Drone manuals

dji Agras T20P User manual

dji

dji Agras T20P User manual

dji AGRAS MG-1S User manual

dji

dji AGRAS MG-1S User manual

dji Phantom 4 RTK Instruction Manual

dji

dji Phantom 4 RTK Instruction Manual

dji MATRICE 200 User manual

dji

dji MATRICE 200 User manual

dji Mavic 2 Enterprise User manual

dji

dji Mavic 2 Enterprise User manual

dji Inspire 2 Series User manual

dji

dji Inspire 2 Series User manual

dji CP.MA.00000660.01 User manual

dji

dji CP.MA.00000660.01 User manual

dji Phantom 4 RTK User manual

dji

dji Phantom 4 RTK User manual

dji MAVI 3 CLASSIC User manual

dji

dji MAVI 3 CLASSIC User manual

dji SPARK User manual

dji

dji SPARK User manual

dji PHANTOM User manual

dji

dji PHANTOM User manual

dji PHANTOM 4 PRO User manual

dji

dji PHANTOM 4 PRO User manual

dji Mavic 2 Enterprise User manual

dji

dji Mavic 2 Enterprise User manual

dji T20 User manual

dji

dji T20 User manual

dji INSPIRE 2 Instruction Manual

dji

dji INSPIRE 2 Instruction Manual

dji Mini 3 User manual

dji

dji Mini 3 User manual

dji AGRAS T30 User manual

dji

dji AGRAS T30 User manual

dji Mavic 2 Enterprise User manual

dji

dji Mavic 2 Enterprise User manual

dji MATRICE 30 Series User manual

dji

dji MATRICE 30 Series User manual

dji Mini 2 Dimensions

dji

dji Mini 2 Dimensions

dji MT3PD User manual

dji

dji MT3PD User manual

dji R4D Instruction Manual

dji

dji R4D Instruction Manual

dji Matrice 600 Pro User manual

dji

dji Matrice 600 Pro User manual

dji Phantom 4 RTK User manual

dji

dji Phantom 4 RTK User manual

Popular Drone manuals by other brands

HALOGENKAUF LIGHTECH L160-2 Instruction

HALOGENKAUF LIGHTECH

HALOGENKAUF LIGHTECH L160-2 Instruction

WORLD TECH ELITE RECON user manual

WORLD TECH ELITE

WORLD TECH ELITE RECON user manual

Autonomous Quadrotor Project Anzhelka user manual

Autonomous Quadrotor Project

Autonomous Quadrotor Project Anzhelka user manual

TYPHOON H Plus quick start guide

TYPHOON

TYPHOON H Plus quick start guide

FPVRACER CINE X2-FPV manual

FPVRACER

FPVRACER CINE X2-FPV manual

Armattan Morphite V2 Assembly guide

Armattan

Armattan Morphite V2 Assembly guide

Notilo Plus Seasam quick start guide

Notilo Plus

Notilo Plus Seasam quick start guide

KLAU Geomatics M200 installation manual

KLAU Geomatics

KLAU Geomatics M200 installation manual

IDENTIFIED TECHNOLOGIES FLIGHT IQ INSPIRE user manual

IDENTIFIED TECHNOLOGIES

IDENTIFIED TECHNOLOGIES FLIGHT IQ INSPIRE user manual

PNJ DR-EAGLE WIFI user manual

PNJ

PNJ DR-EAGLE WIFI user manual

Bird-X Prohawk instruction manual

Bird-X

Bird-X Prohawk instruction manual

DarwinFPV BabyApe II user manual

DarwinFPV

DarwinFPV BabyApe II user manual

Autel Robotics Dragon Fish quick guide

Autel Robotics

Autel Robotics Dragon Fish quick guide

Contixo F20 GPS instruction manual

Contixo

Contixo F20 GPS instruction manual

Airdog ADII user manual

Airdog

Airdog ADII user manual

Downwind S-800 Operator's manual

Downwind

Downwind S-800 Operator's manual

Evolio iFly Range user manual

Evolio

Evolio iFly Range user manual

Microdrones VSM UgCS 2.11.227 user guide

Microdrones

Microdrones VSM UgCS 2.11.227 user guide

manuals.online logo
manuals.online logoBrands
  • About & Mission
  • Contact us
  • Privacy Policy
  • Terms and Conditions

Copyright 2025 Manuals.Online. All Rights Reserved.