GERMAN ITALIAN FRENCH
DEUTSCH ITALIANO FRANÇAIS
VOR GEBRAUCH DER VORRICHTUNG BITTE DIE GEBRAUCHSANWEISUNG SORGFÄLTIG
DURCHLESEN. DIE EINWANDFREIE FUNKTION DER VORRICHTUNG IST NUR BEI RICHTIGEM
ANLEGEN GEWÄHRLEISTET.
PRIMA DELL’USO, LEGGERE INTERAMENTE E ATTENTAMENTE QUESTE ISTRUZIONI. LA
CORRETTA APPLICAZIONE È DI FONDAMENTALE IMPORTANZA PER UN FUNZIONAMENTO
CORRETTO.
LIRE ATTENTIVEMENT LA TOTALITÉ DES INSTRUCTIONS SUIVANTES AVANT D’UTILISER LE
DISPOSITIF. UNE MISE EN PLACE CORRECTE EST INDISPENSABLE AU BON FONCTIONNEMENT DU
DISPOSITIF.
HINWEIS: ES WURDEN UNTER ANWENDUNG DER MODERNSTEN VERFAHRENSWEISEN
SÄMTLICHE ANSTRENGUNGEN UNTERNOMMEN, UM DIE GRÖSSTMÖGLICHE KOMPATIBILITÄT
VON FUNKTION, STÄRKE, HALTBARKEIT UND BEQUEMLICHKEIT ZU ERREICHEN; DIESES PRODUKT
IST JEDOCH NUR EIN BESTANDTEIL DES GESAMTEN VON EINEM ARZT DURCHGEFÜHRTEN
BEHANDLUNGSPROGRAMMS. DIE ANWENDUNG DIESES PRODUKTS STELLT KEINE GARANTIE ZUR
VORBEUGUNG VON VERLETZUNGEN DAR.
AVVISO: NONOSTANTE I FORTI INVESTIMENTI IN TECNICHE D’AVANGUARDIA PER ASSICURARE
LA MASSIMA COMPATIBILITÀ FUNZIONALE, DURABILITÀ, RESISTENZA E COMFORT, QUESTO
DISPOSITIVO È SOLO UNO DEGLI ELEMENTI DEL PROGRAMMA DI TRATTAMENTO GLOBALE
PRATICATO DA UN MEDICO. NON È POSSIBILE GARANTIRE CHE L’USO DEL PRODOTTO PREVENGA IL
VERIFICARSI DI LESIONI.
AVIS : BIEN QUE TOUS LES EFFORTS AIENT ÉTÉ FAITS, SELON LES TECHNIQUES LES PLUS REÇENTES,
POUR OBTENIR UN MAXIMUM DE COMPATIBILITÉ EN MATIÈRE DE FONCTIONNALITÉ, RÉSISTANCE,
DURABILITÉ ET CONFORT, CE DISPOSITIF NE CONSTITUE QU’UN ÉLÉMENT DU PROGRAMME DE
TRAITEMENT GLOBAL ADMINISTRÉ PAR UN PROFESSIONNEL DE LA SANTÉ. NOUS NE POUVONS PAS
GARANTIR QUE L’USAGE DE CE PRODUIT SERA DE NATURE À ÉVITER UNE BLESSURE
PROFILO UTENTE PREVISTO:
Il prodotto è destinato a essere utilizzato da un medico professionista, dal paziente o dal
caregiver del paziente.L’utente deve poter leggere, comprendere ed essere fisicamente in grado
di rispettare tutte le indicazioni, le avvertenze e le precauzioni fornite nelle istruzioni per l’uso.
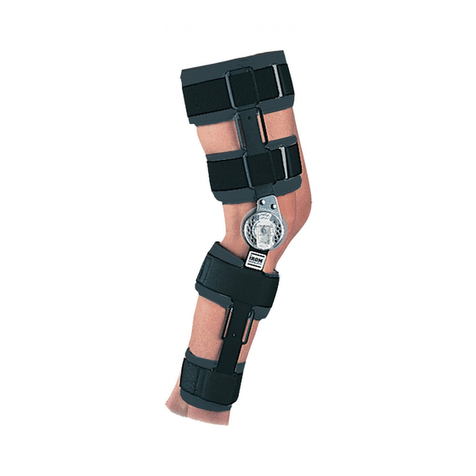
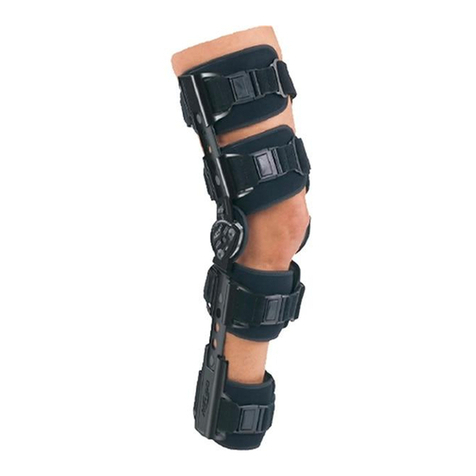
INDICAZIONI: il tutore per ginocchio DonJoy ACL è progettato per sostenere il ginocchio e
permettere una gamma di movimenti con protezione a seguito di lesioni o ricostruzioni del
legamento crociato anteriore (LCA) e di deficienze dei legamenti collaterali.Design morbido/
semirigido per limitare il movimento mediante una struttura elastica o semirigida.Fornisce una
leggera protezione dell’arto o di un segmento del corpo per il trattamento acuto o profilattico.
CONTROINDICAZIONI: nessuna
ISTRUZIONI SULL’APPLICAZIONE:
A) Sedendovi sul bordo di una sedia, infilate la gamba attraverso l’ortesi. Piegando il ginocchio
a 45°, posizio-nate l’ortesi come illustrato nella Figura 1, in modo che la cerniera si trovi 2,5
cm circa sopra la sommità della rotula e leggermente oltre la linea mediana della gamba.
Assicuratevi che l’ortesi non sia girata intorno alla gamba. Fissate la fascetta inferiore del
polpaccio (n. 1), quindi quella superiore della coscia (n. 2).
B) Mantenendo il ginocchio piegato a 45°, spingete entrambi i condili (cerniere) verso il retro
della gamba, come illustrato nella Figura 2. Mantenendo invariata la posizione delle cerniere,
fissate la fascetta inferiore della coscia (n. 3).
C) Tirate le cerniere leggermente in avanti prima di fissare la fascetta frontale della tibia (n. 4).
Non tirate le cerniere oltre la linea mediana della gamba. Fissate quindi la fascetta superiore
del polpaccio (n. 5). Fate attenzione a non stringerla tanto da causare problemi di circolazione.
D) Una volta fissate tutte le fascette, il fulcro della cerniera deve trovarsi appena sopra la
sommità della rotula e leggermente arretrato rispetto alla linea mediana della gamba. Per
evitare lo spostamento dell’ortesi durante l’uso, è consigliabile camminare per qualche minuto
o piegare le ginocchia ripetutamente e quindi ristringere le fascette secondo la necessità,
attenendosi alle istruzioni riportate ai passaggi da B a F.
ISTRUZIONI PER LA REGOLAZIONE DELLE CERNIERE: L’ortesi è provvista di arresti di
estensione ogni 10°. Per cambiarli, asportate innanzitutto la vite (Defiance, Legend, & DonJoy
SE 4-Point figura 5, 4TITUDE figura 6), quindi rimuovete gli arresti ed inserite quelli nuovi,
allineandoli con i fori della placca della cerniera. Completata questa operazione, reinserite la
vite. Utilizzando un cacciavite a croce, accertatevi che le viti siano ben strette e che rientrino
nell’apposita sede. Gli arresti mediale e laterale devono essere identici (in gradi). Copertura
laterale sfilabile di protezione della cerniera (standard sull’ortesi LEGEND, opzionale sull’ortesi
DEFIANCE) Per rimuovere l’arresto di estensione, è necessario flettere prima la cerniera e
sfilarne la copertura di protezione (Figura 7).
Arresti di estensione: 0°, 10°, 20°, 30° e 40°.
Arresti di flessione: 0°, 45°, 60°, 75° e 90° (alla spedizione del prodotto non è installato alcun
arresto di flessione).
AVVERTENZE E PRECAUZIONI:
• La perdita di circolazione, la sensazione di disagio sperimentata dal paziente e una nuova
lesione a suo carico costituiscono effetti potenziali causati dal malfunzionamento del
dispositivo.
• Le impostazioni del ROM non devono essere modificate senza la supervisione di un medico.
• Questo prodotto deve essere prescritto e applicato da un operatore sanitario.
• La frequenza e la durata d’uso devono essere stabilite dall’operatore sanitario.
• Se si sviluppa una reazione allergica e/o si manifesta una sensazione di prurito o si nota un
arrossamento della pelle quando è a contatto con qualsiasi parte del dispositivo, interrompere
l’uso e rivolgersi immediatamente al medico curante.
• In caso di dolore, gonfiore, variazioni di sensibilità o altre reazioni insolite durante l’uso del
prodotto, contattare immediatamente il medico.
• Il supporto deve essere ben aderente, ma non deve ostacolare la circolazione.
• Non usare su ferite aperte.
• Non usare il dispositivo se risulta danneggiato e/o se la confezione è stata aperta.
NOTA: contattare il produttore e l’autorità competente in caso di gravi incidenti dovuti all’uso di
questo dispositivo.
USO E MANUTENZIONE:
• Se durante l’attività fosse necessario ristringere l’ortesi, ristringere tutte le fascette secondo la
sequenza descritta nelle istruzioni per l’applicazione.
• Tutte le fascette ed i cuscinetti possono essere accorciati per adeguarli alla circonferenza
dell’arto del paziente.
• L’ortesi non teme né l’acqua dolce né quella salata. In seguito ad attività che abbiano esposto
all’acqua l’ortesi, farla scolare accuratamente e risciacquarla con acqua dolce pulita. Lasciarla
asciugare all’aria.
• Per lavare a mano i rivestimenti interni ed i cuscinetti condilici, usare acqua fredda e un
detergente neutro. ASCIUGARE ALL’ARIA: NON ESPORRE I RIVESTIMENTI O I CUSCINETTI A
FONTI DI CALORE.
• Il meccanismo della cerniera richiede scarsa manutenzione durante un uso adeguato. Tuttavia,
è possibile applicare un lubrificante secco, come uno spray contenente Teflon™, al suo
meccanismo interno. Tale operazione è consigliata a seguito dell’uso in acqua.
• Controllare periodicamente le viti della cerniera e riavvitarle, se necessario.
PER L’USO SU UN SOLO PAZIENTE.
PRODOTTO RX.
PRODOTTO NON REALIZZATO IN LATTICE DI GOMMA NATURALE.
GARANZIA: DJO, LLC s’impegna alla riparazione o alla sostituzione di tutti i componenti del
dispositivo e dei relativi accessori in caso di difetti di lavorazione o materiali, rinvenuti entro sei
mesi dalla data di acquisto.
PROFIL DE L’UTILISATEUR VISÉ :
Le produit s’adresse à un professionnel de santé agréé, au patient ou à l’aide-soignant du
patient. L’utilisateur doit être capable de lire et de comprendre l’ensemble des consignes, des
avertissements et des précautions qui figurent dans le mode d’emploi et être physiquement
apte à les respecter.
INDICATIONS : L’orthèse de genou DonJoy ACL est conçue pour soutenir le genou et
protéger l’amplitude des mouvements après une blessure du LCA, une reconstruction
du LCA ou une déficience du ligament collatéral. Conçu en matériau souple/semi-rigide
pour restreindre le mouvement grâce à sa texture élastique ou semi-rigide. Elle offre une
protection modérée d’un membre ou d’un segment corporel pour les soins intensifs et
prophylactiques.
CONTRE-INDICATIONS : Aucune
INSTRUCTIONS CONCERNANT LA MISE EN PLACE :
A) Assis sur le bord d’une chaise, genou plié à 45°, enfilez l’orthèse et positionnez-la de la
façon indiquée sur le dessin 1. La charnière doit être placée à environ 2,5 cm au-dessus
de la partie supérieure de la rotule et légèrement en arrière de la ligne médiane.
Assurez-vous que l’attelle n’a pas tourné sur la jambe. Ajustez et serrez d’abord la
sangle antérieure du bas du mollet (No. 1), puis la sangle postérieure du haut de la cuisse
(No. 2).
B) En gardant le genou plié à 45 degrés, poussez les deux charnières vers l’arrière de la
jambe, comme indiqué sur le dessin 2. Tout en maintenant la position des charnières,
ajustez et serrez la sangle postérieure du bas de la cuisse (No. 3).
C) Avancez légèrement les charnières sans toutefois dépasser la ligne médiane de la
jambe, puis ajustez et serrez la sangle tibiale antérieure (No. 4). Ajustez ensuite la sangle
postérieure du haut du mollet (No. 5) sans trop la serrer afin de ne pas géner la circulation.
D) Une fois toutes les sangles ajustées, le centre des charnières doit se positionner juste
audessus de la partie supérieure de la rotule et légèrement en arrière de la ligne médiane.
Afin de prévenir tout glissement durant l’activité, il est recommandé de plier le genou
quelques fois ou de marcher pendant quelques minutes, puis de resserrer les sangles en
suivant les étapes B à F.
REGLAGE DE L’EXTENSION ET DE LA FLEXION : Votre orthèse est livrée avec des butées
d’extension de 10° déjà installées. Pour changer les butées, vous devez d’abord retirer
complètement les vis à l’aide d’un tournevis (embout Phillips) (Defiance, Legend, & DonJoy
SE 4-Point figure 5, 4TITUDE figure 6). Enlevez alors les butées en place. Introduisez les
nouvelles cales, replacez le dessus de la charnière puis revissez complètement. Les butées
d’extension et de flexion des charnières interne et externe doivent être identiques en valeur
de rotation. Couvercle protecteur de charnière à coulissement latéral (standard sur LEGEND
et DEFIANCE extra) Pour enlever la butée d’extension, pliez la charnière et faites glisser le
couvercle protecteur vers l’extérieur avant de retirer la cale (figure 7).
Butées d’extension: 0, 10, 20, 30 et 40 degrés.
Butées de flexion: 0, 45, 60, 75 et 90 degrés (aucune butée de flexion n’est installée lors de
l’expédition).
AVERTISSEMENTS ET PRÉCAUTIONS :
• La perte de circulation, l’inconfort du patient et une nouvelle lésion du patient sont des
effets potentiels en cas de défaillance du dispositif.
• Les réglages de l’amplitude de mouvement ne doivent pas être modifiés sans la supervision
d’un professionnel de santé.
• Ce produit doit être prescrit et installé par un professionnel de santé.
• La fréquence et la durée d’utilisation doivent être déterminées par votre professionnel de
santé.
• En cas de réaction allergique et/ou de démangeaisons ou de rougeurs cutanées après
tout contact avec une partie quelconque de ce produit, cesser de l’utiliser et contacter
immédiatement votre professionnel de santé.
• En cas de douleur, de gonflement, de modification de la sensation ou d’autres réactions
inhabituelles lors de l’utilisation de ce produit, contacter immédiatement un médecin.
• Le support doit être bien serré sans toutefois entraver la circulation.
• Ne pas utiliser sur une plaie ouverte.
• Ne pas utiliser le dispositif s’il est endommagé et/ou si l’emballage a été ouvert.
REMARQUE : Contacter le fabricant et l’autorité compétente en cas d’incident grave
découlant de l’utilisation de ce dispositif.
UTILISATION ET ENTRETIEN :
• Si un réajustement est nécessaire durant l’activité, resserrez toutes les sangles en suivant
les étapes de la notice de pose.
• Toutes les sangles et garnitures peuvent être redécoupées en fonction de la morphologie
de chaque patient.
• L’orthèse peut-être utilisée dans l’eau douce ou l’eau de mer. Après toute activité aquatique,
essorez soigneusement les garnitures. Rincez les garnitures et l’armature à l’eau douce,
puis laissez sécher à l’air libre.
• Les garnitures et les coussins condyliens se lavent à l’eau froide à l’aide d’un détergent
doux. LAISSEZ SECHER A L’AIR LIBRE, NE PAS POSER PRES D’UNE SOURCE DE CHALEUR.
• Le mécanisme de la charnière nécessite un entretien réduit dans des conditions normales
d’utilisation. Vous pouvez, toutefois, utiliser un lubrifiant sec, tel un pulvérisateur de
Teflon™, sur le mécanisme interne de la charnière. Il est recommandé de mettre ce lubrifiant
après toute utilisation dans l’eau.
• Vérifiez périodiquement les vis de la charnière et resserrez-les si cela est nécessaire.
RÉSERVÉ À UN USAGE SUR UN SEUL PATIENT.
PRODUIT DÉLIVRÉ SOUS ORDONNANCE.
FABRIQUÉ SANS LATEX DE CAOUTCHOUC NATUREL.
ANWENDERPROFIL:
Das Produkt ist für zugelassene medizinische Fachkräfte, Patienten oder Pflegekräfte des Patienten
bestimmt. Der Anwender sollte in der Lage sein, alle Anweisungen, Warnungen und Vorsichtshinweise
in der Gebrauchsanweisung zu lesen und zu verstehen, und körperlich in der Lage sein, diese
auszuführen.
INDIKATIONEN: Die DonJoy ACL-Knieorthese wurde entwickelt, um das Knie zu stützen und
einen geschützten Bewegungsumfang nach ACL-Verletzungen, ACL-Rekonstruktionen und
Seitenbandinstabilitäten zu gewährleisten. Textilmaterial/halbsteif, um Bewegungen durch eine
elastische oder halbsteife Konstruktion einzuschränken. Sanfter Schutz einer Extremität oder eines
Körpersegments für die Akut- und Prophylaxeversorgung.
KONTRAINDIKATIONEN: Keine
ANWENDUNGSHINWEISE:
A) Während Sie auf einem Stuhl sitzen, streifen Sie die Orthese über den Fuß. Mit dem Knie in
Beugestellung von 45° die Orthese wie in Abbildung 1 gezeigt positionieren. Dabei wird das Gelenk in
eine Position ungefähr 2,5 cm oberhalb des Kniescheibenoberrandes und knapp hinter der seitlichen
Mittellinie des Beines gebracht. Achten Sie darauf, daß die Orthese am Bein nicht verdreht ist. Ziehen
Sie zuerst den unteren Unter-schenkelgurt (Nr. 1) und dann den oberen Oberschenkelgurt (Nr. 2) an.
B) Mit dem Knie weiterhin in Beugestellung von 45° die beiden Gelenke in Richtung Rückseite des
Beins schieben (siehe Abbildung 2). Unter Beibehaltung der Gelenke in dieser Position, den oberen
Unterschenkelgurt (Nr. 3) befestigen.
C) Die Gelenke etwas nach vorne ziehen, bevor der vordere Schienbeingurt (Tibiagurt) befestigt
wird (Nr. 4). Die Gelenke nicht hinter die seitliche Mittellinie des Beins ziehen. Danach wird der
obere Unter-schenkelgurt (Nr. 5) festgezogen. Diesen Gurt nicht zu fest anziehen, da sonst die
Durchblutung beeinträchtigt wird.
D) Nach dem Festziehen aller Gurte sollte der Mittelpunkt des Gelenkes etwas oberhalb der
Kniescheibenoberseite und ein wenig hinter der seitlichen Mittellinie des Beins liegen. Um ein
Verschieben der Orthese bei Tätigkeiten zu vermeiden, wird empfohlen, ein paar Kniebeugen zu
machen oder für einige Minuten umherzugehen und anschließend die Gurte erneut festzuziehen,
wobei den Schritten B bis F gefolgt wird.
ANWEISUNGEN ZUR GELENKEINSTELLUNG: In Ihrer Knieorthese sind Streckbegrenzungskeile
von 10° installiert. Um die installierten Keile auszuwechseln, zunächst die in (Defiance, Legend, &
DonJoy SE 4-Point Abbildung 5, 4TITUDE Abbildung 6) gezeigte Schraube ganz herausschrauben
und die Keile entfernen. Die neuen Keile einsetzen, mit den Löchern in der Gelenkplatte ausrichten
und die Schraube wieder einsetzen. Mit einem Kreuzschlitzschraubenzieher die Schraube ganz in die
Vertiefung einschrauben und fest anziehen. Die medialen und lateralen Keile müssen den gleichen
Grad aufweisen. Laterale Gleitschutzabdeckung für das Gelenk (standardmäßige Ausrüstung für
LEGENDKnieorthese und auf Wunsch auch für DEFIANCE-Orthese erhältlich) Um die Begrenzungskeile
zu entfernen, muß vorher das Gelenk gebeugt und die Schutzabdeckung abgeschoben werden (siehe
Abbildung 7).
Streckbegrenzungskeile: 0°, 10°, 20°, 30° und 40°.
Beugebegrenzungskeile: 0°, 45°, 60°, 75° und 90° (bei Lieferung sind keine
Beugebegrenzungskeile installiert).
WARNHINWEISE UND VORSICHTSMASSNAHMEN:
• Durchblutungsstörungen, Patientenbeschwerden und erneute Verletzungen des Patienten können
durch Mängel der Vorrichtung verursacht werden.
• Die ROM-Einstellungen dürfen nur unter der Aufsicht eines Arztes geändert werden.
• Dieses Produkt ist verschreibungspflichtig und muss unter Aufsicht einer medizinischen Fachkraft
angepasst werden.
• Die Häufigkeit, die Dauer der Anwendung und die Gebrauchsanweisung sollten vom Arzt bestimmt
werden.
• Wenn eine allergische Reaktion auftritt und/oder Sie nach Kontakt mit einem Teil dieses Produkts
eine juckende, gerötete Haut bemerken, verwenden Sie das Produkt nicht länger und wenden Sie sich
sofort an Ihren Arzt.
• Wenn bei der Verwendung dieses Produkts Schmerzen, Schwellungen, Empfindungsänderungen oder
andere ungewöhnliche Reaktionen auftreten, nehmen Sie bitte sofort Kontakt mit Ihrem Arzt auf.
• Die Orthese sollte fest sitzen, darf die Blutzirkulation jedoch nicht beeinträchtigen.
• Nicht auf offenen Wunden verwenden.
• Das Produkt nicht verwenden, wenn es beschädigt ist und/oder die Verpackung geöffnet wurde.
HINWEIS: Den Hersteller und die zuständige Behörde benachrichtigen, falls es durch die Verwendung
dieses Produkts zu einem schwerwiegenden Vorfall kommt.
GEBRAUCH UND PFLEGE:
• Falls die Knieorthese bei Tätigkeiten erneut festgezogen werden muß, alle Gurte wie in den obigen
Anweisungsschritten beschrieben festziehen.
• Alle Gurte und Polster können zurechtgeschnitten werden, um sie an individuelle Unterschiede im
Beinumfang anzupassen.
• Die Orthese kann in Süß- oder Meerwasser verwendet werden. Nach Benutzung der Orthese in
Wasser, das Wasser gründlich ablaufen lassen und Orthese mit sauberem, frischen Wasser spülen
und danach lufttrocknen.
• Einlagen und Kondylenpolster mit kaltem Wasser und mildem Waschmittel von Hand waschen.
EINLAGEN UND POLSTER NUR LUFT- UND NICHT HITZETROCKNEN.
• Bei normalem Gebrauch ist der Gelenkmechanismus fast wartungsfrei. Der Gelenkinnenmechanismus
kann jedoch mit einem trockenen Gleitmittel wie Teflon™-Spray geschmiert werden. Nach Gebrauch in
Wasser wird die Schmierung mit einem trockenen Gleitmittel empfohlen.
• Die Gelenkschrauben regelmäßig auf festen Sitz überprüfen und, falls nötig, festziehen.
NUR ZUM GEBRAUCH AN EINEM PATIENTEN BESTIMMT.
RX-PRODUKT.
NICHT AUS NATURKAUTSCHUKLATEX HERGESTELLT.
GARANTIE: DJO, LLC garantiert bei Material- oder Herstellungsdefekten die Reparatur bzw. den
Austausch der kompletten Vorrichtung oder eines Teils der Vorrichtung und aller zugehörigen
Zubehörteile für einen Zeitraum von sechs Monaten ab dem Verkaufsdatum.
#1
#2
#3
#4
#5
10
10
1 2
3 4
5 6
7VORSICHT: NACH US-AMERIKANISCHEM GESETZ DARF DIESE VORRICHTUNG NUR DURCH
ODER AUF ANORDNUNG EINES ZUGELASSENEN ARZTES BZW. EINER MEDIZINISCHEN
FACHKRAFT VERKAUFT WERDEN. ATTENZIONE: LA LEGGE FEDERALE STATUNITENSE LIMITA LA VENDITA DI QUESTO
DISPOSITIVO A PERSONALE MEDICO O PROVVISTO DI PRESCRIZIONE MEDICA.
AVERTISSEMENT : LA LOI FÉDÉRALE AMÉRICAINE (ÉTATS-UNIS) EXIGE QUE CET APPAREIL
SOIT VENDU UNIQUEMENT PAR OU SUR L’ORDRE D’UN PROFESSIONNEL DE LA SANTÉ
AUTORISÉ.
