GERMAN ITALIAN FRENCH
DEUTSCH ITALIANO FRANÇAIS
VOR GEBRAUCH DER VORRICHTUNG BITTE DIE GEBRAUCHSANWEISUNG SORGFÄLTIG
DURCHLESEN. DIE EINWANDFREIE FUNKTION DER VORRICHTUNG IST NUR BEI
RICHTIGEM ANLEGEN GEWÄHRLEISTET.
PRIMA DELL’USO, LEGGERE INTERAMENTE E ATTENTAMENTE QUESTE ISTRUZIONI.
LA CORRETTA APPLICAZIONE È DI FONDAMENTALE IMPORTANZA PER UN
FUNZIONAMENTO CORRETTO.
LIRE ATTENTIVEMENT LA TOTALITÉ DES INSTRUCTIONS SUIVANTES AVANT D’UTILISER
LE DISPOSITIF. UNE MISE EN PLACE CORRECTE EST INDISPENSABLE AU BON
FONCTIONNEMENT DU DISPOSITIF.
HINWEIS: OBWOHL ALLE ANSTRENGUNGEN UNTERNOMMEN WURDEN, UNTER EINSATZ
MODERNSTER VERFAHREN MAXIMALE KOMPATIBILITÄT VON FUNKTION, FESTIGKEIT, HALTBARKEIT
UND OPTIMALEM SITZ ZU ERZIELEN, KANN KEINE GARANTIE GEGEBEN WERDEN, DASS DURCH DIE
ANWENDUNG DIESES PRODUKTS VERLETZUNGEN VERMIEDEN WERDEN KÖNNEN.
AVVISO: SEBBENE OGNI SFORZO SIA STATO COMPIUTO CON L’IMPIEGO DI TECNICHE D’AVANGUARDIA
PER FABBRICARE UN PRODOTTO CHE OFFRA IL MASSIMO DELLA FUNZIONALITÀ, ROBUSTEZZA,
DURATA E BENESSERE, NON VIENE DATA ALCUNA GARANZIA CHE L’USO DI TALE PRODOTTO POSSA
PREVENIRE LESIONI.
AVIS : BIEN QUE TOUTES LES TECHNIQUES DE POINTE AIENT ÉTÉ UTILISÉES AFIN D’OBTENIR LE NIVEAU
MAXIMAL DE COMPATIBILITÉ DE FONCTION, DE RÉSISTANCE, DE DURABILITÉ ET DE CONFORT, IL N’EST
PAS GARANTI QUE L’UTILISATION DE CE PRODUIT PRÉVIENNE TOUTE BLESSURE.
12
4a3
4c4b
5a 5b
PROFILO UTENTE PREVISTO: il prodotto è destinato a essere utilizzato
da un medico professionista, dal paziente, dal caregiver del paziente o
da un familiare che lo assiste. L’utente deve poter leggere, comprendere
ed essere fisicamente in grado di rispettare tutte le indicazioni, le
avvertenze e le precauzioni fornite nelle istruzioni per l’uso.
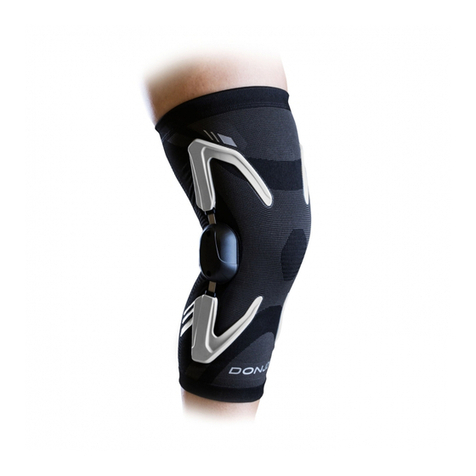
USO PREVISTO/INDICAZIONI: la fascia patello-femorale del sistema
avanzato DonJoy Hinged Tru-pull è progettata per fornire supporto
per il sollievo sintomatico di disfunzioni patello-femorali che includono
dislocazione e/o tendinite rotulea. Progettato nella modalità soft-good/
semirigida per limitare il movimento attraverso una struttura elastica o
semirigida.
CONTROINDICAZIONI: non utilizzare se si è allergici al neoprene.
AVVERTENZE E PRECAUZIONI:
• Il prodotto deve essere applicato con la supervisione di personale
medico qualificato.
• In caso di dolore, gonfiore, variazioni di sensibilità o altre reazioni
insolite durante l’uso del prodotto, contattare immediatamente il
medico.
• Non usare su ferite aperte.
• Non utilizzare questo dispositivo se è stato danneggiato e/o la
confezione è stata aperta.
• Se si sviluppa una reazione allergica e/o si manifesta prurito o si nota
arrossamento cutaneo dopo il contatto con qualsiasi parte di questo
dispositivo, interromperne l’utilizzo e contattare immediatamente il
medico.
NOTA: contattare il produttore e l’autorità competente in caso di gravi
incidenti dovuti all’uso di questo dispositivo.
INFORMAZIONI PER L’APPLICAZIONE: Per la prima applicazione,
allentare gli strap ed estrarre l’imbottitura interna dallo stivale.
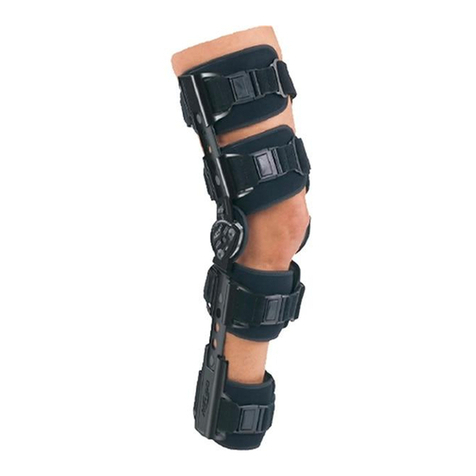
1) Tirare la guaina lungo la gamba utilizzando gli appositi occhielli.
Posizionare la guaina sulla gamba in modo che l’apposita apertura
circondi la rotula
(
Figura
1).
Scegliere il più confortevole. Posizionare il rinforzo sul margine
mediale o laterale della rotula per il sollievo dei sintomi.
2) Prendere lo strap inferiore, avvolgerlo intorno al polpaccio e fissare il
velcro all’estremità inferiore della guaina (Figura 2 e 3).
3) Prendere lo strap superiore, avvolgerlo intorno alla coscia e fissare
il velcro sulla guaina (Figura 2 e 3). Regolare la tensione sulla rotula
stringendo gli strap attorno alla coscia e al polpaccio.
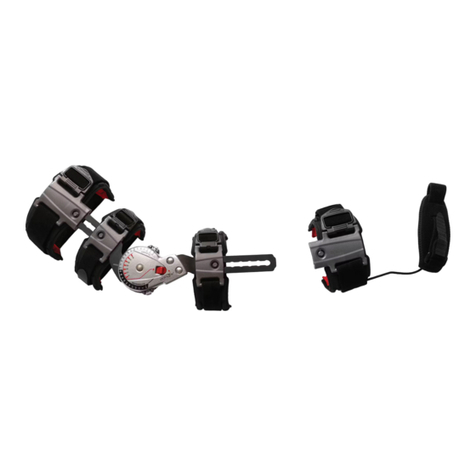
a)Per rimuovere le articolazioni: prendere la parte inferiore del tutore
per l’articolazione (Figura 4a).
b)Tirare fino alla parte superiore del materiale del tutore in modo
da permettere alla parte superiore dell’articolazione di fuoriuscire
dall’incisione nel coperchio dell’articolazione (Figura 4b).
c)Tenere la parte superiore dell’asta ed estrarre l’articolazione
(Figura 4c).
a)Per inserire le articolazioni: assicurarsi che l’articolazione si pieghi
nella stessa direzione del ginocchio prima di inserirla (Figura 5a).
b) Aprire l’incisione nel coperchio dell’articolazione e inserire l’asta
dell’articolazione (Figura 5b).
ISTRUZIONI PER LA PULIZIA: Lavare le imbottiture a mano in acqua
fredda con sapone neutro. Asciugare all’aria. Nota: Se non risciacquate
perfettamente, i residui di sapone potrebbero provocare irritazioni
cutanee o danneggiare il materiale.
GARANZIA: DJO, LLC si impegna a riparare o sostituire il prodotto e i
relativi accessori, per intero o in parte, per eventuali difetti dei materiali o
di lavorazione per un periodo di sei mesi dalla data di acquisto.
Brevetti in corso di registrazione.
PROFIL DE L’UTILISATEUR VISÉ: Le produit s’adresse à un professionnel
de santé agréé, au patient, à l’aide-soignant ou à un membre de la
famille qui prodigue les soins au patient. L’utilisateur doit être capable
de lire et de comprendre l’ensemble des instructions, avertissements et
précautions qui figurent dans le mode d’emploi, et être physiquement
apte à les respecter.
UTILISATION/INDICATIONS: Traitement symptomatique des
dysfonctionnements fémoropatellaires, tels que les luxations et/
ou subluxations, les défauts d’alignement et d’articulation et les
tendinites rotuliennes. Produit en textile/matériau semi-rigide conçu
pour restreindre le mouvement grâce à une construction élastique ou
semi-rigide.
CONTRE-INDICATIONS: Ne pas utiliser en cas d’allergie au néoprène.
AVERTISSEMENTS ET PRÉCAUTIONS:
• Ce produit doit être placé sous la supervision d’un professionnel de
santé.
• En cas de douleur, d’enflure, d’altération de la sensation ou de toute
autre réaction anormale lors de l’utilisation de ce produit, contacter
immédiatement votre médecin.
• Ne pas utiliser sur une plaie ouverte.
• Ne pas utiliser ce dispositif s’il a été endommagé et/ou si l’emballage a
été ouvert.
• En cas de réaction allergique et/ou de démangeaisons ou de rougeurs
cutanées après tout contact avec une partie quelconque de ce dispositif,
cesser de l’utiliser et contacter immédiatement un professionnel de
santé.
REMARQUE: Contacter le fabricant et l’autorité compétente en cas
d’incident grave découlant de l’utilisation de ce dispositif.
INSTRUCTIONS DE MISE EN PLACE:
1) Enfiler l’orthèse en s’aidant des anneaux. L’orthèse doit être
positionnée de façon à ce que l’ouverture circulaire entoure la
rotule (figure 1). Choisir entre les deux renforts celui qui est le plus
confortable. Le positionner sur la face interne ou externe de la rotule,
suivant le cas.
2) Enrouler la sangle inférieure autour du mollet et la fixer à l’aide du
crochet situé sur la partie inférieure de l’orthèse (figures 2 et 3).
3) Enrouler la sangle inférieure autour du mollet et la fixer à l’aide du
crochet situé sur la partie inférieure de l’orthèse (figures 2 et 3).
Ajuster la tension exercée sur la rotule en serrant les sangles qui
entourent la cuisse et le mollet.
a)Pour retirer les charnières : tenir l’orthèse par le bas de la charnière.
(Figure 4a)
b)Tirer sur le tissu de l’orthèse jusqu’à ce que le haut de la barre de la
charnière dépasse par la fente prévue à cet effet. (Figure 4b)
4c) Tenir le haut de la barre et sortir la charnière. (Figure 4c)
a)Pour remettre en place les charnières : vérifier que les charnières sont
orientées dans le sens de la courbure du genou avant de les insérer.
(Figure 5a)
b) Dégager la fente prévue à cet effet sur l’orthèse et insérer la barre de
la charnière. (Figure 5b)
INSTRUCTIONS DE NETTOYAGE: Nettoyer le chausson à la main avec
de l’eau froide et un savon doux. Laisser sécher à l’air libre.
Remarque : si le rinçage est insuffisant, les résidus de savon risquent
d’irriter la peau du patient et de détériorer le matériau.
GARANTIE: DJO LLC réparera ou remplacera tout ou partie de l’unité et
de ses accessoires pour tout vice de matériau ou de fabrication pour une
période de six mois à compter de la date de vente.
Brevet en instance.
ANWENDERPROFIL: Das Produkt ist für zugelassene medizinische
Fachkräfte, Patienten, Pflegekräfte des Patienten oder unterstützende
Familienmitglieder bestimmt. Der Anwender sollte in der Lage
sein, alle Anweisungen, Warnungen und Vorsichtshinweise in den
Gebrauchsinformationen zu lesen, zu verstehen und körperlich in der
Lage sein, diese auszuführen.
VERWENDUNGSZWECK/INDIKATIONEN: Die DonJoy Tru-Pull
Advanced System Patellofemorale Manschette wurde entwickelt, um
Unterstützung bei der symptomatischen Linderung von patellofemoralen
Dysfunktionen einschließlich Dislokation und/oder Patella-Tendonitis zu
bieten. Textilmaterial/halbsteif, um Bewegungen durch eine elastische
oder halbsteife Konstruktion einzuschränken.
KONTRAINDIKATIONEN: Nicht verwenden, wenn Sie allergisch auf
Neopren reagieren.
WARNHINWEISE UND VORSICHTSMASSNAHMEN:
• Dieses Produkt muss unter der Aufsicht einer medizinischen Fachkraft
angebracht werden.
• Wenn bei der Verwendung dieses Produkts Schmerzen, Schwellungen,
Empfindungsänderungen oder andere ungewöhnliche Reaktionen
auftreten, nehmen Sie bitte sofort Kontakt mit Ihrem Arzt auf.
• Nicht auf offenen Wunden verwenden.
• Dieses Produkt nicht verwenden, wenn es beschädigt und/oder die
Verpackung geöffnet wurde.
• Wenn eine allergische Reaktion auftritt und/oder Sie nach Kontakt mit einem
Teil dieses Produkts eine juckende, gerötete Haut bemerken, verwenden Sie
das Produkt nicht länger und wenden Sie sich sofort an Ihren Arzt.
HINWEIS: Den Hersteller und die zuständige Behörde benachrichtigen,
falls es durch die Verwendung dieses Produkts zu einem
schwerwiegenden Vorfall kommt.
INFORMATIONEN ZUM GEBRAUCH: Beim Erstgebrauch lockern Sie
alle Bänder und nehmen den Einsatz aus dem Stiefel heraus.
1) Ziehen Sie die Stütze an den Fingerschlaufen über das Bein. Die
Stütze ist so auf dem Bein zu platzieren, dass die Kniescheibe in
der Patella-Aussparung zentriert ist (Abbildung 1). Es stehen zwei
Abstützungen zur Auswahl. Wählen Sie die für Sie bequemste aus.
Legen Sie die Abstützung entsprechend am medialen oder lateralen
Rand der Patella an, um die Indikation zu behandeln.
2) Legen Sie das untere Band um die Wade und fixieren Sie es am
unteren Ende der Stütze (Abbildungen 2 & 3).
3) Legen Sie das obere Band um den Oberschenkel und fixieren Sie es an
der Stütze (Abbildungen 2 & 3). Passen Sie die Spannung an der Patella
an, indem Sie die Zugbänder um den Oberschenkel und die Wade
fester anziehen.
a)
Entfernen der Scharniere: Halten Sie den unteren Teil der Stütze am
Scharnier fest.
(Abbildung 4a)
b)Schieben Sie das Scharnier zum oberen Rand der Stützbandage,
sodass es aus dem Schlitz der Scharnierabdeckung heraus gedrückt
wird. (Abbildung 4b)
c)Halten Sie die Oberseite der Stange und ziehen Sie das Scharnier
heraus. (Abbildung 4c)
a)Einsetzen der Scharniere: Achten Sie darauf, dass sich das Scharnier
in dieselbe Richtung wie das Knie biegt, bevor Sie es einsetzen.
(Abbildung 5a)
b) Öffnen Sie den Schlitz in der Scharnierabdeckung und setzen Sie die
Scharnierstange ein. (Abbildung 5b)
HINWEISE ZUR REINIGUNG: Um die Einsätze zu reinigen, waschen Sie
diese von Hand in einer milden, kalten Seifenlauge. Die Teile werden an der
Luft getrocknet. Hinweis: Seifenrückstände können Hautirritationen und
Materialverschleiß hervorrufen.
GARANTIE: DJO, LLC übernimmt die Reparatur oder den Ersatz des Produkts,
eines Teils des Produkts oder des entsprechenden Zubehörs bis zu sechs Monate
ab Kaufdatum, wenn ein Material- oder Herstellungsfehler vorliegt.
Zum Patent angemeldet.
NUR ZUM GEBRAUCH AN EINEM PATIENTEN BESTIMMT.
PER L’USO SU UN SOLO PAZIENTE. RÉSERVÉ À UN USAGE SUR UN SEUL PATIENT UNIQUEMENT.
