Drawell DW-TDZ5-WS Installation manual

Operation Manuals
Benchtop Low-Speed Centrifuge
Model: DW-TDZ5-WS
Thanks for using our centrifuge! In order to get quick and sincere service, please
read the operation manuals carefully before you operate.

CONTENTS
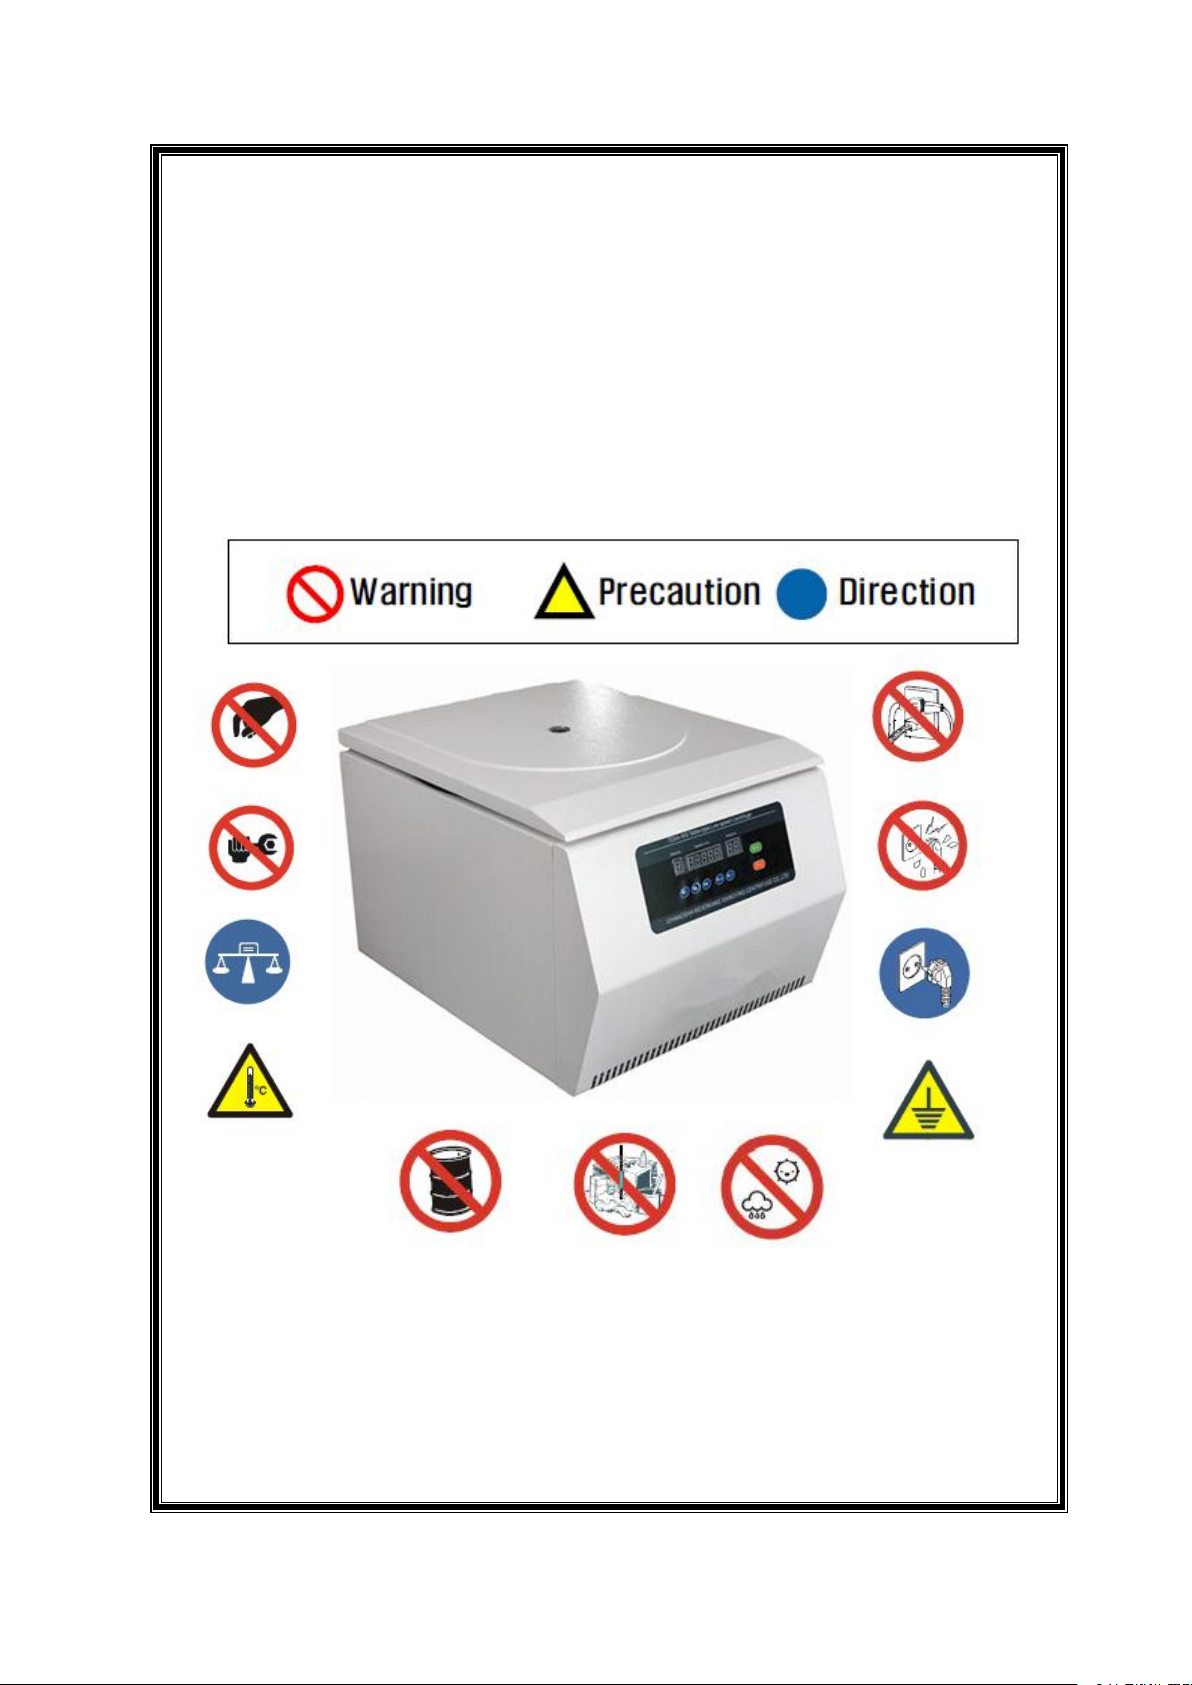
Safety Notices................................................................................................................................. 1
1. Technical description............................................................................................................ 5
2. Technical Features................................................................................................................. 5
3. Technical Data............................................................................................................................ 5
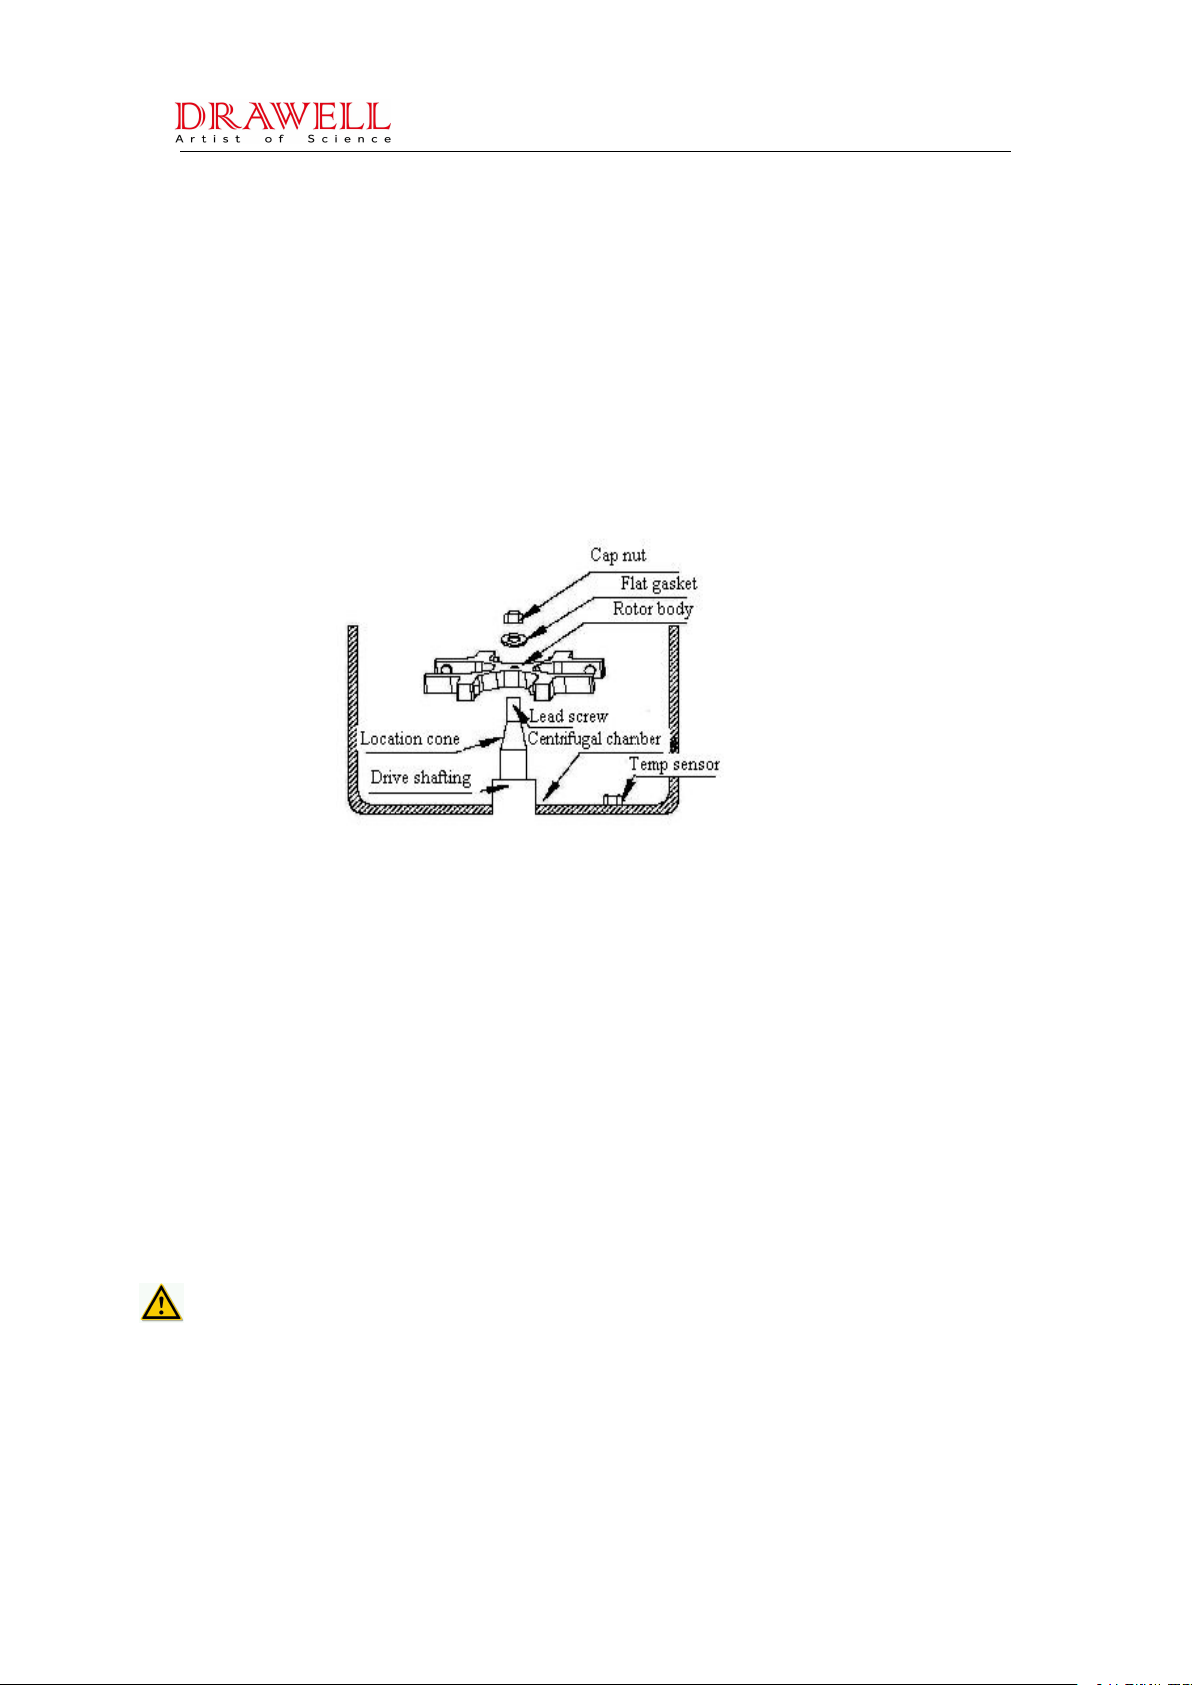
4. Structure Characteristics........................................................................................................ 6
4.1 Structure......................................................................................................................................6
4.2 Main Frame Shap................................................................................................................... 6
5. Installation................................................................................................................................... 6
5.1 Installation Requirement...........................................................................................................6
5.2 Adjusting Requirement..............................................................................................................7
6. operation...................................................................................................................................... 8
6.1 Safety Notice.............................................................................................................................. 8
6.2 How to Operate.....................................................................................................................10
6.2.1 Rotor Installation.................................................................................................................. 10
6.2.2 Tubes Installation................................................................................................................. 10
6.2.3 Preset..................................................................................................................................... 10
6.2.4. Parameter set...................................................................................................................... 11
6.2.5 Start........................................................................................................................................ 11
7. Safety Notice.............................................................................................................................11
8. Maintenance..............................................................................................................................12
9.Trouble Shooting...................................................................................................................... 12
10. Electrical Block...................................................................................................................... 13
Warranty......................................................................................................................................... 14
Quality Certificate........................................................................................................................ 15
Packing List................................................................................................................................... 16

1
Safety Notices
We appreciate your business with us. To prevent any potential accident,
please operate centrifuges according to the following safety protocol.
Safety in installation and maintenance
*The electricity should be cut off before repairing. Please take care if
instrument must be repaired with electricity on. Before opening any lids, please
cut off the electricity and wait for 4 minutes.
*Make sure for placing centrifuge on a steady floor or table and adjusting the
level for normal operation.
*The power supply of centrifuge is the type of nameplate. If you have any
problem of the type of power, please consult the dealer and power supply
bureau in your place.
*As safety measures, the centrifuge equipped with a single-phase
three-phase cable, and the longer cable connects with casing as the protection
grounding. If your sockets hasn’t protection grounding, please contact your
electrician to replace the original socket without allowing security role of
single-phase with three-wire power cable to be invalid.
*When replacing parts, the serviceman should use parts manufacturer
required with the same function of original parts. The unrecognized alternative
parts many cause fire, electric shock or other hazards.
*The room should be installed an air-conditioner for good refrigerating effect
when temperature is higher than 35.℃.
*Please keep cleaning of the installation site for the centrifuge. Pay attention
to the blockage of condenser, it should be cleaned once in three months for
guarantee the refrigerating effect.
*Don’t unpack and repair instrument by oneself. Please contact with our
technicians for necessary matter.
Attention for fireproofing
*Small breaker (Air switch) can protect the circuit when centrifuge
over-currents. Please use breaker (air switch) with same specification and

2
model when replacing it.
*The centrifuge is not designed for the flammable and explosive matters. You
cannot make centrifugal for the matter (chloroform, acetaldehyde), and cannot
put the matters in the centrifuge or store them around centrifuge within 30cm.
Attention for the safe operation
*Please use the rotor and accessories which are designed for this centrifuge.
*Please check rotor, bucket and other accessories carefully before operation.
*Input the right rotor number before operation for not exceeding of its max
speed.
Attention: The max speed of rotor, buckets and accessories may be
different.
*Make sure that rotor can be installed on main spindle correctly for mot
damaging the spindle part.
*Put all buckets (the same model) in rotor before operation for not exceeding
its max imbalance volume, close the rotor lid then.
*Make sure is the centrifugal chamber is cleaned before operation.
*Don’t reduce the speed by hand when it is rotating.
*Don’t open door lid when rotor is rotating
*Don’t move centrifuge lid when rotor is rotating.
*Anything is not allowed to enter into centrifuge during operation.
*If tube broken in centrifugal chamber, please clean out the fragments before
next operation.
*If there is water condensing in centrifugal chamber, please wipe up it with
clean cloth.
*The container with liquid should not be put around centrifuge; the electric
parts may be damaged for water spraying in.
*If centrifuge is irradiated by ultraviolet radiation for long time, the outer skin
may be faded. Clothing should be covered for avoiding irradiation.
*This centrifuge must not be used to separate the sample which producing
flammable and explosive gas. The stock around centrifuge is also forbidden.
*It is forbidden to operate the rotor exceed of its max speed. If user has not
set rotor type according with the number on rotor lid, all damages caused by

3
above misoperation should be borne by user.
*please wipe up the rotor with neutral cleaning mixture after taking out for
avoiding corrosion and then stock it at dry, ventilated place. Central hole in
rotor should be smeared some lubricating grease for protection.
*All action on rotor should be soft, and rotor should be taken out vertically for
protecting the shaft.
*Please wipe up the water in centrifugal chamber if it is leaving unused. Some
lubricating grease should be smeared on drive shaft for protection.
*The interval of between two operations is no less than 5 minutes for avoiding
damage of compressor.
*If rotor damage occurring, allowable space to move for centrifuge is 30cm. *
Anything should not be put around centrifuge within 30cm, especially for
flammable and explosive matter.
*It is not allowed to lean on the centrifuge when it is running. Non-staff are not
allowed to stay in the operation area.
*When unpacking rotor and replacing rotor accessory and sample under
low-temperature, the operator must adapt protection actions for avoiding tissue
frostbiting.
*Centrifuge must be stopped when ant abnormal phenomena occurring or
error code displaying, then you should inform our company or service agent
soon.
Attention for safety in chemistry and biology
The routine manipulation may include all kinds of liquid and test sample which
may be the disease-causing and poisonous matters. The centrifuge can not be
manipulated with the matters unless you have taken the protection measures.
*Please pay attention to the liquid explanation in container before operation.
*Be careful of the infectious liquid. If not understanding the provided sample.
Please at least make sure that they aren’t microbe. You must make further
aerosol protection (the suspended speck aren’t in the air, such as smoke and
fog). For the easier disease-causing hepatitis virus (B or C), HIV, atypical
myco-bacteria and the fungus of physical structure.
*The infectious samples must be manipulated according to the manipulating

4
program and method in lab for avoiding expanding disease.
*The spilt matters may produce aerosol (the suspended speck in the air, such
as smoke and fog.), so please pay attention to the warning about aerosol ( the
suspended speck in the air, such as smoke and fog.)
*Only use the suitable rotor and adapter. The centrifuge can not be
manipulated with disease-causing, poisonous or radioactive matters unless
you substance (according to the “Laboratory Biosafety Manual” of the World
Health Organization.) is manipulated, the air safety level must be monitored.
The superior substances require a higher level of safe protection
measurements.
*You should follow the environment security and protection requirements
when destroying the discarded liquid.
*Users have responsibility to clean ans sterilize centrifuge and accessory if
you need maintenance service from our company.
In a word, centrifuge is a high-risk common equipment in the lab which
refers to safety of people. Correct operation can avoid and reduce
accidents.

5
1. Technical description
DW-TDZ5-WS Benchtop low-speed centrifuge, operates on the principle of
centrifugal sedimentation for the separation, purification or concentration of
solution with different density particles.
The centrifuge consists of housing, centrifugation chamber, drive system,
control system and operating display panel, including rotors and tubes as
accessory.
2. Technical Features
DW-TDZ5-WS centrifuge, equipped with brush-less motor, computer controller,
door safety device etc. for simple operation, is widely used in the fields of
biochemistry, radio immunity, environment protection, Chinese & western
pharmaceutical for particles separation with different density.
3. Technical Data
1. Max. Speed:5000r/min 2. Capacity:4×100ml
3.Max. RCF(field):3500xg 4. Time Range:0~99min
5.Noise:≤65dB 6. Speed control accuracy:±50 r/min
Rotor data
Rotor Number
Max Speed (rpm)
RCF(xg)
Rotor
No.1 AR
5000
3500
12×10ml
No.2 AR
5000
4390
12×15ml
No.3 SR
4000
2810
8×50ml
No.4 SR
4000
2810
8×100ml
No.5 SR
4000
2810
32×10/15ml
No.6 SR
4000
2810
24×10/15ml
No.7 SR
4000
2810
16×10/15ml
No.8 SR
4000
2800
48×7/5/10/15ml
No.9 SR
4000
3000
72×5ml
4×250ml
No.10 SR
3500
2120
2×2×96holes
Rotor:According to the customer's request to process various rotor
Note :Speed and capacity can be customer designed

6
4. Structure Characteristics
4.1 Structure
This centrifuge is composed of main machine, rotor and other accessories
(by user’s option). And main machine is composed of machine frame, door lid,
control panel, drive system and electric control system.
4.2 Main Frame Shap
5. Installation
5.1 Installation Requirement
a). The centrifuge should be placed on the firm table with four feet contacting
the table.
b). Certain space should be allowed around the centrifuge for ideal ventilation.
c). Power: AC 220V 60Hz 10A with socket capacity ﹥10A, ground connection
should be secured.
Warning:This centrifuge should be installed indoor with steady ground, no
conducting dust, no corrosive gas, no strong shocking source and no direct
sunlight.
Space requirement:
The distance between centrifuge and wall should be kept 3cm at least for air
circulation. The room temperature should not exceed 35 for the best.
Power requirements:

7
Warning: The ground wire should be connected properly in case of electric
shock.
As for measures, this centrifuge is adopted with single phase and three
wires plug to make sure of grounding. If your plug can not plug in the mains
jack, please contact the electrician to replay your main jack. Make sure that the
centrifuge is grounded properly.
5.2 Adjusting Requirement
Checking the goods:
Check the packing list the and make sure if damage is occurred during
delivery.
Installation , adjustment and maintenance should all be guided or operated by
professional technicians.
Door lid opening:
After installing the main machine, check the connection of all connectors and
fuses first, and turn on the main switch then. When the screen display
model/Logo, and then the main specifications will be showed. Pull the latch on
the door lid lock device by manually, and the door lid gradually opens at the
holding of gas springs polar and your hands,
Rotor installation:
Rotor should be checked carefully before using. It is forbidden to use rotor
and buckets with crack and corrosion spots (especially the buckets bottom of
swing rotor). All accessories should not be used if it is exceeding of its service
life. The conical surface of driving shaft should be smeared with some
lubricating grease if the main spindle is leaving unused.
Warning: The conical surface of rotor and driving shaft must be connected
closely.
As shown in the following figure: Firstly clasp the symmetric spoke of rotor,

8
and put it on the rotor base vertically and placidly while the rotor bottom’s
location cone aims at the location cone of drive shaft; then put the flat gasket
on the lead screw and screw down the cap nut. At last, hold up the rotor
steadily (not shacking) by one hand, and put the solid wrench on the cap nut
by another hand. In the mean while turn the wrench for 3 to 6 rounds in
clockwise direction until the rotor connects the drive shaft closely.
Rotor disassembly: (After finishing adjust or centrifugal)
First clasp the spoke of rotor with one hand, and put the solid wrench on the
cap nut by another hand. In the mean while turn the wrench for 3 to 6 round in
counter clock wise direction to loose the cap nut until the rotor can be
separated from driving shaft. If the rotor is not taken out from the drive shaft for
a lone time and blocked, you can beat the surrounding spoke of rotor several
times lightly with wooden or rubber hammer. Then clasp the symmetric spoke
of rotor and lift slightly by both hands, and put the rotor on the flat table and
ground covered with soft pad.
Warning: All actions on the rotor must be soft for avoiding the damage of
driving shafting.
6. operation
6.1 Safety Notice
When the centrifuge is under high-speed operation, a small mistake of

9
operation will cause strong damage of the centrifuge. In order to operate the
centrifuge safely, operators should read the instruction manual carefully, and be
careful with the following things:
Performance index for main machine
1. Please make sure the machine and rotor balance before operation.
2. Forbidden for Artificial over speed
Artificial over speed is a serious violation of operating procedures, very easy
to occur personal equipment accidents. Please don’t run the centrifuge over
the max speed of the rotor.
3. Don’t start the centrifuge machine under these conditions:
a. The rotor is unbalance.
b. You have not adjust the level of the centrifuge
4. Please don’t change or set the fixed value of the inverter.
5. The service life of the rotor: The service life of the rotor is 5 years. The use
of cumulative number is 3000 times, the accumulated use time is 2000 hours.
One of the three conditions is reached; the duration of rotor ‘use is invalid.
Prohibit using the rotor with exceeding service life.
5. Please check the rotors if had hair line before use every time. The rotors will
crack if using cracked and corrosion sign rotors.
Check rotor carefully before each operation.
Never use rotor with cracking, corrosion sign, and never use expired rotor.
When maintenance, please take off the plug, wait at least 3mins, then open the
front cover, otherwise, very easy to occur electric shock.
The rotor should be equipped on the rotor block correctly, make sure transfer
pin gather in upon each other.
6. Instrument repair, you should remove the power plug, wait at least 3 minutes,
and then open the front cover, or prone to electric shock.

10
6.2 How to Operate
6.2.1 Rotor Installation
The drive spindle in the chamber and the inside cones of rotor should be first
wiped with a piece of soft and clean cloth, then place the rotor with two hands
to the cone side of the drive spindle in the centrifuge chamber, Washer should
be placed before tightening the screw nuts.
6.2.2 Tubes Installation
Place the bracket into the slot of rotor; make sure that the bracket is turning
smoothly, tube sets (adaptors) are placed into holes of brackets, the solution to
be separated into the tubes. Visually check if the solution in the tubes is
roughly equal before putting them into the tube sets.
6.2.3 Preset
Fig.1 Control Panel
1) Function Declaration of Display Window
①Rotor number Display Window: press "SET" ,when power indicator (red)light
is on, the window of rotor number is flashing, turn the "ENTER" key to
confirm the number.
②Speed Dispaly Window: It can display the running speed and RCF.
Note: the set speed must not exceed the max. speed limit.
③Time Display Window: The window can display the time and the Erro, Detailed
reference to the following sheet 2.
④Set: This button can set rotor number, speed and time.
2) Set button : can set rotor number, speed and time.

11
RCF: show the RCF
▲▼button: Rise or down the number of speed / RCF, when press it. No
matter if the centrifuge is running or not.
6.2.4. Parameter set
a). Program memory set: Turn on power switch, the red light should be on,press "SET",
the window of rotor should flash, set the rotor number and then set the
parameters (speed, time) you need to memory,then Press "ENTER" to
confirm. There are 10 numbers, so can memory 10 program, when you
choose the program just select the cooresponding rotor number.
b). Speed set: press "SET" button, the window of speed should flash, press
"▲", "▼"button to select your ideal speed and confirm.
Note: The selected speed should not exceed the max. speed for bracket.
Time set: Press "SET" button and the time indicator should flash, press
"▲" ,"▼"button to select your desired time and then confirm.
6.2.5 Start
a). Check if the rotor number, speed, separation time are set correctly before
operation.
b). Press START button, and the speed should increase until it reaches to the
set speed.The centrifuge will operate at constant speed you set, and the
timer counts down.
c). If you want to change the value of separation( speed, time) during operation,
you can change the value through speed set, or time set described above.
After confirmation, the centrifuge will operate at the value you reset.
d). Press Speed/RCF switch button during operation, the speed window will
indicate RCF(xg) at the current speed. Press the button again, return to the
speed at the current operation.
e). The speed will decelerate and the centrifuge will buzz when the timer
indicates zero, notifying the operator. The operating light will be off and
stop light on.
f). Press STOP button when you want to stop the machine during operation,
the centrifuge will automatically power off.
7. Safety Notice
1). Confirm button should be pressed after speed is set.
2). The centrifuge will not be allowed to operate under any condition if the
speed exceeds the rated speed for the rotor and brackets.
3). The rotor or tube is prohibited for further use if any corrosion or crack

12
occurred.
4). The door will not be allowed to open when the centrifuge is under
operation.
5). If the rotor is not in use for three months, it should be subjected to operating
for 10 min before it can be allowed to operate at its max speed.
8. Maintenance
1). Dry the centrifuge chamber, rotor and tube with a piece of clean and soft
cloth after operation.
2). Check regularly to find if there is any corrosion or crack on the rotor, bracket,
tube sets and tubes.
3). If the centrifuge will not be in use for a month, take out the rotor from the
chamber, grease the cone side of drive spindle and the center hole of the
rotor, and keep the rotor in a dry place.
9. Trouble Shooting
1). No power indication after the machine is powered on:
a). Check if the power supply is OK.
b). Check if the plug and sockets are well connected.
c). Check if the fuse is burned. The correct size of the fuse is F10A250V
(Φ5×20);
d). Check if the power indicator is burned.
2). After power on, the power indication is OK, but the operation of
machine is abnormal:
a). Check if the time or speed is set .
b). Check if the control circuit is normal.
3). Abnormal vibration occurred after starting the machine:
a). Check if there is any foreign materials in the tube set, check if the
solution in the tubes are properly and symmetrically arranged.
b). Check if the tube set of swing rotor is properly contacted with the
bracket.
Error mind as follow:

13
10. Electrical Block
Display
E2
E3
E7
E8
ERROR
overspeed
Door cover is not
closed
No speed
communication
failure

14
Warranty
Respected customers,
Thank you for purchase of our company’s product. To protect your legal
rights and avoid your worries, we provide warranty service for one year with
the main machines. If it is broken under warranty with un-artificial reason, we
will supply free maintenance service. The customer needs to pay the prime
cost of the product parts if the product has exceeded the warranty period. We
will not supply the free maintenance if any following matter is happened:
1.Exceed of the warranty period or without the warranty card.
2.The trouble is caused by wrong installation, operation and maintenance.
3.The trouble is caused by the unauthorized uninstalling and repairing by our
company.
4.The trouble is caused by using the rotor not equipped with this centrifuge.
5.The trouble is caused by war or other irresistible factors.
This centrifuge has been subjected to thorough testing and quality control
before delivery. We promise to do as below:
1. One year warranty for this centrifuge (from the date of delivery).
2. Our company after-service center will build up files in time and follow up the
user's information.
3. We will offer the replacement parts freely if the centrifuge within warranty

15
Quality Certificate for DW-TDZ5-WS
Benchtop Low-speed Centrifuge
Max.Speed: 5000r/min
Max.RCF: 4390xg
Serial No:
It is certified that the centrifuge is passed quality inspection & test .
Test Department:
Date:

16
Packing List
Ser.No
Description
Quantity
Remark
1
Centrifuge
1set
√
2
Rotor
pcs
√
3
Certificate
1pc
√
4
Operation Instruction
1pc
√
5
Packing List
1pc
√
6
Solid wrench
1pc
√
7
Rotor Handler
1pc
√
8
Adapter
1 set
√
9
10
Rotor
Rotor Number
Max Speed (rpm)
RCF(xg)
Rotor
Mark
No.1 AR
5000
3500
12×10ml
No.2 AR
5000
4390
12×15ml
No.3 SR
4000
2810
8×50ml
No.4 SR
4000
2810
8×100ml
No.5 SR
4000
2810
32×10/15ml
No.6 SR
4000
2810
24×10/15ml
No.7 SR
4000
2810
16×10/15ml
No.8 SR
4000
2800
48×7/5ml
No.9 SR
4000
3000
72×5ml
4×250ml
No.10 SR
3500
2120
2×2×96holes
Rotor:According to the customer's request to process various rotor

17
Warranty Card
Name & Model
DW-TDZ5-WS Benchtop Low-speed Centrifuge
Specifications
Date of Delivery
Address
Service Records
Date
Contents
Signature

Drawell International Technology Limited
Shanghai Drawell Scientific Instrument Co.,Ltd
Add : Suite 1117, Lane561 XiuChuan Rd., Greeland Max-Mall,PuDong , Shanghai
Tel: 0086 21 54411195
Fax: 0086 21 33823261
Web : www.drawell.com.cn
Email : [email protected]
Table of contents
Other Drawell Laboratory Equipment manuals

Drawell
Drawell ZNHW-500ML User manual

Drawell
Drawell DW-280B 18L User manual

Drawell
Drawell DW-FD Sereries User manual

Drawell
Drawell CIC-D100 User manual

Drawell
Drawell LBI-175A-N User manual

Drawell
Drawell DW-GI Series User manual

Drawell
Drawell B Series User manual

Drawell
Drawell GL10-MC Installation manual

Drawell
Drawell TDD4-MC User manual

Drawell
Drawell Gentier 96E User manual
Popular Laboratory Equipment manuals by other brands

CORNING
CORNING AXYGEN AxySpin R instruction manual

REITEL
REITEL SUPERSTEAM operating instructions

Baracoda
Baracoda RoadRunners Laser Programming guide

HAVER & BOECKER
HAVER & BOECKER USC 200 S operating instructions

Harvard Bioscience
Harvard Bioscience CMA 470 user manual

Biotage
Biotage Isolera Prime user manual