Drawell DW-FD Sereries User manual

Drawell Scientific
USER’S MANUAL
DW-FD Series
FD Series Automatic Autoclave

Drawell Scientific
Content
Precautions on Safe Operation-----------------------------------------------------------02
Chapter 1 External Features&Controller—-------------------------------------------03
1.External Features-------------------------------------------------------------------------03
2.Introduction of the controller------------------------------------------------------------04
Chapter 2 Technical Specification------------------------------------------------------05
1.Technical Specification-----------------------------------------------------------------05
Chapter 3 Installation of Instrument-----------------------------------------------------06
1. Placement of Instrument---------------------------------------------------------------06
2. Connection--------------------------------------------------------------------------------06
3. Setting--------------------------------------------------------------------------------------06
Chapter 4 Operation Instruction---------------------------------------------------------07
Basic Sterilization Illustration & Operation Instruction------------------------------07
1. Turning on the power--------------------------------------------------------------------07
2. Opening the sterilizer chamber cover-----------------------------------------------07
3. Adding distilled water-------------------------------------------------------------------08
4. Loading articles to be sterilized-------------------------------------------------------08
5. Closing the sterilizer chamber cover------------------------------------------------09
6. Selecting sterilizing program----------------------------------------------------------09
7. Starting sterilization--------------------------------------------------------------------10
8. Opening the cover & Program finished--------------------------------------------10
9. Taking the sterilized articles out------------------------------------------------------11
10.Turning off the power-------------------------------------------------------------------11
Chapter 5 Troubleshooting----------------------------------------------------------------11
Chapter 6 Maintenance & Care----------------------------------------------------------12
Chapter 7 Setting of Administrator-------------------------------------------------------13
Chapter 8 Diagram of Pipeline& Interface
1.A series diagram of pipeline----------------------------------------------------------15
2.R series diagram of pipeline---------------------------------------------------------- 15
3.FD65R/FD65A/FD80R/FD100R/FD100A diagram of interface---------------16
4.FD36R/FD36A/FD50R/FD50A diagram of interface-----------------------------16
Chapter 9 Wiring diagram
1.FD36R/FD50R/FD65R/FD80R/FD100R Electrical schematic diagram------17
2.FD36A/FD50A/FD65A/FD80A/FD100A Electrical schematic diagram------18

Drawell Scientific
Precautions on Safe Operation
Precaution:
♦For your safety and to operate the instrument properly, please read this operation instruction
carefully before using and operate the following requirements in this manual.Where you violate
the instruction of manufacturer in this manual, it is possible to damage the protection of this
instrument.
♦This instrument shall not be used for purposes other than sterilization,drying,and it shall also
not be used for sterilizing the flammable, explosive and readily oxidizable products or strong acid,
alkali and saline solutions to avoid explosionand corruption of sterilizer chamber or pipelines.
♦The power supply of sterilizer should be properly connected according to nameplate on the
instrument. In case of excessive voltage fluctuation, the regulated power supply shall be used to
ensure optimum performance of the instrument. IF you are using other types of voltage, a
transformer must be used to prevent the instrument from being damaged.
♦It is necessary to ground the instrument properly, and never connect the ground wire to
plastic pipeline, gas pipe, telephone ground wire and lightning rod.
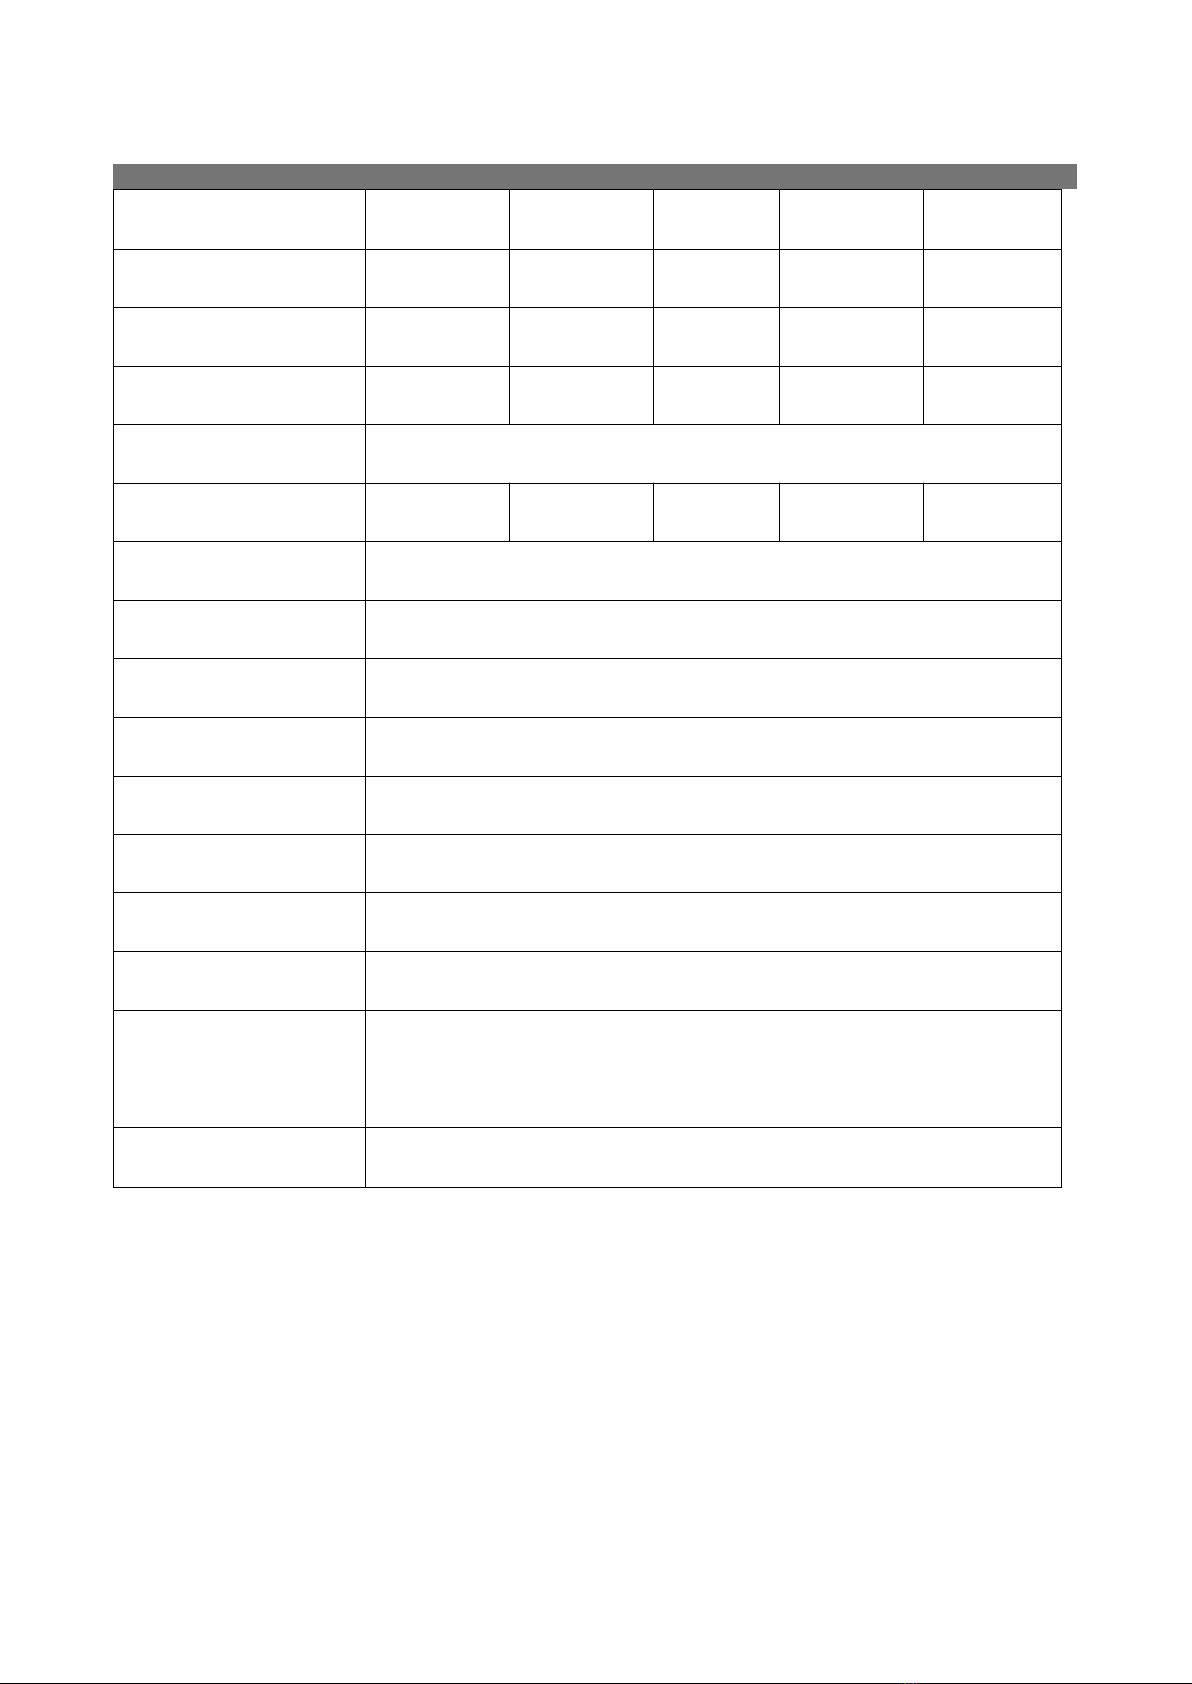
♦Never block the steam exhaust hole on the safety valve with articles, so that the safety valve
may work properly under abnormal conditions.
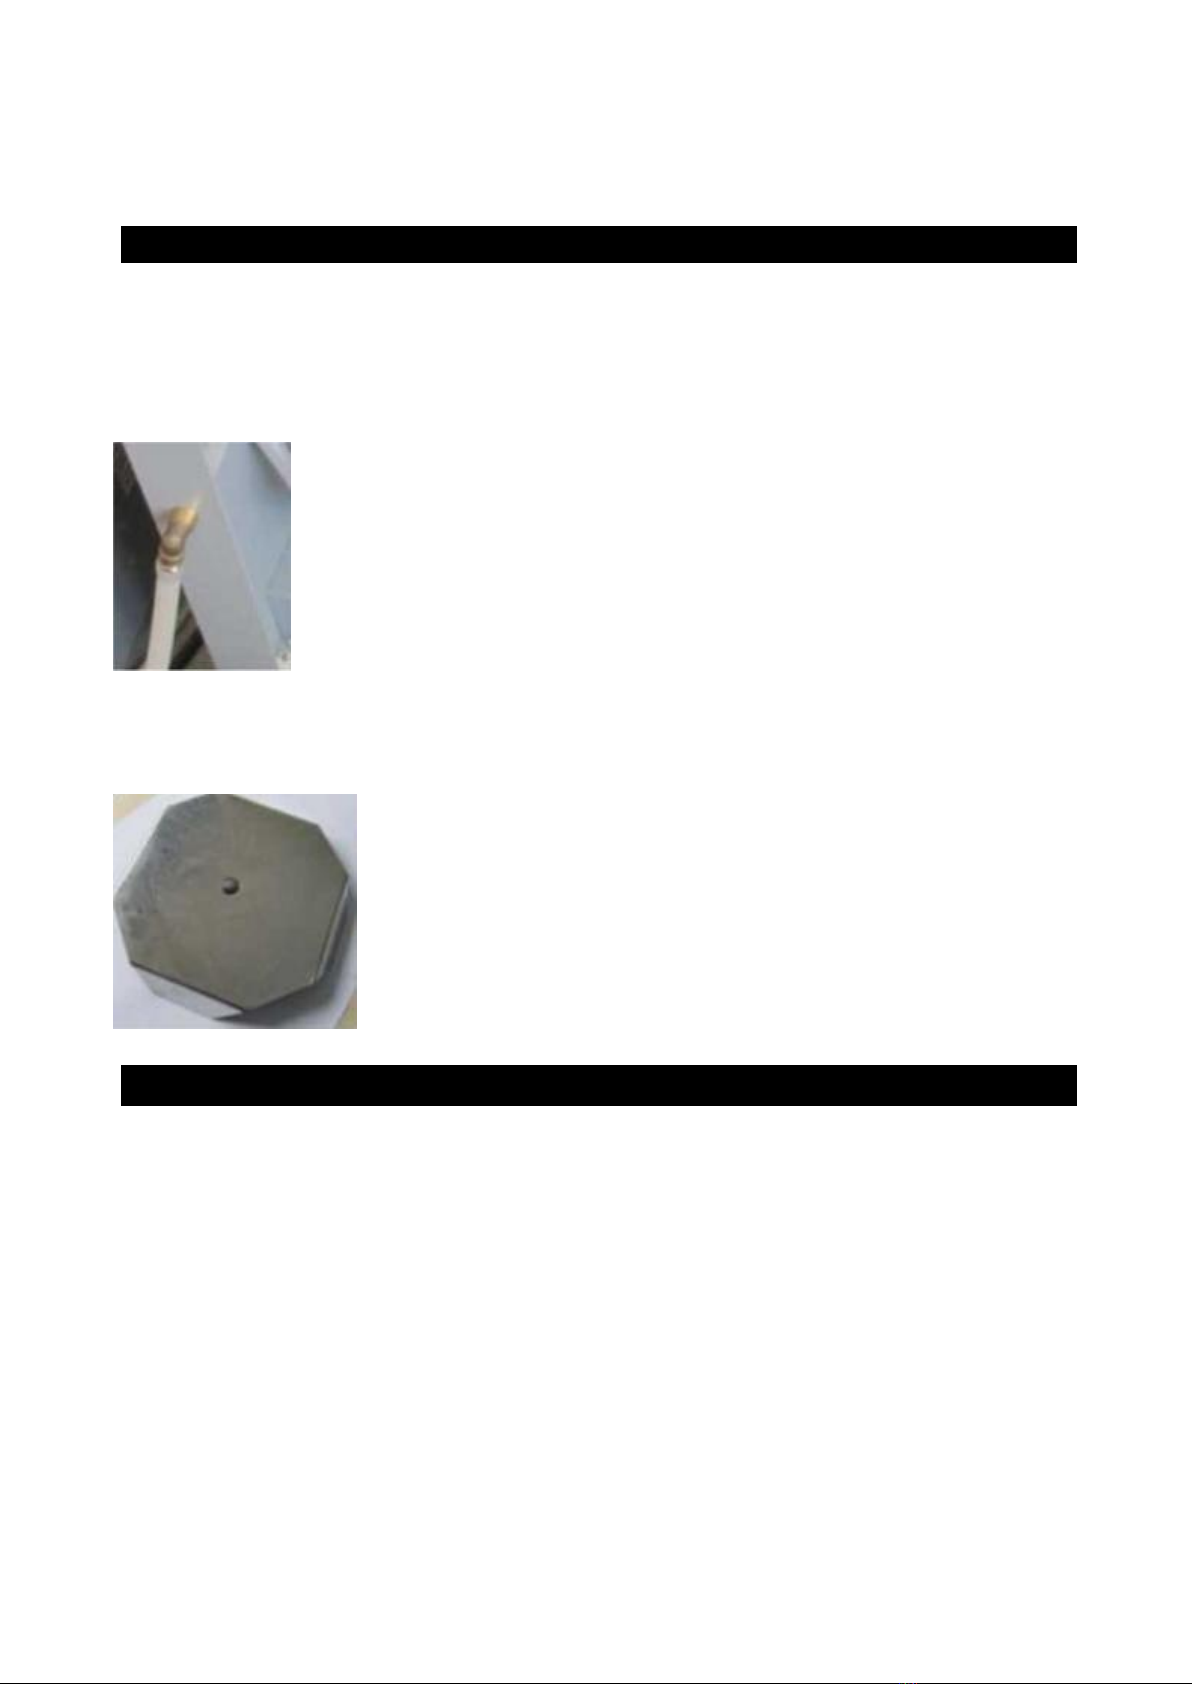
♦Always ensure that the reading of pressure gauge is "OMpa" before opening the chamber
cover. Never attempt to open the chamber cover and drainage valve, or draw out the steam
trapping bottle when the pressure inside the sterilizer chamber is over "OMpa" to avoid injury
from ejected pressurized steam.
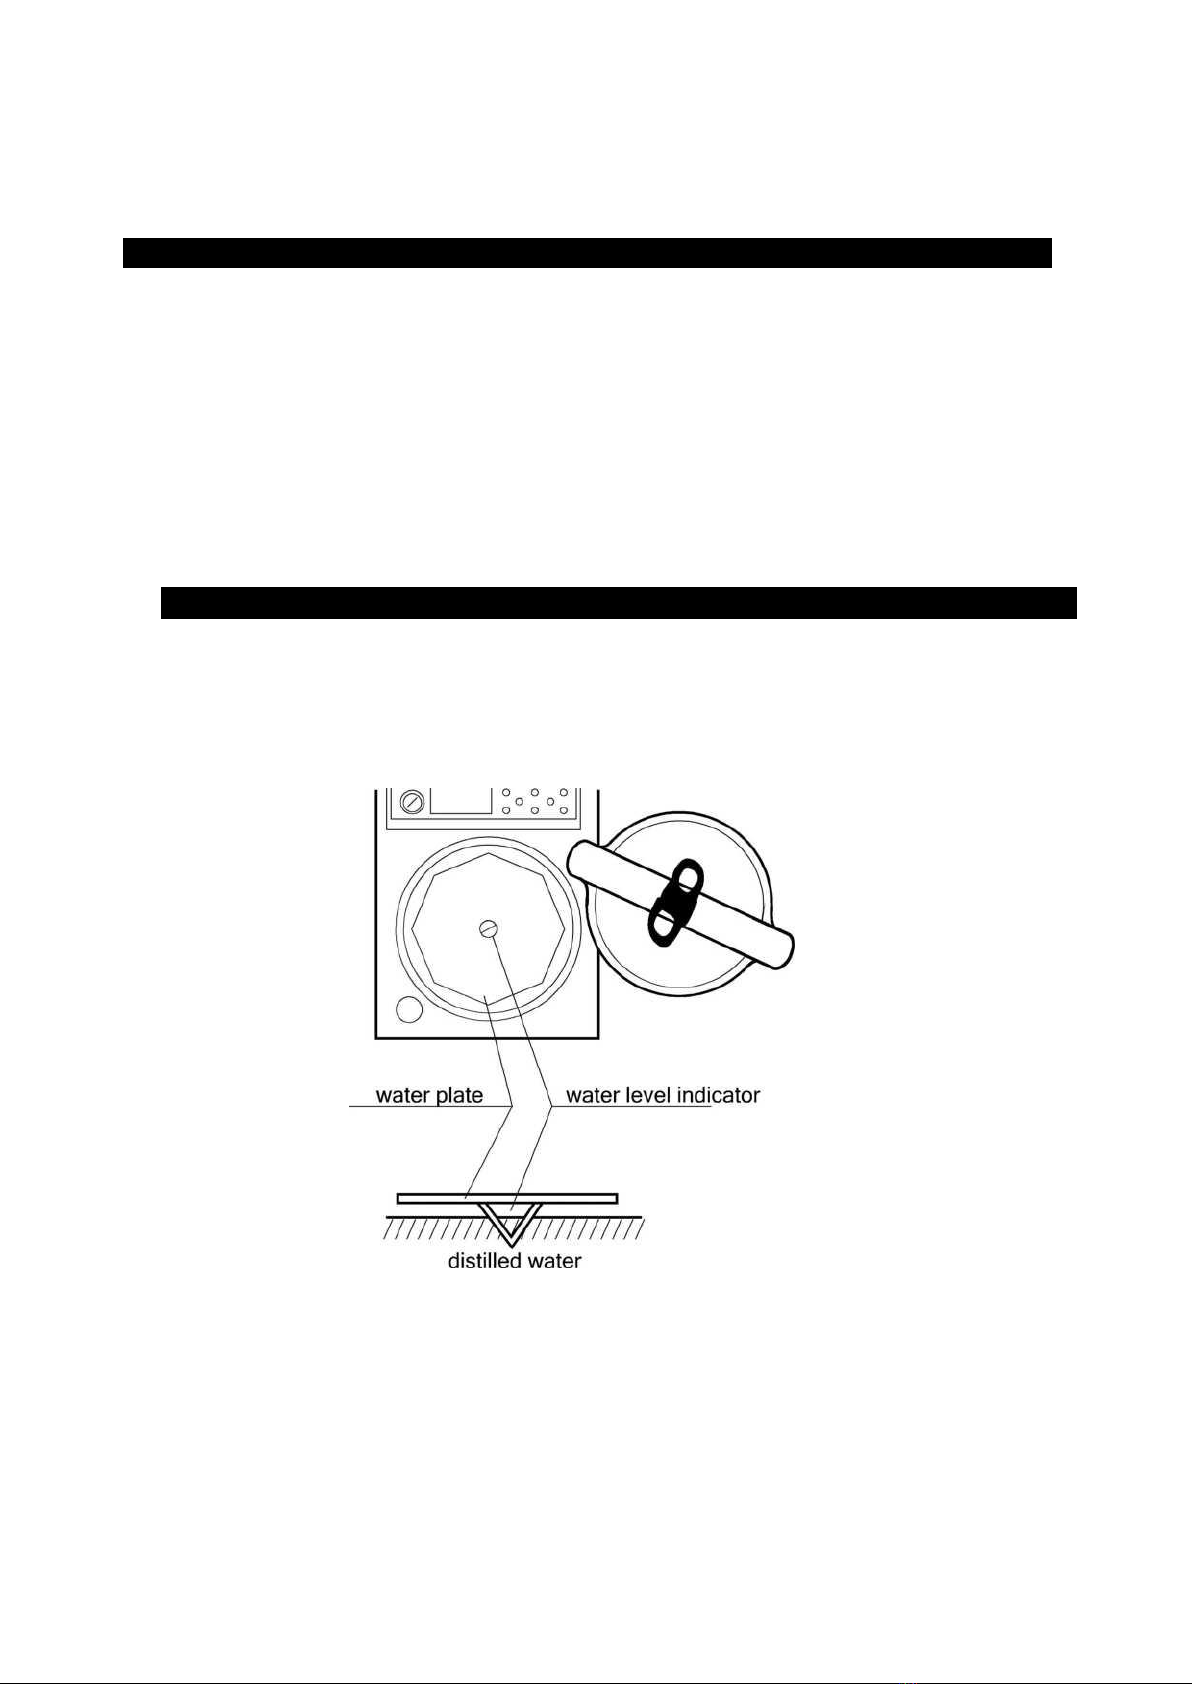
♦Avoid dripping water to the control circuit when adding distilled water to the sterilizer
chamber to against electric shock or other faults.
♦When using waste processing bags or other type of bags, please put the bags into the
stainless steel basket before put into the sterilizer chamber to avoid affecting the precision of
temperature.
♦If the handle is turned by mistake during sterilization, it will not continue turning as it has
been locked by the interlocking device, and there will be a little steam exhausted to release. In this
case, press the"STOP" button to stop the instrument immediately. When opening the chamber
cover, turn the handle slightly toward the opposition direction that it is wrongly operated, and
then turn the handle counter-clockwise until the cover is released.
♦Observe the temperature variation inside the sterilizer chamber. The temperature is relatively
high when operation has been finished, keep the face and hands away from the sterilizer chamber
when opening the cover to avoid injury from ejected pressurized steam. Gloves must be used
when taking articles out of the sterilizer chamber.
♦Liquid does take some time to get cooling, verify whether the temperature is low enough or
not, when taking the liquid after sterilization out of the chamber to avoid scalding.

Drawell Scientific
♦Use only distilled water as sterilizing water to avoid affecting the service life of sterilizer.
♦When using the instrument continuously, 15 minutes and above interval is required before
next operation to allow the instrument to cool down, so that it will be able to produce adequate
saturated steam.
♦In case of abnormal conditions, such as noise, odor and smog, please turn off the power
immediately, and observe until the abnormal condition stops, and then contact the local dealer or
customer service department of our company.
♦The user shall observe the local regulations related to the pressurized vessels.

Drawell Scientific
Chapter 1 External Features & Controller
I. External Features

Drawell Scientific

Drawell Scientific
Chapter 2 Technical Specification
I. Technical Specification
Model
FD36R/FD36A
FD50R/FD50A
FD65R/FD65
A
FD80R/FD80A
FD100R/FD100
A
Capacity
36(L)
50(L)
65(L)
80(L)
100(L)
External dimension(mm)
580x490x1080
580x490x1080
730x625x955
730x625x1100
730x625x1200
Size of sterilizer chamber
mm
φ 325x460
φ325x670
φ400x564
φ400x709
φ400x809
Power supply
220V 50/60HZ
Rated power
2300W
2600W
2900W
4600W
4600W
Range of pressure gauge
0-0.4Mpa
Working environment
5-40°C relative humidity 10-85%
Rated working pressure
0.25Mpa
Designed pressure
0.3Mpa
Sterilization temperature
105-135℃
Sterilization timer
1-300min
Drying timer
1-300min ①
Operation mode
Solid Mode、Solid& Drying Mode ②、Liquid Mode
safety equipment
Safety valve, over temperature and temperature abnormal protection
system,over pressure protectionsystem,electric leakage protection equipment,
chamber cover checking system,self- induction interlocking device
Accessories
Stainless steel baskets,waterplate,waste water tank
①② R series have drying mode for solid,drying time can be pre-setted.

Drawell Scientific
Chapter 3 Installation of Instrument
Placement of Instrument
1.Place the instrument on the level ground with the brakes of four casters pressed down
before installation.Do not place any objects within 10cm around for ventilation.
2.Connect the drainage pipe between machine and wastewater
receiving bottle or pipe.
3. Take out the water plate,remove the packaging, place it in the bottom of the chamber
in a horizontal position.
Connectioninstrument must be grounded reliably, if the power socket does not
1. The instrument must be grounded reliably, if the power socket does not have the
ground terminal, it is required to connect the instrument with independent ground
wire before powered on.
2.Power supply: single-phase AC 220V 土10%, 50Hz/60Hz
3. Requirement for current intensity: FD36A/FD36R 16A
FD50A/FD50R 16A
FD65A/FD65R 20A
FD80A/FD80R 32A
FD100A/FD100R 32A

Drawell Scientific
III. Setting
When shipped from the factory,the unit is set for an elevation of between 0 and 300m.If
the elevation of the installation location is higher than 300m,please ask your dealer to
change the setting to avoid affecting normal work of sterilization.
★Caution:
If the elevation is not set properly, machine can not work normally.
Chapter 4 Operation Instruction
I. Basic Sterilization Illustration & Operation Instruction
♦1.Turning on the power
Turn on the leakage protection switch and the power switch on the control panel
♦2.Opening the sterilizer chamber cover
1) Turn the handle connter-clockwise until the chamber cover is loosened

Drawell Scientific
3. Adding water
Adding distilled water into the sterilizer chamber until the water flows into the observation hole in
the middle of the water plate.
2) Push the handle rigntward slightly to move the cover to one side
★Note:
〇The indicator "locked" is off at this time, and the sterilizer will not be able to work until the chambercover
is closed and secured.
〇Do not open the chamber cover too fiercely, so that it will not be extruded and broken.
4.Loading articles to be sterilized
1) Put the articles to be sterilized into the baskets and close the cover
2) Make sure the water plate is placed well, in case baskets place on the heater directly.
3) Put the baskets lightly into the chamber
★Note:
〇Verify whether the water plate is in place or not before putting the baskets back into the sterilizer chamber, so that
they will not be put on the heater directly.
〇When plastic bag is used for sterilizing, please put some water into the bag and keep the bag open, and make sure

Drawell Scientific
the bags do not contact with the inner wall of the sterilizer. Sealed bags will result in inefficient sterilization. If the
sterilization chamber is over crowded, steam can not reach every corner, will result in incomplete sterilization.
〇When sterilizing the glassware like beaker, conical flask and test tube, the vessel must be put up side down or across.
If the vessel can only be in vertical direction, put a little water in the vessel before sterilizing.
〇When sterilizing the liquids like chemical reagent or menstruum, care must be taken to the volume of liquid inside the
container (3/4 of total volume of flask, and 1/2 of total volume of test tube), so that the liquid will not overflow from the
container during sterilizing.
〇The cover of container to be sterilized should be loosened for air exhaust to prevent container broken.
〇When melting the agar, each container should be less than 2 L, otherwise the melting may not be completed
thoroughly.
〇The DURHAM TEST TUBE with over 6mm caliber should be used, otherwise air bubble may stay in the tube.
〇Please put article temperature sensor properly if the instrument is attached artilcle thermometer.
5.Closing the sterilizer chamber cover
1) Push the handle leftward slightly until the arm leans against the arm stopped.
2) Turn the handle until it is secured and the cover closed indicator “Locked”is on. The cover closed indicator may
change repeatedly in course of tightening. When it is nearly secured, turn the handle slowly while observing
whether the cover closed indicator is on or not.
6. Selecting sterilizing program
Select the sterilization mode, set up the Sterilization time and drying time according to your needs.
★Note:
〇For sterilization of liquids, set a sterilization time longer than desired, taking a delaytime
into account:For example, if the volume of water in the flask is 3L , when the internal
temperature of the sterilizer chamber reaches the set value, another 33 minutes shall be
required for the water in the flask to reach this temperature, therefore, the sterilizing time
must be set to 53 minutes.
Model
StSerilization Parameter
S Setting Way
FD36A
FD50A
FD65A
FD80A
FD100A
1、Sterilizing mode
3) Solid mode
4) Liquid mode
PrPess"FUNC"button to switch between solid mode and
liquid mode
2、Main Parameter
1) Sterilizing temperature 105-135°C
2) Sterilizing time 1-300min
PPrees sterilizing temperature up or down button to set
PrPress Sterilizing time up or down button to set
FD36R
FD50R
FD65R
FD80R
FD100R
1、Sterilizing mode
1) Solid mode
2) Solid&drying mode
3) Liquid mode
PrPress"FUNC"button to switch between solid mode,
solid&drying mode and liquid mode
2、Main Parameter
1) Sterilizing temperature: 105-135°C
2) Sterilizing time:1-300min
3) Drying time:1-300min
PrPreees sterilizing temperature up or down button to set
PrPress Sterilizing time up or down button to set
Press drying time up or down button to set

Drawell Scientific
Actual required sterilizing time (53min)=Delay time(33min) + Normal sterilizing time(20min)
FD50A Sterilizing Delay Time Reference Value (Every Flask)
Liquid Volume
Delay Time
3L
30min
2L
25min
1L
20min
500cc
15min
〇Never press the "STOP"button casually to stop the running program during sterilizing of
liquids to avoid the liquid overflowing into the sterilizer chamber and even blocking the
valve and pipe lines.
7. Starting sterilization
After setting the sterilization parameter, press "START" button to start work, "STER"
indicator will start to blink, when reaching the setting sterilization time, the sterilizing time
on the screen start to count down.
★Note:
〇In order to prevent misuse, "START" and "STOP" button have a delayed response
function. Keep the button for 2 seconds to start work.
8. Opening the cover & Program finished
1) When the set sterilizing time is up, the system will send out a sound alarm, and the
steam will be exhausted to release automatically "EXHT" indicator starts to blink.
2) Under solid mode with drying, when the temperature is lower than the boiling point, the
system will send out a sound alarm, and the screen will show "OPEN" to indicate the
opening of the cover. After opening the cover, system will start drying function, "DRY"
indicator starts to blink, drying time on the screen starts to count down.
3) When program finished and the temperature is below 97 C(Solid mode or solid+drying mode) or below 80°C (liquid mode),
the "COMP" indicator will blink, which means the sterilization is finished.
9.Taking the sterilized articles out
1)Always wear the heat insulation gloves when taking articles after sterilizing out of the sterilizer chamber, and wait until the
steam disperses before reaching into the sterilizer chamber.
2)When sterilizing the liquids, verify the temperature is low enough before taking it out to avoid scald due to low cooling

Drawell Scientific
speed of liquid.
10.Turning off the power
1)Power must be switched off after the completion of daily operations or the instrument will not be used for a long period of
time.
2)When sterilization is completed of a day, it is recommended to drain out all water in sterilization chamber.
Chapter 5 Troubleshooting
1.The automatic control system of the sterilizer monitors the real time operation of the instrument. Whenever any failure
occurs, the system may send out alarm and display the error code, then, please press the STOP button to return to
standby status, and turn off the power, check the error code and handle on time.
2.To insure the safety, the chamber cover can be open under the circumstance that no pressure in the chamber and the
temperature is below 80°C at the same time
3.Under liquid mode,donot press STOP button before the temperature is lower than the boiling point,so as to avoid the
liquid loads overflowing.
Error Code
Possible Causes
Troubleshooting Method
E01
The cover of sterilizer chamber is not
secured
Turn the handle until the cover closed
indicator is on and the cover is
secured
E02
Heater is burnt
Contact the local dealer
E03
No sufficient water inside chamber
makes heater dry scorch.
The elevation above 300m isn’t set
correctly on user administration menu
Set correct elevation
E04
Abnormal fluctuation of power results in
abnormal change of temp
Whether the power supply is between
198V and 242V
E05
Solenoid valve jammed by
contaminants leads to abnormal work of
exhaust valve
Contact the local dealer to change
the automatic steam exhaust value
E06
Temperature sensor comes off the
circuit board
Plug the temperature sensor in place
Temperature sensor is not functional
Replace the temperature sensor
E07
Plug or joint of temperature sensor is
short-circuited
Contact the local dealer to replace
the temperature sensor
E08
Temperature in the chamber when start
working is higher than 100°C
Wait until the temperature falls down
before restart
E10
Power failure in the course of
sterilization
Re-sterilize
E13
Failure of drying temp controller
Contact the local dealer
E14
Failure of heating system or
temperature control system
Contact the local dealer
E18
Over high pressure in sterilization
chamber
Stop working and contact the local
dealer
E20
Safety valve test circuit failed
Contact the local dealer
The above chart covers the simple problems, if you can not handle them by yourselves, please contact the local dealer
and provide the following information:
1)Model and Number of Machine

Drawell Scientific
2)Broken part and symptom of failure (or Error code)
3)Purchasing date of machine
4)Operational information (including sterilizing articles)
Chapter 6 Maintenance&Care
1 .Daily care:
Sterilization chamber and chamber cover should be cleaned with soft cloth every day.
2.Weekly care:
1) The water in the sterilizer chamber must be changed every week, or change at any time
within one week if the water is dirty.
2) When changing the water, connect one end of the drainage hose with the drain port of
sterilizer chamber, and put the other end into a water collector, release the drainage valve
to drain, and turn off the valve counter-clockwise after the drainage.
★Note:
〇Make sure that the water in the sterilizer chamber is at room temperature before
changing the water.
〇If the sterilizer will not be used for a long period of time, the water in the sterilizer
chamber must be emptied to avoid blocking the pipeline.
3) Wipe the surface of the sealing ring and its contact parts with soft and clean cloth at
least once a week.
3.Monthly care:
Take out the water plate to cheak the heating pipe.If dirt can be gently scrub with a soft
brush and flush,and then discharge the dirty water.
4.Yearly care:
1)Check the wires damage and problem of fuse and connector.
2)Check the pipe for leaks .
3)Check if there is leaking of the solenoid valve or lose of coil.
4)Check the indicator and process indicators (check the security of cover)
5)Press the testing button of leakage protection switch, if the leakage protection switch
trips means everything is normal,otherwise turn off the power switch and contact local
dealer. Press the reset switch,make the position up right,the power will be on.
5.Spare parts list offered by manufacturer or agents
No.
Spare
No.
Spare parts
No.
Spare parts
No.
Spare parts

Drawell Scientific
parts
1
Mainboar
d
2
Control
panel
3
Safety valve
4
Solenoid
valve
5
Gasket
ring
6
Heater
7
Temperature
sensor
8
Temperature
switch
9
Pressure
gauge
10
Voltage
transformer
11
Power switch
12
Leakage
protector
13
Pressure
switch
14
Beam
micro
switch
15
Chain switch
16
Solid state
relay
17
Heating
relay
18
Solenoid
valve relay
19
Drying plant
Chapter 7 Setting of Administrator
1.Under standby condition, press and hold FUNC and DATA buttons, then screen A will
show “ 0000” . Among these, the first “ 0” flashing means it is changeable. And press of
UP or Down button may adjust the first digit to “ 6” ,andthen press the FUNC button. At
this time, the second “ 0” flashing means it is changeable, you could input the password
by analogy.
2.After entering into the parameter modification menu, press the UP or Down button to
select the menu you want to modify.
3.Administrator menu:
P001 Printer enabled or not (Yes: enabled No: disabled)
P002 Button sound enabled or not (Yes: enabled No: disabled)

Drawell Scientific
P003 Setting of pressure unit: 1: Kpa; 2: bar; 3: psi;
4: No ( Not available or no operation
for pressure sensor)
P005: Printing language: 0: English 1: Chinese
P006: Safety valve test enabled or not (Yes: enabled No: disabled)
P007: Chamber temp sensor,temp compensation: the temp compensation scope is -5°
C - +5°C
P008:Setting of max working temp: the temp range is 135°C-145°C
P009: Setting of local altitude: (0-3000m)
P010: Boiling point temp corresponding to altitude( according to altitude)
P011: Version of system, unmodified
P012: Solid mode: exhaustion temperature setting (105°C-130°C)
Chapter 8 Diagram of Pipeline& Interface
1.A series diagram of pipeline
1. Pressure gauge 2. Pressure switch
3. Pressure sensor 4.Safety valve
5. One-way valve 6. Exhaust solenoid 7.Drainage valve
2.R series diagram of pipeline
1. Pressure gauge 2.Pressure switch 3.Pressure sensor 4.Safety valve
5.One-way valve 6.Exhaust solenoid 7. Drainage solenoid 8.Filter
9.Drainage valve 10. Drainage valve
3.FD65R/FD65A/FD80R/FD80A/FD100R/FD100A diagram of interface
4.FD36R/FD36A/FD50R/FD50A diagram of interface
Chapter 9 Wiring diagram
1.FD36R/FD50R/FD65R/FD80R/FD100R Electrical schematic diagram

Drawell Scientific
2.FD36A/FD50A/FD65A/FD80A/FD100A Electrical schematic diagram
Drawell International Technology Limited
Add : Suite 1117, Lane561 XiuChuan Rd., Greeland Max-Mall,PuDong , Shanghai
Tel: 0086 21 54411195
Fax: 0086 21 33823261
Web : www.drawell.com.cn
Email : [email protected]
Table of contents
Other Drawell Laboratory Equipment manuals

Drawell
Drawell LBI-175A-N User manual

Drawell
Drawell CIC-D100 User manual

Drawell
Drawell DW-ATN-300 User manual

Drawell
Drawell DW-GI Series User manual

Drawell
Drawell TANK User manual

Drawell
Drawell Gentier 96E User manual

Drawell
Drawell DW-280D User manual

Drawell
Drawell DW-280A User manual

Drawell
Drawell DW-280B 18L User manual

Drawell
Drawell TDD4-MC User manual