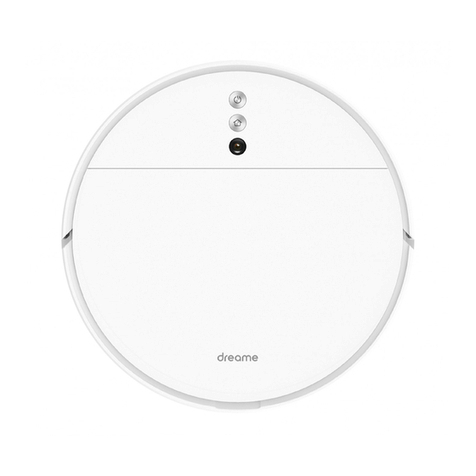
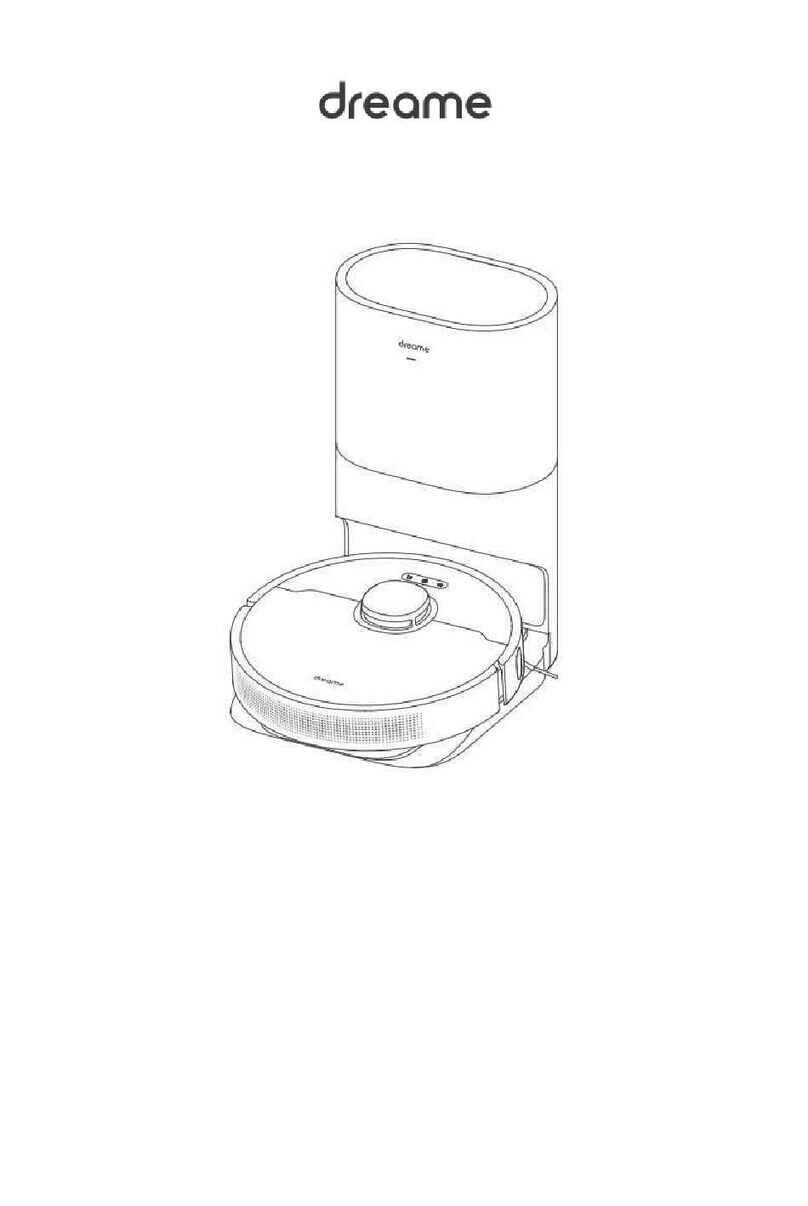
Dreame Bot D9 Max User manual

注:此页面非印刷内容

łł ąż
łśżęęąęąął
Robot Vacuum and Mop
User Manual
Read this manual carefully before use and keep it for future reference.
D9
追觅

1
EN
Usage Restrictions
Safety Information
EN
DE
FR
IT
ES
RU
PL
PT
SA
User Manual
Benutzerhandbuch
Manuel d’utilisation
Manuale utente
Manual de usuario
Руководство пользователя
Instrukcja obsługi
Manual do utilizador
1
20
39
58
77
96
116
135
154

2 3
EN EN
Safety Information
Hereby, Dreame Trading (Tianjin) Co., Ltd. declares that the radio equipment type RLS5-BL1 is in compliance with Directive 2014/53/EU.
The full text of the EU declaration of conformity is available at the following internet address: www.dreame-technology.com
For detailed e-manual, please go to https://www.dreame-technology.com/pages/user-manuals-and-faqs
Batteries and
Charging
Usage Restrictions
Safety Information

4 5
EN EN
Robot
Power/Clean Button
• Press and hold for 3 seconds
• Press to begin cleaning after the robot is powered on
Dock Button/Spot Clean Button
• Press to send robot back to the charging dock
• Press and hold for 3 seconds to start Spot Clean Mode
Status Indicator
• White: Cleaning/ Cleanup is completed/ Charging is
completed
• Blinking White: Return to dock to charge when the
battery power is not low
• Breathing White: Vacuum is charging when the battery
power is not low
• Blinking Orange: Return to dock to charge when the
battey power is low/Error
• Breathing Orange: Vacuum is charging when the battey
power is low
Product Overview
Accessories
Note: The illustrations in this manual are for reference only. Please refer to the actual product.
Charging Dock
Water Tank Side Brush
Cleaning Tool Power Cord
Mop Pad
Product Overview

6 7
EN EN
Dust Bin Mopping Module
Charging Dock
Water Inlet
Water Tank
Mop Pad
Attaching Area
Filter
Bin Cover
Bin Clip
Signaling Area
Power Port
Charging Contacts
Water Tank Release Clip
Product Overview
Robot
Robot Sensors
Reset Button
• Press and hold for 3
seconds to restore the
robot to factory settings
Wi-Fi Indicator
Cleaning Tool
Air Outlet/Speaker
Returning-to-dock Sensor
Bumper
Laser Distance Sensor
Cli Sensor
Cli Sensor
Cli Sensor
Main Wheels
Main Brush
Charging ContactsCharging Contacts
Brush Guard Clips
Omnidirectional
Wheel
Side Brush
Product Overview

8 9
EN EN
xxxxxxx’home
No home environment info
Devices Rooms
Scanning for devices nearby...
What should I do if I cannot scan for
devices?
1.Download the Mi Home/Xiaomi Home App 3. Reset Wi-Fi
2.Add Device
This product works with the Mi Home/Xiaomi Home app. * Use the Mi Home/Xiaomi Home app to control your device and to interact with
other smart home devices.
Scan the QR code to download and install the app. You will be
directed to the connection setup page if the app has been installed
already. Alternatively, search "Mi Home/Xiaomi Home" in the app
store to download and install it.
Note:
• Only 2.4GHz Wi-Fi is supported.
• The version of the app might have been updated. Please follow the
instructions based on the current app version.
Note: If your robot cannot connect to the app successfully, reset the Wi-Fi
and add the device again.
Simultaneously press and hold the buttons and until
you hear a voice say, "Waiting for the network conguration."
Once the Wi-Fi indicator is blinking slowly, the Wi-Fi has been
successfully reset.
Open the Mi Home/Xiaomi Home app, and tap " " in the upper
right. Then tap " " in the top right corner, scan the QR code,
add "Dreame Bot D9 Max", and follow the prompts to nish the
connection.
Connecting with Mi Home/Xiaomi Home App
Wi-Fi Indicator
•
•
•
> 0.5 m
> 0.5 m> 1.5 m
Note:
• Fully charge your robot before rst-time use.
• Don't install the mopping module while charging. Be extra careful with
wet mop as it can damage the oor.
1. Remove the protective lm 3. Place the charging dock on the level ground
against the wall and connect it to a power outlet
2. Install the side brush
Click
4. Place the robot onto the charging dock to
recharge. The robot will turn on automatically and
begin recharging
Note:
• Keep the immediate area 1.5m in front of the charger and 0.5m to both
sides of the charging dock clear of objects.
• To ensure you can connect to the robot with your phone well, make sure
the robot and charging dock are within the range of Wi-Fi.
• Do not place the charging dock in an area with direct sunlight or where
other objects might block the signal, as this may hinder the robot from
returning to the charging dock.
Note: Install the side brush until it clicks into place.
Preparation Before Use
Remove the protective lms on the robot.
Tidy up Any
Loose Cord
Battery Level Indicator
• White: Battery level
is more than 15%
• Orange: Battery
level is less than 15%

10 11
EN EN
6. Spot Clean Mode 7. Scheduled Cleaning
8. Additional App Functions
You can schedule cleaning time in the Mi Home/Xiaomi Home
app. The robot will automatically start cleaning at the designated
time and then return to the charging dock to recharge when the
cleaning is done.
Follow the instructions on the app interface to use more
functions.
The version of the app might have been updated; please follow
the instructions based in the current app version.
Note: Activating Spot Clean Mode will end the current cleaning task of the
robot.
When the robot is paused or in Standby Mode, press and hold the
button for 3 seconds to start Spot Clean Mode. In this mode,
it will clean a square-shaped area of 1.5 ×1.5 meters directly
around the robot. When the spot cleaning is done, the robot will
automatically return to its original location and power o.
How to Use
1.5 meter
1.5 meter
1. Turn On/O
4. Pause/Sleep Mode
5. Do Not Disturb Mode
2. Start Cleaning
Press and hold the button for 3 seconds to turn on the robot.
Once the power indicator turns solid white, the robot is in standby
mode. To turn o the robot, press and hold the button for 3
seconds when the robot is not moving. Turning o the robot will
end the current cleaning task.
3. Cleaning Mode
Dreame Bot D9 Max has four cleaning modes: Quiet, Standard,
Strong and Turbo. The default mode is Standard. You can specify
the cleaning mode in the Mi Home/Xiaomi Home app.
Pausing: Press any button to pause the robot during cleaning.
Sleep Mode: The robot will automatically enter Sleep Mode after
10 minutes of inactivity, then the power and charging indicators
will go o. To wake up the robot, press any button.
Do Not Disturb Mode prevents the robot from automatically
starting cleaning tasks, and the power indicator remains o. You
can enable Do Not Disturb Mode or modify its hours in the app.
(The mode is on by default from 22:00 to 08:00.)
Press the button briey to turn on the robot. Upon activation,
the robot will accurately map out a route, methodically clean
along the edges and walls, then nish by cleaning each room in
an S-shaped pattern to ensure a thorough job.
Note: If the battery is too low, the robot will automatically return to the dock
to charge. It will resume unfinished cleaning tasks after charging to the
necessary battery level.(The breakpoint continuous cleaning function must
be enabled on the app in advance.)
Note:
• The robot will turn o automatically if left in Sleep Mode for more than 12
hours.
• When the robot is paused, placing it onto the charging dock will end the
current cleaning task.
Note:
• Scheduled cleaning tasks will still be carried out during the DND period.
• The robot will continue cleaning after the DND period ends.
How to Use

12 13
EN EN
Clean the Dust Bin and Filter
1. Open the robot cover, then press the dust bin clip to remove the
dust bin.
2. Open the dust bin cover as indicated by the diagram.
3. Remove the lter and tap its basket gently.
4. Rinse the dust bin and lter with water until they are clean.
Thoroughly dry the lter before re-installing.
Note: Do not attempt to clean the lter with a brush or nger.
Note:
• Only clean water should be used to clean the lter. Do not use detergent.
• Keep it in a well-ventilated or cool place.
Routine Maintenance
9. Use the Mopping Function
It is recommended that all oors are vacuumed at least three times before
the rst mopping session to achieve a better cleaning eect.
1) Dampen the mop pad and wring out excess water. Slide the
pad all the way into the slot of the water tank until it is securely in
place.
3) Align the mopping module as indicated by the arrow, then
slide it into the back of the robot until it clicks into place. Press the
button or use the Mi Home/Xiaomi Home app to start cleaning.
2) Open the water tank lid, ll the tank with water, then securely
close the lid. 4) Press the two side clips inwards and slide the water tank
backwards to separate it from the robot.
Note:
• It is not recommended to use the mopping function on carpets.
• Use the app to adjust the water ow as required.
Note: Do not use detergent or disinfectant.
Note: When the robot is charging or not in use, remove the mopping
module, pour out all the remaining water in the tank, and clean the mop
pad to prevent mildew or odor.
Click
Click
How to Use

14 15
EN EN
Clean the Main Brush
Clean the Side Brush
Clean the Main Wheel / Omnidirectional Wheel
Press the brush guard clips inwards to remove the brush guard
and lift the brush out of the robot.
Pull out the side brush and use the included cleaning tool to
remove any hair tangled on the brush.
Pull out the brush cover as shown in the diagram. Use the
included cleaning tool to remove any hairs tangled in the brush.
Note: Use a tool such as a small screwdriver to separate the axle and the tire.
Routine Maintenance
Clean the Mopping Module
1. Press the two release clips on the side of water tank, remove the
mopping module and pull the mop pad o the mopping module.
3. Clean the mop pad with water only and leave to air dry before
re-installing.
2. Pour out the water in the tank. Clean with water only and leave
to air dry before re-installing.
4. If slow water ow occurs, or the volume is not well-distributed,
please clean the air hole in the cover of the water tank.
Note: Do not expose the tank to the sun directly.
Note:
• Remove the pad from the mopping module before cleaning it, and make
sure dirty water does not ow back into the water outlet to avoid clogging.
• For optimal performance, it is recommended to replace the mop pad every
3 to 6 months.
Routine Maintenance

16 17
EN EN
Problem Type
Robot does not turn on
Robot does not recharge
Robot does not return to
charging dock
Robot is making a strange
noise
Robot no longer cleans
eciently or leaves dust
behind
Robot cannot connect to
Wi-Fi
Robot is malfunctioning
Solution
Battery level is low. Recharge the robot at the charging dock, then try again.
The ambient temperature is too low (below 0 ° C) or too high (above 40 ° C). The operating
temperature of the robot is 0° C to 40° C.
The charging dock is not receiving power. Please conrm that both ends of the power cord
are plugged in correctly.
Poor contact. Clean the charging contacts of the charging dock and the robot.
There are too many obstructions around the charging dock. Place the charging dock in a
more open area.
Please clean the dock's signaling area.
The dust bin is full. Please clean it.
The lter is blocked. Please clean it.
A foreign object is caught in the main brush. Please clean it.
There is something wrong with the Wi-Fi connection. Reset the Wi-Fi and download the
latest version of the Mi Home/Xiaomi Home app, then try reconnecting.
Location permission is not open. Please ensure the location permission on the Mi Home/
Xiaomi Home app is enabled.
Wi-Fi signal is weak. Make sure the robot is in an area with good Wi-Fi coverage.
5GHz Wi-Fi is not supported. Please ensure your robot connects to 2.4GHz Wi-Fi.
The username or password of Wi-Fi is incorrect. Please enter the correct username and
password.
A foreign object may be caught in the main brush, side brush, or one of the main wheels.
Stop the robot and remove any debris.
Turn o the robot and then reactivate it.
FAQ
Clean the Laser Distance Sensor/
Returning-to-dock Sensor
Clean the Charging Contact
Clean the Cli Sensor
Note: Wet cloths can damage sensitive elements within the robot and charging dock. Please use dry rags for cleaning.
Battery
The robot contains a high-performance lithium-ion battery
pack. Please ensure that it remains well-charged for daily use to
maintain optimal battery performance. If the robot is not used for
an extended period of time, turn it o and put it away. To prevent
damage from over-discharging, the robot should be recharged at
least once every three months.
Robot Restarting
If the robot stops responding or cannot be turned o, press and
hold down the button for 10 seconds to forcefully turn it o.
Then press and hold the button for 3 seconds to turn the robot
on.
Routine Maintenance

18 19
EN EN
Model RCS0
19.8 V 1 A
100-240 V ~ 50/60 Hz 0.5 A
Rated Input
Rated Output
Robot Charging Dock
Specifications
Under normal use of condition, this equipment should be kept a
separation distance of at least 20cm between the antenna and
the body of the user.
WEEE Information
All products bearing this symbol are waste electrical and electronic equipment (WEEE as in directive 2012/19/EU) which should
not be mixed with unsorted household waste. Instead, you should protect human health and the environment by handing over
your waste equipment to a designated collection point for the recycling of waste electrical and electronic equipment, appointed
by the government or local authorities. Correct disposal and recycling will help prevent potential negative consequences to the
environment and human health. Please contact the installer or local authorities for more information about the location as well
as terms and conditions of such collection points.
Problem Type
Does leaving the robot
on the charging dock
consume power if it is
already fully charged?
No water comes out of
the mopping module, or
only a little bit comes out
Robot doesn’t resume
cleaning after charging
Robot doesn’t return to
charging dock after being
moved
Solution
Leaving the robot on the charging dock after it’s fully charged consumes very little
electricity and helps maintain optimal battery performance.
Conrm that the water tank is lled with water, and clean the mop pad if necessary.
Clean the mop if it becomes dirty.
Make sure the mop pad is installed correctly according to the user manual.
Clean the blowhole on the top of the water tank.
Moving the robot may cause it to re-position itself or re-map its surroundings. If the
robot is too far from the charging dock, it might not be able to automatically return
on its own, in which case you need to manually place the robot onto the charging
dock.
Make sure the robot is not set to Do Not Disturb Mode, which will prevent it from
resuming cleaning.
The robot does not resume cleaning when it is manually recharged or placed onto the
charging dock.
FAQ
Robot does not perform
scheduled cleaning The robot has low battery. Scheduled cleaning will not start unless the robot has been
recharged in time.
Model RLS5-BL1
Battery 5200 mAh (Battery Nominal Capacity)
Charging Time Approx. 6 hours
Wireless
Connectivity Wi-Fi IEEE 802.11b/g/n 2.4 GHz
Rated Voltage 14.4 V
Rated Power 40 W
Operation
Frequency 2400-2483.5 MHz
Maximum Output
Power < 20 dBm

20 21
DE DE
Sicherheitsinformationen
Nutzungseinschrän
-kungen
Sicherheitsinformationen
Nutzungseinschrän
-kungen

22 23
DE DE
Sicherheitsinformationen
Akkus und Ladung
Hiermit bestätigt, Dreame Trading (Tianjin) Co., Ltd. dass das Funkgerät des Typs RLS5-BL1 mit der Verordnung 2014/53/EU in
Einklangsteht. Der vollständige Wortlaut der EU-Konformitätserklärung ist unter der folgenden Internetadresse abrufbar:
www.dreame-technology.com
Ein detailliertes elektronisches Handbuch nden Sie unter https://www.dreame-technology.com/pages/user-manuals-and-faqs
Zubehör
Hinweis: Die Abbildungen in dieser Anleitung dienen nur als Referenz, bitte beziehen Sie sich auf das eigentliche Produkt für die tatsächliche Erscheinung.
Ladestation
Wassertank Seitenbürste
Reinigungswerkzeug Stromkabel
Wischer
Produktübersicht

24 25
DE DE
Roboter
Ein-/Aus- und Reinigungstaste
• Drücken und 3 Sekunden lang gedrückt halten
• Drücken, um die Reinigung nach dem Einschalten des
Roboters zu starten
Zum Auaden/Zielreinigungstaste
• Drücken, um den Roboter zur Ladestation
zurückzufahren
• Halten Sie die Taste 3 Sekunden gedrückt, um den
Zielreinigungstaste zu starten
Statusanzeige
• Weiß: Bereinigung/Bereinigung ist abgeschlossen/
Auaden is abgeschlossen
• Weiß blinkend: Zurück zum Dock Auaden (normale
Batterie)
• Atmend weiß: Auadung (normale Batterie)
• Orange blinkend: Zurück zum Dock Auaden (niedrige
Batterie)/Fehler
• Orange pulsierend: Auaden (niedrige Batterie)
Produktübersicht
Roboter
Robotersensor
Reset-Taste
• Halten Sie 3 Sekunden
lang gedrückt, um die
ursprünglichen Einstellungen
wiederherzustellen
WLAN-Anzeiger
Reinigungswerkzeug
Luftauslass/Lautsprecher
Ladestationsensor
Stoßfänger
Laserdistanzsensor
Absturz-Sensor
Absturz-Sensor
Absturz-Sensor
Haupträder
Hauptbürste
LadekontakteLadekontakte
Freigabe
Hauptbürstenabdeckung
Omnidirektionales Rad
Seitenbürste
Produktübersicht

26 27
DE DE
Staubbehälter Wischmodul
Ladestation
Wasserzuuss
Wassertank
Wischer
Befestigungsbereich
Filter
Staubbehälter-Abdeckung
Freigabe Staubbehälter
Signalbereich
Stromanschluss
Ladekontakte
Freigabe
Wassertankabdeckung
Produktübersicht
> 0,5 m
> 0,5 m> 1,5 m
Hinweis:
• Vollständige Auadung vor dem ersten Gebrauch.
• Montieren Sie den Moppaufsatz nicht, während das Gerät geladen wird.
Gehen Sie vorsichtig mit dem nassen Mopp um, da die Feuchtigkeit den
Boden beschädigen kann.
1. Entfernen Sie die Schutzfolie 3. Platzieren Sie die Ladestation auf einer ebenen
Oberäche neben einer Wand und schließen Sie
sie an einer Steckdose an.
2. Seitenbürste installieren
Klick
4. Platzieren Sie den Roboter zum Auaden. in der
Ladestation. Der Roboter schaltet sich automatisch
ein und lädt sich auf
Hinweis:
• Stellen Sie sicher, dass auf beiden Seiten der Ladestation ein Abstand von
mindestens 0,5 Metern und vor der Ladestation ein Abstand von mehr als
1,5 Metern eingehalten wird.
• Um sicherzustellen, dass Sie den Roboter einfach mit dem Telefon
verbinden können, stellen Sie sicher, dass sich der Roboter und die
Ladestation im Bereich des WLAN benden.
• Platzieren Sie die Ladestation nicht in einem Bereich mit direkter
Sonneneinstrahlung oder in einem Bereich, in dem andere Objekte den
Signalbereich blockieren könnten, da dies den Roboter daran hindern
könnte, zur Ladestation zurückzukehren.
Hinweis: Bringen Sie die Seitenbürste an, so dass sie in der korrekten
Position einrastet.
Vorbereitung vor der Verwendung
Entfernen Sie die Schutzfolien am Roboter.
Lose Kabel
wegräumen
Akkuladestandsanzeige
• Weiß: Der Akkustand
beträgt mehr als 15 %
• Orange: Der Akkustand
beträgt weniger als 15 %

28 29
DE DE
xxxxxxx’home
No home environment info
Devices Rooms
Scanning for devices nearby...
What should I do if I cannot scan for
devices?
1. Laden Sie die Mi Home/Xiaomi Home App herunter 3. WLAN zurücksetzen
2. Fügen Sie das Gerät hinzu
Dieses Produkt funktioniert mit der Mi Home-/Xiaomi Home-App*.
Scannen Sie den QR-Code, um die App herunterzuladen und
zu installieren. Ist die App bereits installiert, werden Sie zur
Verbindungseinrichtungs-Seite weitergeleitet. Sie können aber auch
im App Store nach „Mi Home/Xiaomi Home" suchen, um die App
herunterzuladen und zu installieren.
Hinweis:
• Es wird nur WLAN mit 2,4 GHz unterstützt.
• Die Version der App wurde möglicherweise aktualisiert. Befolgen Sie bitte
die Anweisungen zur aktuellen App-Version.
Hinweis: Wenn Ihr Telefon keine erfolgreiche Verbindung mit dem Roboter
herstellen kann, setzen Sie das WLAN zurück und fügen Sie das Gerät erneut
hinzu.
Gleichzeitig drücken und halten Sie die und Taste bis Sie
eine Sprachmeldung hören „Warten auf Netzwerkkonguration".
Sobald die WLAN-Anzeige langsam blinkt, wurde das WLAN
erfolgreich zurückgesetzt.
Önen Sie die Mi Home / Xiaomi Home App und tippen Sie oben rechts auf
"" . Tippen Sie daraufhin in der Ecke oben rechts auf " ". Scannen Sie den
QR-Code ein, fügen Sie den "Dreame Bot D9 Max" hinzu und folgen Sie den
Anweisungen, um die Verbindung abzuschließen.
Mit der Mi Home-/Xiaomi Home-App verbinden
WLAN-Anzeiger
•
•
•
1. Einschalten/Ausschalten
4. Pausiert/Energiesparmodus
5. Nicht-Stören-Modus
2. Mit der Reinigung beginnen
Drücken und halten Sie die Taste 3 Sekunden lang um den
Roboter anzuschalten. Sobald die Betriebsanzeige ständig weiß
leuchtet, bendet sich der Roboter im Standby-Modus. Um den
Roboter auszuschalten, drücken und halten Sie die Taste 3
Sekunden lang gedrückt, während der Roboter stillsteht.
Durch das Ausschalten des Roboters wird die aktuelle
Reinigungsaufgabe beendet.
3. Reinigungsmodus
In der Mi Home/Xiaomi Home-App sind vier Reinigungsmodi
verfügbar: Leise, Standard, Stark und Turbo. Voreingestellt ist der
Standardmodus.
Pausiert: Drücken Sie eine beliebige Taste, um den Roboter
während der Reinigung zu pausieren.
Energiesparmodus: Der Roboter geht nach 10 Minuten Inaktivität
automatisch in den Energiesparmodus. Dabei werden die
Betriebs- und Ladeanzeige ausgeschaltet. Um den Roboter
aufzuwecken, drücken Sie eine beliebige Taste.
Der Nicht-Stören-Modus verhindert, dass der Roboter automatisch
Reinigungsaufgaben startet, und die Betriebsanzeige bleibt
ausgeschaltet. Sie können den Nicht-Stören-Modus in der App
aktivieren oder die Stunden für den Modus ändern.(Der Modus ist
standardmäßig von 22:00 bis 08:00 Uhr aktiviert.)
Drücken Sie die Taste kurz, um den Roboter einzuschalten.
Nach dem Einschalten legt der Roboter eine genaue Route fest,
reinigt methodisch entlang der Kanten und Wände und reinigt
abschließend jeden Raum in einem S-förmigen Muster, um eine
gründliche Arbeit zu gewährleisten.
Hinweis:
Falls der Akkustand zu niedrig ist, wird der Roboter automatisch zum Laden
zur Ladestation zurückkehren. Er wird unvollendete Reinigungsaufgaben
fortsetzen, nachdem der entsprechende Ladestand erreicht ist.
(das Fortsetzen des Reinigungsmodus muss zuvor auf der APP aktiviert werden).
Hinweis:
• Wenn das Gerät länger als 12 Stunden im Ruhemodus ist, schaltet es sich
automatisch aus.
• Wenn der Roboter sich im Pause-Modus befindet, wird die aktuelle
Reinigungsaufgabe beendet, wenn Sie ihn auf die Ladestation setzen.
Hinweis:
• Geplante Reinigungen werden jedoch weiterhin während der DND-
Periode(Nicht-Stören-Modus) durchgeführt.
• Der Roboter wird nach dem Ablauf dieses Zeitraums die Reinigung
fortsetzen.
Gebrauchsanleitung

30 31
DE DE
6. Zielreinigungsmodus 7. Geplantes Reinigen
8. Weitere APP-Funktionen
Sie können die Reinigungszeiten automatisch mit der Mi Home/
Xiaomi Home-App planen. Der Roboter wird zu der geplanten
Zeiten automatisch mit der Reinigung anfangen und nach
ausgeführter Reinigung wieder zur Ladung an die Ladestation
zurückkehren.
Folgen Sie den Anweisungen auf der APP-Schnittstelle, um
weitere Funktionen zu nutzen.
Die App-Version könnte aktualisiert worden sein. Bitte folgen Sie
den Anweisungen entsprechend der aktuellen App-Version.
Hinweis: Die Aktivierung der Zielreinigungsmodus beendet die aktuelle
Reinigungsaufgabe des Roboters.
Wenn sich der Roboter im Standby-Modus oder im Pause-Modus
bendet, halten Sie die Taste 3 Sekunden lang gedrückt, um
den Zielreinigungsmodus zu starten. In diesem Modus wird eine
quadratische Fläche von 1,5 × 1,5 Metern direkt um den Roboter
herum gereinigt. Wenn die Zielreinigung beendet ist, kehrt der
Roboter automatisch an seinen ursprünglichen Standort zurück
und schaltet sich ab.
Gebrauchsanleitung
1.5 Metern
1.5 Metern
9. Verwenden der Wischfunktion
Zur Erzielung eines besseren Reinigungseekts, wird empfohlen, alle Boden
mindestens dreimal vor der ersten Mopp-Reinigung zu saugen.
1) Befeuchten Sie das Wischer-Pad und wringen Sie
überschüssiges Wasser aus. Schieben Sie das Wischer-Pad ganz
in den Schlitz des Wassertanks, bis es sicher an seinem Platz ist.
3) Richten Sie das Wischmodul wie durch den Pfeil angezeigt aus,
und schieben Sie es dann in die Rückseite des Roboters, bis es
einrastet. Drücken Sie die Taste oder verwenden Sie die App Mi
Home/Xiaomi Home, um mit der Reinigung zu beginnen.
2) Önen Sie den Wassertankdeckel, füllen Sie den Tank mit
Wasser und verschließen Sie den Deckel sicher. 4) Drücken Sie die beide Clips auf der Seite nach innen, und
schieben Sie den Wassertank zurück, um ihn vom Roboter
abzutrennen.
Hinweis:
• Die Verwendung der Wischfunktion auf Teppichen wird nicht empfohlen.
• Verwenden Sie die App, um den Wasseruss wie benötigt einzustellen.
Hinweis:VerwendenSiekeineReinigung-oderDesinfektionsmittel.
Hinweis: Wenn der Roboter geladen oder nicht verwendet wird, entfernen
Sie das Wischmodul, gießen Sie das gesamte restliche Wasser aus dem Tank
aus und reinigen Sie das Wisch-Pad, um Schimmelbildung oder verweilende
Gerüche zu vermeiden.
Klick
Klick
Gebrauchsanleitung

32 33
DE DE
Staubbehälter und Filter reinigen
1. Önen Sie den Deckel des Roboters und drücken Sie dann den
Staubbehälter-Clip ein, um das Staubfach zu entfernen.
2. Önen Sie den Deckel des Staubbehälters wie in der Abbildung
dargestellt.
3. Entnehmen Sie den Filter, wiederholt ausspülen und auf
den Fliterrahmen klopfen, um so viel Schmutz wie möglich zu
entfernen.
4. Spülen Sie den Staubbehälter aus und ltern Sie ihn mit
Wasser, bis er sauber ist. Trocknen Sie den Filter gründlich, bevor
Sie ihn erneut installieren.
Hinweis: Den Filter nicht mit einer Bürste oder Finger reinigen.
Hinweis:
• Zur Reinigung des Filters darf nur sauberes Wasser verwendet werden.
Verwenden Sie kein Reinigungsmittel.
• Der Filter muss vor der Benutzung vollständig trocken sein.
Regelmäßige Wartung
Reinigen Sie das Wischmodul
1. Drücken Sie die Freigabetaste des Wischmoduls nach innen und
ziehen Sie das Modul heraus. Ziehen Sie den Wischlappen vom
Wischmodul ab.
3. Die Wischlappen ausschließlich mit Wasser reinigen und vor
Reinstallieren an der Luft trocknen lassen.
2. Entleeren Sie das Restwasser aus dem Wassertank und lassen
Sie ihn an der Luft trocknen.
4. Falls eine langsamer Wasserdurchuss auftritt bzw.das
Wasservolumen nicht gut verteilt ist, reinigen Sie das Luftloch in
der Abdeckung des Wassertanks.
Hinweis: Setzen Sie den Tank keiner direkten Sonneneinstrahlung aus.
Hinweis:
• Nehmen Sie den Wischlappen vor der Reinigung aus dem Wischmodul
heraus und stellen Sie sicher, dass das Schmutzwasser nicht in den
Wasserauslass zurückießt, um eine Verstopfung zu vermeiden.
• Für optimale Performanz wird empfohlen, das Wischer-Pad jede 3 bis 6
Monaten auszutauschen.
Regelmäßige Wartung

34 35
DE DE
Bürste reinigen
Seitenbürste reinigen
Das Hauptrand und das omnidirektionale Rad
reinigen
Drücken Sie die Clips zusammen, um die Bürstenabdeckung zu
entfernen. Heben Sie dann die Bürste aus dem Roboter heraus.
Ziehen Sie die Seitenbürste aus und benutzen Sie die
eingeschlossene Reinigungstool, um die Haare auf der Bürste zu
entfernen.
Ziehen Sie die Bürstenabdeckungen wie in der Abbildung gezeigt
heraus. Verwenden Sie das mitgelieferte Reinigungswerkzeug,
um die auf der Bürste verfangenen Haare zu entfernen.
Hinweis: Verwenden Sie Werkzeuge wie z.B. einen kleinen Schraubendreher,
usw.., um die Reifen von der Achse zu trennen.
Regelmäßige Wartung
Reinigen Sie den Laserdistanzsensor /Ladestationsensor
Reinigen Sie die Kontakte der Ladestation
Reinigen Sie die Absturz-Sensor
Hinweis: Bitte verwenden Sie zur Reinigung ein trockenes Geschirrtuch, da der Roboter und das innere der Ladestation empndliche Komponenten enthalten.
Verwenden Sie keine nassen Spültücher, um durch Wasser verursachte Schäden zu vermeiden.
Akku
Der Roboter enthält einen Hochleistungs-Lithium-Ionen-Akku.
Bitte stellen Sie sicher, dass dieser bei täglicher Nutzung gut
geladen ist, um die optimale Akkuleistung beizubehalten.Wenn
der Roboter längere Zeit nicht benutzt wird, schalten Sie ihn aus
und stellen Sie ihn weg. Um Schäden durch Tiefentladung zu
vermeiden, sollte der Roboter mindestens einmal je drei Monate
aufgeladen werden.
Neustart des Roboter
Wenn der Roboter nicht mehr reagiert oder sich nicht mehr
ausschalten lässt, halten Sie die Taste 10 Sekunden lang
gedrückt, um eine Zwangsabschaltung durchzuführen. Drücken
und halten Sie dann die Taste 3 Sekunden lang, um den
Roboter wieder einzuschalten.
Regelmäßige Wartung
Other manuals for Bot D9 Max
2
Table of contents
Languages:
Other Dreame Vacuum Cleaner manuals

Dreame
Dreame Bot L10 Pro User manual

Dreame
Dreame V9 User manual

Dreame
Dreame R10 User manual

Dreame
Dreame DreameBot D9 PLus User manual

Dreame
Dreame DreameBot D10s User manual

Dreame
Dreame DreameBot D10s User manual

Dreame
Dreame D10s Plus User manual

Dreame
Dreame WN5 User manual

Dreame
Dreame Bot D9 Max User manual

Dreame
Dreame U20 User manual

Dreame
Dreame Bot Z10Pro User manual

Dreame
Dreame H12 Pro User manual

Dreame
Dreame R10 Pro User manual

Dreame
Dreame P10 User manual

Dreame
Dreame VTN1 User manual

Dreame
Dreame R20 User manual

Dreame
Dreame DreameBot L10S Ultra User manual

Dreame
Dreame VTT1 User manual

Dreame
Dreame T20 Installation guide

Dreame
Dreame M12 User manual