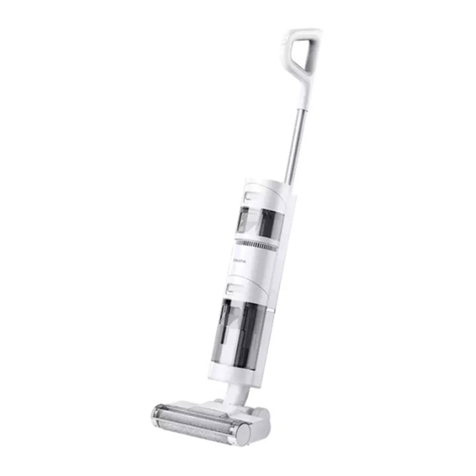
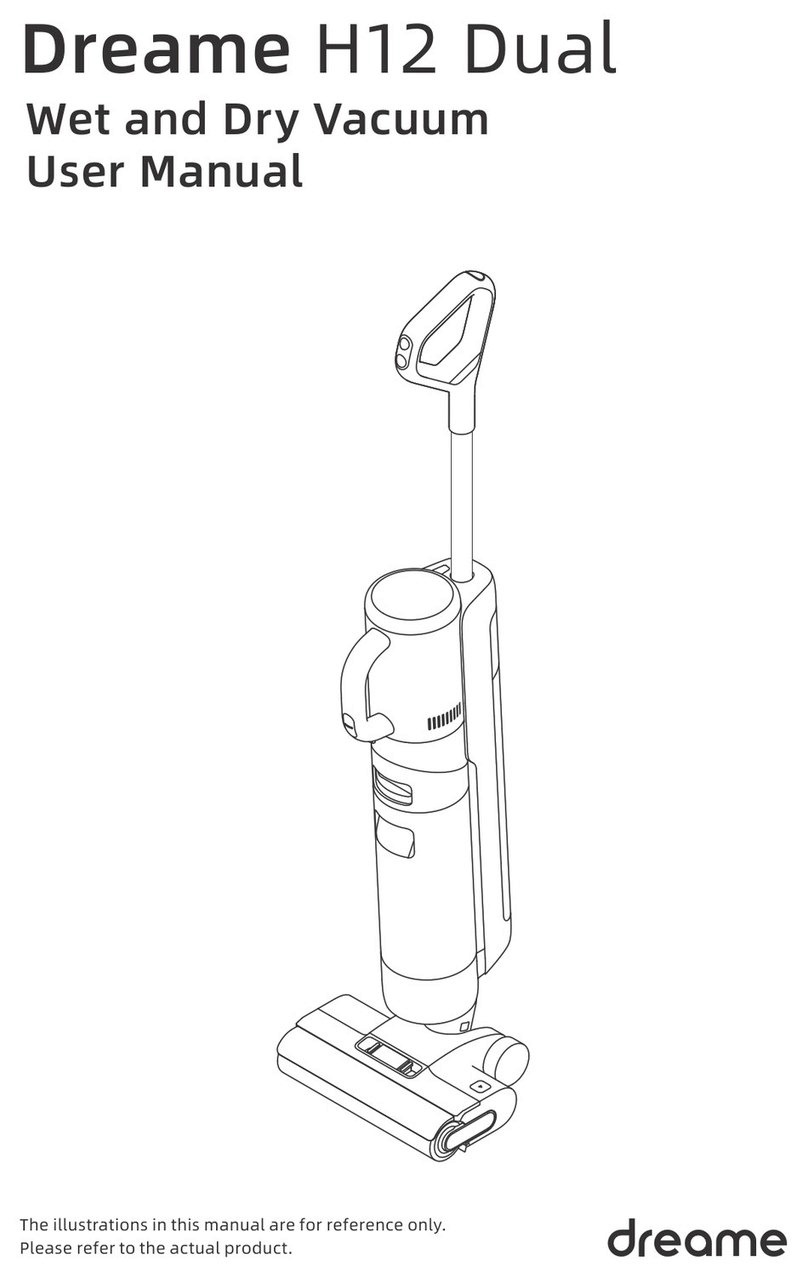
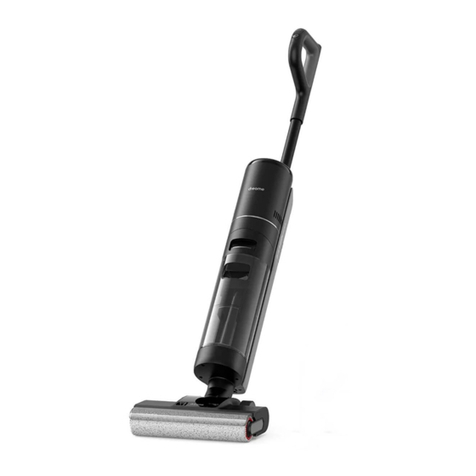
Dreame M12 User manual

The illustrations in this manual are for reference only. Please
refer to the actual product.
Wet and Dry Vacuum
User Manual
M12

THANK YOU
FOR PURCHASING THIS DREAME
WET AND DRY VACUUM.
Registration Quick Start
Welcome to register a Dreame account by
scaning the QR code. You are available
for the User Manual and Special Oers.
With it you are obtaining a high quality product that is
engineered for optimal performance.
If you have any questions on the product,
please contact us: aftersales@dreame.tech.
Contents
EN User Manual 001
DE Benutzerhandbuch 022
FR Manuel d'utilisation 043
IT Manuale utente 064
ES Manual de usuario 085
RU Руководство пользователя 106
PL Instrukcja obsługi 127
TH คู่มือการใช้งาน 168
VN Hướng Dẫn SửDụng 189
HE 148
שמתשמל ךירדמ
NL Gebruikershandleiding 210

1 21 2
EN EN
• Please read this manual carefully before use and retain it for future reference.
• When using an electrical appliance, basic precautions should always be followed,
including the following:
• READ ALL INSTRUCTIONS BEFORE USING (THIS APPLIANCE). Failure to follow the
warnings and instructions may result in electric shock, re and/or serious injury.
Safety Information
To reduce the risk of re, electric shock, or injury:
WARNING-
Important Safety Instructions
For Household Use Only
• Use only as described in this user guide. Use only manufacturer's recommended
attachments.
•Use indoors only, on non-carpeted oor surfaces such as vinyl, tile, sealed wood, etc.
Be careful not to run over loose objects or the edges of area rugs. Stalling the brush
may result in premature belt failure.
• This appliance should not be used by children younger than 8 years old nor persons
with physical, sensory, intellectual deciencies, or limited experience or knowledge
without the supervision of a parent or guardian to ensure safe operation and to avoid
any risks. Cleaning and maintenance shall not be performed by children without
supervision.
•Do not use a ammable or combustible liquid to clean oors.
•Do not use to pick up ammable or combustible liquids, such as gasoline. Do not use
in areas where ammable or combustible liquids may be present.
• For the purposes of recharging the battery, only use the detachable adapter provided
with this appliance. Use only with <YLS0251B-E260090> adapter.
•An adapter that is suitable for one type of battery pack may create a risk of re when
used with another battery pack.
• Do not immerse the appliance in liquid.
•Plastic lm can be dangerous. To avoid the danger of suocation, keep it away from
children.
•Keep hair, loose clothing, ngers, and all parts of the body away from openings and
moving parts of the appliance and its accessories.
•Use only ocially-approved oor cleaner as described in the user guide.
• Do not put any object into openings. Do not use the appliance when any opening is
blocked; keep free of dust, lint, hair, and anything that may inhibit air ow.
•Do not use it without lters in place.
• Do not use the appliance with a damaged adapter. If the adapter is damaged, it must
be replaced by the manufacturer, its service agent or similarity qualied persons in
order to avoid hazards.
• Keep ground cables away from the appliance when using it, because a hazard may
occur if the appliance runs over a supply cord.
Safety Information
•Do not pick up toxic material (chlorine bleach, ammonia, drain cleaner, etc.). Do not
pick up hard or sharp objects such as glass, nails, screws, coins, etc.
•Do not use the appliance in an enclosed space lled with vapour given o by oil-
based paint, paint thinner, some moth-proong substances, ammable dust, or other
explosive or toxic vapour.Do not pick up anything that is burning or smoking, such as
cigarettes, matches or hot ashes.
• Follow all charging instructions and do not charge the appliance outside of the
temperature range specied in the battery as doing so increases the risk of re.
• Charger base output terminals should not be short-circuited. Do not use it with
damaged charger base. If the appliance has been dropped, damaged, left outdoors,
dropped into water, or is not working as it should, return it to a service center.
• Keep the adapter cable away from heated surfaces. Do not handle the adapter plug or
appliance with wet hands. To unplug, grasp the adapter plug, rather than the cable.
• Do not pull or carry adapter by cable, use cable as a handle, close door on cable, or
pull cable around sharp edges or corners.
•Switch o when not in use, before cleaning, maintainingor servicing the appliance,
and before connecting or disconnecting the tool with a moving brush.
•Do not use an appliance that is damaged or modied. Damaged or modied
appliance may exhibit unpredictable behavior resulting in re, explosion, or risk of
injury.
•Do not expose the appliance to re or excessive temperature. Exposure to re or
excessive temperature may cause an explosion.
• Ensure that the appliance is placed on a horizontal surface. Do not use the appliance
at the same position if the appliance is equipped with a brush roller and the handle is
not completely upright. Do not store the appliance in a place where it may freeze.
•Use extra care when cleaning on stairs.
• Prevent unintentional starting. Ensure the switch is in the OFF-position before picking
up or carrying the appliance. Carrying the appliance with your nger on the switch or
energizing appliance that have the switch on invites accidents.
•This product contains batteries that can only be replaced by qualied technicians or
after-sales service.
3 43 4
EN EN
Safety Information
SAVE THESE INSTRUCTIONS
IMPORTANT SAFEGUARDS
•Have servicing performed by a qualied repair person using only identical
replacement parts. This will ensure that the safety of the product is maintained.
•Do not modify or attempt to repair the appliance excepts as indicated in the
instructions for use and care.
•Do not use in extremely hot or cold environments (below 5° C/41° F or above
40° C/104° F). Please charge the appliance in temperature above 5° C/41° F and below
40° C/104° F).
• If appliance has been dropped, damaged, left outdoors, dropped into water, or is
not working as it should, never attempt to operate it. Please have it repaired at an
authorized service center.
We, Dreame Trading (Tianjin) Co., Ltd., hereby declares that this equipment is in
compliance with the applicable Directives, European Norms, and amendments. The full
text of the EU declaration of conformity is available at the following internet address:
https://global.dreametech.com
For detailed e-manual, please go to
https://global.dreametech.com/pages/user-manuals-and-faqs
detachable supply unit
read operator's manual
Product Overview
Spare Brush
Roller
Main Body
Storage BoxCharging
Base
Dust Cup
Assembly
2-in-1 Crevice
Nozzle
Power
Adapter
Replacement
Filter
Storage
Mount
Cleaning Brush
Handle
Packing List
Motorized cleaning head for water suction cleaning

5 65 6
EN EN
14
13
Product Overview
Wet and Dry Vacuum Floor Washer
Handvac Mode Switch
Handvac Power Switch
Used Water Tank
Brush Roller Cover
Brush Roller Cover
Release Buttons
Self-Cleaning Button
Power Switch
Handvac Release Button
Used Water Tank
Handle
Display Screen
Used Water Tank
Release Button Clean Water Tank
Brush Roller Handle
Brush Roller Release
Button
Clean Water Tank Handle
Clean Water Tank Release
Button
Mode Switch
1
2
3
4
5
6
7
8
9
10
11
12
18
17
16
15
1
2
3
4
5
6
7
8
9
10
11
12
13
14
15
16
17
18 Voice Prompt Button
•Press briey to activate the voice
prompt or adjust the volume
•Press and hold for 3 seconds to
access the language settings.Press
to switch between languages. Press
andhold to conrm the selection
Charging Port
Charging Base
Display Screen
If the appliance is not working properly, the screen display will show an error message. Please refer to the
troubleshooting table to nd your solution.
1
21
2Charging Contacts
8
1
5
3
2
4
7
6
Error Message
Insucient water in the
Clean Water Tank
Used Water Tank full
Blocked tube
Brush roller stuck /
Brush roller not installed
Suction Mode Standard Mode
Self-Cleaning
Turbo Mode
Dirt Level Indicator
Battery Status
Indicator Auto Mode
1
2
3
4
6
7
8
5
Press briey to enable this
function (battery level ≥ 15%) The color of the indicator
changesin real time
according to theamount of
dirt.
Product Overview

7 87 8
EN EN
Installation Charging
Handle Installation 1. Place the charging baseagainst a wallon level ground and connect it to a
powersource. Fully charge the appliance before rst use.
2. Place the appliance on the charging base, the on the screenwilllight up to indicate
the charging status.When charging, the number on the display screen represents the
current battery levelasa percentage. When the numberreaches100, the battery is fully
charged and the will turn o.
Insert the end of the handle vertically into the port on the top of the appliance as
indicated until you hear a click.
Note: To disassemble, extend a hard object into the hole on the back of the appliance to press contacts and pull the
handle upwards at the same time.
Storage Box Installation
Install the storage box onto the charging base as shown in the diagram.
2
咔哒 1
Note:
• If no operation is performed within 10 minutes, the appliance will enter the sleep mode.
• To extend the battery life time, the battery keeps cooling down for about one hour automatically after you
have used the appliance for a long time.
Click

9 109 10
EN EN
The appliance is powered on in Auto modeby default, you can switch to Suction
modeas needed.
Auto Mode
While washing the oor, the appliance can adjust its suction
poweraccording todierent situations.
Suction Mode
If Suction mode is selected, the appliance will vacuum water only and the
brush roller will not be dampened. No water is coming out of the Clean
Water Tank.
Standard Mode (Handvac)
When the appliance converts to a handheld vacuum, it is powered on by
default in Standard mode.
Turbo Mode (Handvac)
Press the handvac mode switch to select the Turbo mode.
1. Fill the Clean Water Tank: Press the Clean Water Tank release button to remove the
tank. Open the tank cover and ll the tank with clean water. Re-install the Clean Water
Tank and ensure it clicks into place.
Note:
•For better cleaning performance, it is recommended to add 10ml detergent with the bottle cap into the full Clean
Water Tank, then shake gently and evenly for use.
•Do not add any liquids other than the ocially-approved cleaner.
Using asaFloor Washer
1
2
2. Start cleaning: Gently step on the brush cover and recline the appliance backwards.
Press the Power Switch to start operating, press the Mode Switch tto switch
between the Auto mode and the Suction mode according to your needs.
3. Empty the Used Water Tank: Press the Used Water Tank release button to take out the
tank. Remove the tank cover and pour out the used water. Close the tank cover and re-
install the tank before use.
Note:
• Do not vacuum any foamy liquids.
• If the appliance is in the upright position while working, the current task will be suspended.
• The appliance is suitable for cleaning oors, marble, tiles and other hard surfaces.
• Do not recline the appliance backwards more than 140° to prevent the appliance from leaking water.
• When the appliance isin operation,do not liftit o the ground, move it, tilt itorlay it at.Doing so may cause the
usedwatertoow into the motor.
<140°
1
2
How to Use How to Use
Working Modes

11 1211 12
EN EN
1. Press the handvac release button to remove the handvac.
2. Install the dust cup assembly and other attachments as shown in the diagram until
you hear a click.
3. Brieypressthe handvac Power Switch to start operating.Brieypressthe handvac
mode switch to switch between Standard mode and Turbo mode according to your
needs.
How to Use
One-Touch Self-Cleaning
* The self-cleaning function can be enabled only when the appliance is being charged and the battery level is more
than 15%.
1. After the appliance completes the cleaning task, place it back onto the base and
make sure that the water in the Clean Water Tank is sucient for self-cleaning.
2. Briey press the self-cleaning button on the top of the handle. The self-cleaning
indicatorwilllight up and the appliancewillstart self-cleaning.
3. After self-cleaning is complete, promptly clean the Used Water Tank. If some stains
are left on the charging base, clean the base.
How to Use
Using asaHandheld Vacuum
1
2
咔哒
Click
咔哒
Click

13 1413 14
EN EN
2-in-1 crevice nozzle:
For cleaning corners, stairs, sofas, coee
tables and other narrow spaces.
Storage box:
Store the cleaning brush, the lter, and the
brush rolleronthe storage box as shown in
the diagram.
Storage mount:
If the dust cup assembly and the 2-in-1 crevice
nozzle are not in use, store themonthe
storage mount as shown in the diagram.
Using Dierent Attachments
Care and Maintenance
Used Water
Tank Cover
Filter
Tips:
• Turn o the appliance before performing care and/or maintenance. Do not touch the Power Switch.
• Replace parts if needed. The parts must be replaced by those available from the manufacturer or its service agent.
• If the appliance is not used for an extended period, fully charge it, unplugthepower adapter, and store the
appliance in a cool, low-humidity environment away from direct sunlight. To avoid over-discharge of the battery,
charge the appliance at least once every 3 months.
Cleaning the Used Water Tank and the Filter
* Cleaning the Used Water Tank after each use is recommended.
* Replacing the lter every 3 to 6 months is recommended.
1. Press the Used Water Tank release
button and take out the Used Water Tank.
2. Take out the lter from the Used Water
Tank cover. Remove the tank cover and
pour out the wastewater.
3. Rinse the Used Water Tank and the tank
cover with water, the provided cleaning
brush can be used to clean the inner wall
of the tank.
4. Close the Used Water Tank cover, re-
install the Used Water Tank and ensure
the tank clicks into place.
1
2
Note: When the lter is dirty and needs washing, rinse it
with water. It must be completely dry before use.
How to Use
1
2
咔哒
Click

1
2
15 1615 16
EN EN
Care and Maintenance
1.First, press the brush roller cover
release buttonsinwardson both sides
to remove the brush roller cover.Next,
press the brush roller release
buttonandthe handle of the brush
roller will pop out. Pull the handle to
take out the brush roller.
2. Clean out any hair and debris tangled
on the brush roller with the provided
cleaning brush. Rinse the brush roller
with clean water and dry it completely.
3. Tap the lter gently or clean it with the
cleaning brush. Rinse the lter and the
dust cup with water.
4. Dry the lter and the dust cup
completely before use.
* Clean as needed.Alternatinguse of the two provided brush rollers is recommended.
* Replacing the brush roller every 3 to 6 months is recommended.
1
2
3. Wipe the suction inlet with a dry cloth
or wet tissue. Do not rinse the brush
assembly with water.
4. After cleaning the brush roller, re-install
the brush roller and the brush roller cover.
You will hear a click to indicate that they
are installed in place.
CareandMaintenance
Cleaning the Dust Cup Assembly
1. Press the dust cup release button and
remove the cup.
2. Take out the lter and the cyclone
assembly from the dust cup, then empty
the cup.
* Cleaning the dust cup after each use or after the amount of dust in the cup reaches the MAX line is
recommended.
* Replacing the lter every 3 to 6 months is recommended.
Note: To reduce the risk
of electric shock or injury,
do not rinse the cyclone
assembly with water.
Remove the Used Water Tank, wipe the tube and the dirt
sensor with a wet cloth before use.
Cleaning the Tube and the Dirt Sensor Cleaning the Brush Assembly

17 1817 18
EN EN
Error Possible Cause Solution
The appliance
does not work.
The appliance is out of battery or
its battery level is low. Fully charge its battery before use.
The appliance is in the upright
position. Recline the appliance backwards.
The appliance is overheatingdue
to blockageand the high-
temperature cut-ohas activated.
Clear the blockage and wait until
the temperature returns normal.
The Used Water Tank is full. Empty the Used Water Tank.
The handle, brush roller, or Used
Water Tank is not installed in
place.
Ensure the handle, brush roller, or
Used Water Tank are all properly in
place.
The appliance
charges slowly. The temperature of the battery is
too low or too high. Wait until the battery's temperature
returns normal.
The suction
power of the
appliance is
weak.
The lter is clogged. Clean the Used Water Tank and
thelter that is in the dust cup.
There are some foreign objects
in the tube and the suction inlet
orthe tube and the suction
inletare blocked.
Clean the tube and the suction inlet.
The motor
is making a
strange noise.
There is too much dirty water in
the Used Water Tank. Empty the Used Water Tank.
The suction inlet is blocked. Clear any blockage in the suction
inlet.
The dirt level
indicator is solid
red.
The dirt sensor needs cleaning.
The dirt sensor is in the
tube. Please refer to the
troubleshootingsectionfor
guidance on howto clean the tube.
The concentration of the cleaner is
too high. Dilute the cleaner with water at the
recommended ratio.
Someliquidother than the
ocially-approved cleanerhas
beenadded andlarge amounts
offoamareproduced.
Use only the ocially-approved
cleaner.
The display
screen does not
light up while
charging.
The power adapter is not plugged
into the electrical outlet.
Make sure the power adapter is
plugged in.
The appliance is not placed onto
the charging base properly.
Make sure the appliance is placed
onto the charging base properly.
If an error occurs, the appliancewill stop working. Please refer to the following table for
troubleshooting. If the problem persists, please contact the customer service.
For additional services, please contact us via aftersales@dreame.tech
Website: https://global.dreametech.com
Error Possible Cause Solution
No wateris
comingout
oftheappliance.
The Clean Water Tank is not
properly installed in place, or the
water in the Clean Water Tank is
insucient.
Re-install or ll the Clean Water
Tank.
It takes 30 second to dampen the
brush roller.
Turn on the appliance and check
again in 30 seconds.
The vent leaks
water.
A collision or a sharp pull causes
water to enter the motor.
Movethe appliancegently back and
forthwhile itis turned on.
Thelteris not completely dry
after being cleaned. Dry the lter completely before use.
Self-cleaning
fails.
The brush roller may be jammed
by largedebris.
Open the brush roller cover to check
and clean the brush roller.
The appliance is not being
charged.
Make sure the appliance is being
charged before enabling the self-
cleaning function.
Self-cleaning cannot be enabled
if the battery level is lower than
15%.
The self-cleaning function
canonlybe enabledwhen the
appliance is being charged and the
battery level is more than 15%.
TheUsed Water Tankis not
installed in place, or theUsed
Water Tankis full.
Re-install or empty theUsed Water
Tank.
The Clean Water Tank is not
installed in place, or the water
in the Clean Water Tank is
insucient.
Fill or re-install theClean Water
Tank.
FAQ FAQ

19 2019 20
EN EN
Troubleshooting
If the appliance is not working properly, the screen display will show an error message.
Please refer to the troubleshooting table to nd your solution.
Troubleshooting
Code Possible Cause Solution
E1-E7 Error
Restart the appliance for troubleshooting.
If the problem persists, please contact
customer service.
H1-H6
H7 Battery
overheating
Wait until the battery's temperature returns
normal.
Error Icon Possible Cause Solution
Insucient water in Clean
Water Tank Fill the Clean Water Tank.
Used Water Tank full Empty the Used Water Tank.
Brush roller stuck Clean the brush roller with the
provided cleaning brush.
Brush roller not installed Install the brush roller.
Blocked tube
Check whetherthelteris clogged.
Alternatively,clean the tube and
the dirt sensor.
Specications
Wet and Dry Vacuum Floor Washer
Model HHV3 Charging Time Approx. 5 hours
Rated Voltage 21.6 V Charging Voltage 26 V
Used Water Tank
Capacity 700 mL Clean Water Tank
Capacity 900 mL
Rated Power 300 W
Power Adapter
Model YLS0251B-E260090 No-load Power
Consumption 0.08 W
Input 100-240 V~ 50/60 Hz
0.8 A Max
Average Active
Eciency 87.28%
Output 26 V 0.9 A Eciency at Low
Load (10%) 79.74%

22
DE
2121
EN
The built-in lithium-ion battery contains substances that are hazardous to the
environment. Before disposing of the battery, make sure the battery is removed by
qualied technicians and discarded at an appropriate recycling facility.
– thebatterymustberemovedfromtheappliancebeforeitisscrapped;
– theappliancemustbedisconnectedfromthesupplymainswhenremovingthe
battery;
– thebatteryistobedisposedofsafely.
Removal Guide
1. Re movethedisplayscreenbyrotatingitwithatool.
2. Removethescrewsonthebatterycoverinturnandthenpryopenthecoverwith
propertools.
3. UnplugtheterminalsbetweenthebatteryandPCBboardtoremovethebattery.
CAUTION:
• Before removing the battery, disconnect the power and run out the battery as much
as possible.
• Unneeded batteries should be discarded at an appropriate recycling facility.
• Do not expose to high temperature environment to avoid risks of explosion.
• Under abusive conditions, liquid may be ejected from the battery. If contact occurs,
ush with water and seek medical help.
WEEE Information
All products bearing this symbol are waste electrical and electronic equipment
(WEEE as in directive 2012/19/EU) which should not be mixed with unsorted
household waste. Instead, you should protect human health and the
environment by handing over your waste equipment to a designated collection
point for the recycling of waste electrical and electronic equipment, appointed
by the government or local authorities. Correct disposal and recycling will
help prevent potential negative consequences to the environment and human
health. Please contact the installer or local authorities for more information
about the location as well as terms and conditions of such collection points.
• Bitte lesen Sie dieses Handbuch vor der Verwendung sorgfältig durch und bewahren
Sie es zum späteren Nachschlagen auf.
• Bei der Verwendung eines elektrischen Geräts sollten immer grundlegende
Vorsichtsmaßnahmen beachtet werden, einschließlich der folgenden:
•LESEN SIE ALLE ANWEISUNGEN, BEVOR SIEDIESES GERÄTVERWENDEN. Die
Nichtbeachtung der Warnhinweise und Anweisungen kann zu einem elektrischen
Schlag, Brand und/oder schweren Verletzungen führen.
Sicherheitsinformationen
Um die Gefahr von Bränden, Stromschlägen oder Verletzungen zu
verringern:
WARNUNG-
Wichtige Sicherheitshinweise
Nur für den Hausgebrauch
• Verwenden Sie das Gerät nur wie in dieser Bedienungsanleitung beschrieben.
Verwenden Sie nurdasvom Hersteller empfohlenenZubehör.
• Verwenden Sie das Gerät nur in Innenräumen, auf nicht mit Teppichboden versehenen
Böden wie Vinyl, Fliesen, versiegeltem Holz usw. Achten Sie darauf, nicht über lose
Gegenstände oder Kanten von Teppichen zu fahren. Ein Abwürgen der Bürste kann zu
einem vorzeitigen Ausfall des Riemens führen.
• Um einen sicheren Betrieb zu gewährleisten und Risiken zu vermeiden, darf dieses
Produkt nicht von Kindern unter 8 Jahren, von Personen mit körperlichen, sensorischen
oder geistigen Einschränkungen oder von Personen mit mangelnden Kenntnissen
ohne Aufsicht eines Elternteils oder Vormunds verwendet werden. Kinder dürfen die
Reinigung und Wartung nicht ohne Aufsicht durchführen.
•Verwenden Sie keine brennbare oder leicht entzündliche Flüssigkeit, um Böden zu
reinigen.
•Dieses Gerät darf nicht verwendet, um brennbare oder leicht entzündliche
Flüssigkeiten wie Benzin aufzunehmen. Dieses Gerät darf nicht in Bereichen verwendet
werden, in denen brennbare oder leicht entzündliche Flüssigkeiten vorhanden sein
können.
•Zum Auaden der Batterie verwenden Sie nur den mitgelieferten
abnehmbarenAdapter.Nur mit Adapter <YLS0251B-E260090> verwenden.
•Ein Adapter, der für eine Art von Akkupack geeignet ist, kann bei Verwendung mit
einem anderen Akkupack zu Brandgefahr führen.
•Tauchen Sie das Gerät nicht in Flüssigkeit.
•Kunststofolie kann gefährlich sein. Um die Gefahr des Erstickens zu vermeiden, halten
Sie sie von Kindern fern.
•Halten Sie Haare, lose Kleidung, Finger und alle Körperteile von den Önungen und
beweglichen Teilen des Geräts und seines Zubehörs fern.
•Verwenden Sie nur oziell zugelassene Bodenreinigungsmittel, wie in der
Bedienungsanleitung beschrieben..
•Setzen Sie kein Objekt in die Önungen. Verwenden Sie das Gerät nicht, wenn die
Önung blockiert ist. Halten Sie sich frei von Staub, Fusseln, Haaren und allem, was
den Luftstrom behindern kann.
• Verwenden Sie es nicht ohne eingesetzte Filter.
Battery Disposal and Removal

23 24
DE DE
Sicherheitsinformationen
• Verwenden Sie das Gerät nicht mit einem beschädigten Adapter. Wenn der Adapter
beschädigt ist, muss er durch den Hersteller, seinen Serviceagenten oder ähnliche
qualizierte Personen ersetzt werden, um Gefahren zu vermeiden.
• Halten Sie Erdungskabel vom Gerät fern, da eine Gefahr auftreten kann, wenn das
Gerät in Betrieb über ein Netzkabel läuft.
• Nehmen Sie kein giftiges Material auf (Chlorbleiche, Ammoniak, Abussreiniger usw.).
Heben Sie keine harten oder scharfen Gegenstände wie Glas, Nägel, Schrauben,
Münzen usw. auf.
• Verwenden Sie das Gerät nicht in einem geschlossenen Raum, der mit Dämpfen
gefüllt ist, die von ölhaltigen Farben, Farbverdünnern, einigen Mottenschutzmitteln,
brennbarem Staub oder anderen explosiven oder giftigen Dämpfen abgegeben
werden.Nehmen Sie keine brennenden oder rauchenden Gegenstände auf, wie z. B.
Zigaretten, Streichhölzer oder heiße Asche.
• Befolgen Sie alle Ladeanweisungen und laden Sie das Gerät nicht außerhalb des in
der Batterie angegebenen Temperaturbereichs auf, da dies die Brandgefahr erhöht.
• Die Ausgangsklemmen der Ladestation dürfen nicht kurzgeschlossen werden.
Verwenden Sie es nicht mit beschädigten Ladestation. Wenn das Gerät
heruntergefallen ist, beschädigt wurde, im Freien gelassen wurde, ins Wasser gefallen
ist oder nicht ordnungsgemäß funktioniert, bringen Sie es zu einem Service Center.
• Halten Sie das Adapterkabel von beheizten Oberächen fern. Behandeln Sie den
Adapterstecker oder das Gerät nicht mit nassen Händen. Um den Stecker zu entfernen,
greifen Sie den Adapterstecker und nicht das Kabel.
• Adapter nicht per Kabel ziehen oder trage, stattdessen ihn als Gri verwenden, Tür am
Kabel schließen oder Kabel um scharfe Kanten oder Ecken ziehen.
• Schalten Sie das Gerät aus, wenn Sie es nicht benutzen, bevor Sie es reinigen, pegen
oder warten, und bevor Sie das Werkzeug mit einer beweglichen Bürste anschließen
oder trennen.
• Verwenden Sie kein Gerät, das beschädigt oder modiziert ist. Beschädigte oder
modizierte Batterien können ein unvorhersehbares Verhalten zeigen, was zu Feuer,
Explosion oder Verletzungsgefahr führen kann.
• Setzen Sie das Gerät keinem Feuer oder übermäßigen Temperaturen aus. Die
Exposition gegenüber Feuer oder übermäßige Temperatur kann eine Explosion
verursachen.
• Stellen Sie sicher, dass das Gerät auf einer horizontalen Fläche steht. Verwenden
Sie das Gerät nicht an der gleichen Stelle, wenn das Gerät mit einer Walzenbürste
ausgestattet ist und der Gri nicht vollständig aufrecht steht. Lagern Sie das Gerät
nicht an einem Ort, an dem es einfrieren kann.
• Gehen Sie bei der Reinigung auf Treppen besonders vorsichtig vor.
• Verhindern Sie ein unbeabsichtigtes Starten. Vergewissern Sie sich, dass der Schalter
in der AUS-Stellung ist, bevor Sie das Gerät in die Hand nehmen oder tragen.
Motorisierter Reinigungskopf für Whater Saugreinigung
DIESE ANWEISUNGEN SICHERN
WICHTIGE SCHUTZMASSNAHMEN
• Lassen Sie die Wartung von einer qualizierten Reparaturkraft durchführen, die nur
identische Ersatzteile verwendet. Dadurch wird sichergestellt, dass die Sicherheit des
Produkts erhalten bleibt.
• Verändern Sie das Gerät nicht und versuchen Sie nicht, es zu reparieren, es sei denn,
dies ist in der Gebrauchs- und Pegeanleitung angegeben.
• Nicht in extrem heißen oder kalten Umgebungen verwenden (unter 5° C/41° F oder
über 40° C/104° F). Bitte laden Sie das Gerät bei Temperaturen über 5° C/41° F und
unter 40° C/104° F) auf.
• Wenn das Gerät heruntergefallen ist, beschädigt wurde, im Freien abgestellt wurde,
ins Wasser gefallen ist oder nicht ordnungsgemäß funktioniert, versuchen Sie niemals,
es zu bedienen. Bitte lassen Sie es von einem autorisierten Servicecenter reparieren.
• Das Tragen des Geräts mit dem Finger auf dem Schalter oder auf dem stromführenden
Gerät, das den Schalter eingeschaltet hat, trägt zu Unfällen bei.
• Dieses Produkt enthält Batterien, die nur durch qualizierte Techniker oder
Kundendienst ersetzt werden können.
Sicherheitsinformationen
Wir, Dreame Trading (Tianjin) Co., Ltd., bestätigen hiermit, dass dieses Gerät mit
dengeltenden Verordnungen und europäischen Normen sowie etwaigen Ergänzungen
inEinklang steht. Der vollständige Wortlaut der EU-Konformitätserklärung ist unter der
folgenden Internetadresse abrufbar: https://global.dreametech.com
Ein detailliertes elektronisches Handbuch nden Sie unter
https://global.dreametech.com/pages/user-manuals-and-faqs
abnehmbare Versorgungseinheit
Bedienungsanleitung lesen

25 26
DE DE
Produktübersicht
Ersatzwalzen-
bürste
Hauptkörper
AufbewahrungsboxLadestation Staubbehälterver-
bundteile
2-in-1
Spaltdüse
Netzadapter
ErsatzlterStaubkapazität
Reinigungsbürste
Handgri
Packliste
Produktübersicht
Nass-Trockensauger
Handstaubsauger-
Modusschalter
Handstaubsauger
Netzschalter
Schmutzwassertank
Bürstenrolleabdeckung
Eentriegelungstaste für
Bürstenrolleabdeckung
Selbstreinigungstaste
Netzschalter
Handstaubsauger-
Eentriegelungstaste
Gri fürSchmutzwasser-
tank
Bildschirm
Entriegelungstaste
fürSchmutzwassertank
Reinwassertank
Bürstenrollengri
Eentriegelungstaste für
Bürstenrolle
Grifür den Reinwassertank
Entriegelungstastefür den
Reinwassertank
Modusschalter
1
2
3
4
5
6
7
8
9
10
11
12
13
14
15
16
17
18 Taste für die Sprachansage
•Kurz drücken, um die Sprachansage
zu aktivieren oder die Lautstärke
einzustellen
•3 Sekunden lang gedrückt halten,
um auf die Spracheinstellungen
zuzugreifen. Drücken, um zwis-
chen den Sprachen zu wechseln.
Gedrückt halten, um die Auswahl zu
bestätigen
14
13
1
2
3
4
5
6
7
8
9
10
11
12
18
17
16
15

27 28
DE DE
Ladeanschluss
Ladestation
Bildschirm
Wenn das Gerät nicht ordnungsgemäß funktioniert, wird auf dem Bildschirm eine Fehlermeldung angezeigt. Bitte
beachten Sie die Tabelle zur Fehlerbehebung, um Ihre Lösung zu nden.
1
2Ladekontakte
Fehlermeldungen
Zu wenig Wasserim Reinwassertank
Der Schmutzwassertank ist voll
Blockierte Röhre
Die Bürstenrolle gesteckt/
Die Bürstenrolle nicht installiert
Saugmodus Standardmodus
Selbstreinigung
Turbo-Modus
Füllstandsanzeige für
den Schmutz
Akkustatus-Anzeige Auto-Modus
1
2
3
4
6
7
8
5
Kurz drücken, um diese
Funktion zu aktivieren
(Batteriestand ≥ 15%) Die Farbe des Indikators
ändert sich in Echtzeit
entsprechend der Menge an
Schmutz.
Produktübersicht
1
2
8
1
5
3
2
4
7
6
Installation
Grimontage
Fügen Sie das Ende der Gribaugruppe senkrecht in die Önung auf der Oberseite
desGerätsein, wie angegeben, Sie werden ein Einrasten spüren.
Hinweis: Um den Gri zu demontieren, verwenden Sie bitte einen harten Gegenstand, um in das Loch auf der
Rückseite desGerätszu greifen, um den Kontakt zu drücken, und ziehen Sie gleichzeitig den Gri nach oben.
Aufbewahrungsbox Installation
Installieren Sie die Aufbewahrungsbox wie im Diagramm gezeigt auf der Ladestation.
2
咔哒 1
Klicken

29 30
DE DE
Laden
1. Stellen Sie die Ladestation gegen eine Wand auf dem Boden und schließen Sie sie an
eine Stromquelle an. Laden Sie das Gerät vor dem ersten Gebrauch vollständig auf.
2. Stellen Sie das Gerät auf die Ladestation, die auf dem Bildschirm aueuchtet,
um den Ladestatus anzuzeigen. Beim Laden stellt die Nummer auf dem Display
den aktuellen Batteriestand in Prozent dar. Wenn die Zahl 100 erreicht, ist der Akku
vollständig aufgeladen und wird ausgeschaltet.
Hinweis:
• Wenn innerhalb von 10 Minuten keine Operation ausgeführt wird, wechselt das Gerät in den Ruhemodus.
• Um die Akkulaufzeit zu verlängern, kühlt der Akku nach längerer Benutzung des Gerätes automatisch etwa eine
Stunde lang ab.
Das Gerät ist standardmäßig im Auto-Modus eingeschaltet, Sie können nach Bedarf die
Saugleistung auswählen.
Auto-Modus
Während des Bodenwaschens kann das Gerät seine Saugleistung an
verschiedene Situationen anpassen.
Saugmodus
Wenn der Saugmodus ausgewählt ist, saugt das Gerät nur Wasser und die
Bürstenrolle wird nicht befeuchtet.
Standardmodus
Wenn das Gerät in einen Handstaubsauger umgewandelt wird, wird es
standardmäßig im Standardmodus eingeschaltet.
Turbo-Modus
Drücken Sie den Handstaubsauger-Modus-Schalter, um den Turbo-
Modus auszuwählen.
1. Reinwassertank befüllen: Drücken Sie die Eentriegelungstaste, um den Tank zu
entfernen. Önen Sie den Tankdeckel und füllen Sie den Tank mit sauberem Wasser.
Installieren Sie den Reinwassertank erneut und stellen Sie sicher, dass er einrastet.
Hinweis:
•Für eine bessere Reinigungsleistung wird empfohlen, 10 ml Reinigungsmittel mit dem Flaschenverschluss in den
vollen Reinwassertank zu geben und dann sanft und gleichmäßig für die Verwendung zu schütteln.
•Keine anderen Flüssigkeiten als die oziell zugelassenen Reinigungsmittel zugeben.
Als Bodenwischer verwenden
1
2
Verwendung
Betriebsmodus

31 32
DE DE
2. Starten Sie die Reinigung: Treten Sie vorsichtig auf die Bürstenrolleabdeckung und
stellen Sie das Gerät nach hinten. Drücken Sie den Netzschalter , um den Betrieb zu
starten, und drücken Sie den Modusschalter , um nach dem Bedarf zwischen dem
Auto- und dem Saugmodus zu wechseln.
3. Leeren Sie den Schmutzwassertank: Drücken Sie die Schmutzwassertank-
Eentriegelungstaste, um den Tank herauszunehmen. Entfernen Sie den Tankdeckel und
gießen Sie das Schmutzwasser aus. Schließen Sie den Tankdeckel und setzen Sie den
Tank vor Gebrauch wieder ein.
Hinweis:
• Verwenden Sie es nicht, um schäumende Flüssigkeiten zu saugen.
• Wenn sich das Gerät während der Arbeit in aufrechter Position bendet, wird die aktuelle Aufgabe unterbrochen.
• Das Gerät eignet sich zur Reinigung von Böden, Marmor, Fliesen und anderen harten Oberächen.
• Stellen Sie das Gerät nicht mehr als 140° nach hinten, um zu verhindern, dass Wasser austritt.
• Wenn das Gerät in Betrieb ist, heben Sie es nicht vom Boden ab. Außerdem sind das Bewegen, das Kippen und
Flachlegen verboten. Dies kann dazu führen, dass das verbrauchte Wasser in den Motor ießt.
<140°
1
2
Verwendung Verwendung
One-TouchSelbstreinigung
* Die Selbstreinigungsfunktion kann nur aktiviert werden, wenn das Gerät beim auaden ist und der Batteriestand
mehr als 15% beträgt.
1. Nachdem das Gerät die Reinigungsaufgabe abgeschlossen hat, stellen Sie es wieder
auf den Boden und stellen Sie sicher, dass das Wasser im Reinwassertank für die
Selbstreinigung ausreicht.
2. Drücken Sie kurz den selbstreinigenden Knopf oben am Gri. Die
Selbstreinigungsanzeige leuchtet auf und das Gerät beginnt mit der Selbstreinigung.
3. Nachdem die Selbstreinigung abgeschlossen ist, reinigen Sie sofort den
Schmutzwassertank. Wenn einige Flecken auf der Ladebasis verbleiben, reinigen Sie
die Basis.

33 34
DE DE
1. Drücken Sie die Handstaubsauger-Entriegelungstaste, um den Handstaubsauger zu
entfernen.
2. Installieren Sie den Staubbehälter und andere Verbundteile wie im Diagramm gezeigt,
bis Sie ein Klicken hören.
3. Drücken Sie kurz den Handstaubsauger-Netzschalter , um den Betrieb zu starten.
Drücken Sie kurz den Handstaubsauger-Modus-Schalter , um je nach Bedarf
zwischen Standard- und Turbo-Modus zu wechseln.
Verwendung
Als Handstaubsauger benutzen
1
2
咔哒
Klicken
咔哒
Klicken
2-in-1-Spaltdüse:
Zum Reinigen von Ecken, Treppen, Sofas,
Couchtischen und anderen engen Räumen.
Aufbewahrungsbox:
Lagern Sie die Reinigungsbürste, den Filter
und die Bürstenrolle wie im Diagramm gezeigt
auf der Aufbewahrungsbox.
Aufbewahrungshalterung:
Wenn die Staubsaugerhalterung und die 2-in-
1-Spaltdüse nicht verwendet werden, lagern
Sie sie wie im Diagramm gezeigt auf der
Aufbewahrungshalterung.
Verschiedene Ansätze verwenden
Verwendung

35 36
DE DE
Pege & Wartung
Die Abdeckung für den
Schmutzwassertank
Filter
Tipps:
• Schalten Sie das Gerät vor der Pege und/oder Wartung aus. Berühren Sie den Netzschalter nicht.
• Teile müssen bei Bedarf ausgetauscht werden, bitte verwenden Sie die vom Originalwerk vorgesehenen Teile, um
Schäden am Produkt aufgrund von Ungeeignetheit zu vermeiden.
• Wenn das Gerät längere Zeit nicht verwendet wird, laden Sie es vollständig auf, ziehen Sie den Netzstecker ab und
lagern Sie das Gerät in einer kühlen Umgebung mit geringer Luftfeuchtigkeit, fern von direkter Sonneneinstrah-
lung. Um das übermäßige Entladen des Akkus zu vermeiden, laden Sie das Gerät mindestens alle 3 Monate auf.
Den Schmutzwassertank und Filter reinigen
* Es wird empfohlen, den Schmutzwassertank nach jedem Gebrauch zu reinigen.
* Es wird empfohlen, den Filter alle 3 bis 6 Monate auszutauschen.
1. Drücken Sie die Schmutzwassertank-
Eentriegelungstaste und nehmen Sie den
Schmutzwassertank heraus.
2. Nehmen Sie den Filter aus dem
Deckel des Schmutzwassertanks heraus.
Entfernen Sie den Tankdeckel und gießen
Sie das Schmutzwasser aus.
3. DenSchmutzwassertankund dessen
Abdeckung mit sauberem Wasser
abspülen. Innenwand des Tanks mit der
mitgelieferten Reinigungsbürste reinigen.
4. Schließen Sie den Abdeckel des
Schmutzwassertanks, installieren Sie
Schmutzwassertank erneut und stellen
Sie sicher, dass der Tank einrastet.
1
2
Hinweis: Wenn der Filter verschmutzt ist und gewaschen
werden muss, spülen Sie ihn mit Wasser. Er muss vor
Gebrauch vollständig trocken sein.
1
2
咔哒
Klicken
Pege & Wartung
3. Den Filter vorsichtig antippen oder mit
der Reinigungsbürste reinigen. Filter und
Staubbehälter mit Wasser abspülen.
4. Trocknen Sie den Filter und den
Staubbehältervor dem Gebrauch
vollständig.
Reinigung der Staubbehälterverbundteile
1. Drücken Sie die Taste zum Lösen des
Staubbehälters und entfernen Sie ihn.
2. Nehmen Sie den Filter aus dem
Deckel des Schmutzwassertanks heraus.
Entfernen Sie den Tankdeckel und gießen
Sie das Schmutzwasser aus.
* Es wird empfohle, dass den Staubbehälter nach jedem Gebrauch oder nachdem die Staubmenge in der Tasse die
MAX-Linie erreicht, zu reinigen.
* Es wird empfohlen, den Filter alle 3 bis 6 Monate auszutauschen.
Hinweis: Um das Risiko
von Stromschlägen oder
Verletzungen zu verringern,
spülen Sie den Zyklon nicht
mit Wasser ab.
Entfernen Sie den Schmutzwassertank, wischen Sie das Rohr
und den Schmutzsensor vor Gebrauch mit einem feuchten
Tuch ab.
Reinigung des Rohres und des Schmutzsensors
Other manuals for M12
4
Table of contents
Languages:
Other Dreame Vacuum Cleaner manuals

Dreame
Dreame DreameBot L10S Pro User manual

Dreame
Dreame DreameBot D10s User manual

Dreame
Dreame H12 User manual

Dreame
Dreame R20 User manual

Dreame
Dreame H11 MAX Dimensions

Dreame
Dreame F9 User manual

Dreame
Dreame DreameBot L10 Ultra User manual

Dreame
Dreame DreameBot D10s Pro User manual

Dreame
Dreame H12 Pro User manual

Dreame
Dreame P10 Pro User manual