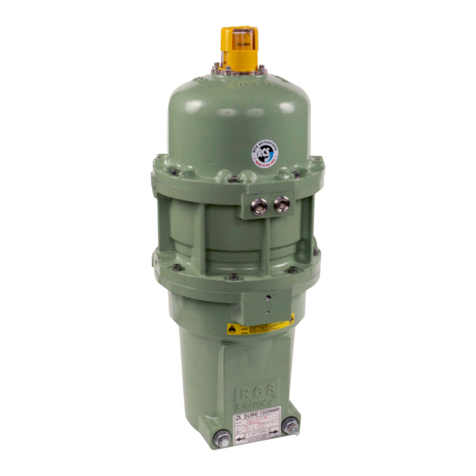
Dresser Andco Eagle User manual

Andco Eagle Actuator
Installation Manual
Refer all questions not covered in this manual to:
Industrial Products Group
Andco Actuators
16240 Port Northwest Drive
Houston, TX 77041
T: 832-590-2306
Toll Free: 1-800-945-9898
F: 713-849-2879
Be sure to include the model and serial number located on the
nameplate of your Eagle actuator in all communications and
parts orders. The nameplate is located on the gear housing cover.
Numbers in brackets refer to item number in gure 2 on page 8.
Intent of Usage/Application
Dresser Natural Gas Solutions (NGS) Andco electric linear
actuators oer a superior choice when reliable, precise, controlled
motion is required. Whether moving industrial doors, providing
accurate positioning feedback for antennas, or modulating
and controlling louver dampers, customers can rely on Andco
actuator solutions.
The Andco Eagle actuators include weatherproof and dustproof
units, oering customers durability and performance in severe
industrial environments, including hot and cold temperature
extremes. Andco Actuators are a superior solution for a range of
functions including positioning, lifting/lowering, pushing/pulling,
and opening/closing.
Andco actuator technology oers low maintenance packages
with internal adjustable limit switches for on/o controls and
light indication, optional internal position/process controls for
positioning, and motor control. Our actuator solutions deliver
ease of installation, maintain constant output force and velocity,
and consume power only during movement.
These actuators feature:
• High-starting torque motor with thermal overload protection
• Non-rotating extension rod
• Non-back driving acme screw
• All metal gearing
The information contained in this manual is essential
to safe, successful, long term operation of your Andco
Eagle linear actuator. Read and follow the requirements
concerning storage, installation and adjustments. Failure
to do so could void the warranty covering your actuator.
NOTICE
WARNING
PPE
Approved Personnel Protective
Equipment for the site must
be worn.
WARNING
GROUNDING LUG
Unit must be grounded with
minimum size 10 AWG wire.
AVERTISSEMENT
EPI
Il convient de porter un
équipement de protection
individuelle sur le site.
AVERTISSEMENT
PATTE DE MISE À LA TERRE
L’unité doit être mise à la terre
avec un l de calibre10 au moins.
Les renseignements contenus dans ce manuel sont essentiels
au fonctionnement sûr, ecace, durable de votre actionneur
linéaire Andco Eagle. Lisez et respectez les exigences relatives au
stockage, à l’installation et aux réglages. Le non-respect de ces
exigences peut annuler la garantie couvrant votre actionneur.
AVIS
This manual gives instructions for storing, installing, operating and
servicing the Model 3100 Eagle linear actuator.
Andco Actuators

2 |Dresser Natural Gas Solutions
WARNING
PPE
Approved Personnel Protective
Equipment for the site must
be worn.
CAUTION
BURN HAZARD
Possible hot surface. Keep hands
clear of surface. Allow surface
to cool before performing any
maintenance.
WARNING
MOVING PARTS
Internal moving parts. Pinch point
hazard. Keep hands clear during
operation.
CAUTION
SERVICE PERSONEL
Service operators must be licensed/trained and authorized before
being allowed to perform maintenance on the actuator.
CAUTION
VOLTAGE SUPPLY
Verify that the supply voltage to the actuator matches the voltage
on the nameplate (33) on the gear compartment cover (21).
1.0 Storage Requirements
1. Actuators should always be stored in a clean dry
environment, in a location where mechanical damage
to the actuator can’t accidentally occur.
2. All covers must remain in place and securely fastened.
3. All pipe plugs must remain in place and be kept tight.
4. Actuators equipped with controllers can be damaged by
excessive moisture. Units so equipped should be stored in
a controlled environment prior to installation. If the units
are equipped with compartment heaters, the heaters must
be continuously energized while in storage.
2.0 Lifting Instructions
1. Do not lift Eagle actuator by limit switch compartment.
2. Follow applicable safety guidelines when lifting or moving
actuator.
3.0 Installation Requirements
While it is possible to mount the actuator in any position, it is not
recommended that the control compartment cover be positioned
face down. In order to maximize seal integrity, the unit should be
mounted with the extension rod pointed up (vertical installations)
or with motor on top (horizontal installations).
NOTICE
1. The body tube adapter (57) is used for face ange or
trunnion-type mounting.
2. The actuator can be clevis-mounted utilizing the clevis (29) in
the extension rod (6) and the rear clevis bracket, located on
the gear compartment cover (21).
Refer to Figure 1 on page 7.
Bien qu'il soit possibled'installer l'actionneur, on ne recommande
pas que le couvercle du compartiment de commande soit
positionné face vers le bas. An de maximiser l'étanchéité du joint,
l'unité doit êtreinstallée avec sa tige d'extension orientée vers
le haut (installations verticales) ou avec le moteur sur le dessus
(installations horizontales).
AVIS
AVERTISSEMENT
EPI
Il convient de porter un
équipement de protection
individuelle sur le site.
ATTENTION
RISQUE DE BRÛLURE
La surface risque de devenir
chaude. Éloignez vos mains de la
surface. Laissez refroidir la surface
avant les travaux de maintenance.
AVERTISSEMENT
PIÈCES MOBILES
Pièces mobiles internes.
Risque de point de pincement.
Tenez vos mains éloignées
pendant le fonctionnement.
ATTENTION
PERSONNEL DE MAINTENANCE
Les opérateurs de maintenance doivent être licenciés/formés et
agréés avant de pouvoir eectuer des travaux de maintenance sur
l’actionneur.
ATTENTION
SOURCE DE TENSION
Vériez que la source de tension de l’actionneur correspond à la
tension indiquée sur la plaque signalétique (33) du couvercle du
compartiment pour l’engrenage (21).

Andco Eagle Actuator IOM NGS.IPG.0031| 3
In all mounting situations, the nal trimming
adjustment of the actuator installation is ±1/8 inch.
NOTICE
8. After Installation the actuator length can be adjusted
+/-1/8 inch
a. Loosen the jam nut (28).
b. Turn the Clevis (29) clockwise to decrease or counter
clockwise to increase the actuators installed length.
Because the thread grip is limited, make sure the clevis (29) is
engaged by a minimum of four threads and that it does not contact
the drive screw (4) when the extension rod (6) is fully retracted.
CAUTION
13. Keep limit switch compartment dry and clean.
To minimize the possibility of condensation damage, it is
suggested that moisture/gas tight conduit seals be installed
at the conduit connections.
14. Dust Ignition Proof Enclosure, Class II, Division 1, Groups E, F
& G.
Indoor and Outdoor Locations.
All actuators provided with dust-ignition proof enclosures must
have properly installed electrical access covers to exclude ignitable
amounts of dust. When reinstalling these covers make sure the
mating seating surfaces and gaskets are clean and the attachment
bolts are securely tightened. If the motor end bell pipe plug has
been removed to adjust the actuator, the pipe plug must be
reinstalled tightly. The actuators must be able to operate at full
rating without developing surface temperatures high enough
to cause excessive dehydration or gradual carbonization of any
organic dust deposits on the actuator enclosure.
The grounding lug on the actuator enclosure exterior must be
wired to a suitable grounding system with a minimum of #10
AWG wire as noted in the electric wiring diagram provided with
the actuator.
CAUTION
CONDUCTOR TEMPERATURE RATING
All conductors used for eld wiring connections to the actuator
shall carry a rating for a minimum temperature of 90°C.
CAUTION
LIFTING HAZARD
Single person lift could cause injury.
Use assistance when moving or lifting.
CAUTION
VOLTAGE SUPPLY
Verify that the supply voltage to the actuator matches the voltage
on the nameplate (33) on the gear compartment cover (21).
3. To prevent premature wear of the drive nut (7) or extension
rod seal/wiper (2), verify that the alignment between the
actuator mounting support and the driven equipment
places no side loading on the extension rod (6) at any point
throughout the full stroke length. Refer to Figure 2 on page
7.
4. Do not hammer or gouge the outside surface of the
extension rod (6). This may damage the plating integrity or
cause surface irregularities which can damage rod seals.
5. Face ange or trunnion mounted:
a. Position the body tube adapter (57) to the desired
orientation.
b. Verify that the pins of the trunnion mounting
conguration are parallel with the clevis pin.
c. Tighten the nut and bolt arrangement of the body tube
adapter to 50-55 ft-lbs. of torque.
6. For Clevis mounting: Verify the pins of the Clevis bracket
and for Clevis (29) are parallel.
7. Apply a light lm of lubricant to all pinned connections.
ATTENTION
TEMPÉRATURE NOMINALE DES CONDUCTEURS
Tous les conducteurs utilisés pour les raccordements du câblage sur
site de l’actionneur doivent présenter une température nominale
minimum de 90°C.
ATTENTION
RISQUE LIÉ AU LEVAGE
Le levage de l’unité par une seule personne est dangereux.
Demandez de l’aide lors du déplacement ou du levage de l’unité.
Dans toutes les situations de montage, le réglage nal de coupe de
l'installation de l'actionneur est de ±1/8 pouce (3,175 mm).
AVIS
Étant donné que le letage de la poignéeest limité, assurez-vous
que la chape (29) est engagée d'un minimum de quatre lets
et qu'elle ne touche pas la vis d'entraînement (4) lorsque la tige
d'extension (6) est complètement rétractée.
PRUDENCE
PRUDENCE
TENSION D'ALIMENTATION
Vérier que la tension d'alimentation vers l'actionneur correspond
sur la plaque signalétique (33) du couvercle du compartiment de
l'engrenage (21).
9. Upon completion of all mounting operations verify that
the jam nut (28) is tight, and that all cotter pins have been
secured.
10. The actuator must be installed and wired in accordance
with all local electrical codes and the most current edition
of the National Electrical Code.
11. Grounding connection must be wired to a TN-S, IT (with
insulation monitoring device), or TT (with residual current
device) type grounding system with a minimum of #10
AWG wire. (see below for picture).
12. Route the electrical conduit up into the actuator to prevent
internal condensation from running into the limit switch
compartment.

4 |Dresser Natural Gas Solutions
5.0 Electrical and Functional tests
Functional Test:
1. Unit ratings (voltage, speed, stroke, options, etc) are to be
conrmed with the Sales Order.
2. Wiring is to be conrmed through continuity tests refenced
from the assigned wiring diagram. Electrical connections
and components are to be secure.
3. Unit is to be run in both directions through the full rated
stroke. Unit should operate smoothly without unusual noise
or vibration.
4. Unit housing is to be visually inspected for mechanical
soundness and esthetics.
WARNING
MOVING PARTS
Internal moving parts. Pinch point
hazard. Keep hands clear during
operation.
WARNING
HAZARDOUS VOLTAGE
Disconnect all electrical power to the actuator prior to performing
any service or maintenance. Unit may have more than one live
circuit. Refer to wiring diagram supplied with unit.
CAUTION
BURN HAZARD
Possible hot surfaces. Keep hands clear of surface. Allow surface to
cool before performing any maintenance.
Disconnect all electrical power to the actuator prior to removing
the limit switch compartment cover and performing any setting
adjustments. Unit may have more than one live circuit. Refer to
wiring diagram supplied with unit.
WARNING
1. Remove the limit switch compartment cover (38) to gain
access to the position switch assembly.
2. Remove the motor pipe plug (46) for access to slot“A”
located in the end of motor shaft.
3. With a manual or power screw driver rotate the motor shaft
in a clockwise direction to extend or counterclockwise
direction to retract the extension rod.
4. To set the extend limit switch, turn the motor shaft in a
clockwise direction. Note the direction the slotted shaft (48)
is turning while extending extension rod to its
desired position.
5. Depress the position switch plunger (47) and turn the
slotted shaft (48) in the same direction it was turning as in
step 4 and continue to turn in this
direction until the cam (50) at comes in contact with the
limit switch (52) lever.
6. Repeat steps 4 and 5 to set the retract limit switch utilizing
the slotted shaft (49), limit switch (53) and cam (51). Turn
the motor shaft in a counterclockwise direction.
7. Replace the motor pipe plug (46).
8. Replace the limit switch compartment cover (38).
9. Re-energize electrical power to the actuator.
If damaged, replace the complete geared position limit switch
assembly rather than attempting eld repair.
NOTICE
En cas de dommage, remplacer l’assemblage complet de
l’interrupteur de n de course du train d’engrenages plutôt que de
tenter une réparation sur place.
AVIS
Débranchez tous les câbles électriques de l'actionneur avant de retirer
le couvercle du compartiment de l'interrupteur de n de course et de
procéder aux réglages. L'unité peut avoir plus d'un circuit sous tension.
Reportez-vous au schéma de câblage fourni avec l'appareil.
AVERTISSEMENT
ATTENTION
RISQUE DE BRÛLURE
La surface risque de devenir chaude. Éloignez vos mains de
la surface. Laissez refroidir la surface avant les travaux de
maintenance.
AVERTISSEMENT
PIÈCES MOBILES
Pièces mobiles internes.
Risque de point de pincement.
Tenez vos mains éloignées
pendant le fonctionnement.
AVERTISSEMENT
TENSION DANGEREUSE
Débranchez l'alimentation électrique de l'actionneur avant
d'eectuer une réparation ou un entretien. L'unité peut avoir plus
d'un circuit sous tension. Reportez-vous au schéma de câblage
fourni avec l'appareil.
4.0 Geared Position Limit Switch
Adjustment
The geared position limit switches have been preset at the
factory to trip and interrupt the electric control for the extend and
retract positions according to specied stroke. Final limit switch
adjustment must be done at installation. Set the extended and
retract limit switches to the positions required per the application,
the setting is to be done in accordance with the following
procedure.
CAUTION
BURN HAZARD
Possible hot surfaces. Keep hands clear of surface. Allow surface to
cool before performing any maintenance.
ATTENTION
RISQUE DE BRÛLURE
La surface risque de devenir chaude. Éloignez vos mains de
la surface. Laissez refroidir la surface avant les travaux de
maintenance.

Andco Eagle Actuator IOM NGS.IPG.0031| 5
5. Markings shall be visually inspected to be sure all warnings
and data plates are installed correctly.
6. Unit ratings (voltage, speed, stroke, options, etc) are to be
conrmed with the Sales Order.
7. Wiring is to be conrmed through continuity tests refenced
from the assigned wiring diagram. Electrical connections
and components are to be secure.
8. Unit is to be run in both directions through the full rated
stroke. Unit should operate smoothly without unusual
noise or vibration.
9. Unit housing is to be visually inspected for mechanical
soundness and esthetics.
10. Markings shall be visually inspected to be sure all warnings
and data plates are installed correctly.
Grounding Test:
Using a continuity tester, verify continuity between grounding
lugs and housing (bare metal).
Pressure Test:
1. Unit shall be pressurized to 3psi (.02 bar)
2. All surfaces and joints, including all gasket and o-ring sealed
surfaces shall be checked for leaks by applying a soap and
water solution and checking for signs of bubbles.
3. No bubbles should be observed.
4. Unit is to be dried after leak test is completed.
Electrical Withstand Test (Hi-Pot):
1. Test Voltage: 1200V
2. Withstand time: 1 second
The test equipment shall incorporate a transformer with an
essentially sinusoidal output, a means to indicate the applied
test potential, and an audible and/or visual indicator of dielectric
breakdown.
Method:
1. The test shall be conducted on products which are fully
assembled.
2. Refer to the assigned wiring diagram for specic test points.
3. The test voltage shall be applied between primary circuits
and accessible dead-metal parts. The test voltage may be
gradually increased to the specied value but must be
maintained at the specied value for one second.
4. If the rated output of the test equipment is 500VA or more,
the applied test potential may be indicated by either:
1 - A voltmeter in the primary circuit;
2 - A selector switch marked to indicate the test potential; or
3 - A marking in a readily visible location to indicate the
test potential for test equipment having a single test
potential output.
In cases 2 and 3, the test equipment shall include a lamp
or other visual means to indicate that the test potential is
present at the test equipment output.
5. All test equipment shall be maintained in current calibration.
6. The test equipment shall incorporate a voltmeter in the output
circuit to indicate directly the applied test potential if the rated
output of the test equipment is less than 500VA.
5.1 High Potential Test
1. Do not apply this test to units equipped with motor control
cards. Tests which involve putting electrical power to units
equipped with motor control cards are covered by a sepa-
rate procedure.
2. Select the voltage setting for the appropriate motor voltage
as indicated on nameplate. Set the selected test equipment
to the selected volts.
3. With the test equipment ground wire contacting the
gear case plate, contact each test point shown on wiring
diagram. The actuator shall be capable of withstanding for
one second per test point, without breakdown, the applied
voltage from Table 1.
Circuit
Voltage
Test
Duration/
Test Point
Test Voltage
(AC) setting
Max
Acceptable
Leakage
12 VDC One Second 1000 Volts 10.33 mA
24 VDC One Second 1000 Volts 10.33 mA
120 VAC 1PH One Second 1200 Volts 10.33 mA
220 VAC 1PH One Second 1200 Volts 10.33 mA
220 VAC 3PH One Second 1200 Volts 10.33 mA
460 VAC 3PH One Second 1200 Volts 10.33 mA
575 VAC 3PH One Second 1200 Volts 10.33 mA
Note: Motor power circuits are to be tested based on the motor
voltage (AC). Dielectric strength tests may be made by applying
a direct current (DC) voltage instead of an alternative current (AC)
voltage, provided that the voltage used is 1.414 times the values
specied above. See wiring diagram for test points.
5.2 Ground Continuity
1. Verify continuity between actuator ground lug and ground.
5.3 Functional Test
1. Electrically energize the actuator.
2. Drive the actuator over the full range of motion.
Table 1 - HIPOT Testing Specications

6 |Dresser Natural Gas Solutions
6.1 Acceptable Lubricants
Standard lubricants and acceptable substitutions for
use in the actuator in Table 3.
Recommended Manufacturer
AeroShell Grease 6 Shell Oil Products
Substitute Manufacturer
Lubriplate MAG-1 Fiske
Mobilgrease 28 Mobil
Litholene HEP1 ARCO
Mobilux EP1 Mobil
Gulfcrown EP1 Gulf
7.0 Troubleshooting Guide
In the event of a problem with your Andco actuator, make
the following preliminary checks before calling the factory for
assistance.
1. The actuator’s rod will not extend or retract.
a. Check for a blown fuse or circuit breaker in the wiring.
b. Check for loose wiring.
c. Check if the motor has overheated and activated the
thermal switch.
d. Check that the limit switches are set correctly.
e. Check the binding in the load being actuated.
f. Check if a capacitor lead is open.
g. Check if the drive nut is damaged or worn, by
disconnecting the actuator from the load and pulling
or pushing on the extension rod.
8.0 Optional Equipment
8.1 Gear Driven Potentiometer
This optional assembly is directly driven by the operation of
the actuator and gives the capability of providing a continuous,
linear output signal directly proportional to the actuator’s stroke.
The signal can be interfaced with automatic control equipment
to position or sense the actuator at any desired stroke between
fully extended and fully retracted. The potentiometer assembly
is mounted directly to and driven by the geared position limit
switch assembly. Characteristics of the potentiometer are 1000
ohm total resistance ±2.0% linearity, 1 watt at 40°C power
rating. Input gearing to the potentiometer is factory selected
to accommodate the full range of the actuator’s strokes and
the acme screw pitches. The potentiometer has been factory
adjusted so the 0 and 1000 ohm resistance points correspond,
respectively, to the fully extended and fully retracted rod
positions. Field adjustments may be made by loosening the jam
nut holding the potentiometer (64) to the mounting bracket
(65). Rotate potentiometer to the desired position and tighten
the jam nut. Potentiometer only to be connected to a class II
power source.
For units that utilize the last portion of the actuator stroke only;
the potentiometer gearing must be disconnected if the unit is to
be retracted beyond the“zero”point.
Table 3 - Standard and Substitute Lubricants
Stroke
(Inches)
Actuator Lubricant Amount
(Body Tube)
(Pounds)
6.22
12 .36
18 .51
24 .66
30 .81
36 .96
Table 2 - Actuator lubricant amount per stroke length
6.0 Lubrication Instructions
Every Eagle linear actuator has been lubricated for life at the
factory and should not require further lubrication if operated
at published duty cycle, rated thrust and in appropriate
environmental conditions. However, if the unit is disassembled,
it should be cleaned and lubricated as given in step 4 of Section
6.0. The amount of lubricant in each actuator depends on the
stroke of the actuator as shown in Table 2.
2. The actuator only actuates in one direction.
a. Check that all wiring connections are secure.
b. Check that the position limit switches are
set correctly.
c. Check for an excessive external load on the
actuator in one direction.
3. The actuator is excessively noisy.
a. Check for a damaged bearing.
b. Check for a damaged gear (chipped tooth,
missing teeth, etc.)
c. Check for a damaged screw.
4. Actuator exhibits high motor current.
a. Check for low line voltage.
b. Check for external binding related to the load
being actuated.
c. Check for excessive external load being actuated.
d. Check for loss of lubricant.
e. Check the extension rod for excessive contaminates.
If you still have a specic problem with your Andco Eagle
Actuator after making all of the above checks, contact Dresser
NGS for further assistance.

Andco Eagle Actuator IOM NGS.IPG.0031| 7
Figure 1 - Eagle Outline Dimension Drawing
108
ADJUSTABLE FACE/FLANGE MOUNT (OPTIONAL)
VIEWED FACING DRIVE ROD END OF ACTUATOR)
6
12
18
24
30
36
THE INFORMATION CONTAINED IN THIS
DRAWING IS THE SOLE PROPERTY OF GE OIL &
GAS AND MAY NOT BE USED, REPRODUCED,
PUBLISHED OR DISCLOSED TO OTHERS WITHOUT
EXPRESS AUTHORIZATION THEREOF. IT SHALL BE
RETURNED TO THE OWNER UPON DEMAND.
PROPRIETARY AND CONFIDENTIAL
INTERPRET PER ASME Y14.5-XXXX
THIRD ANGLE PROJECTION
SHEET
FILENAME
SIZE
SCALE
REV
1:2
-
ES1250
6 of 8
DRAWN BY
CHECKED BY
RK
030314
ET
DATE
D
ASSEMBLY EAGLE ACTUATOR GENERAL AR
DESCRIPTION
GE Oil & Gas
APPVD BY
RK
UNLESS OTHERWISE SPECIFIED:
.XX =
.01
.XXX =
.005
FRACTIONS:
1/32
MATERIAL :
WEIGHT:
ANGLES (EXCEPT CHAMFERS):
1/2
ANGLES ON CHAMFERS: ± 2
REMOVE BURRS & BREAK EDGES, .015 MAX.
MACHINED FINISH: 125 µ in
$PRPSHEET:{Material}
DIMENSIONS ARE IN INCHES
CHAMFERS AND FILLETS: .03
CRITICAL DIMENSION; MUST INSPECT

8 |Dresser Natural Gas Solutions
Figure 2 - Eagle Actuator Parts Drawing

Andco Eagle Actuator IOM NGS.IPG.0031| 9
Parts List
Description Item
1. Drive nut (7)
2. Limit switch (52) + (53)
3. Body tube/End cap (5)
4. Motor (27)
5. Gasket and Seal kit to include:
Wiper rod seal
O-Rings
Sealing washer
Gaskets
(2)
(30), (31), and (55)
(35)
(25), (56)
Part # Description Qty (Std. Unit) Qty. (w/ Ext. Lim. Sw. Compt.)
190470322 Limit switch gasket 1 2
P03-025100-3900 Screw 4 –
P03-025250-3900 Screw – 4
924036X2963 Lock Washer 4 4
Table 4 - Suggested Spare Parts List
Recommended Spare Parts
1. Flex nut
2. Wiper seal
3. Support washer
4. Drive screw
5. Body tube/End Cap
6. Extension rod
7. Drive nut
8. Key
9. Helical gear
10. Spacer
11. Retaining ring
12. Bearing
13. Gear Spacer
14. Woodri key
15. Hex bolt
16. Lock washer
17. Flex nut
19. Main drive gear
20. Unassigned
21. Gear compartment cover
22. Unassigned
23. Intermediate gear
24. Pin
25. Motor gasket
26. Actuator body housing
27. Motor
28. Jam nut
29. Clevis
30. O-ring
31. O-ring
32. Fastener
33. Nameplate
34. Screw
35. Seal washer
36. Position limit switch assembly
37. Capacitor/terminal strip
sub-assembly
38. Limit switch compartment cover
39. Machine screw
40. Lock washer
41. Socket head screw
42. Lock washer
43. Motor pinion retaining ring
44. Motor drive pinion
45. Motor pinion set screw
46. Motor pipe plug
47. Position switch plunger
48. Slotted shaft
49. Slotted shaft
50. Cam
51. Cam
52. Limit switch
53. Limit switch
54. Bearing
55. O-Ring
56. Limit switch cover gasket
57. Body tube adapter
58. Limit switch housing
59. Clevis pin
60. Cotter pin
61. Flat washer
62. Grounding lug
63. Gear driven potentiometer (optional)
64. Potentiometer (optional)
65. Potentiometer mounting bracket
(optional)

10 |Dresser Natural Gas Solutions
Figure 3 - Typical Wiring Diagram for Single Phase, Please refer to the wiring diagram came with your units before you work on the actuators.
1.
2.
DO NOT PERFORM HI-POT TEST ON TERMINAL BLOCK LOCATIONS 10, 11, & 12.
CUSTOMER ALTERNATIVE
FOR OPTIONAL DRY CONTACTS
DETAIL A
1
2
3
4
CAPACITOR CONNECTIONS
WITH OPTIONAL SERIES
WIRE RESISTOR
DETAIL C
STANDARD CAPACITOR
CONNECTIONS
DETAIL B
LEGEND
EE
7
7
4
3
3

Andco Eagle Actuator IOM NGS.IPG.0031| 11
Figure 4 - Typical Wiring Diagram for three Phase, Please refer to the wiring diagram came with your units before you work on the actuators.
LEGEND
1.
2.
DO NOT PERFORM HI-POT TEST ON TERMINAL BLOCK LOCATIONS 10, 11, & 12.
CUSTOMER ALTERNATIVE
FOR OPTIONAL DRY CONTACTS
DETAIL A
1
2
3
4
EE
E
7
7
7
7
4
3
3

12 |Dresser Natural Gas Solutions
Temperature
Rating
-40 to 150°F
-40 to 65°C
90% Relative Humidity
Canadian Applications US Applications
Electrical
Ratings
Voltage Current (FL) Frequency Voltage Current (FL) (50 | 60HZ) Frequency
115 V 1Ph 2.6 A 60 HZ 110–120 1Ph 2.6 A 3.0 A 50/60 HZ
208–240 1Ph 1.7 A 1.7 A 50/60 HZ
230 V 3Ph 0.52 A 60 HZ 208–240 3Ph 0.6 A 0.6 A 50/60 HZ
460 V 3Ph 0.26 A 60 HZ 380–480 3Ph 0.4 A 0.4 A 50/60 HZ
575 V 3Ph 0.2 A 60 HZ 575V 3Ph 0.2 A 60 HZ
Motor
Class B Insulation
Internal Thermal Switch
NEMA D Design
Stroke Lengths 6, 12, 18, 24, 30, and 36 inches
Speed and
Force
Velocity
(in/sec)
Force (lbs)
Breakaway Running
0.2 2000 1000
0.4 1500 750
0.8 750 340
2.0 500 200
Duty Cycle 25%
Certications -
North America
C2D1 Groups E, F, and G Dust Ignition
Proof, T5
Type 4 Watertight
CSA Certicate US Certicate
CSA C22.2 No. 0 ANSI/UL 61010-1
CSA C22.2 No. 25 UL50 and UL50E
CSA C22.2 No. 94 FM 3600 and FM3616
CSA C22.2 No. 142
Mounting
Types
Clevis and pin on drive rod end
Clevis mount on motor end
Trunnion (adjustable)
Face/Flange (Adjustable)
Control and
Position Cards
Positran V051 (4–20 ma)
SCC05 Modbus (US only)
SCC10 (US only)
ACT-100 w/Modbus
Weight 35 –75 lbs depending on length of
extension rod and options
Options Oversize Clevis
Manual Override
Table 5 - Andco Eagle Technical Specications

Andco Eagle Actuator IOM NGS.IPG.0031| 13

14 |Dresser Natural Gas Solutions

Andco Eagle Actuator IOM NGS.IPG.0031| 15

Industrial Products Group
Andco Actuators
16240 Port Northwest Drive
Houston, TX 77041
T: 832-590-2306
Toll Free: 1-800-945-9898
F: 713-849-2879
© 2018 Natural Gas Solutions North America, LLC – All rights reserved. Natural
Gas Solutions reserves the right to make changes in specications and features
shown herein, or discontinue the product described at any time without notice
or obligation. Contact your Dresser Natural Gas Solutions representative for the
most current information. The Dresser Logo and all Trademarks containing the
term “Dresser” are the property of Dresser, LLC, a subsidiary of Baker Hughes,
a GE Company. www.dresserngs.com
Andco Eagle Actuator IOM NGS.IPG.0031
10.18
This manual suits for next models
1
Table of contents
Other Dresser Controllers manuals

Dresser
Dresser RB 4000 DN100 User manual

Dresser
Dresser RB 1700 How to use

Dresser
Dresser MAR Series User manual

Dresser
Dresser RB 4000 User manual

Dresser
Dresser Surepowr Sure 150 User manual

Dresser
Dresser RCS Sure 100 User manual

Dresser
Dresser RB 4600 User manual

Dresser
Dresser Masoneilan 173 Series User manual

Dresser
Dresser Texsteam TA 4626 Guide

Dresser
Dresser RCS Sure 24 User manual