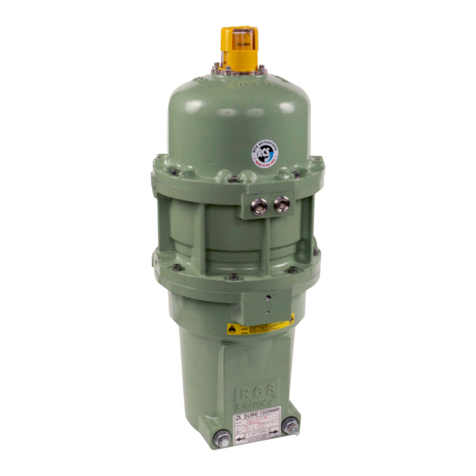
Dresser MAR Series User manual

RCS Actuators
1
Safety First
In the maintenance and operation of mechanical equipment, SAFETY is
the basic factor which must be considered at all times. Through the
use of the proper clothes, tools and methods of handling, serious
accidents causing injury to you or your fellow worker can be prevented.
Throughout this manual are listed a number of safety precautions.
Study them carefully and follow them; also insist upon those working
for you do the same. Remember, an accident is usually caused by
someone’s carelessness, neglect or oversight.
CAUTION
To prevent ignition of hazardous atmospheres, do not
remove actuator cover while curcuits are live.
Installation
1. Operate valve manually before installing actuator and place into
open position.
2. If valve is equipped with mechanical position stops they should
be removed, but care should be taken not to damage or remove
necessary parts from the valve.
3. When actuator is supplied separately from valve, actuator will
be shipped in valve open position and care should be taken to
maintain proper alignment between the actuator and valve
shafts. If actuator and valve shafts are not in correct alignment
repeat operation number one (1) with correction as required.
Direction of rotation is defined as the direction the actuator
output shaft rotates (CW or CCW) as viewed from above the top
of the actuator.
4. Mount the actuator to the valve. The actuator is usually mounted
parallel to the run of the pipe. Tighten all bolts and nuts evenly,
taking care to center the actuator on the valve stem. It is often a
good idea to manually cycle the actuator while the mounting
bolts are somewhat loose. This will allow the unit to center
itself.
5. Loosen socket set screw and remove the manual declutching
knob (Models MAR/DCR10, 50 & 90 only).
6. Remove the hex bolts located around the enclosure of the
actuator.
7. Wire per diagram, or if actuator is of special design, wiring
diagram is included with unit. Wiring diagram is drawn with the
actuator in the open position. Use #18AWG stranded wire or
better, for field hook-up.
8. Manually operate the actuator from one extreme to the other
several times.
To Manually Operate:
Models MA8, MAR8:
• Manual operation is accomplished by use of an open-end
wrench on the hex stock-coupling adapter.
• Direction of rotation and or position can be checked by
indicator located on output shaft.
• Avoid turning beyond normal open/close travel.
Models MAR10, 50 & 90:
• Pull the black declutching knob (A) all the way up and hold.
Gently rock shaft back and forth with wrench to disengage, and
rotate to desired position as indicated by the arrows.
• Actuator will automatically re-engage when “knob” is released
and electrical power is applied.
• Avoid turning beyond normal open/close travel.
Models MAR100, 120, 160, 250, 800, 1600 & 4000:
• Depress and rotate handwheel slowly until detent is felt to
engage.
• Turn handwheel in desired direction (note markings on wheel
and check position by indicator located on output shaft).
• Avoid turning beyond normal open/close travel.
• When handwheel is returned to raised position, electrical
operation is restored (see manual cut-off switch).
Manual cut-off switch:
When handwheel is depressed for manual operation, an integral
cut-off switch prevents injury due to unexpected restoration of
electrical power and is automatically reset when handwheel is
returned to raised position. (Models MAR100, 160, 250, 800,
1600 & 4000 only)
MAR10, 50 & 90 Only
Manual Declutching Knob
MAR/DCR Series Groups 3, 9, 12, 16, 25 &40
Installation Manual
REQUEST A QUOTE AT WWW.AUTHORIZEDPARTS.COM
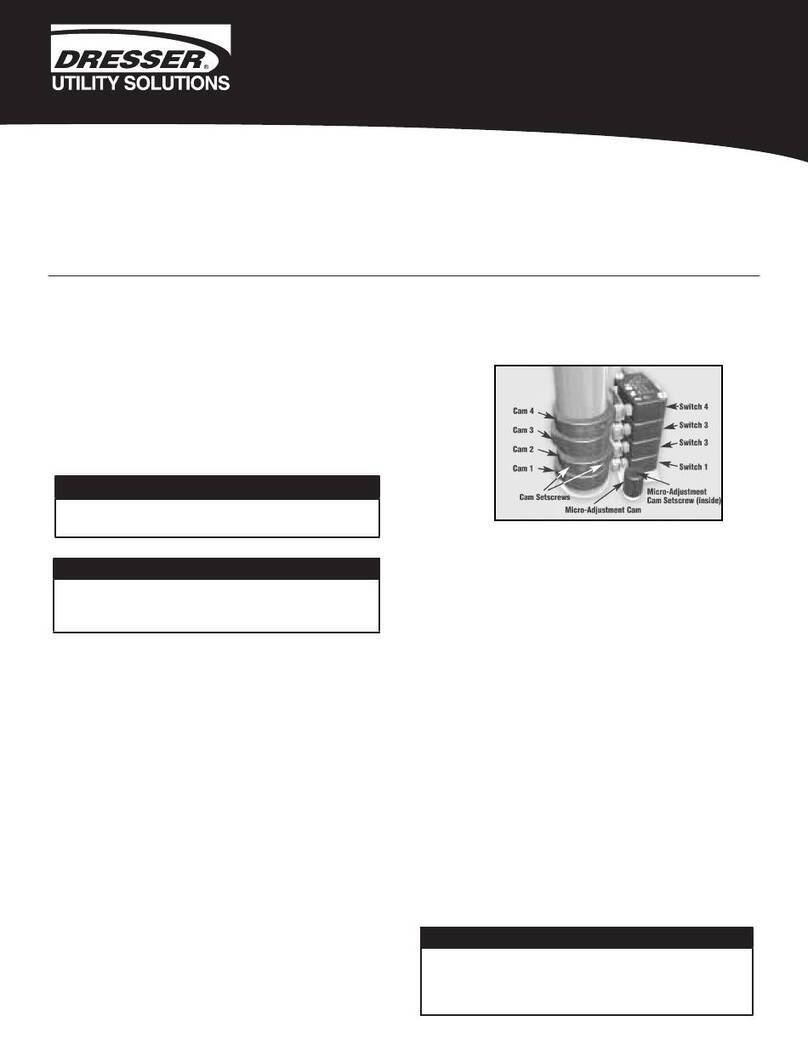
Cam Adjustment–Square Group 3:
MAR8 Models
Cam adjustments (if required), as follows:
Open (counter-clockwise) direction of travel:
a. Loosen setscrew on Cam 1 (and Cam 3 for auxiliary
switches) to give the cam(s) a finger tight grip on the
shaft. Rotate cam(s) in a counter-clockwise direction away
from the switch.
b. Manually move the actuator to the full “open” (CCW)
position.
c. Rotate Cam 1 (and Cam 3) clockwise until it engages the
switch roller and the switch just “breaks”. You should hear
a light click.
d. Tighten the setscrew on Cam 1.
e. If auxiliary switches were provided, rotate Cam 3 about 2
degrees in the clockwise direction. Then tighten the
setscrew. This will ensure that Switch 3 “makes” when the
actuator reaches the full open position.
f. If travel is not correct, repeat steps (a) through (e).
Close (clockwise) direction of travel:
a. Loosen setscrew on Cam 2 (and Cam 4 for auxiliary
switches) to give the cam(s) a finger tight grip on the
shaft. Rotate cam(s) in a clockwise direction away from the
switch.
b. Manually move the actuator to the full “close” (CW)
position.
c. Rotate Cam 2 (and Cam 4) counter-clockwise until it
engages the switch roller and the switch just “breaks”. You
should hear a light click.
d. Tighten the setscrew on Cam 2.
e. If auxiliary switches were provided, rotate Cam 4 about 2
degrees in the counter-clockwise direction. Then tighten
the setscrew. This will ensure that Switch 4 “makes” when
the actuator reaches the full open position.
f. If travel is not correct, repeat steps (a) through (e).
Replace the cover and tighten all flange bolts.
The actuator is now ready for electrical operation.
Cam Adjustment–Round Group 3:
MAR/DCR8RH Models
Cam adjustments (if required), as follows:
Open (counter-clockwise) direction of travel:
a. Loosen setscrew on Cam 1 (and Cam 3 for auxiliary
switches) to give the cam(s) a finger tight grip on the
shaft. Rotate cam(s) in a counter-clockwise direction
away from the switch.
b. Manually move the actuator to the full “open” (CCW)
position.
c. Rotate Cam 1 (and Cam 3) clockwise until it engages the
switch roller and the switch just “breaks”. You should hear
a light click.
d. Tighten the setscrew on Cam 1.
e. If auxiliary switches were provided, rotate Cam 3 about 2
degrees in the clockwise direction. Then tighten the
setscrew. This will ensure that Switch 3 “makes” when the
actuator reaches the full open position.
f. If travel is not correct, repeat steps (a) through (e).
Close (clockwise) direction of travel:
a. Loosen setscrew on Cam 2 (and Cam 4 for auxiliary
switches) to give the cam(s) a finger tight grip on the
shaft. Rotate cam(s) in a clockwise direction away from the
switch.
b. Manually move the actuator to the full “close” (CW)
position.
c. Rotate Cam 2 (and Cam 4) counter-clockwise until it
engages the switch roller and the switch just “breaks”. You
should hear a light click.
d. Tighten the setscrew on Cam 2.
e. If auxiliary switches were provided, rotate Cam 4 about 2
degrees in the counter-clockwise direction. Then tighten
the setscrew. This will ensure that Switch 4 “makes” when
the actuator reaches the full open position.
2
CAM 1
CAM 2
CAM 3
CAM 4
CAUTION
To prevent ignition of hazardous atmospheres, do not
remove actuator cover while curcuits are live.
REQUEST A QUOTE AT WWW.AUTHORIZEDPARTS.COM
3
f. If travel is not correct, repeat steps (a) through (e).
Replace cover by screwing in a clockwise direction. Ensure the
cover is tight.
The actuator is now ready for electrical operation.
Cam Adjustment–Group 9:
MAR/DCR10, 50, 90–Part Turn Models
(old style)
Cam adjustments (if required), as follows:
Open (counter-clockwise) direction of travel:
a. Loosen setscrew on Cam 7 (and Cam 9 for auxiliary
switches) to give the cam(s) a finger tight grip on the
shaft. Rotate cam (s) in a clockwise direction away from
the switch.
b. Manually move the actuator to the full “open” (CCW)
position.
c. Rotate Cam 7 (and Cam 9) counter-clockwise until it
engages the switch roller and the switch just “breaks”. You
should hear a light click.
d. Tighten the setscrew on Cam 7.
e. If auxiliary switches were provided, rotate Cam 9 about 2
degrees in the counter-clockwise direction. Then tighten
the setscrew. This will ensure that Switch 9 “makes” when
the actuator reaches the full open position.
f. If travel is not correct, repeat steps (a) through (e).
Close (clockwise) direction of travel:
a. Loosen setscrew on Cam 2 (and Cam 4 for auxiliary
switches) to give the cam(s) a finger tight grip on the
shaft. Rotate cam(s) in a counter-clockwise direction away
from the switch.
b. Manually move the actuator to the full “close” (CW)
position.
c. Rotate Cam 2 (and Cam 4) clockwise until it engages the
switch roller and the switch just “breaks”. You should hear
a light click.
CAM 4
CAM 3
CAM 2
CAM 1
d. Tighten the setscrew on Cam 2.
e. If auxiliary switches were provided, rotate Cam 4 about 2
degrees in the clockwise direction. Then tighten the
setscrew. This will ensure that Switch 4 “makes” when the
actuator reaches the full open position.
f. If travel is not correct, repeat steps (a) through (e).
Replace the cover and tighten all flange bolts.
Replace manual de-clutching knob and tighten setscrew.
The actuator is now ready for electrical operation.
Note: In the event that the above procedure does not give the
necessary travel control, the micro-adjustment cam must
be repositioned as follows:
To set the open (counter-clockwise) direction of travel by
adjusting the switch plate:
a. Loosen Pivot and Micro-adjustment screws on Switch 7.
b. If the actuator has not reached the full open (CCW)
position, rotate the micro-adjustment cam to swing the
switch outward (away) from Cam 7.
c. If the actuator has over-traveled, move the switch inward
(toward) Cam 7.
d. Tighten pivot and micro-adjustment screws on Switch 7.
To set the close (clockwise) direction of travel by adjusting
the switch plate:
a. Loosen Pivot and Micro-adjustment screws on Switch 2.
b. If the actuator has not reached the full close (CW)
position, rotate the micro-adjustment cam to swing the
switch outward (away) from Cam 2.
c. If the actuator has over-traveled, move the switch inward
(toward) Cam 2. Tighten pivot and micro-adjustment
screws on Switch 2.
Replace the cover and tighten all flange bolts.
Replace manual de-clutching knob and tighten setscrew.
The actuator is now ready for electrical operation.
Pivot Screws
Cam 2
Switch 2
Switch 7 Cam 7
Micro-Adjustment Cams
Micro-Adjustment Screws (inside)
CAUTION
To prevent ignition of hazardous atmospheres, do not
remove actuator cover while curcuits are live.
REQUEST A QUOTE AT WWW.AUTHORIZEDPARTS.COM
4
Cam Adjustment–Group 9:
MAR/DCR10, 50, 90–Part Turn Models
(new style)
Cam adjustments (if required), as follows:
Open (counter-clockwise) direction of travel:
a. Loosen setscrew on Cam 2 (and Cam 4 for auxiliary
switches) to give the cam(s) a finger tight grip on the shaft.
Rotate cam(s) in a clockwise direction away from the
switch.
b. Manually move the actuator to the full “open” (CCW)
position.
c. Rotate Cam 2 (and Cam 4) counter-clockwise until it
engages the switch roller and the switch just “breaks”.
You should hear a light click.
d. Tighten the setscrew on Cam 4.
e. If auxiliary switches were provided, rotate Cam 4 about 2
degrees in the counter-clockwise direction. Then tighten
the setscrew. This will ensure that Switch 4 “makes” when
the actuator reaches the full open position.
f. If travel is not correct, repeat steps (a) through (e).
Close (clockwise) direction of travel:
a. Loosen setscrew on Cam 1 (and Cam 3 for auxiliary
switches) to give the cam(s) a finger tight grip on the
shaft. Rotate cam(s) in a counter-clockwise direction
away from the switch.
b. Manually move the actuator to the full “close” (CW)
position.
c. Rotate Cam 1 (and Cam 3) clockwise until it engages the
switch roller and the switch just “breaks”. You should hear
a light click.
d. Tighten the setscrew on Cam 1.
e. If auxiliary switches were provided, rotate Cam 3 about 2
degrees in the clockwise direction. Then tighten the
setscrew. This will ensure that Switch 3 “makes” when the
actuator reaches the full open position.
f. If travel is not correct, repeat steps (a) through (e).
Replace the cover and tighten all flange bolts.
Replace manual de-clutching knob and tighten setscrew.
The actuator is now ready for electrical operation
Cam Adjustment–Group 9: MAR/DCR10,
50, 90–Multi-Turn Models
Cam adjustments (if required), as follows:
Open (counter-clockwise) direction of travel:
a. Manually operate the actuator in the “open” (CCW)
direction of travel and note the direction of rotation of the
cams: either clockwise or counter-clockwise as view from
above the cam stack.
b. Loosen setscrew on Cam 1 (and Cam 3 for auxiliary
switches) to give the cam(s) a finger tight grip on the shaft.
c. Rotate Cam 1 (and Cam 3) in the same direction as
noted in step (a) until it engages the switch roller and the
switch just “breaks”. You should hear a light click.
d. Tighten the setscrew on Cam 1.
e. If auxiliary switches were provided, continue to rotate
Cam 3 about 2 degrees in the same direction. Then tighten
the setscrew. This will ensure that Switch 3 “makes” when
the actuator reaches the full open position.
f. If travel is not correct, repeat steps (a) through (e).
Close (clockwise) direction of travel:
a. Manually operate the actuator in the “close” (CW) direction
of travel and note the direction of rotation of the cams:
either clockwise or counter-clockwise as view from above
the cam stack.
b. Loosen setscrew on Cam 2 (and Cam 4 for auxiliary
switches) to give the cam(s) a finger tight grip on the shaft.
c. Rotate Cam 2 (and Cam 4) in the same direction as
noted in step (a) until it engages the switch roller and the
switch just “breaks”. You should hear a light click.
d. Tighten the setscrew on Cam 2.
CAM 4
CAM 3
CAM 2
CAM 1
Switch 4
Switch 3
Switch 2
Switch 1
CAUTION
To prevent ignition of hazardous atmospheres, do not
remove actuator cover while curcuits are live.
REQUEST A QUOTE AT WWW.AUTHORIZEDPARTS.COM
5
e. If auxiliary switches were provided, continue to rotate Cam
4 about 2 degrees in the same direction. Then tighten the
setscrew. This will ensure that Switch 4 “makes” when the
actuator reaches the full open position.
f. If travel is not correct, repeat steps (a) through (e).
Replace the cover and tighten all flange bolts.
Replace manual de-clutching knob and tighten setscrew.
The actuator is now ready for electrical operation.
Cam Adjustment–Groups 12/16: MAR100,
120, 160, 250 & 800;
DCR100, 160, 250 & 800–Part Turn
Models (new style)
Cam adjustments (if required), as follows:
Open (counter-clockwise) direction of travel:
a. Loosen setscrew on Cam 2 (and Cam 4 for auxiliary
switches) to give the cam(s) a finger tight grip on the shaft.
Rotate cam(s) in a clockwise direction away from the
switch.
b. Manually move the actuator to the full “open” (CCW)
position.
c. Rotate Cam 2 (and Cam 4) counter-clockwise until it
engages the switch roller and the switch just “breaks”. You
should hear a light click.
d. Tighten the setscrew on Cam 2.
e. If auxiliary switches were provided, rotate Cam 4 about 2
degrees in the counter-clockwise direction. Then tighten
the setscrew. This will ensure that Switch 4 “makes” when
the actuator reaches the full open position.
Cam 1
Cam 2
Cam 3
Cam 4
Set
Screw
Switch 4
Switch 3
Switch 2
Switch 1
f. If travel is not correct, repeat steps (a) through (e).
Close (clockwise) direction of travel:
a. Loosen setscrew on Cam 1 (and Cam 3 for auxiliary
switches) to give the cam(s) a finger tight grip on the shaft.
Rotate cam(s) in a counter-clockwise direction away from
the switch.
b. Manually move the actuator to the full “close” (CW)
position.
c. Rotate Cam 1 (and Cam 3) clockwise until it engages the
switch roller and the switch just “breaks”. You should hear
a light click.
d. Tighten the setscrew on Cam 1.
e. If auxiliary switches were provided, rotate Cam 3 about 2
degrees in the clockwise direction. Then tighten the
setscrew. This will ensure that Switch 3 “makes” when the
actuator reaches the full open position.
f. If travel is not correct, repeat steps (a) through (e).
Replace the cover and tighten all flange bolts.
Replace manual handwheel, pin, washer and bolt.
The actuator is now ready for electrical operation.
Cam 4
Set Screw
Cam 1
Cam 2
Cam 3
Cam Adjustment–Groups 12 & 16:
MAR100, 120, 160, 250 & 800 plus
DCR100, 160, 250 & 800–Part Turn
Models (old style)
Cam adjustments (if required), as follows:
Open (counter-clockwise) direction of travel:
a. Loosen setscrew on Cam 7 (and Cams 9 & 11 for auxiliary
switches) to give the cam(s) a finger tight grip on the shaft.
Rotate cam(s) in a clockwise direction away from the switch.
CAUTION
To prevent ignition of hazardous atmospheres, do not
remove actuator cover while curcuits are live.
CAUTION
To prevent ignition of hazardous atmospheres, do not
remove actuator cover while curcuits are live.
REQUEST A QUOTE AT WWW.AUTHORIZEDPARTS.COM

b. Manually move the actuator to the full “open” position.
c. Rotate Cam 7 (and Cams 9 & 11) counter-clockwise until
it engages the switch roller and the switch just “breaks”.
You should hear a light click.
d. Tighten the setscrew on Cam 7.
e. If auxiliary switches were provided, rotate Cams 9 & 11
about 2 degrees in the counter-clockwise direction. Then
tighten the setscrew. This will ensure that Switches 9 & 11
“makes” when the actuator reaches the full open position.
f. If travel is not correct, repeat steps (a) through (e).
Close (clockwise) direction of travel:
a. Loosen setscrew on Cam 2 (and Cams 4 & 6 for auxiliary
switches) to give the cam(s) a finger tight grip on the shaft.
Rotate cam(s) in a counter-clockwise direction away from
the switch.
b. Manually move the actuator to the full “close” position.
c. Rotate Cam 2 (and Cams 4 & 6) clockwise until it
engages the switch roller and the switch just “breaks”. You
should hear a light click.
d. Tighten the setscrew on Cam 2.
e. If auxiliary switches were provided, rotate Cams 4 & 6
about 2 degrees in the clockwise direction. Then tighten
the setscrew. This will ensure that Switches 4 & 6 “makes”
when the actuator reaches the full open position.
f. If travel is not correct, repeat steps (a) through (e).
Replace the cover and tighten all flange bolts.
Replace manual handwheel, pin, washer and bolt.
The actuator is now ready for electrical operation.
Note: In the event that the above procedure does not give the
necessary travel control, the micro-adjustment cam must be
repositioned as follows:
To set the open (counter-clockwise) direction of travel by
adjusting the switch plate:
a. Loosen Pivot and Micro-adjustment screws on the open
switch stack (switches 7, 9 and 11).
b. If the actuator has not reached the full open position, rotate
the micro-adjustment cam to swing the switches outward
(away) from the cams.
c. If the actuator has over-traveled, move the switch stack
inward (toward) the cams.
d. Tighten pivot and micro-adjustment screws.
To set the close (clockwise) direction of travel by adjusting
the switch plate:
a. Loosen Pivot and Micro-adjustment screws on the close
switch stack (switches 2, 4 and 6).
b. If the actuator has not reached the full open position,
rotate the micro-adjustment cam to swing the switches
outward (away) from the cams.
c. If the actuator has over-traveled, move the switch inward
(toward) the cams.
d. Tighten pivot and micro-adjustment screws.
Replace the cover and tighten all flange bolts.
Replace manual handwheel, pin, washer and bolt.
The actuator is now ready for electrical operation.
Pivot Screw
7
2
Switch 6
Switch 4
Switch 11
Switch 7
Switch 9
Switch 2
Cam 6
Cam 11
Cam 9
Cam 2
Cam 7
Cam 4
6
Cam Adjustment–Groups 25 & 40:
MAR1600 & 4000–Part Turn Models
Cam & Stop adjustments (if required), as follows:
Open (counter-clockwise) direction of travel:
a. Loosen setscrew on Cam 1 (and Cam 3 for auxiliary
switches) to give the cam(s) a finger tight grip on the shaft.
Rotate cam(s) in a counter-clockwise direction away from
the switch.
b. Loosen both manual stop bolts on the worm gear
assembly by rotating both counter-clockwise 3 to 4 full
turns.
c. Manually move the actuator to the full “open” (CCW)
position.
Open
(CCW)
Close
(CW)
Set Screw
CAUTION
To prevent ignition of hazardous atmospheres, do not
remove actuator cover while curcuits are live.
REQUEST A QUOTE AT WWW.AUTHORIZEDPARTS.COM

7
d. Rotate Cam 1 (and Cam 3) clockwise until it engages the
switch roller and the switch just “breaks”. You should hear
a light click.
e. Tighten the setscrew on Cam 1.
f. If auxiliary switches were provided, rotate Cam 3 about 2
degrees in the clockwise direction. Then tighten the
setscrew. This will ensure that Switch 3 “makes” when the
actuator reaches the full open position.
g. Rotate the Open Stop Bolt clockwise until it “bottoms out”
against the worm segment inside the worm gear assembly.
Then rotate 1 full turn counter-clockwise.
h. If travel is not correct, repeat steps (a) through (e).
Close (clockwise) direction of travel:
a. Loosen setscrew on Cam 8 (and Cam 10 for auxiliary
switches) to give the cam(s) a finger tight grip on the shaft.
Rotate cam(s) in a clockwise direction away from the
switch.
b. Manually move the actuator to the full “closed” (CW)
position.
c. Rotate Cam 8 (and Cam 10) counter-clockwise until it
engages the switch roller and the switch just “breaks”. You
should hear a light click.
d. Tighten the setscrew on Cam 8.
e. If auxiliary switches were provided, rotate Cam 10 about 2
degrees in the counter-clockwise direction. Then tighten
the setscrew. This will ensure that Switch 10 “makes”
when the actuator reaches the full open position.
f. Rotate the Close Stop Bolt clockwise until it “bottoms out”
against the worm segment inside the worm gear assembly.
Then rotate 1 full turn counter-clockwise.
g. If travel is not correct, repeat steps (a) through (e).
Replace the cover and tighten all flange bolts.
Replace manual handwheel, pin, washer and bolt.
The actuator is now ready for electrical operation.
Note: In the event that the above procedure does not give the
necessary travel control, the micro-adjustment cam must
be repositioned as follows:
To set the open (counter-clockwise) direction of travel by
adjusting the switch plate:
a. Loosen Pivot and Micro-adjustment screws on the close
switch stack (switches 8 and 10).
b. If the actuator has not reached the full open position,
rotate the micro-adjustmen cam to swing the switch
outward (away) from the cams.
c. If the actuator has over-traveled, move the switch inward
(toward) the cams.
d. Tighten pivot and micro-adjustment screws on.
To set the close (clockwise) direction of travel by adjusting
the switch plate:
a. Loosen Pivot and Micro-adjustment screws on the open
switch stack (switches 1 and 3).
b. If the actuator has not reached the full open position,
rotate the micro-adjustment cam to swing the switch
outward (away) from the cams.
c. If the actuator has over-traveled, move the switch inward
(toward) the cams.
d. Tighten pivot and micro-adjustment screws.
Replace the cover and tighten all flange bolts.
Replace manual handwheel, pin, washer and bolt.
The actuator is now ready for electrical operation.
Cam 10
Switch 3
Cam 8
Switch 1
Switch 10
Switch 8
Cam 3
Cam 1
Close Stop Bolt Open Stop Bolt
Actuator Shown in Full Open Position
Open
(CCW)
Close
(CW)
CAUTION
To prevent ignition of hazardous atmospheres, do not
remove actuator cover while curcuits are live.
REQUEST A QUOTE AT WWW.AUTHORIZEDPARTS.COM

Note: In the event that the above procedure does not give the neces-
sary travel control, the micro-adjustment cam must be repositioned
as follows:
To set the open (counter-clockwise) direction of travel by
adjusting the switch plate:
a. Loosen Pivot and Micro-adjustment screws on the open
switch stack (switches 8 and 10).
b. If the actuator has not reached the full open position,
rotate the micro-adjustment cam to swing the switch
outward (away) from the cams.
c. If the actuator has over-traveled, move the switch inward
(toward) the cams.
d. Tighten pivot and micro-adjustment screws.
To set the close (clockwise) direction of travel by adjusting
the switch plate:
a. Loosen Pivot and Micro-adjustment screws on the close
switch stack (switches 1 and 3).
b. If the actuator has not reached the full open position,
rotate the micro-adjustment cam to swing the switch
outward (away) from the cams.
c. If the actuator has over-traveled, move the switch inward
(toward) the cams.
d. Tighten pivot and micro-adjustment screws.
Replace the cover and tighten all flange bolts.
Replace manual handwheel, pin, washer and bolt.
The actuator is now ready for electrical operation.
Cam Adjustment–Group 12 Multi- Turn
Models: MAR120 & 250–5, 8, 13 & 50
Turn Models
Cam adjustments (if required), as follows:
Open (counter-clockwise) direction of travel:
a. Loosen setscrew on Cam 8 (and Cam 10 for auxiliary
switches) to give the cam(s) a finger tight grip on the shaft.
Rotate cam(s) in a clockwise direction away from the
switch.
b. Manually move the actuator to the full “open” (CCW)
position.
c. Rotate Cam 8 (and Cam 10) counter-clockwise until it
engages the switch roller and the switch just “breaks”. You
should hear a light click.
d. Tighten the setscrew on Cam 8.
e. If auxiliary switches were provided, rotate Cam 10 about 2
degrees in the counter-clockwise direction. Then tighten
the setscrew. This will ensure that Switch 10 “makes”
when the actuator reaches the full open position.
f. If travel is not correct, repeat steps (a) through (e).
Close (clockwise) direction of travel:
a. Loosen setscrew on Cam 1 (and Cam 3 for auxiliary
switches) to give the cam(s) a finger tight grip on the
shaft. Rotate cam(s) in a counter-clockwise direction
away from the switch.
b. Manually move the actuator to the full “close” (CW)
position.
c. Rotate Cam 1 (and Cam 3) clockwise until it engages the
switch roller and the switch just “breaks”. You should hear
a light click.
d. Tighten the setscrew on Cam 1.
e. If auxiliary switches were provided, rotate Cam 3 about 2
degrees in the clockwise direction. Then tighten the
setscrew. This will ensure that Switch 3 “makes” when the
actuator reaches the full open position. If travel is not
correct, repeat steps (a) through (e).
Replace the cover and tighten all flange bolts.
Replace manual handwheel, pin, washer and bolt.
The actuator is now ready for electrical operation.
Open
(CCW)
Close
(CW)
Cam 10
Switch 3
Cam 8
Switch 1
Switch 10
Switch 8
Cam 3
Cam 1
8
CAUTION
To prevent ignition of hazardous atmospheres, do not
remove actuator cover while curcuits are live.
REQUEST A QUOTE AT WWW.AUTHORIZEDPARTS.COM

9
Cam Adjustment–Group 12 Multi- Turn
Models: MAR120 & 250–18 & 26 Turn
Models
Cam adjustments (if required), as follows:
Open (counter-clockwise) direction of travel:
a. Loosen setscrew on Cam 1 (and Cam 3 for auxiliary
switches) to give the cam(s) a finger tight grip on the shaft.
Rotate cam(s) in a counter-clockwise direction away from
the switch.
b. Manually move the actuator to the full “open” (CCW)
position.
c. Rotate Cam 1 (and Cam 3) clockwise until it engages the
switch roller and the switch just “breaks”. You should hear
a light click.
d. Tighten the setscrew on Cam 1.
e. If auxiliary switches were provided, rotate Cam 3 about 2
degrees in the clockwise direction. Then tighten the
setscrew. This will ensure that Switch 3 “makes” when the
actuator reaches the full open position.
f. If travel is not correct, repeat steps (a) through (e).
Close (clockwise) direction of travel:
a. Loosen setscrew on Cam 8 (and Cam 10 for auxiliary
switches) to give the cam(s) a finger tight grip on the shaft.
Rotate cam(s) in a clockwise direction away from the
switch.
b. Manually move the actuator to the full “close” (CW)
position.
c. Rotate Cam 8 (and Cam 10) counter-clockwise until it
engages the switch roller and the switch just “breaks”. You
should hear a light click.
d. Tighten the setscrew on Cam 8.
e. If auxiliary switches were provided, rotate Cam 10 about 2
degrees in the counter-clockwise direction. Then tighten
the setscrew. This will ensure that Switch 10 “makes”
when the actuator reaches the full open position.
f. If travel is not correct, repeat steps (a) through (e).
Replace the cover and tighten all flange bolts.
Replace manual handwheel, pin, washer and bolt.
The actuator is now ready for electrical operation.
Note: In the event that the above procedure does not give the
necessary travel control, the micro-adjustment cam must
be repositioned as follows:
To set the open (counter-clockwise) direction of travel by
adjusting the switch plate:
a. Loosen Pivot and Micro-adjustment screws on the open
switch stack (switches 1 and 3).
b. If the actuator has not reached the full open position,
rotate the micro-adjustment cam to swing the switch
outward (away) from the cams.
c. If the actuator has over-traveled, move the switch inward
(toward) the cams.
d. Tighten pivot and micro-adjustment screws.
To set the close (clockwise) direction of travel by adjusting
the switch plate:
a. Loosen Pivot and Micro-adjustment screws on the close
switch stack (switches 8 and 10).
b. If the actuator has not reached the full open position,
rotate the micro-adjustment cam to swing the switch
outward (away) from the cams.
c. If the actuator has over-traveled, move the switch inward
(toward) the cams.
d. Tighten pivot and micro-adjustment screws.
Replace the cover and tighten all flange bolts.
Replace manual handwheel, pin, washer and bolt.
The actuator is now ready for electrical operation.
Open
(CCW)
Close
(CW)
Cam 10
Switch 3
Cam 8
Switch 1
Switch 10
Switch 8
Cam 3
Cam 1
CAUTION
To prevent ignition of hazardous atmospheres, do not
remove actuator cover while curcuits are live.
REQUEST A QUOTE AT WWW.AUTHORIZEDPARTS.COM

10
MA8 & MAR8 Parts List & Technical Data
1
6
2
4
7
2
8
9
5
3
4 Switch Option
13
14
4.38 Sq.
2.191.25
.82
1.37
1/2 N.P.T.
ÿ
.438
.437
.75
1.50 Sq.
10-24 UNC-2B x .44 DP.
4 Places as shown
.281
.279
Across
OSS Flats
Technical Data
Parts List
Voltage: 115 Vac 60/50 Hz., 1 Phase—Standard
Operation: MA4 & MA8 Unidirectional MAR8 Reversible
Limit Switches: 5 Amps at 125 and 250 Vac UL &
CSA Listed
Ambient Temperature: -40°F to +150°F.*
Lubrication: High temperature grease for gears;
Self-lubricating bearings
Mounting positions: Universal
Weight: 3.5 lbs.
* The addition of a heater is recommended for all outdoor
installations and for all applications that are exposed to high
humidity or temperatures below 32°F. (Consult factory)
Loc. Description 2 Sw. 4 Sw. Part No.
No. Qty. Qty.
1 PC Board, 2 Sw. 1 – 177-068-42
1 PC Board, 2 Sw. + 2 ASWS – 1 177-068-44
2 Spacer, 0.073 Long 2 4 24-532
3 Bracket 1 1 62-118
4 6-32UNC x 3/16 Long RHMS 2 2 P08-N06018-200
5 Lock Washer 2 2 P51-N06000-0200
6 Capacitor 1 1 Per Order
7 6-32UNC x 1/4 Long SSS 4 8 P19-NO5025-0200
8 Switch Cam 2 4 68-03
9 Spacer, 0.19 Long – 1 24-21
10 Spacer, 0.71 Long 1 – 24-504
11 Grounding Screw Bracket 1 1 62-238
12 Green Ground Screw 1 1 126A105719
13 Spacer, 0.51 Long 2 2 24-16
14 Spacer, 0.135 Long 1 1 24-70
REQUEST A QUOTE AT WWW.AUTHORIZEDPARTS.COM

11
MAR8RH Parts List & Technical Data
Technical Data Parts List
Voltage: 115 vac 60/50 Hz., 1 Phase—Standard
Operation: Reversible
Limit Switches: 15 Amps at 125 and 250 Vac UL &
CSA Listed
Ambient Temperature: -40°F to +150°F.*
Lubrication: High temperature grease for gears;
Self-lubricating bearings
Mounting positions: Universal
Weight: 6.5 lbs.
* The addition of a heater is recommended for all outdoor
installations and for all applications that are exposed to high
humidity or temperatures below 32°F. (Consult factory)
Loc. No. Description Qty. Part No.
1 Cover 1 10-212
2O-Ring 1 14-134
3 Base 1 33-417
4 Gear Plate 1 33-420
5 Geartrain Assembly 1 C/F
6 Terminal Block – 6 Point 1 72-01
7 Motor 1 31-01M
8 Cam-Adjusting 2 68-03-10
9 Capacitor As Req’d
7
6
5
4
2
3
8
1
9
4.88
For Cover Removal
7.47
.56 .375
Of Actuator
.375
3/4” 14 N.P.T.
2 Places
6.12 Dia.
3.12
6.25
#10-24.50 Deep
4 Places
.750.
1.500 Sq.
.436/.432
Across Flats
(Output Shaft) .562/.561
REQUEST A QUOTE AT WWW.AUTHORIZEDPARTS.COM

12
MAR10, 50 & 90 Parts List & Technical Data
Technical Data
Parts List
Voltage: 115 Vac 60/50 Hz., 1 Phase—Standard
Operation: Standard Reversible (Unidirectional upon request)
Limit Switches: UL & CSA Listed–15 Amps & 1/3 HP, 125 or 250
Vac; 1/2 Amp, 125 Vdc; 1/4 Amp, 250 Vdc; 5 Amps, 120 Vac “L”
(Lamp Load)
Ambient Temperature: -40°F to +150°F.*
Lubrication: High temperature grease for gears;
Self-lubricating bearings
Mounting positions: Universal
Weight: 12.5 to 14.5 lbs. (depending on model)
* The addition of a heater is recommended for all outdoor
installations and for all applications that are exposed to high
humidity or temperatures below 32°F. (Consult factory)
Loc. No. Description Qty. Part No.
1 Knob – Manual 1 15-01-10
2Retainer – Spring 1 25-11
3 O-Ring 1 14-78
4 Bushing 1 22-83
5 Shaft – Output 1 21-86
6 Push Rod – Declutching 1 21-93
7 Control Cover – NEMA 4 1 88-93
8 Terminal Strip 1 72-01/72-03
9 Cam 2 68-85-10
10 Cover Bolts 1/4-20 x 3/4 4 PO3-025075-3900
11 Gasket 1 16-27
12 Gear Case Assembly 1 As Required
13 Motor 1 As Required
14 Capacitor 1 As Required
15 Micro-Adjustment Plate 2 65-14
16 Limit Switch 2 63-01
17 Micro-Adjustment Cam 2 68-07
1
6
2
9
7
3
8
5
4
16
11
14
13
17
15
10
12
3.28
7.83 6.00
3/4” N.P.T
1.32
3.00
.90 1.03
8.00 Clearance for
Cover Removal
7.41
(MAR9,
12, 24,
49 & 89)
9.81
Manual
Position
(MAR10,
13, 25,
50 & 90)
9.41
Auto
Position
(MAR10,
15, 13,
25, 50
& 90)
.874/.875 Dia.
1.125
2.250 Sq.
.624/.620
Across Flats
5/16-18 UNC-28 Thread.
3/8 Dp. (4-Places)
for Mounting
REQUEST A QUOTE AT WWW.AUTHORIZEDPARTS.COM

Loc. No. Description Qty. Part No.
1 Handwheel 1 15-05 (9")
2Shaft – Manual 1 21-19
3 Control Cover – NEMA 4 1 88-91
4 Stop Ring 1 25-03
5 Spring – Manual 1 30-04
6 Drive Pin – Manual 1 850X24-58
(.187 Dia. x 7/8 LG.)
7 Terminal Strip 1 72-10
8 Screws (5/16-18 x 1LG.) 10 P03-031100-3900
9 Gasket 1 16-03
10 Gear Case Assembly 1 As Required
11 Limit Switch 4 63-01
12 Cam 4 68-48
13 Electrical Lockout Switch 1 63-01
14 Mtg. Bracket–Lockout Switch 1 62-09
15 Clutch Collar
(For MAR-100, 120, 160 & 250) 1 28-07
(For MAR-800) 28-24
16 Motor 1 As Required
17 Capacitor 1 As Required
18 Dowel Pin (.250 Dia. x 2LG.) 1 300W80-28
13
MAR100, 160, 250 & 800 Parts List & Technical Data
Technical Data
Voltage: 115 Vac 60/50 Hz., 1 Phase—Standard
Operation: Standard Reversible (Unidirectional upon request)
Limit Switches: UL & CSA Listed–15 Amps & 1/3 HP, 125 or 250
Vac, 1/2 Amp, 125 Vdc, 1/4 Amp, 250 Vdc, 5 Amps, 120 Vac “L”
(Lamp Load)
Ambient Temperature: -40°F to +150°F.*
Lubrication: High temperature grease for gears;
Self-lubricating bearings
Mounting positions: Universal
Weight: 34 lbs.
* The addition of a heater is recommended for all outdoor
installations and for all applications that are exposed to high
humidity or temperatures below 32°F. (Consult factory)
3/8-16 UNC-28 THD. 3/4 DP.
4-PLACES FOR MAR100, 120, 160 & 250
1/2-13 UNC-28 THD. 7/8 DP.
4-PLACES FOR MAR800
12.36
3.33 3.30
.874/.870 For MAR100,
120, 160 & 250
1.124/1.120 For MAR800
Across Flats
1.500 or
1.750
3.00 Sq. for
MAR100,
120,
160 & 250
3.60 Sq. for
MAR800
3/4” NPT
2 Places
1.124/1.125 Dia.
for MAR100, 120,
160 & 250
1.498/1.500 Dia.
for MAR800
2.69
2.06
9.00 Dia.
2.14
10.00 Clearance
for Cover Removal
4.18
8.36
1.03 for
MAR100,
120, 160
& 250
1.50 for
MAR800
1.05 for
MAR100,
120, 160 &
1.35 for
MAR800
10.44
13.50 Auto
Position
13.00
Manual
Position
18
4
14
13
515
16
7
17
6
10
1
2
3
12 8
14
11
9
Parts List
REQUEST A QUOTE AT WWW.AUTHORIZEDPARTS.COM

14
MAR1600 & 4000 Parts List & Technical Data
Technical Data Parts List
Voltage: 115 Vac 60/50 Hz., 1 Phase—Standard
Operation: Standard Reversible (Unidirectional upon request)
Limit Switches: UL & CSA Listed–15 Amps & 1/3 HP, 125 or 250
Vac, 1/2 Amp, 125 Vdc, 1/4 Amp, 250 Vdc, 5 Amps, 120 Vac “L”
(Lamp Load).
Ambient Temperature: -40°F to +150°F.*
Lubrication: High temperature grease for gears; Self-lubricating
bearings
Mounting positions: Universal
Weight: MAR1600 – 93 lbs., MAR4000 – 120 lbs.
* The addition of a heater is recommended for all outdoor
installations and for all applications that are exposed to high
humidity or temperatures below 32°F. (Consult factory)
Loc. No. Description Qty. Part No.
1 Handwheel 1 15-05 (9")
2Shaft – Manual 1 21-19
3 Control Cover – NEMA 4 1 88-91
4 Stop Ring 1 25-03
5 Spring – Manual 1 30-04
6 Drive Pin – Manual 1 850X24-58
(.187 Dia. x 7/8 LG.)
7 Terminal Strip 1 72-10
8 Screws (5/16-18 x 1LG.) 10 117-125
9 Gasket 1 16-03
10 Gear Case Assembly 1 As Required
11 Micro-Adjustment Cam 2 68-07
12 Micro-Adjustment Plate 2 65-14
13 Limit Switch 4 63-01
14 Cam 4 68-48
15 Electrical Lockout Switch 1 63-01
16 Mtg. Bracket–Lockout Switch 1 62-09
17 Clutch Collar 1 28-07
18 Motor 1 As Required
19 Capacitor 1 As Required
20 Dowel Pin (.250 Dia. x 2LG.) 1 300W80-28
21.00 Max
1.96 5.62 Max
4.56 Max
Mounting
Surface
2.38
Manual
Position
3.00 Auto
Position
8.36
10.00
Clearance
for Cover
Removal
1.94
2.500
5.000 Sq.
3.250 Dia. x 3.75 DP.
1/2 x 1/4 Key Slot (2-Places)
3/4-10 UNC-28 Thd. 3/4 Dp.
(4-Places) for Mounting
4.38
13.08 9.00
Dia.
12.36
3/4” NPT
8
20
14
5
10 19 17
18
6
9
12
4
16
15
13
11
7
1
2
3
REQUEST A QUOTE AT WWW.AUTHORIZEDPARTS.COM

15
Maintenance
The actuator is constructed with an adequately lubricated gear case
section, this lubricant need never be changed. However, through
disassembly, etc., should it become necessary to refill, we
recommended use of Lubriplate Mag-1 (Temperature range: -60°F
to +300°F )
Thermal Overload
A thermal protective device is provided integral to every motor. This
device will disable the motor control circuit to protect the motor from
damage due to overheating. When the temperature drops to a safe
level, the thermal overload will automatically reset. All RCS motors
are supplied with Class B insulation. The trip points are as follows:
AC motors: 248°F; DC
motors: 194°F.
Duty Cycle
The maximum duty-cycle to be expected without interruption by
thermal cut-off at an ambient temperature of 100 degrees F is 50%.
Storage
The Electripowr actuator must be stored in a clean, dry, temperature
controlled building, that is protected from the weather. Precautions
shall be taken to prevent condensation inside or outside the actuator.
If there is insufficient external temperature and humidity control,
internal heaters must be installed and energized to protect the unit
against condensation from extreme temperature variations. The
actuators shall be stored off the floor on suitable pallets and must be
covered with an unsealed dust protector allowing side and bottom
ventilation.
Troubleshooting
Problem 1: Actuator is receiving electric power but the
motor does not respond.
Instructions:
1a. Check actuator nameplate to insure correct model and
voltage type is in use.
1b. Check all wiring against installation wiring diagram.
1c. Measure live voltage to insure that actuator is receiving full
rated voltage.
1d. Check cam/travel limit switch position to insure that one
switch is not made and that the actuator is within its
normal open-close rotation limits. This check can be made
using a volt meter connected between one side of the
incoming line (common) and one leg of the motor or
capacitor. This check should show power between
common and one leg only. Power at
the common and both legs or no power at all, would
indicate cam and or wiring adjustment(s) are required.
1e. Check to insure that manual handwheel on Models
MAR-100 through MAR-400 is in automatic operation
(disengaged-up position).
Problem 2: Actuator is receiving electric power but the
motor only hums.
Instructions:
2a. Perform steps 1a through 1d listed above.
2b. If actuator is equipped with motor brake, check to insure
brake is completely disengaged when power is applied.
Problem 3: Actuator runs but its operation is erratic.
Instructions:
3a. Check ambient temperature. Standard Electripowr actuators
have a maximum ambient operating temperature rating
of 150°F.
3b. Check duty cycle (frequency of operation). Standard
Electripowr actuators have a maximum duty cycle of 50%
(one “ON” operation followed by an equal “off” period.
3c. Check to insure actuator is not running into a continuous
stall condition.
NOTE: All Electripowr actuators are manufactured with built-in
thermal overload motor protectors. Should any of the
above cause the protector to open, it will automatically
reset when the motor temperature is lowered to a
safe level.
Locating and Ordering Parts
For ease and accuracy in identifying and ordering spare or
replacement parts, use parts drawings and part lists on the
preceding pages.
Data required from parts drawings and list are:
• Part number
• Name of part
To obtain replacement parts, submit the following
information from the actuator nameplate:
• Serial Number
• Model Number
• Voltage
REQUEST A QUOTE AT WWW.AUTHORIZEDPARTS.COM

mar/dcr_im
1.09
©2008 Dresser, Inc.
RCS and DRESSER are registered trademarks of Dresser, Inc.
Industrial Products Group
Dresser, Inc.
16240 Port Northwest Drive
Houston, Texas 77041-2645 USA
Ph: 832.590.2306 Fax: 713.849.2879
Toll Free Phone: 800.945.9898 Email: rcs@dresser.com
www.dresser.com
REQUEST A QUOTE AT WWW.AUTHORIZEDPARTS.COM
This manual suits for next models
13
Table of contents
Other Dresser Controllers manuals

Dresser
Dresser Andco Eagle User manual

Dresser
Dresser Surepowr Sure 150 User manual

Dresser
Dresser Texsteam TA 4626 Guide

Dresser
Dresser Masoneilan 173 Series User manual

Dresser
Dresser RB 4000 DN100 User manual

Dresser
Dresser RCS Sure 24 User manual

Dresser
Dresser RCS Sure 100 User manual

Dresser
Dresser RB 4000 User manual

Dresser
Dresser RR 16 User manual

Dresser
Dresser RB 1700 How to use