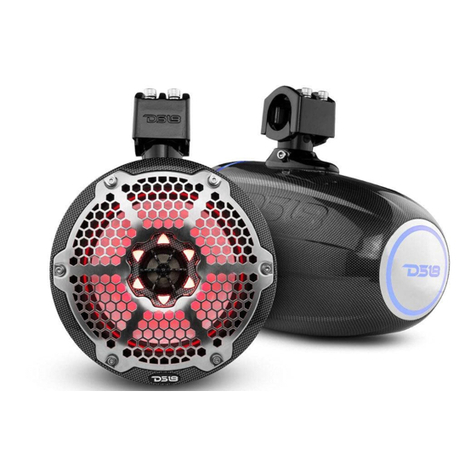
DS18 MP4TP.4A User manual

MANUAL DE USUARIO
OWNER'S MANUAL
ENGLISH | ESPAÑOL
PAQUETE DE SISTEMA DE SONIDO PARA
POWERSPORTS Y MARINO DE 600W
600W MARINE & POWERSPORTS SOUND
SYSTEM PACKAGE
MP4TP.4A

INTRODUCTION / INTRODUCCIÓN
Congratulations on the purchase of the
MP4TP.4A! It has been designed, engineered,
and manufactured for the highest level of
performance and quality.
DS18 presents the best digital class amplifier
that will provide the best performance out of
your speaker towers. They come ready to resist
all the elements, water, dust, and vibrations
that the world of motorsports brings; it won’t be
a problem.
This is a practical system with a few parts that
are easy to install and enjoy. You won't need to
adjust anything on the amplifier because it
comes ready to play your favorite music loud
and clear.
FEATURES
• Designed for marine and powersports
applications
• IPX5 water resistance rating
• For All Elements
• BT 5.0 A2DP connectivity
• Wireless connection range up to 130ft.*
• USB Input to play your favorite music files
• 3.5mm jack auxiliary audio input
• High Efficiency 4 Channel Digital Amplifier
• 4 x 4” Tower Speaker pods with Tube Clamp
• Easy to use - LED illuminated push buttons
• Round cage design for easy installation
• Seamless Flush Mount
*Conditions may vary the maximum range.
CAUTION
This symbol with ”CAUTION” is intended to alert
the user to the presence of important instruc-
tions. Failure to heed the instructions could
result ininjury or unit damage. To prevent injury
and damage to the unit, please read and follow
the instructions in this manual. If you feel
unsure about installing this system yourself,
have it installed by a qualified technician. Before
installation, disconnect the battery negative (-)
terminal to prevent damage to the unit, fire, and
/ or possible injury.
¡Felicitaciones por la compra del MP4TP.4A! Ha
sido diseñado y fabricado para el más alto nivel de
rendimiento y calidad.
DS18 presenta el mejor amplificador de clase
digital que proporcionará el mejor rendimiento de
sus torres de altavoces. Vienen preparados para
resistir todos los elementos, agua, polvo y
vibraciones que trae el mundo de los deportes
motorizados; no será un problema.
Este es un sistema práctico con pocas partes que
son fáciles de instalar y disfrutar. No necesitará
ajustar nada en el amplificador porque viene listo
para reproducir su música favorita alto y claro.
FEATURES
• Diseñado para aplicaciones marinas y de
deportes motorizados
• Clasificación de resistencia al agua IPX5
• Para todos los elementos
• Conectividad BT 5.0 A2DP
• Alcance de conexión inalámbrica de hasta
130 pies. *
• Entrada USB para reproducir sus archivos
de música favoritos
• Entrada de audio auxiliar jack de 3,5 mm
• Amplificador digital de 4 canales de alta
eficiencia
• 4 x Altavoces de torre de 4" con abrazadera
para tubo
• Fácil de usar con botones iluminados
por LED
• Diseño de jaula redonda para una fácil
instalación
• Montaje a ras sin bordes
* Las condiciones pueden variar el rango máximo.
PRECAUCION
Este símbolo con "PRECAUCIÓN" tiene como
objetivo alertar al usuario de la presencia de
instrucciones importantes. No seguir las
instrucciones podría resultar en lesiones o daños
en la unidad. Para evitar lesiones y daños a la
unidad, lea y siga las instrucciones de este manual.
Si no está seguro de instalar este sistema usted
mismo, haga que lo instale un técnico calificado.
Antes de la instalación, desconecte el terminal
negativo (-) de la batería para evitar daños a la
unidad, incendios y / o posibles lesiones.
1

PACKAGE / PAQUETE
PACKAGING INCLUDES LA CAJA INCLUYE:
After you have unpack the speaker system,
check all the contents of package; If
something is missing, please call us.
• (4) MP4TP/BK speakers
• (4) Mounting clamps (Pre-Installed on speakers)
• (16) M6 x 15mm bolts (Pre-Installed)
• (24) Rubber clamp adapters (1/8” thickness)
• (1) BTRC-R BT Receiver
• (1) MP.4A (4 Channels Amplifier)
• (8) 16-22 AWG butt connector
• (1) RCA to 3.5mm jack Audio Cable 6.5ft
• (1) 3.5mm Stereo Aux cord
• (1) Remote Wire 6.5ft
• (1) Bag with Screws
Una vez que haya desempacado el sistema
de altavoces, verifique todo el contenido del
paquete para que contenga todos los
elementos a continuación. Si falta algo,
llámenos.
• (4) Altavoces MP4TP/BK
• (4) Abrazaderas de montaje (Preinstaladas
en los altavoces)
• (16) Tornillos M6 x 15 mm (Preinstalados)
• (24) Adaptadores de abrazadera de goma
(grosor de 1/8 ”)
• (1) BTRC-R receptor BT
• (1) MP.4A Amplificador de 4 Canales
• (8) Uniones para cable de calibre 16-22
• (1) Cable de Audio de RCA a conector
3.5mm de 2m
• (1) Cable estereo auxiliar de 3.5mm
• (1) Cable de remoto de 2m
• (1) Bolsa con tornillos
Short Press
Previous Song
Presión corta
canción anterior
BT / AUX / USB Switch
Interruptor BT / AUX / USB
Play / Pause
Press Hold = On/Off
Short Press
Next Song
Presión corta
Siguiente canción
Disconnect BT
Desconectar BT
Press and Hold
Volume Down
Presione y mantenga
Baja el volumen
1
2
3
4
5
NO CONTROL
Short press for Play/ Pause Long press 3
seconds for On/Off
Short Press to switch BT/AUX In/ MP3 mode
Long press 3 seconds to disconnecting and
repress 3 secods for reconnecting.
Short press for next song Long press for voulme
up continuously
Short press for previoussong Long press for
volume down continuously
FUNCTION FUNCION
Press and Hold
Volume Up
Presione y mantenga
Sube el volumen
Reproducir pausar
Presione y mantenga= On / Off
Presion para Reproducir / Pausa Presione
prolongadamente 3 segundos para Encendido /
Apagado
presione brevemente para cambiar entre BT / AUX
In / modo MP3
Presione 3 segundos para desconectar y Presione
nuevamente por 3 segundos para volver a conectar.
Pulsación corta para la siguiente canción Mantenga
pulsado para subir el volumen de forma continua.
Pulsación corta para la canción anterior Mantenga
pulsado para bajar el volumen de forma continua.
OPERATION CONTROLS
CONTROLES DE OPERACIÓN
2

SPEAKER TOWER INSTALLATION /
INSTALACIÓN DE LA TORRE DE ALTAVOCES
1. Unpack and disassemble the clamps from
the speaker. Make sure you account for all
hardware when removing it from the
clamps. There are lock washers that must be
re-installed on the clamp.
2. Determine the location of the speaker.
3. Determine the correct rubber clamp adapt-
ers that are needed for your application.
4. The rubber adapters will need to be cut to
lenght, so they fit the enclosure and clamp.
5. After the rubber clamp have been cut,
remove the white protective layer and stick
them to the clamp and enclosure.
6. Place the speaker on the tower and have
the top clamp ready to place on top.
7. Screw the two bolts evenly, until snug.
Once the position is verified, tighten the
bolts another halft-turn.
DO NOT OVERTIGHTEN.
8. The speaker accept up to 16 GA wire, it is
recommended you use a high-quality marine
grade speaker cable for your installation.
1. Desembale y desmonte las abrazaderas
del altavoz. Asegúrate de tener en cuenta
todo el hardware al retirarlo de las abraza-
deras. Hay arandelas de seguridad que deben
volver a instalar en la abrazadera.
2. Determine la ubicación del altavoz.
3. Determine los adaptadores de abrazadera
de goma correctos que se necesitan para su
aplicación.
4. Los adaptadores de goma deberán
cortarse a la longitud adecuada para que se
ajusten a la carcasa y la abrazadera.
5. Una vez cortada la abrazadera de goma,
retire la capa protectora blanca y péguela a la
abrazadera y el recinto.
6. Coloque el altavoz en la torre y tenga la
abrazadera superior lista para colocar en la
parte superior.
7. Atornille los dos pernos de manera
uniforme, hasta que estén ajustados. Una vez
que se verifica la posición, apriete los pernos
otra media vuelta. NO APRIETE DEMASIADO.
8. El altavoz acepta cables de hasta 16 GA, se
recomienda que utilice un cable de altavoz de
grado marino de alta calidad para su
instalación
3

MOUNTING (BT Module BTRC-R)
To mount the unit, you will need to find a flat
surface with adequate clearance behind it
that provides enough clearance for the unit
and all it’s necessary wiring.
1. Once you have determined a mounting
location, you will need to cut a circular hole
2.87" (73 mm) in diameter.
2. After the hole is cut, remove the nut ring
unscrewing it from the unit, then slide the
unit and wiring through the hole.
3. Take the nut ring and screw it back on.
Tighten down with hand, DO NOT OVER-
TIGHTEN.
4. Plug in all wiring harnesses and cables.
Refer to the wiring diagram to make the
connections.
MONTAJE (Módulo BT BTRC-R)
Para montar la unidad, necesitará encontrar
una superficie plana con espacio suficiente
detrás para la unidad y el cableado necesario.
1. Una vez que haya determinado la ubicacion
del montaje, deberá cortar un orificio circular
de 2,87"(73 mm) de diámetro.
2. Después de cortar el orificio, retire el anillo
de tuerca desenroscándolo de la unidad, luego
deslice la unidad y el cableado a través del
agujero.
3. Tome el anillo de tuerca y vuelva a
enrroscarlo. Apriete con la mano, NO APRIETE
DEMASIADO.
4. Enchufe todos los conectores y cables.
Refierace al diagrama del cableado para
realizarlas conecciones.
BT MODULE INSTALLATION /
INSTALACIÓN DE MODULO BT
AMPLIFIER INSTALLATION INSTALACION DE AMPLIFICADOR
Amplifiers are generally mounted in closed
compartments of the vehicle or watercrafts.
Select a location that will provide adequate
ventilation for the amplifier. Avoid mounting
the amplifier in exposed areas.
Secure the amplifier with the screws provid-
ed. Before securing the amplifier, inspect the
mounting location carefully to ensure that
you do not drill into or damage any electrical,
hydraulic, fluid, or fuel lines.
1. Before you start, disconnect the negative
cable from the battery, tape up the end so it
is isolated from the battery.
Los amplificadores generalmente se montan
en compartimentos cerrados del vehículo o
embarcaciones. Seleccione una ubicación que
proporcione una ventilación adecuada para el
amplificador. Evite montar el amplificador en
áreas expuestas.
Asegure el amplificador con los tornillos
proporcionados. Antes de asegurar el
amplificador, inspeccione cuidadosamente la
ubicación de montaje para asegurarse de no
perforar ni dañar ninguna línea eléctrica,
hidráulica, de fluido o de combustible.
1. Antes de comenzar, desconecte el cable
negativo de la batería, pegue el extremo con
cinta adhesiva para que quede aislado de la
batería. 4

AMPLIFIER INSTALLATION / INSTALACIÓN DE AMPLIFICADOR
2. Run an appropriate gauge wire from the
battery to the amplifier. Plan this part of the
installation carefully. this cable will carry very
high current. If it should short to the body and it
is not properly fused, it could catch fire.
3. Connect the power wire to the battery using a
fuse capable of the total current load of all amplifi-
ers connected. Wait until the end locate the fuse
as close as possible to the battery.
4. Find the closest clear metal area to the amp
for a ground. sand, grind or scrape all paint and
undercoating from the body and screw the
ground securely in place. In some vehicles or
boats the ground wire must go directly to the
battery, use a proper size and color wire to
identify as a ground wire and avoid mixing it
with the positive wire.
It is advisable to test the ground with an
ohmmeter between the ground cable and the
negative battery cable to ensure a good low
resistance connection. Some alloys used in
modern vehicles do not offer the best ground.
If you believe this is the case – first consult
with the vehicle manufacturer.
5. Run the speaker wire to the speakers. It is
advised that you leave some extra wire at this
point. You can fix it later. This amplifier is a
multi-channel amplifier design, meaning it has
more than one channel of speaker outputs. It is
equipped with a harness over-mold. Connect
this carefully and neatly; strip your wire back
and twist the exposed leads and use an insulat-
ed waterproof marine butt connector. If the
wires ever contact each other the amplifier will
go into protection mode.
6. Connect the speaker wires to the amplifier
and speakers (make sure the amp is off first).
Make sure the polarity (+) and (-) is correct.
7. Connect the remote wire and the RCA audio
signal from the BT Receiver to the amplifier.
8. If you haven’t done so already, mount the amplifi-
er now.
Only after this step - you should connect back the
negative cable at the battery.
9. Now is a good time to turn on the amp for the first
time. This MP.4A amplifier already comes with all
the factory settings, it is ready to enjoy with your
new speaker system.
2. Tienda un cable de calibre adecuado desde la
batería hasta el amplificador. Planifique esta parte
de la instalación con cuidado. este cable transpor-
tará una corriente muy alta. Si tiene un cortocircuito
enalgunlugary noestá correctamenteprotejidocon
fusible, podría incendiarse.
3. Conecte el cable de alimentación a la batería
usando un fusible capaz de la carga de corriente
total de todos los amplificadores conectados.
Espere hasta el final y ubique el fusible lo más
cerca posible de la batería.
4. Encuentre el área de metal descubierto más
cercana al amplificador como tierra. lijar, esmeri-
lar o raspar toda la pintura y la capa base de la
cabina y atornillar la “Tierra” de forma segura en
su lugar. En algunos vehículos o embarcaciones,
el cable de tierra debe ir directamente a la
batería, use un cable de color y tamaño adecua-
do para identificarlo como cable de tierra y evite
mezclarlo con el cable positivo.
Es aconsejable probar la tierra con un ohmímet-
ro entre el cable de tierra y el cable negativo de
la batería para asegurar una buena conexión de
baja resistencia. Algunas aleaciones utilizados
en vehículos modernos no ofrecen la major
tierra. Si cree que este es el caso, primero
consulte con el fabricante del vehículo.
5. Tienda el cable del altavoz hasta los altavoces.
Se aconseja que deje algo extra alambre en este
punto. Puedes arreglarlo más tarde. Este ampli-
ficador tiene un diseño de amplificador multica-
nal, lo que significa que tiene más de un canal de
salidas de altavoz. Está equipado con un arnés
sobremoldeado. Conecte esto con cuidado y
prolijamente; Pele el cable hacia atrás y retuerza
los cables expuestos y use un conector o union
marino impermeable aislado. Si los cables alguna
vez entran en contacto, el amplificador entrará
en modo de protección.
6. Conecte los cables de los altavoces al amplifica-
dor y los altavoces (asegúrese de que el amplifica-
dor esté apagado primero). Asegúrese de que la
polaridad (+) y (-) sea correcta.
7. Conecte el cable remoto y la señal de audio
RCA del receptor BT al amplificador.
8. Siaún noloha hecho,monte el amplificadorahora.
Solo después de este paso, conecte de nuevo el
cable negativo en la bateria.
9. Ahora es un buen momento para encender el
amplificador por primera vez. Este amplificador
MP.4A ya viene con todos los ajustes de fábrica,
está listo para disfrutar con tu nuevo sistema de
altavoces.
5

WIRING / CABLEADO
+ YELLOW
Fuse:5A
Line out-L
Line out-R
DC12V(-) Grounded to
metal chassis, or directly to
negative polarity of battery.
DC12V(+)
Recommended wiring
with fuse (parts are not included)
Salida de Linea-L
RCA hacia 3.5mm
Entrada
de Audio
Audio
Input
Salida de Linea-R
Line out-L
Line out-R
Salida de Linea-L
Salida de Linea-R
+ AMARILLO
Fusible:5A
DC12V (-) conectado a tierra del
chasis de metal, o directamente a
polaridad negativa de la batería
DC12V(+)
Cableado recomendado
con fusible
(las piezas no están incluidas)
- NEGRO
- BLACK
13
14
FUSIBLE: 20A | +ROJO
FUSE: 20A | +RED
RCA to 3.5 mm
6
AUX Input
Red / Acc | Rojo / Acc
USB
Entrada Auxiliar 10
11
12
Blue / Remote
Azul / Remoto
9
6

1. White : CH1 Speaker Output (+)
White/Black: CH1 Speaker Output (-)
2. Green: CH3 Speaker Output (+)
Green/Black: CH3 Speaker Output (-)
3. Gray: CH2 Speaker Output (+)
Gray/Black: CH2 Speaker Output (-)
4. Violet: CH4 Speaker Output (+)
Violet/Black: CH4 Speaker Output (-)
5. Audio Input: Audio Signal from the BT
receiver using the 3.5mm Jack to RCA
included wire.
6. RCA Pre-Output: Audio Signal to the MP.4A
amplifier (White: Left Ch, Red: Right Ch).
7. Black Wire (16Ga): Negative/Ground, Connect
this directly to the Negative post or chassis
ground.
8. Red Wire (16Ga) with Fuse Holder: Power
+12V, connect directly to the battery source
(positive).
9. Blue Wire: Remote Output, connect this to
the MP.4A amplifier.
10. 3.5mm Jack Audio Input: Analog Audio
Auxiliary input using a stereo plug wire.
11. USB Port: Connect a USB Drive up to 32Gb
with MP3/WMA Audio Files.
12. Red Wire (20Ga): ACC, connect this to an
Accessory switch or a Master Switch, this
allows to turn on/off the device to avoid battery
from discharging when not in use.
13. Yellow Wire (20Ga) with Fuse Holder: Power
+12V, connect directly to the battery source
(positive).
14. Black Wire (20Ga): Negative/Ground,
Connect this directly to the Negative post or
chassis ground.
15. Audio Wire: RCA to 3.5mm wire adapter
included to connect the BT receiver to the
Amplifier.
16. Audio Output: use this to feed another
amplifier, for example you can use this to add a
Sub-woofer amplifier.
1. Blanco: Salida de altavoz CH1 (+).
Blanco/Negro: Salida de altavoz CH1 (-).
2. Verde: Salida de altavoz CH3 (+).
Verde/Negro: Salida de altavoz CH3 (-).
3. Gris: Salida de altavoz CH2 (+).
Gris/Negro: Salida de altavoz CH2 (-).
4. Violeta: Salida de altavoz CH4 (+).
Violeta/Negro: Salida de altavoz CH4 (-).
5. Entrada de Audio: Señal de audio desde el
receptor BT usando el cable de RCA a connector
3.5mm inlcluido.
6. Salida previa RCA: Señal de audio al
amplificador MP.4A (Blanco: canal izquierdo,
Rojo: canal derecho).
7. Cable negro (16Ga): Negativo / Tierra, conéctelo
directamente al polo negativo o a la tierra
del chasis.
8. Cable Rojo (16Ga) con portafusibles:
Alimentación +12V, conéctelo directamente a la
fuente de batería (positivo).
9. Cable azul: Salida remota, conéctelo al
amplificador MP.4A.
10. Entrada de audio jack de 3,5 mm: Entrada
auxiliar de audio analógico mediante un cable de
enchufe estéreo.
11. Puerto USB: Conecte una unidad USB de hasta
32 Gb con archivos de audio MP3 / WMA.
12. Cable rojo (20Ga): ACC, conéctelo a un
interruptor de accesorios o un interruptor
maestro, esto permite encender / apagar el
dispositivo para evitar que la batería se descargue
cuando no está en uso.
13. Cable Amarillo (20Ga) con portafusibles:
Alimentación +12V, conéctelo directamente a la
fuente de batería (positivo).
14. Cable negro (20Ga): Negativo / Tierra,
conéctelo directamente al polo negativo o a la
tierra del chasis.
15. Cable de Audio: cable adaptador de RCA hacia
3.5mm incluido para conectar el receptor BT con
el amplificador.
16. Salida de Audio: use esto para alimentar otro
amplificador, por ejemplo puede usar esto para
adicionar un amplificador para Sub-woofer.
WIRING / CABLEADO
7

SPECIFICATIONS / ESPECIFICACIONES
GENERAL SPECIFICATIONS / ESPECIFICACIONES GENERALES
TOWER BODY FEATURES / CARACTERÍSTICAS DE CARCAZA DE LA TORRE
Enclosure Material / Material de Recubrimiento..........................Injection PC+ABS / Injection PC+ABS
Marine Grade Type / Tipo de Grado Marino...................................... IPX5 + UV Stable / IPX5 + UV Stable
RGB Led Type / Tipo de Led RGB ........................................................................................................No / No
Grill Type / Tipo de Parrilla............................................................... Injection PC+ABS / Injection PC+ABS
Clamp / Abrazaderas ..............................................................Tube Type Fixed with pads for 1-1/2" to 2"
Tipo de tubo fijo con almohadillas 1-1/2" por 2"
Front Logo/ Logo Frontal.................................................................................................................... Yes / Si
Finish / Finalizado.................................................................................................. Matt Black / Negro Mate
Sensitivity / Sensibilidad....................................................................................................................... 89 dB
Total Impedance / Impedancia Total............................................................................ 4 Ohm (Each Tower)
TOWER WOOFER SPECIFICATIONS / ESPECIFICACIONESDEL WOOFER DELATORRE
Voice Coil Diameter / Diámetro de la Bobina de Voz ..........................................................1" / 25.4mm
VC Former Material / Material Interior de Bobina Móvil ...................................................................... KSV
Winding Material / Material de Bobinado......................................................................................... PEPSV
Cone Material / Material del Cono....................Injection Molded Polypropylene + UV Compliant /
Polipropileno Moldeado por Inyección + Cumplimiento UV
Surround Material / Material de la Suspensión .....................................................Butyl (Rubber) / Goma
Basket Material / Material de la Canasta........................................ Steel with Salt Protection Coating /
Acero con Proteccion para Sal
Magnet Material / Material del Imán.................................................................................. Ferrite / Ferrita
Magnet Weight / Peso del Imán ............................................................................................................11 oz
Magnet Diameter / Diametro del Imán .................................................................................3.14" / 80mm
TOWER TWEETER SPECIFICATIONS/ ESPECIFICACIONES DETWEETER DE LA TORRE
Voice Coil Diameter / Diámetro de la Bobina de Voz ............................................................1" / 25mm
Voice Coil Former Material / Material Interior de Bobina Móvil........................................................... ASV
Winding Material / Material de Bobinado........................................................................................... CCAW
Type / Tipo ................................................................................................................................Dome / Domo
Diaphragm Material / Material del Diafragma....................................................................................... PEI
Magnet Material / Material del Imán....................................................................Neodymium / Neodimio
Magnet Weight / Peso del Imán .............................................................................................................. 45g
Crossover............................................................................................................................................ 6dB/Oct
Speaker Type / Size / Tipo de Bocina/Tamaño...........................................................4" Tower Speakers
Sound System Components / Componentes del Sistema de Sonido........................4 x Tower Speakers
(MP4TP/BK) + 4 Ch Amplifier (MP.4A) + BT Receiver (BTRC-R)
Total Max Power Handling / Manejo de Potencia Máxima Total.....................................................600W
Frequency Response / Respuesta Frecuencia........................................................................60Hz-20KHz
Voltage Operation / Operación de Voltaje.....................................................................................9-15V DC
TOWER SPEAKER MEASUREMENT / MEDIDAS DEL ALTAVOZ DE TORRE
Overall Diameter /
Diámetro Total
.......................................................................................5.51" / 140 mm
Overall Depth /
Profundidad Total
.......................................................................................8.07" / 205 mm
Overall Height /
Altura Total
.............................................................................7.28" / 185 mm with clamp
AMPLIFIER FEATURES / CARACTERÍSTICAS DEL AMPLIFICADOR
Audio Source / Fuente de Audio ..............................3.5mm Jack Input / Entrada de connector 3.5mm
Waterproof Rating / Clasificación Impermeable..................................................................................IPX5
Audio Output / Salida de Audio......................................................................................YES / Si (RCA L+R)
Body Material / Color / Finish / Material del cuerpo / Color / Acabado ...... Aluminum / Red Brushed
..............................................................................................................................................Aluminio / Rojo Cepillado
8

AMPLIFIER SPECIFICATIONS / ESPECIFICACIONES DEL AMPLIFICADOR
Amplifier Class / Clase del Amplificador .......................... Stero Full Range / Estereo Rango Completo
Amplifier Type / Tipo de Amplificador ................................................................................ Digital / Digital
Number of Channels / Numero de Canales ......................................................... 4 Channels / 4 Canales
Total RMS Power Handling / Manejo de Potencia RMS Total .................................. 4 x 40W @ 4 Ohm
Total MAXPower Handling / Manejo de Potencia MAX Total................................. 4 x 120W @ 4 Ohm
Minimun Impedance / Impedancia Minima.................................................................................... 4 Ohms
Signal to Noise Ratio / Relación señal a ruido................................................................................... 82 dB
Power Input Wire Size / Tamaño del cable de entrada de energía..................................................16 Ga
Fuse Size / Tamaño del Fusible ........................................................................................................ 20 Amp
Thermal Protection / Proteccion Térmica ............................................Yes / Si (>75°C / 167°F (+/- 5°)
Over-Load Protection / Proteccion de Sobrecarga.........................................................................Yes / Si
DC Output Protection /Protección de salida DC..............................................................................Yes / Si
Short Circuit Output Protection / Protección de salida de cortocircuito......................................Yes / Si
Voltage Input Protection / Protección de entrada de voltaje...................................Yes (<9.2V / > 16V)
BT RECEIVER SPECIFICATIONS / ESPECIFICACIONES DEL RECEPTOR BT
Frequency Response / Frecuencia de Respuesta .......................................................... 20Hz-20KHz
Signal to Noise Ratio / Relación Señal a Ruido ................................................................................. >80dB
T.H.D / T.H.D ........................................................................................................................................... <0.1%
Channel Separation / Canales de Separacion ................................................................................. >60dB
Voltage Operation / Voltaje de Operacion ............................................................................ DC 12-14.4V
Fuse Size / Tamaño del Fusible .......................................................................................................... 5 Amp
BT Version / Version BT ............................................................................................................................. 5.0
Wireless Range / Alcance inalámbrico ...................................................... >130 ft (conditions may vary)
Waterproof Rating / Clasificación Impermeable ........................................................................... IPX6
USB Charging Capacity / Capacidad de Carga USB.......................................................................... 1 amp
USB Files Format Compatible / Formato de archivos USB compatible ............................... MP3 / WMA
BT RECEIVER FEATURES / CARACTERÍSTICAS DEL RECEPTOR BT
RCA Line Out (Pre-Amp) / Salida de línea RCA (preamplificador) .... Yes/ Si ... 1 pair (Left & Right) 2.5V
Aux Line Input / Entrada de Línea Auxiliar ............................................................ Yes/ Si ... Plug 3.5mm
Remote Out / Salida Remota .......................................................................................... Yes/ Si ... < 200mA
USB Player / ReproductorUSB....... Yes/ Si ...< 32Gb with4ft extension cord/ Concabledeextensionde4Pies
Buttons / Controls / Botones / Controles ................ Yes/ Si ... Power/Source/Play/Pause/Next/Prev
Vol+/Vol-/BT Pairing
Energía / Fuente / Reproducir / Pausa / Siguiente / Anterior / Vol + / Vol- / Emparejamiento BT
Illumination / Iluminacion .................................................... Yes/ Si ... Blue Backlit / Azul retroiluminado
Body Material / Color / Finish / Material del cuerpo / Color / Acabado .................... ABS Black housing
Rubber Buttons
ABS Carcasa negra / Botones de goma
BT RECEIVER MEASUREMENT / MEDIDAS DE RECEPTOR BT
Overall Diameter/
Diametro Total
........................................................................................... 3.7" / 96mm
Overall Depth /
Profundidad Total
....................................................................................... 2.44" / 62mm
Mounting Depth /
Profundidad de montaje
....................................................................... 1.85" / 47mm
Mounting Hole Size / Tamaño del orificio de montaje........................................................ 2.87" / 73mm
SPECIFICATIONS / ESPECIFICACIONES
AMPLIFIER MEASUREMENT / MEDIDAS DEL AMPLIFICADOR
Overall Length /
Largo Total
....................................................................................................... 6" / 153mm
Overall Wide /
Ancho General
................................................................................................. 3.66" / 93mm
Overall Height /
Altura Total
....................................................................................................1.96" / 50mm
Heatsink Length /
Longitud del disipador de calor
............................................................ 4.72" / 120mm
Gross Single Unit Weight /
Peso bruto de una sola unidad
............................................. 1.62Lb / 735g
9

MEASUREMENT / MEDIDAS
10

MEASUREMENT / MEDIDAS
11

MEASUREMENT / MEDIDAS
12

TROUBLE / PROBLEMA CAUSE / CAUSA SOLUTION / SOLUCIÓN
Unit will not turn on
La Unidad no enciende
The fuse is blown
El fusible esta quemado
Check/Replace the fuse
Revisa/Remplazar el Fusible
Main acc switch not
engaged
Conmutador acc principal
no activado
Turn switch to on position
Gire el interruptor a la
posición de encendido
No sound is heard
No se escucha nada
Device volume is low/muted
El volumen del dispositivo
es bajo/muteado
Turn the volume level up
Subir de nivel de volumen
Cannot pair BT
No empareja el BT
The BT Function of the device
is not enabled
La función BT del dispositivo
no está habilitado
Refer to the user manual
of the device for how to
enable the BT Funtion
Consulte el manual del
usuario del dispositivo para
saber cómo habilitar
la funcion BT
The audio quality is poor
after connection with a
BT Enabled device
La calidad de audio es
pobre después de la
conexión con un
Dispositivo habilitado
para BT
The BT Reception is Poor
La Recepcion BT es Pobre
Move the device closer to the
audio system or remove
any obstacle between the device
Acercar el dispositivoa lasistema de
audio o quitarcualquier obstáculo
entre el dispositivo
Unit has become
unresponsive
La unidad no responde
Power glitch or interference
Fallo de alimentación o
interferencia
Disconnect power for 10
seconds to reset
Desconecte la alimentación
durante 10 segundos para
restablecerla
TROUBLESHOOTING / SOLUCIÓN DE PROBLEMAS
WARRANTY GARANTÍA
Please visit our website DS18.com for more
information on our warranty policy
Visita nuestra pagina web DS18.com para
obtener mas informacion sobre nuestra
garantia
Nos reservamos el derecho de cambiar productos y especificaciones en cualquier momento sin
previo aviso. Las imágenes pueden incluir o no equipo opcional.
We reserve the right to change products and specifications at any time without notice.
Images may or may not included optional equipment.
MP4TP.4A
MP4TP.4A
MP4TP.4A
MP4TP.4A
MP4TP.4A
MP4TP.4A
MP4TP.4A
MP4TP.4A
MP4TP.4A
MP4TP.4A
MP4TP.4A
MP4TP.4A
MP4TP.4A
MP4TP.4A
MP4TP.4A
MP4TP.4A
MP4TP.4A
MP4TP.4A
MP4TP.4A
MP4TP.4A
MP4TP.4A
MP4TP.4A
MP4TP.4A
MP4TP.4A
MP4TP.4A
MP4TP.4A
MP4TP.4A
13
MP4TP.4A
MP4TP.4A
MP4TP.4A
MP4TP.4A
MP4TP.4A
MP4TP.4A
MP4TP.4A
MP4TP.4A
MP4TP.4A
MP4TP.4A
MP4TP.4A
MP4TP.4A
MP4TP.4A
MP4TP.4A
MP4TP.4A
MP4TP.4A
MP4TP.4A
MP4TP.4A
MP4TP.4A
MP4TP.4A
MP4TP.4A
MP4TP.4A
MP4TP.4A
MP4TP.4A
MP4TP.4A
MP4TP.4A
MP4TP.4A

MP4TP.4A
MP4TP.4A
MP4TP.4A
MP4TP.4A
MP4TP.4A
MP4TP.4A
MP4TP.4A
MP4TP.4A
MP4TP.4A
MP4TP.4A
MP4TP.4A
MP4TP.4A
MP4TP.4A
MP4TP.4A
MP4TP.4A
MP4TP.4A
MP4TP.4A
MP4TP.4A
MP4TP.4A
MP4TP.4A
MP4TP.4A
MP4TP.4A
MP4TP.4A
MP4TP.4A
MP4TP.4A
MP4TP.4A
MP4TP.4A
MP4TP.4A
MP4TP.4A
MP4TP.4A
MP4TP.4A
MP4TP.4A
MP4TP.4A
MP4TP.4A
MP4TP.4A
MP4TP.4A
MP4TP.4A
MP4TP.4A
MP4TP.4A
MP4TP.4A
MP4TP.4A
MP4TP.4A
MP4TP.4A
MP4TP.4A
MP4TP.4A
MP4TP.4A
MP4TP.4A
MP4TP.4A
MP4TP.4A
MP4TP.4A
MP4TP.4A
MP4TP.4A
MP4TP.4A
MP4TP.4A
FOR MORE INFORMATION
PLEASE VISIT
DS18.COM
We LIKE IT LOUD
V1
Table of contents
Other DS18 Marine Equipment manuals
Popular Marine Equipment manuals by other brands

Ultraflex
Ultraflex T67 Installation and maintenance manual

ECO SISTEMS
ECO SISTEMS Water-pro Compact S-90 12V owner's manual

Hansson PyroTech
Hansson PyroTech Ikaros-Line instructions

Raymarine
Raymarine LIGHTHOUSE 4 Operation instructions

Aquadrive
Aquadrive B20 installation manual

Kongsberg
Kongsberg EA640 installation manual