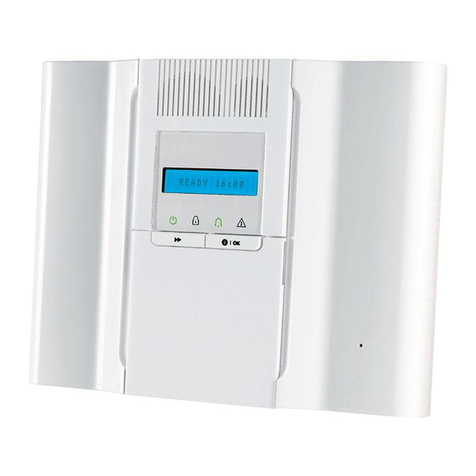
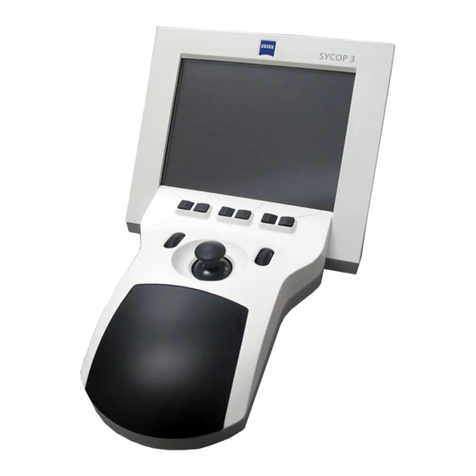
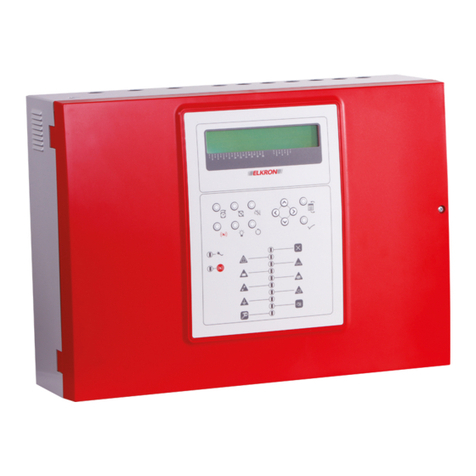
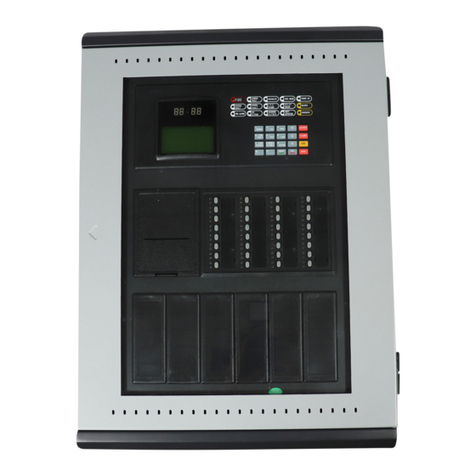
DSC PowerSeries Neo User manual

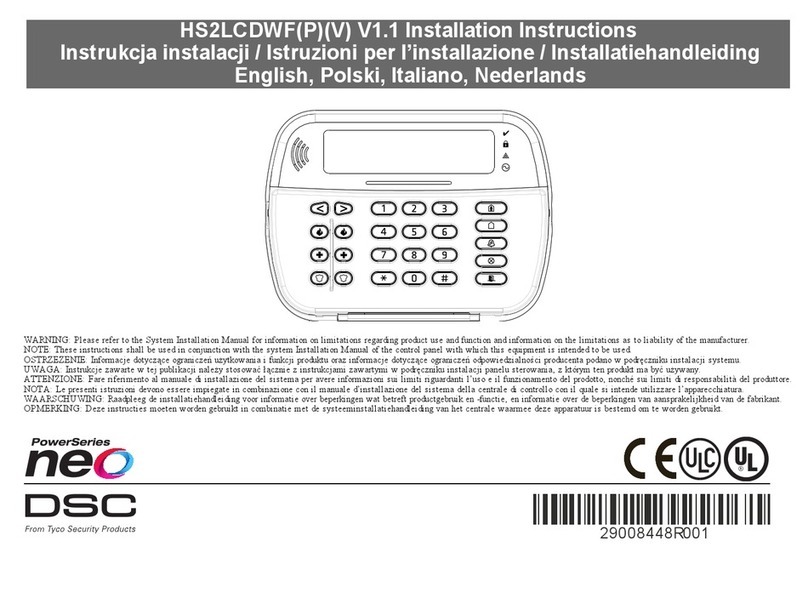
HS2LCDWF(P)(V) V1.2
Installation Instructions / Instructions
d’installation / Installatiehandleiding /
Installationsanleitung - English,
Français, Nederlands, Deutsch
WARNING: Please refer to the System Installation Manual for information on limitations regarding
product use and function and information on the limitations as to liability of the manufacturer.
NOTE: These instructions shall be used in conjunction with the system Installation Manual of the con-
trol panel with which this equipment is intended to be used.
ATTENTION: Ce manuel contient des informations sur les restrictions concernant le fonctionnement
et l’utilisation du produit et des informations sur les restrictions en ce qui concerne la responsabilité
du fabricant. La totalité du manuel doit être lu attentivement.
NOTE: Ce manuel doit être utlisé en conjunction avec le Manuel d’installation de la centrale.
WAARSCHUWING: Raadpleeg de installatiehandleiding voor informatie over beperkingen wat betreft
productgebruik en -functie, en informatie over de beperkingen van aansprakelijkheid van de fabrikant.
OPMERKING: Deze instructies moeten worden gebruikt in combinatie met de sys-
teeminstallatiehandleiding van het centrale waarmee deze apparatuur is bestemd om te worden
gebruikt.
WARNHINWEIS: Siehe System-Installationsanleitung für Informationen zu Beschränkungen der Pro-
duktbenutzung und Funktionen sowie Informationen zu den Haftungsbeschränkungen des Herstellers.
HINWEIS: Diese Installationsanleitung muss zusammen mit der Installationsanleitung der Alar-
mzentrale benutzt werden, an welcher das Gerät angeschlossen werden soll.

Introduction
These instructions must be used with the appropriate control panel installation manual with which this
equipment is intended to be used. Operating instructions shall be made available to the user. The
HS2LCDWF wireless keypad is compatible with wireless transceivers HSM2HOST and
HS2LCDRF keypads.
Specifications
lTemperature range: -10°C to +55°C (14°F to 131°F) UL/ULC: 0°C to +49°C (32°F to 120°F)
lHumidity (MAX): 93%R.H. non-condensing
lPlastic enclosure protection degree: IP30, IK04
lPower adaptor output voltage: 9. 0Vdc @ 1.25A. Models - US/Latin America: HK- XX11-
U09N (UL), Canada: HK- XX11-U09NC (ULC), EU: HK-XX11-U09EU, UK: HK- XX11-
U09NGB, AUS. /NZ, China: HK- XX11-U09NAU limited power supply, acceptable to the
authority having jurisdiction.
lRestraints are in place for UL installations.
lThis product is not to be connected to a receptacle that is controlled by a switch.
lBattery. 4 AA, 1.5V, Energizer alkaline consumer-grade (E91)
lLow Battery Indication: 4.5V
lHS2LCDWF current draw: 30mA(min)/105mA(max)
lWall-mount tamper (connected when installed in UL commercial applications
l5 programmable function keys
lReady (Green LED), Armed (Red LED), Trouble/RF Jam (Red/Yellow), AC (Green)
lFrequency: 433MHz (Brazil, China, Aus.(CE), NZ (NA), South Africa (ICASA), MEA, India
(WPC)
lFrequency: 868MHz (EN + Local, MEA (CE))
lFrequency: 912 - 919MHz (NA/LATAM, Argentina)
lDimensions (LxWxD): 168mm x 122mm x 25 mm
lWeight: 370g (batteries included)
NOTE: For UL commercial installations, the tamper switches are enabled.
Unpack
The HS2LCDWF keypad package is available in three configurations. The keypad contains patented
technology for the Proximity (Prox) Tag.
HS2LCDWF - Wall Mount HS2LCDWFP - Prox
1 HS2LCDWF wall bracket 1 HS2LCDWF wall bracket
1 installation manual 1 installation manual
1 inner door sticker 1 inner door sticker
4 AA batteries 4 AA batteries
1 hardware pack 1 hardware pack
1 prox tag
HS2LCDWFPV - Prox Tag w/verbal annunciation
1 HS2LCDWF wall bracket
1 installation manual
1 inner door sticker
4 AA batteries
1 hardware pack
1 prox tag
Mount the Keypad
Mount the keypad where it is accessible from designated points of entry and exit. Once a dry and
secure location has been selected, perform the following steps to mount the keypad.
Wall Mounting Plate
1. Locate the screw holes (4) at each corner of the mounting plate.
2. Use the four screws provided to affix the mounting plate to the wall; ensure the mounting tabs are
facing you (see following diagram). If the keypad is to be mounted on drywall, use plastic anchors.
3. Once the batteries are installed, align the four mounting slots in the HS2LCDWF housing with the
four mounting tabs protruding from the mounting plate.
4. Firmly but carefully snap the keypad down onto the mounting plate.
Desk Stand - HS2LCDWFDMK (Optional)
1. Insert the four rubber feet (found in the hardware pack) into the indentations provided in the bottom
of the desk stand.
2. Place the desk stand on a secure, uncluttered surface.
3. Align the four mounting slots in the HS2LCDWF housing with the four
mounting tabs protruding from the desk stand.
4. Slide the keypad into place. Firmly but carefully snap the keypad down
onto the desk stand.
5. To fasten the keypad securely onto the desk stand, locate the hole in
the center of the bottom of the desk stand. Using the screws provided,
screw the keypad to the desk stand.
Apply Battery Power
WARNING: If a low battery trouble signal is noted,the unit will operate
for a duration of no longer than 30 days. When a low battery trouble signal is noted, the batteries must
be replaced to ensure proper operation of the unit.
1. If required, slide the keypad up and out from the mounting plate/desk stand (removing the screws
first if required). The bay for the four AA batteries is open and visible at the back of the keypad.
2. Insert the batteries as directed on the back of the keypad. Ensure the correct polarity is observed.
3. Replace the keypad on the mounting plate/desk stand.
CAUTION: Do not mix old batteries with new ones.

Apply AC Power
CAUTION: The socket-outlet in which the
direct plug-in adaptor is inserted must be
close to the keypad, easily accessible, and
have unobstructed access. The plug of the
adaptor serves as a means of disconnection
from the supply mains.
1. Slide the keypad up and out from the
mounting plate/desk stand.
2. Locate the power adaptor jack at the
back of the keypad housing.
3. Place the adaptor plug in the housing
indentation, perpendicular to the keypad.
Insert the adaptor plug firmly into the jack.
4. Pivot the adaptor plug downwards so that
it fits flush with the housing. Guide the AC
wire along the channel provided in the keypad housing; the wire will extend through the bottom of the
housing.
5. Replace the keypad on the mounting plate/desk stand (in the latter case, a further channel is
provided in the bottom of the desk stand. Guide the AC wire along this channel; the wire will extend
through an opening in the back of the stand).
6. Plug the adaptor into a wall outlet.
Only use the power adaptor (9.0VDC, @1.25A, 2.25W, limited power supply for models: HK-XX11-
U09N (UL) and HK-XX11-U09NC (ULC).
Program the Keypad
There are several programming options available for the keypad (see the following table). Programming
the keypad is similar to programming the rest of the system. The installer menu is a text driven flow.
For information on programming the rest of your security system, refer to your system’s installation
manual.
1. Press [*][8][Installer Code].
2. Use the [<][>] keys to navigate through the menus or jump directly to a specific section by entering
the section number.
Language Programming
To enter language programming, enter [000]>[000], then enter the two-digit number that corresponds to
the language desired:
01 = English (def)
02 = Spanish
03 = Portuguese
04 = French
05 = Italian
06 = Dutch
07 = Polish
08 = Czech
09 = Finnish
10 = German
11 = Swedish
12 = Norwegian
13 = Danish
14 = Hebrew
15 = Greek
16 = Turkish
17 = Future Use
18 = Croatian
19 = Hungarian
20 = Romanian
21 = Russian
22 = Bulgarian
23 = Latvian
24 = Lithuanian
25 = Ukrainian
26 = Slovakian
27 = Serbian
28 = Estonian
29 = Slovenian
Keypad Symbols
Symbol Description
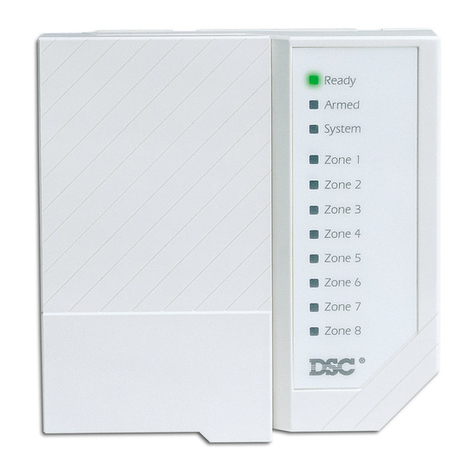
Ready Light (Green) If Ready light is ON, the system is ready to arm.
Armed Light (Red) If Armed light is ON/Flashing, the system has been
armed successfully.
System Trouble (Yellow) ON - Indicates that a system trouble is active..
Flashing - Keypad low battery.
AC (Green) ON - Indicates that AC is present at the keypad
Enroll HSM2HOST
The HSM2HOST wireless transceiver or HS2LCDRF/HS2ICNRF keypad must be enrolled onto the
alarm panel before any wireless devices can be enrolled. When the alarm system is powered up for the
first time, the first keypad or the HSM2HOST (if using a wireless keypad as the first keypad) can be
enrolled. To do this:
1. Once the HSM2HOST is wired to the alarm panel and power has been applied, power up a wire-
less keypad.
2. Press any button on the keypad to enroll it on the HSM2HOST. The HSM2HOST is then auto-
matically enrolled on the alarm panel.
Enroll Keypad
1. Press [*][8][Installer Code] and then [804][000].
2. When prompted, either activate the device to enroll immediately or enter a device serial number. Do
the latter to pre-enroll devices then enroll them later at the customer site.
3. Use the [<][>] keys or enter the corresponding number to select an option.
4. Scroll through the available selections and enter a number or enter text as appropriate.
5. Press [*] to accept and move to the next option.
6. Once all options are configured, the system prompts you to enroll the next device.
7. Repeat this process until all wireless devices are enrolled.
For UL/ULC Residential Fire applications, HS2LCDWF9, HS2LCDWFP9, HS2LCDWFPV9
keypads must be set up for 200 seconds wireless supervision, by enabling toggle option 4 (200s Fire
Supv), in section [804][810].
Delete Keypad
1. Press [*][8][Installer Code] and then [804][905].
2. Use the [<][>] keys to select the keypad or press [#] to exit.
3. Press [*] to delete. The screen will read “Keypad deleted”.

Program Labels
Use this section to assign a meaningful name (e.g., Front Door, Hallway, etc.) to each zone.
1. Press [*][8] [Installer code].
2. Press [*] and use the [<][>] keys to scroll to Zone Labels and press [*] again. The first zone is dis-
played. Alternatively, enter [000][001].
3. Scroll to the zone label to be programmed and press [*] or enter the zone number (e.g., 001 for zone
label 1).
4. Scroll to the desired character’s location using the [<][>] keys.
5. Enter the number of the corresponding character group until the desired character is displayed (see
the following table).Example: Press the “2” key 3 times to enter the letter “F”. Press the “2” key 4
times to enter the number “2”.
[1] - A, B, C, 1 [4] - J, K, L, 4 [7] - S, T, U, 7 [0] - Space
[2] - D, E, F, 2 [5] - M, N, O, 5 [8] - V, W, X, 8 [*] - Select
[3] - G, H, I, 3 [6] - P, Q, R, 6 [9] - Y, Z, 9,0 [#] - Escape
6. To save the label, press [#], and the label is automatically saved. To delete a character, use the [<]
[>] keys to move the cursor under the character, then press [0]. If any key other than [<] or [>] is
pressed before [0], the cursor moves one space to the right and deletes that character.
ASCII Character
Label Library
The Label Library is a database of words commonly used when programming labels. Individual words
can be combined as needed (e.g., Front + Door). Each line of the display supports a maximum of 14
characters. If a word will not fit on a line, scroll right until the cursor appears at the first character of
the second line then add the word.
To program a custom label using the Label Library:
1. Press [*][8][Installer Code][000][001] (to program the label for zone 01).
2. Press [*] to open the menu.
3. Press [*] again to select the “Word Entry” option.
4. Enter the 3-digit number corresponding to a word (see Words Library) or use the scroll keys [<][>]
to view words in the library.
5. Press [*] to select the word.
6. To add another word, repeat the previous procedure from step 2.
7. To add a space, press the right scroll key [>].
8. To clear characters, select “Clear to End” or “Clear Display” from the “Select Options” menu.
9. To save the label, press [#], and the label is automatically saved.
Broadcast LCD Labels
If more than one LCD keypad is present on the system, labels programmed at one keypad will be broad-
cast to all other LCD keypads right after the change is confirmed.
Voice Prompt/Voice Chime
Voice Prompt Control (for wireless keypads only)
Menu: [*][6][access code] > Voice Prompt
This function is used to change the volume level of keypad voice prompts, for example, “User arming
in progress.” The voice prompt speaks the zone labels programmed for zone openings/closings. Use
the scroll keys [<][>] to increase or decrease the volume from levels 0-10. Selecting 00 turns off
keypad voice prompts.
Voice Chime Control
Menu: [*][6][access code] > Chime Control
This function is used to change the keypad voice chime volume level. Use the scroll keys [<][>] to
increase or decrease the volume from levels 0-10. Selecting 00 turns off voice chime.
Change Brightness/Contrast/Buzzer
LCD Keypads
1. Press [*][6][Master Code].
2. Use the [<][>] keys to scroll to either Bright Control, Contrast Control, Buzzer Control.
3. Press [*] to select the setting you want to adjust.
4. (a) Brightness/LED Bar Control: There are 15 back lighting levels. Use the [<][>] keys to scroll to
the desired level. Changing this level adjusts the LED bar accordingly.
b) Contrast Control: There are 15 different display contrast levels. Use the [<][>] keys to scroll to the
desired contrast level.
c) Buzzer Control: There are 15 different buzzer control levels. Use the [<][>] keys to scroll to the
desired buzzer level.
Proximity Tags (HS2LCDWFP, HS2LCDWFPV only)
The proximity tag can be used to perform any keypad function that would normally require a user
access code or to activate a programmable output. Present the tag to the tag reader ( ) or to the left
of the keypad LCD. While the keypad is running off AC, the transceiver is always on to detect
any prox tag approaching. While the keypad is running on battery and in sleep mode, the user can
press any key to wake the keypad, then present the prox tag.
Enroll Proximity Tags
Enrolling a tag on one keypad will enroll it automatically to all HS2LCDWFP or HS2LCDWFPV
keypads enrolled on the system. Master code (code 1) cannot have a prox tag assigned to it.
1. Press [*][5][Master Code].
2. Use the [<][>] keys to scroll to the applicable user and press [*].
3. Use the [<][>] keys to scroll to Prox Tag and press [*]. The screen displays: “Present Tag”.
4. Pass the enrolled tag near the tag reader on the keypad. A prox tag can only be assigned to one user
at a time.
5. If enrollment is successful, acknowledgment beeps will sound and the keypad LCD will read ‘Tag
Enrolled Successfully’. If enrollment is unsuccessful, an error tone will sound and the keypad will
read ‘Invalid Tag Not Enrolled’. If the tag has been enrolled previously, an error tone will sound and
the keypad will read ‘Duplicate Tag Not Enrolled’.
Delete Proximity Tags
Delete the prox tags from the system when they are lost or no longer needed.
1. Press [*][5][Master Code].
2. The keypad displays the user number and includes the letter ‘T’ if a prox tag is programmed.
3. Use the [<][>] keys to locate the desired user and press [*]. Scroll to Prox Tag and press [*].
4. The keypad reads ‘Press [*] To Delete Tag’. After pressing [*], the message ‘Tag Deleted Suc-
cessfully’ appears.
Keypad Function Key Programming
To program a function key:
1. Press [*][8][Installer Code].
2. Enter [861] for keypad programming. Section [860] is read-only and shows the slot number of the
keypad being accessed.
3. Enter [001]-[005] for function keys 1-5.
4. Enter a 2-digit number to assign a function key operation - [00]-[68]. See the following tables.
5. Continue from step 3 until all function keys are programmed.
6. Press [#] twice to exit Installer Programming.

[001]-[005] Function Key Assignments
Section Function
Key Button Valid
Range Default Function
[001] 1 00-68 03 Stay Arm |____|____|
[002] 2 00-68 04 Away Arm |____|____|
[003] 3 00-68 06 Chime ON/OFF |____|____|
[004] 4 00-68 22 Comm Output 2 |____|____|
[005] 5 00-68 16 Quick Exit |____|____|
Keypad Function Keys
Please see your system installation manual for more details on the function key options:
[00] - Null [17] - Arm Interior [39] -Trouble Display
[02] - Instant Stay Arm [21] - Command Output 1 [40] - Alarm Memory
[03] - Stay Arm [22] - Command Output 2 [61] - Partition Select 1
[04] - Away Arm [23] - Command Output 3 [62] - Partition Select 2
[05] - [*][9] No-Entry Arm [24] - Command Output 4 [63] - Partition Select 3
[06] - Chime ON/OFF [29] - Bypass Group Recall [64] - Partition Select 4
[07] - System Test [31] - Local PGM Activate [65] - Partition Select 5
[09] - Night Arm [32] - Bypass Mode [66] - Partition Select 6
[12] - Global Stay Arm [33] - Bypass Recall [67] - Partition Select 7
[13] - Global Away Arm [34] - User Programming [68] - Partition Select 8
[14] - Global Disarming [35] - User Functions
[16] - Quick Exit [37] -Time and Date Program
Keypad Programming
Press [*][8][Installer Code]
[860] Keypad Slot Number
This is not for programming; the two-digit slot number is displayed for informational purposes only.
[861]-[876] Keypad Programming Sections
Sections [861]-[876] apply to keypad slot numbers 1-16 accordingly. After selecting the appropriate
keypad section number, the following programming options are available:
[000] Address of Partition
On selecting [000], a 2-digit entry is required to assign the keypad to a partition. Valid entries are 01-
08. The default is 01. NOTE:The HS2LCDWF keypad cannot be assigned as a global keypad.
[001]-[005] Function Key 1- 5 Assignment
[011] Keypad Input/Output Programming
Zone or PGM Number 000 |______|______|______|
[012] Local PGM Output Pulse Activation Time
|_____|_____| Minutes (00-99); |_____|_____| Seconds (00-99)
[021] First Keypad Options
Default Opt. ON OFF
ON |______| 1 Fire Key Enabled Fire Key Disabled
ON |______| 2 Medical Key Enabled Medical Key Disabled
ON |______| 3 Panic Key Enabled Panic Key Disabled
ON |______| 4 Display Access Code When
Programming
Display X’s When Programming
Access Codes
OFF |______| 5 For Future Use For Future Use
OFF |______| 6 For Future Use For Future Use
OFF |______| 7 For Future Use For Future Use
OFF |______| 8 For Future Use For Future Use
NOTE: For EN50131-1/EN50131-3 compliant systems, section [021]: options 1 and 2 shall be OFF.
[022] Second Keypad Options
Default Opt. ON OFF
ON |______| 1 Local Clock Display ON Local Clock Display OFF
OFF |______| 2 Local Clock Displays 24-hr Time Local Clock Displays AM/PM
ON |______| 3 Auto Alarm Scroll ON Auto Alarm Scroll OFF
OFF |______| 4 For Future Use For Future Use
OFF |______| 5 Power LED Enabled Power LED Disabled
ON |______| 6 Power LED AC Present ON Power LED AC Present OFF
ON |______| 7 Alarms Displayed While Armed Alarms Not Displayed While Armed
OFF |______| 8 Auto-Scroll Open Zones ON Auto-Scroll Open Zones OFF
[023] Third Keypad Options
Default Opt ON OFF
OFF |______| 1 Armed LED On in Sleep Mode Armed LED Off in Sleep Mode
ON |______| 2 Keypad Status Shows Stay Arm Keypad Status Shows Stay/Away Arm
ON |______| 4 Prox Tag will Arm/Disarm Prox Tag does not Arm/Disarm
OFF |______| 7 Temperature Display Enabled Temperature Display Disabled
Programming options indicated in GREY are required for systems compliant with EN50131-1 and
EN50131-3 standards. Section [023]: 1=OFF
[030] LCD Message
|_____|_____|_____|_____|_____|_____|_____|_____|_____|_____|_____|_____|_____|_____|_____|_____|
NOTE: Clock display (Section [022], Option 1) must be enabled.
[031] Downloaded LCD Message Duration
Default: 000 |______|______|______| (Valid entries are 000-255), 000=Unlimited Message Display.
This number represents the number of times the downloaded message must be cleared before it is per-
manently removed. Press any key to delete message.
[041] Indoor Temperature Zone Assignment
Default: 000 |______|______|______| (Valid entries are 000-128)
[042] Outdoor Temperature Zone Assignment
Default: 000 |______|______|______| (Valid entries are 000-128)

[101]-[228] Door Chime for Zones 1-128
The keypad can be programmed to make up to four different chime sounds for individual zones. (e.g.,
for Zone 1, enter Section [101], for Zone 2 enter Section [102]). Default: 01 |_____|_____|
Option
01 6 beeps
02 Bing-Bing tone
03 Ding-Dong tone
04 Alarm tone (4 second duration)
05 Zone Name
[991] Reset Keypad Programming to Factory Defaults
1. Press [*][8][Installer Code].
2. Enter [991].
3. Use the [<][>] keys to scroll to the applicable keypad.
4. Press [*] to select the keypad.
5. Re-enter [Installer Code].
6. Press [*] to reset the selected keypad to factory defaults.

Word Library
Item # Text Item # Text Item # Text Item # Text Item # Text Item # Text Item # Text
001 Aborted 037 Closed 073 Feature 109 Library 145 Pool 181 Tamper 217 N
002 AC 038 Closet 074 Fence 110 Light 146 Porch 182 Temperature 218 O
003 Access 039 Closing 075 Fire 111 Lights 147 Power 183 Test 219 P
004 Active 040 Code 076 First 112 Living 148 Press 184 Time 220 Q
005 Activity 041 Communicator 077 Floor 113 Load 149 Program 185 To 221 R
006 Alarm 042 Computer 078 Force 114 Loading 150 Progress 186 Touchpad 222 S
007 All 043 Control 079 Foyer 115 Low 151 Quiet 187 Trouble 223 T
008 AM 044 Date 080 Freeze 116 Lower 152 Rear 188 Unbypass 224 U
009 Area 045 Daughter’s 081 Front 117 Main 153 Receiver 189 Unit 225 V
010 Arm 046 Degrees 082 Furnace 118 Master 154 Report 190 Up 226 W
011 Armed 047 Delay 083 Gallery 119 Mat 155 RF 191 West 227 X
012 Arming 048 Den 084 Garage 120 Medical 156 Right 192 Window 228 Y
013 Attic 049 Desk 085 Gas 121 Memory 157 Room 193 Zone 229 Z
014 Auxiliary 050 Detector 086 Glass 122 Menu 158 Safe 194 0 230 Space
015 Away 051 Dining 087 Goodbye 123 Monoxide 159 Saver 195 1 231 ,
016 Baby 052 Disarmed 088 Gym 124 Mother’s 160 Schedule 196 2 232 -
017 Back 053 Door 089 Hallway 125 Motion 161 Screen 197 3 233 _ (Underscore)
018 Bar 054 Down 090 Heat 126 No 162 Second 198 4 234 *
019 Basement 055 Download 091 Hello 127 North 163 Sensor 199 5 235 #
020 Bathroom 056 Downstairs 092 Help 128 Not 164 Service 200 6 236 :
021 Battery 057 Drawer 093 High 129 Now 165 Shed 201 7 237 /
022 Bedroom 058 Driveway 094 Home 130 Number 166 Shock 202 8 238 ?
023 Bonus 059 Duct 095 House 131 Off 167 Shop 203 9
024 Bottom 060 Duress 096 In 132 Office 168 Side 204 A
025 Breezeway 061 East 097 Install 133 OK 169 Siren 205 B
026 Building 062 Energy 098 Interior 134 On 170 Sliding 206 C
027 Bus 063 Enter 099 Intrusion 135 Open 171 Smoke 207 D
028 Bypass 064 Entry 100 Invalid 136 Opening 172 Son’s 208 E
029 Bypassed 065 Error 101 Is 137 Panic 173 Sound 209 F
030 Cabinet 066 Exercise 102 Key 138 Partition 174 South 210 G
031 Camera 067 Exit 103 Kids 139 Patio 175 Special 211 H
032 Canceled 068 Exterior 104 Kitchen 140 Pet 176 Stairs 212 I
033 Car 069 Factory 105 Latchkey 141 Phone 177 Stay 213 J
034 Carbon 070 Failure 106 Laundry 142 Please 178 Sun 214 K
035 Central 071 Family 107 Left 143 PM 179 Supervisory 215 L
036 Chime 072 Father’s 108 Level 144 Police 180 System 216 M
- 8 -

Limited Warranty
Digital Security Controls (DSC)warrants that for a period of 12 months from thedate of purchase, the
product shall be freeof defects in materials and workmanship under normal useand that infulfilment of
any breach of such warranty, DSC shall, at its option, repair or replace the defective equipment upon
return of the equipment toits repair depot. This warranty applies only to defects inparts and workmanship
and not todamage incurredin shipping orhandling, or damage due to causes beyond the control of DSC
such as lightning, excessive voltage, mechanical shock, water damage, or damage arising out of abuse,
alterationor improperapplicationof the equipment. The foregoing warranty shall apply only tothe original
buyer, and is and shall bein lieuof any and all other warranties, whether expressedor impliedand of all
otherobligations orliabilities on the part of DSC. Digital Security Controls neitherassumes responsibility
for, nor authorizes any other personpurporting to act on its behalf tomodify or to changethis warranty, nor
toassume forit any other warranty or liability concerning this product. Inno event shall DSC be liable for
any direct, indirect or consequential damages, loss of anticipated profits, loss of time orany other losses
incurred by the buyer in connection with thepurchase, installation oroperation or failure of this product.
WARNING: DSC recommends that the entire system be completely tested on a regular basis.
However,despite frequent testing, and due to, butnot limited to, criminal tamperingor electrical dis-
ruption, it is possible for this product to fail to perform as expected. Important Information: Changes/-
modifications not expressly approvedby DSC couldvoidtheuser’s authority to operatethis equipment.
IMPORTANT -READ CAREFULLY: DSC Softwarepurchased with orwithout Products and Com-
ponents is copyrighted andis purchasedunderthefollowinglicenseterms:This End-UserLicenseAgree-
ment (“EULA”)is a legal agreement betweenYou (thecompany, individual orentity who acquired the
Software and any related Hardware) and Digital Security Controls, a divisionof Tyco Safety Products
Canada Ltd. (“DSC”), themanufacturerof theintegratedsecurity systems andthe developerof the soft-
wareandany relatedproducts orcomponents (“HARDWARE”) which You acquired. If the DSC software
product (“SOFTWARE PRODUCT” or “SOFTWARE”) is intended to be accompanied by
HARDWARE, and is NOT accom panied by new HARDWARE, Youmay not use, copy or install the
SOFTWARE PRODUCT. The SOFTWARE PRODUCT includes computersoftware, and may
include associated media, printed materials, and “online” orelectronic documentation.
Any software provided along with the Software Product that is associated with a separate end- user
licenseagreement is licensedto You under the terms of that licenseagreement. By installing, copying,
downloading, storing, accessing orotherwiseusing the Software Product, You agree unconditionally tobe
boundby the terms of thisEULA, even if this EULA is deemed tobe amodification of any previous
arrangem ent or contract. If You do not agree to the terms of this EULA, DSC is unwilling to license the
Software Product toYou, and Youhaveno right touseit.
SOFTWARE PRODUCT LICENSE - TheSOFTWARE PRODUCT is protectedby copyright laws
and international copyright treaties, as well as other intellectual property laws and treaties. The
SOFTWARE PRODUCT is licensed, not sold.
1. GRANT OF LICENSE This EULA grants You the followingrights:
(a) Software Installation andUse - Foreach license You acquire, You may have only one copy of the
SOFTWARE PRODUCT installed.
(b) Storage/Network Use- The SOFTWARE PRODUCT may not beinstalled, accessed, displayed,
run, sharedor used concurrently on orfrom different computers, including aworkstation, terminal or other
digital electronic device(“Device”). Inother words, if You have several workstations, Youwill have to
acquire alicense foreachworkstationwhere theSOFTWARE will beused.
(c)BackupCopy - Youmay make back-upcopies of the SOFTWARE PRODUCT, but You may only
haveone copy perlicenseinstalledat any giventime. You may usethe back-upcopy solely for archival
purposes. Except as expressly provided in this EULA, You may not otherwise make copies of the
SOFTWARE PRODUCT, including the printedmaterials accompanying the SOFTWARE.
2. DESCRIPTION OF OTHER RIGHTS AND LIMITATIONS
(a) Limitations on Reverse Engineering, Decompilationand Disassembly - You may not reverse engin-
eer, decompile, or disassemble theSOFTWARE PRODUCT, except andonly totheextent that such
activity is expressly permitted by applicable law notwithstandingthis limitation. You may not make any
changes ormodifications to the Software, without the writtenperm ission of an officer of DSC. You may
not removeany proprietary notices, marks orlabels from the Software Product. You shall institute reas-
onablemeasures toensure compliancewith the terms and conditions of this EULA.
(b) Separation of Components - TheSoftware Product is licensedas a single product. Its component
parts may not beseparated foruseon morethan oneHARDWARE unit.
(c)Single INTEGRATED PRODUCT - If Youacquired this SOFTWARE with HARDWARE, then
theSOFTWARE PRODUCT is licensedwiththeHARDWARE as a single integratedproduct. In this
case,the SOFTWARE PRODUCT may only be used with theHARDWARE as set forth in this
EULA.
(d) Rental -You may not rent, leaseor lend the SOFTWARE PRODUCT. Youmay not make it avail-
able to others orpost it on aserveror web site.
(e) Software Product Transfer -You may transfer all of Your rights under this EULA only as part of a per-
manent sale or transfer of the HARDWARE, provided You retain no copies, Youtransfer all of the
SOFTWARE PRODUCT (including all component parts, the media and printed materials, any
upgrades and this EULA), and provided the recipient agrees to the terms of this EULA. If the
SOFTWARE PRODUCT is an upgrade, any transfer must also include all prior versions of the
SOFTWARE PRODUCT.
(f)Termination -Without prejudice to any otherrights, DSC may terminatethis EULA if You fail tocom-
ply with the terms and conditions of this EULA. In suchevent, You must destroy all copies of the
SOFTWARE PRODUCT and all of its component parts.
(g) Trademarks - This EULA does not grant You any rights in connection with any trademarks or service
marks of DSC or its suppliers.
3. COPYRIGHT - All title and intellectual property rights in and to the SOFTWARE PRODUCT
(includingbut not limited to any images, photographs, and text incorporated into the SOFTWARE
PRODUCT), theaccompanying printedmaterials, and any copies of the SOFTWARE PRODUCT,
are owned by DSC or its suppliers. You may not copy the printed materials accompanying the
SOFTWARE PRODUCT. All title and intellectual property rights in and to the content whichmay be
accessedthrough use of theSOFTWARE PRODUCT are the property of therespective content owner
and may beprotected by applicable copyright or other intellectual property laws and treaties.This EULA
grants You norights to usesuchcontent. All rights not expressly grantedunderthis EULA arereservedby
DSC and its suppliers.
4. EXPORT RESTRICTIONS - You agreethat You will not export or re-export the SOFTWARE
PRODUCT to any country, person, or entity subject toCanadian export restrictions.
5. CHOICE OF LAW -This Software License Agreement is governed by the laws of the Province of
Ontario, Canada.
6. ARBITRATION - All disputes arising inconnectionwith this Agreement shall be determinedby final
and binding arbitrationin accordance withtheArbitration Act, andthe parties agree tobe bound by the arbit-
rator’s decision. The placeof arbitration shall be Toronto, Canada, and the languageof the arbitrationshall
beEnglish.
7. LIMITED WARRANTY
(a) NO WARRANTY -DSC PROVIDES THE SOFTWARE “AS IS” WITHOUT WARRANTY.
DSC DOES NOT WARRANT THAT THE SOFTWARE WILL MEET YOUR
REQUIREMENTS OR THAT OPERATION OF THE SOFTWARE WILL BE
UNINTERRUPTED OR ERROR-FREE.
(b) CHANGES IN OPERATING ENVIRONMENT - DSC shall not be responsible for problems
causedby changes intheoperating characteristics of theHARDWARE, or forproblems in theinteraction
of theSOFTWARE PRODUCT withnon-DSC-SOFTWARE orHARDWARE PRODUCTS.
(c)LIMITATION OF LIABILITY; WARRANTY REFLECTS ALLOCATION OF RISK - IN ANY
EVENT, IF ANY STATUTE IMPLIES WARRANTIES OR CONDITIONS NOT STATED IN
THIS LICENSE AGREEMENT, DSC’S ENTIRE LIABILITY UNDER ANY PROVISION OF
THIS LICENSE AGREEMENT SHALLBE LIMITED TO THE GREATER OF THE AMOUNT
ACTUALLY PAID BY YOU TO LICENSE THE SOFTWARE PRODUCT AND FIVE
CANADIAN DOLLARS (CAD$5.00). BECAUSE SOME JURISDICTIONS DO NOT ALLOW
THE EXCLUSION OR LIMITATION OF LIABILITY FOR CONSEQUENTIALOR INCIDENTAL
DAMAGES, THE ABOVE LIMITATION MAY NOT APPLY TO YOU.
(d) DISCLAIMER OF WARRANTIES - THIS WARRANTY CONTAINS THE ENTIRE
WARRANTY AND SHALL BE IN LIEU OF ANY AND ALL OTHER WARRANTIES,
WHETHER EXPRESSED OR IMPLIED (INCLUDING ALL IMPLIED WARRANTIES OF
MERCHANTABILITY OR FITNESS FOR A PARTICULAR PURPOSE) AND OF ALLOTHER
OBLIGATIONS OR LIABILITIES ON THE PART OF DSC. DSC MAKES NO OTHER
WARRANTIES. DSC NEITHER ASSUMES NOR AUTHORIZES ANY OTHER PERSON
PURPORTINGTOACT ON ITS BEHALF TO MODIFY OR TO CHANGE THIS WARRANTY,
NOR TOASSUME FOR IT ANY OTHER WARRANTY OR LIABILITY CONCERNING THIS
SOFTWARE PRODUCT.
(e) EXCLUSIVE REMEDY AND LIMITATION OF WARRANTY - UNDER NO
CIRCUMSTANCES SHALL DSC BE LIABLE FOR ANY SPECIAL, INCIDENTAL,
CONSEQUENTIAL OR INDIRECT DAMAGES BASED UPON BREACH OF WARRANTY,
BREACH OF CONTRACT, NEGLIGENCE, STRICT LIABILITY, OR ANY OTHER LEGAL
THEORY. SUCH DAMAGES INCLUDE, BUT ARE NOT LIMITED TO, LOSS OF PROFITS,
LOSS OF THE SOFTWARE PRODUCT OR ANY ASSOCIATED EQUIPMENT, COST OF
CAPITAL, COST OF SUBSTITUTE OR REPLACEMENT EQUIPMENT, FACILITIES OR
SERVICES, DOWN TIME, PURCHASERS TIME, THE CLAIMS OF THIRD PARTIES,
INCLUDING CUSTOMERS, AND INJURY TO PROPERTY. WARNING:DSC recommends that
theentire system be completely tested on a regular basis. However, despitefrequent testing, and due to,
but not limited to, criminal tampering or electrical disruption, it is possible for this SOFTWARE
PRODUCT to fail toperform as expected.
FCC Compliance Statement
Caution: Changes or modifications not expressly approved by Digital Security Controls could void your
authority to usethis equipment.
This equipment generates and uses radio frequency energy andif not installed andused properly, in strict
accordancewith the manufacturer’s instructions, may causeinterferencetoradio and television reception.
Ithas beentypetested andfound to comply with thelimits for Class B devicein accordancewith the spe-
cifications in Subpart “B” of Part 15 of FCC Rules, which are designed to provide reasonable protection
against suchinterference in any residential installation. However, there is no guaranteethat interference
will not occur in aparticular installation. If this equipment does causeinterferenceto televisionor radio
reception, whichcanbe determined by turningthe equipment off and on, the user is encouragedtotry to
correct the interferenceby one ormore of the followingmeasures: (i) Re-orient the receiving antenna; (ii)
increasetheseparationbetweenthe equipment and receiver; (iii)connect theequipment into anoutlet on
a circuit different from that to whichthereceiver is connected. If necessary, theuser should consult the
dealeror anexperienced radio/televisiontechnician for additional suggestions. Theusermay findthe fol-
lowing booklet preparedby theFCC helpful: “How to Identify andResolveRadio/Television Interference
Problems”. This booklet is available from theU.S. Government Printing Office, Washington, D.C.
20402, Stock # 004-000-00345-4.
This Class B digital apparatus com plies with Canadian ICES-003. Cet appareil numérique de la classe
B est conform eà la norme NMB-003du Canada. IC:160A-HS2LCDWF The term IC before the radio
certificationnumber signifies that the Industry Canada technical specifications were met.

+HUHE\'6&GHFODUHVWKDWWKLVGHYLFHLVLQFRPSOLDQFHZLWKWKHHVVHQWLDOUHTXLUHPHQWVDQGRWKHUUHOHYDQWSURYLVLRQVRI'LUHFWLYH(&7KHFRPSOHWH577('HFODUDWLRQRI&RQIRUPLW\FDQEHIRXQGDWKWWSZZZGVFFRPOLVWLQJVBLQGH[DVS[&=('6&MDNRY¿UREFHSURKODģXMHŀHWHQWRY¿UREHNMHYVRXODGXVHYģHPLUHOHYDQWQ¯PLSRŀDGDYN\VPÝUQLFH(&'$1'6&HUNO¨UHUKHUYHGDWGHQQHNRPSRQHQWHQRYHUKROGHUDOOHYLNWLJHNUDYVDPWDQGUHEHVWHPPHOVHUJLWWLGLUHNWLY(&'87+LHUELMYHUNODDUW'6&GDWGLWWRHVWHOLQRYHUHHQVWHPPLQJLVPHWGHHLVHQHQEHSDOLQJHQYDQULFKWOLMQ(&),1'6&YDNXXWWDDODLWWHHQW¦\WW¦Y¦QGLUHNWLLYLQ(&ROHQQDLVHWYDDWLPXNVHW)5(3DUODSU«VHQWH'6&G«FODUHTXHFHGLVSRVLWLIHVWFRQIRUPHDX[H[LJHQFHVHVVHQWLHOOHVHWDXWUHVVWLSXODWLRQVSHUWLQHQWHVGHOD'LUHFWLYH(&*(5+LHUGXUFKHUNO¦UW'6&GD¡GLHVHV*HU¦WGHQHUIRUGHUOLFKHQ%HGLQJXQJHQXQG9RUUDXVHW]XQJHQGHU5LFKWOLQLH(&HQWVSULFKW*5(˂˜˞˱ˬ˲˭˞ˮ˹˪˱ˬ˯ˤ'6&ˡˤ˨˻˪ˢ˦˹˱˦˞˲˱˛ˤ˰˲˰˧ˢ˲˛ˢ˜˪˞˦˰˺˩˳˶˪ˤ˩ˢ˱˦˯ˬ˲˰˦˻ˡˤ˯˞˭˞˦˱˛˰ˢ˦˯˧˞˦˩ˢ˹˨ˢ˯˱˦˯˙˨˨ˢ˯˰˴ˢ˱˦˧˚˯˞˪˞˳ˬˮ˚˯˱ˤ˯ˍˡˤˠ˜˞˯(&,7$&RQODSUHVHQWHOD'LJLWDO6HFXULW\&RQWUROVGLFKLDUDFKHTXHVWRSURGRWWRªFRQIRUPHDLUHTXLVLWLHVVHQ]LDOLHGDOWUHGLVSRVL]LRQLULOHYDQWLUHODWLYHDOOD'LUHWWLYD&(125'6&HUNO¨UHUDWGHQQHHQKHWHQHULVDPVYDUPHGGHJUXQQOHJJHQGHNUDYRJºYULJHUHOHYDQWHNUDYLGLUHNWLY()32/'6&RĝZLDGF]DľHXU]ÇG]HQLHMHVWZ]JRGQRĝFL]]DVDGQLF]\PLZ\PDJDQLDPLRUD]SR]RVWDĄ\PLVWRVRZQ\PLSRVWDQRZLHQLDPL'\UHNW\Z\:(3253RUHVWHPHLRD'6&GHFODUDTXHHVWHHTXLSDPHQWRHVW£HPFRQIRUPLGDGHFRPRVUHTXLVLWRVHVVHQFLDLVHRXWUDVGHWHUPLQD©·HVUHOHYDQWHVGD'LUHFWLYD(&63$3RUODSUHVHQWH'6&GHFODUDTXHHVWHHTXLSRHVW£HQFRQIRUPLGDGFRQORVUHTXLVLWRVHVHQFLDOHV\RWURVUHTXLVLWRVUHOHYDQWHVGHOD'LUHFWLYD(&6:('6&EHNU¦IWDUK¦UPHGDWWGHQQDDSSDUDWXSSI\OOHUGHY¦VHQWOLJDNUDYHQRFKDQGUDUHOHYDQWDEHVW¦PPHOVHUL'LUHNWLYHW(&
This installation sheet applies tomodels: HS2LCDWF, HS2LCDWF P, and HS2LCDWFPV.
The Model HS2LCDWF, HS2LCDWFP, andHS2LCDWFPV keypads have beencertifiedby Tele-
fication according to EN50131- 1:2006+ A1:2009, EN50131- 3:2009 for Grade 2, Class II. EN50131- 1
Grade2/Class II.
CAUTION: Do not dispose of the waste battery as unsortedmunicipal waste. Consult your local rules
and/or laws regardingrecycling of this battery.
The use of external power adapter is optional and it has not been investigated by Telefication for
EN50131 certifiedinstallations.
ForINCERT certified applications the wireless keypads have been evaluatedundertherequirements of
T014A using powersupply type C.
© 2016TycoSecurity Products. All Rights Reserved. Toronto, Canada• www.dsc.com
TechSupport: 1-800-387-3630 (Canada, US), 905-760-3000

Introduction
Ces instructions doivent être utilisées conjointement au manuel d'installation de la centrale avec
laquelle il est prévu d'utiliser cet équipement. Les instructions de fonctionnement doivent rester dis-
ponibles pour l'utilisateur. Le clavier sans fil HS2LCDWF est compatible avec les émetteurs-récep-
teurs sans fil HSM2HOST et les claviers HS2LCDRF.
Caractéristiques techniques
lPlage de température: de -10°C à +55°C (de 14°F à 131°F) UL/ULC: de 0°C à +49°C
(de 32°F à 120°F)
lHumidité (MAX): 93% du taux d'humidité relative, sans condensation
lDegré de protection du boîtier plastique : IP30, IK04
lTension de sortie de l'adaptateur d'alimentation : 9,0 V CC, 1,25A. Modèles – États-Unis/A-
mérique Latine: HK-XX11-U09N (UL), Canada: HK-XX11-U09NC (ULC), Europe: HK-
XX11-U09EU, Royaume-Uni: HK-XX11- U09NGB, Australie/Nouvelle-Zélande, Chine:
HK-XX11-U09NAU à puissance électrique limitée, acceptable pour l'autorité compétente.
lDes restrictions sont appliquées pour les installations UL.
lCe produit ne doit pas être connecté à une prise électrique commandée par un interrupteur.
lBatterie. 4 batteries de type AA, 1,5V, Energizer alcaline, grand public (E91)
lSignal de batterie faible : 4,5V
lCourant absorbé HS2LCDWF : 30mA (min)/105mA (max)
lContact anti-sabotage à montage mural (connecté pour les installations commerciales UL
l5 touches de fonctions programmables
lVoyant lumineux « Prêt » (vert), « Armé » (rouge), Problème/Interférence RF (rouge/jaune),
Alimentation secteur (vert)
lFréquence :433 MHz (Brésil, Chine, Australie (CE), Nouvelle-Zélande (NA), Afrique du sud
(ICASA), MEA, Inde (WPC)
lFréquence : 868 MHz (EN + Local, MEA (CE))
lFréquence: 912 - 919 MHz (NA/LATAM, Argentine)
lDimensions (H x l x P) : 168mm x 122mm x 25 mm
lPoids: 370g (piles incluses)
REMARQUE: Pour les installations commerciales UL, les contacts anti-sabotage sont activés.
Contenu de l'emballage
Le bloc clavier HS2LCDWF est disponible dans trois configurations. Le clavier dispose d'une tech-
nologie brevetée pour la balise de proximité (Prox).
HS2LCDWF - Montage mural HS2LCDWFP: Balise de proximité
1 support mural HS2LCDWF 1 support mural HS2LCDWF
1 manuel d'installation 1 manuel d'installation
1 autocollant pour porte intérieure 1 autocollant pour porte intérieure
4 batteries de type AA 4 batteries de type AA
1 ensemble matériel 1 ensemble matériel
1 balise de proximité
HS2LCDWFPV - Balise de proximité avec annonceur vocal
1 support mural HS2LCDWF
1 manuel d'installation
1 autocollant pour porte intérieure
4 batteries de type AA
1 ensemble matériel
1 balise de proximité
Installation du clavier
Screw
hole
Screw
hole
Screw
hole
Screw
hole
Mounting tab Mounting tab
Mounting
tab
Mounting
tab
Installez le clavier où il est accessible aux points désignés d'entrée et de sortie. Une fois un endroit
sec et sûr choisi, réalisez les opérations suivantes pour installer le clavier.
Plaque de fixation murale
Localisez les trous de vis (4) à chaque coin de la plaque de fixation.
Utilisez les quatre vis fournies pour serrer la plaque de fixation au mur, vérifiez que les onglets de
fixation font face vers vous (voir schéma ci-dessous). Si le clavier doit être installé sur une cloison
sèche, utilisez des chevilles en plastique.
Une fois les batteries installées, alignez les quatre fentes de montage du boîtier HS2LCDWF avec
les quatre onglets de montage de la plaque de fixation.
Montez fermement mais avec soin le clavier sur la plaque de fixation.
Support de bureau: HS2LCDWFDMK (Optional)
1. Insérez les quatre pieds en caoutchouc (voir ensemble matériel) dans les renfoncements prévus au
bas du support de bureau.
2. Place the desk stand on a secure, uncluttered surface.
3. Alignez les quatre fentes de montage du boîtier HS2LCDWF avec les
quatre onglets de fixation en saillie du support de bureau.
4. Faites glisser le clavier en place. Montez fermement mais avec soin
le clavier sur le support de bureau.
5. Pour fixer en toute sécurité le clavier sur le support de bureau, loca-
lisez le trou en bas et au milieu de celui-ci. À l'aide des vis fournies, vis-
sez le clavier au support de bureau.
Alimentation par batterie
Si un problème de niveau faible de batterie est présent, l'équipement peut
fonctionner encore 30 jours uniquement. Quand un problème de niveau faible de batterie est présent,
les batteries doivent être remplacées pour garantir un bon fonctionnement.
1. Si nécessaire, faites glisser le clavier vers le haut et hors de la plaque de fixation ou le support de
bureau (retirez d'abord les vis si nécessaire). Le logement des quatre batteries AA est ouvert et
visible à l'arrière du clavier.
2. Insérez les batteries dans le sens indiqué sur l'arrière du clavier. Veillez à respecter les polarités.
3. Remontez le clavier sur la plaque de fixation ou le support de bureau.
ATTENTION: Ne mélangez pas les batteries usées et les nouvelles.

Plug
Mounting
Holes
Mounting
Holes
Wire
channel
Alimentation par secteur
ATTENTION: La prise électrique dans laquelle la
prise directe de l'adaptateur est insérée doit être à
proximité du clavier, facilement accessible et déga-
gée de tout obstacle. La fiche de l'adaptateur sert de
moyen de déconnexion de l'alimentation secteur.
1. Faites glisser le clavier vers le haut et hors de la
plaque de fixation ou du support de bureau.
2. Localisez la prise de l'adaptateur d'alimentation à
l'arrière du boîtier du clavier.
3. Placez la prise de l'adaptateur dans le ren-
foncement du boîtier, de façon perpendiculaire au cla-
vier. Insérez fermement la fiche de l'adaptateur dans
la prise.
4. Faites pivoter la fiche de l'adaptateur vers le bas de façon qu'il soit à ras du boîtier. Guidez le cor-
don secteur le long du passage intégré dans le boîtier du clavier.
5. Remontez le clavier sur la plaque de fixation ou le support de bureau (dans ce dernier cas, un pas-
sage supplémentaire est présent au bas du support de bureau. Guidez le cordon secteur le long du pas-
sage, le cordon se prolongera à travers l'ouverture sur l'arrière du support).
6. Branchez l'adaptateur dans la prise murale.
Utilisez exclusivement l'adaptateur d'alimentation (9,0 V CC, 1,25 A, 2,25W, à puissance électrique
limitée pour les modèles : HK-XX11-U09N (UL) et HK-XX11-U09NC (ULC).
Programmation du clavier
Plusieurs options de programmation sont disponibles sur le clavier (voir le tableau ci-dessous). La pro-
grammation du clavier est identique à la programmation du reste du système. Le menu de l'installateur
est à défilement de texte. Pour plus d'informations sur la programmation du reste de votre système de
sécurité, veuillez consulter le manuel d'installation de votre système.
1. Tapez [*][8][Code de l'installateur].
2. Utilisez les touches [<][>] pour parcourir les menus ou passez directement à une section donnée en
tapant le numéro de section.
Programmation de la langue
Pour accéder au réglage de la langue, saisissez [000] > [000]. Ensuite, entrez le numéro à deux
chiffres qui correspond à la langue souhaitée :
01 = Anglais (par défaut)
02 = Espagnol
03 = Portugais
04 = Français
05 = Italien
06 = Néerlandais
07 = Polonais
08 = Tchèque
09 = Finlandais
10 = Allemand
11 = Suédois
12 = Norvégien
13 = Danois
14 = Hébreu
15 = Grec
16 = Turque
17 = Utilisation future
18 = Croate
19 = Hongrois
20 = Roumain
21 = Russe
22 = Bulgare
23 = Letton
24 = Lituanien
25 = Ukrainien
26 = Slovaque
27 = Serbe
28 = Estonien
29 = Slovène
Symboles du clavier
Symbole Description
Voyant «Prêt» (vert) Si le voyant «Prêt» est allumé, le système est prêt
à être armé.
Voyant «Armé» (rouge) Si le voyant «Armé» est allumé ou clignote, le sys-
tème a été armé avec succès.
Problème du système (jaune) Allumé: Indique qu'un problème est présent sur le
système.
Clignotant: Niveau faible de batterie du clavier.
Alimentation secteur (vert) Allumé: Indique que le clavier est alimenté par le
secteur
Attribuer le module HSM2HOST
L'émetteur-récepteur sans fil HSM2HOST ou les claviers HS2LCDRF/HS2ICNRF doivent être attri-
bués sur la centrale d'alarme avant que tout dispositif sans fil puisse être attribué. Quand le système
d'alarme est mis sous tension pour la première fois, le premier clavier ou le HSM2HOST (si vous uti-
lisez un clavier sans fil comme premier pavé) peut être attribué. Pour cela, effectuez les opérations
suivantes :
1. Une fois le HSM2HOST relié à la centrale d'alarme et alimenté, mettez sous tension un clavier
sans fil.
2. Appuyez sur un bouton quelconque du clavier pour l'attribuer sur le HSM2HOST. Le HSM2HOST
est alors automatiquement attribué sur la centrale.
Attribution du clavier
1. Tapez [*][8][Code de l'installateur] puis [804][000].
2. Quand vous y êtes invité, activez le dispositif pour l'attribuer immédiatement ou entrez le numéro
de série du dispositif. Effectuez cette dernière opération pour pré-attribuer les dispositifs puis attri-
buez-les plus tard sur le site du client.
3. Utilisez les touches [<][>] ou entrez le numéro correspondant à l'option choisie.
4. Faites défiler les options disponibles, saisissez un numéro ou entrez les valeurs si nécessaire.
5. Appuyez sur [*] pour valider et passer à l'option suivante.
6. Une fois toutes les options configurées, le système vous invite à attribuer le dispositif suivant.
7. Répétez ces opérations tant que tous les dispositifs sans fil n'aient été attribués.
Pour les applications anti-incendie UL/ULC, les claviers HS2LCDWF9, HS2LCDWFP9,
HS2LCDWFPV9 doivent être définis avec une supervision sans fil de 200 secondes, en activant l’op-
tion de bascule 4 (Supervision incendie 200 s), dans la section [804][810].
Suppression d'un clavier
1. Tapez [*][8][Code de l'installateur] puis [804][905].
2. Utilisez les touches [<][>] pour sélectionner le clavier ou appuyez sur [#] pour quitter.
3. Tapez [*] pour supprimer. L'afficheur indique «Clavier supprimé».

Programmation des étiquettes
Utilisez cette section pour donner un nom significatif (par ex., Porte d'entrée, Couloir, etc.) à chaque
zone.
1. Tapez [*][8][Code de l'installateur].
2. Appuyez sur [*] et utilisez les touches [<][>] pour faire défiler les étiquettes de zone et appuyez à
nouveau sur [*]. La première zone est affichée. Autrement encore, saisissez [000][001].
3. Faites défiler jusqu'à l'étiquette de zone à programmer et appuyez sur [*] ou tapez le numéro de zone
(par exemple, 001 pour l'étiquette 1 de zone).
4. Placez-vous sur le caractère souhaité à l'aide des touches [<][>].
5. Entrez le numéro du groupe de caractères correspondants tant que le caractère souhaité n'est pas affi-
ché (voir le tableau suivant). Exemple: Appuyez 3 fois sur la touche «2» pour entrer la lettre «F».
Appuyez 4 fois sur la touche «2» pour entrer le numéro «2».
[1] - A, B, C, 1 [4] - J, K, L, 4 [7] - S, T, U, 7 [0] - Espace
[2] - D, E, F, 2 [5] - M, N, O, 5 [8] - V, W, X, 8 [*] - Sélectionner
[3] - G, H, I, 3 [6] - P, Q, R, 6 [9] - Y, Z, 9, 0 [#] - Quitter
6. Pour enregistrer l’étiquette, appuyez sur [#]: l’enregistrement est automatique. Pour effacer un
caractère, utilisez les touches [<][>] pour déplacer le curseur sous le caractère puis appuyez sur [0].
Si une autre touche que [<] ou [>] est appuyée avant [0], le curseur se déplace d'un espace à droite et
efface ce caractère.
Caractères ASCII
Bibliothèque de mots
La bibliothèque de mots est une base de données de mots fréquemment utilisés lors de la pro-
grammation des étiquettes. Les mots peuvent être combinés selon les besoins. par ex. Porte +
Devant. Chaque ligne de l'affichage permet un maximum de 14 caractères. Si un mot ne rentre pas
dans une ligne, faites défiler jusqu'à ce que le curseur apparaisse au premier caractère de la deuxième
ligne puis ajoutez le mot.
Pour programmer une étiquette personnalisée en utilisant la bibliothèque de mots:
1. Saisissez [*][8][Code de l'installateur][000][001] (pour programmer l'étiquette de zone 01).
2. Appuyez sur [*] pour ouvrir le menu.
3. Appuyez à nouveau sur [*] pour sélectionner l'option «Saisie de mot».
4. Saisissez le numéro à 3 chiffres correspondant à un mot (voir Bibliothèque de mots) ou utilisez les
touche de défilement [<][>] pour visualiser les mots dans la bibliothèque.
5. Appuyez sur [*] pour sélectionner le mot.
6. Pour ajouter un autre mot, répétez la procédure ci-dessus à partir de l'étape 2.
7. Pour ajouter un espace, appuyez sur la touche de défilement de droite [>].
8. Pour effacer des caractères, sélectionnez «Effacer jusqu'à la fin» ou «Effacer affichage» dans le
menu «Sélection d'options».
9. Pour enregistrer l’étiquette, appuyez sur [#]: l’enregistrement est automatique.
Diffusion d'étiquettes ACL
Si plus d'un clavier ACL est présent sur le système, les étiquettes programmées sur un pavé seront
reproduites sur tous les autres pavés ACL tout de suite après confirmation.
Guide vocal/Carillon vocal
Commande de guide vocal (pour les claviers sans fil uniquement)
Menu: [*][6][codes d'accès] > Guide vocal
Cette fonction permet de régler le niveau de volume du guide vocal du clavier, par exemple,
« Armement par l’utilisateur en cours ». Le guide vocal annonce les étiquettes de zone programmées
pour les ouvertures/fermetures de zone. Utilisez les touches de défilement [<][>] pour augmenter ou
diminuer le volume du niveau 0 à 10. Sélectionnez 00 pour désactiver le guide vocal du clavier.
Commande de guide vocal
Menu: [*][6][codes d'accès] > Commande du carillon
Cette fonction est utilisée pour régler le volume du carillon vocal du clavier. Utilisez les touches de
défilement [<][>] pour augmenter ou diminuer le volume du niveau 0 à 10. Sélectionnez 00 pour désac-
tiver le carillon vocal.
Réglage de la luminosité/contraste/volume de l'avertisseur
Claviers à afficheur ACL
1. Tapez [*][6][code maître].
2. Utilisez les touches [<][>] pour faire défiler le réglage de luminosité, le réglage de contraste et le
réglage de volume de l'avertisseur.
3. Tapez [*] pour sélectionner le paramètre que vous désirez ajuster.
4. (a) Luminosité/Réglage de la barre lumineuse: 15 niveaux de rétroéclairage sont possibles. Utilisez
les touches [<][>] pour défiler jusqu'au niveau souhaité. Le réglage de ce niveau définit aussi la barre
lumineuse.
b) Commande de contraste: 15 niveaux de contraste sont possibles. Utilisez les touches [<][>] pour
défiler jusqu'au niveau de contraste désiré.
c) Volume de l'avertisseur: 15 niveaux différents de volume de l'avertisseur sont possibles. Utilisez
les touches [<][>] pour défiler jusqu'au niveau de volume de l'avertisseur souhaité.
Balises de proximité (HS2LCDWFP, HS2LCDWFPV uni-
quement)
La balise de proximité peut exécuter toute fonction du clavier qui nécessite normalement un code d’ac-
cès utilisateur ou pour activer une sortie programmable. Présentez la balise au lecteur ( ) ou au côté
gauche du clavier LCD.
Attribution de balises de proximité
Attribuer une balise sur un seul clavier l'attribue automatiquement à tous les claviers HS2LCDWFP
ou HS2LCDWFPV attribués sur le système. Master code (code 1) cannot have a prox. tag assigned to
it.
1. Tapez [*][5][code maître].
2. Utilisez les touches [<][>] pour faire défiler jusqu'à l'utilisateur en question et appuyez sur [*].
3. Utilisez les touches [<][>] pour faire défiler jusqu'à la balise de proximité et appuyez sur [*].
L’écran affiche: «Présenter la balise».
4. Passez la balise attribuée près du lecteur de balise sur le clavier. Une balise de proximité peut être
uniquement affectée à un seul utilisateur à la fois.
5. Si l'attribution est réussie, des bips sonores de confirmation sont émis et le clavier ACL indique
«Balise attribuée avec succès». Si l'attribution échoue, un son d'erreur est émis et le clavier indique
«Balise invalide non attribuée». Si l'attribution de la balise a été précédemment réalisée, un son d'er-
reur est émis et le clavier indique «Balise double non attribuée».
Suppression de balises de proximité
Supprimez les balises de proximité du système quand elles sont égarées ou ne sont plus nécessaires.
1. Tapez [*][5][code maître].
2. Le clavier affiche le numéro de l'utilisateur et inclus la lettre «T» si une balise de proximité est
programmée.
3. Utilisez les touches [<][>] pour sélectionner l’utilisateur souhaité et appuyez sur [*]. Faites défiler
jusqu’à la balise de proximité et appuyez sur [*].
4. Le clavier indique «Appuyer sur [*] pour supprimer la balise». Après avoir appuyé sur [*], le mes-
sage «Balise effacée avec succès» apparaît.

Programmation des touches de fonction du clavier
Pour programmer une touche de fonction:
1. Tapez [*][8][Code de l'installateur].
2. Tapez [861] pour la programmation du clavier. La section [860] est en lecture seule et indique le
numéro de l'emplacement du clavier en cours d'accès.
3. Entrez [001]-[005] pour les touches de fonction 1 à 5.
4. Entrez un numéro à 2 chiffres pour attribuer une opération [00]-[68] à la touche de fonction. Voir les
tableaux suivants.
5. Continuez depuis l'étape 3 tant que toutes les touches de fonction ne soient programmées.
6. Appuyez deux fois sur [#] pour quitter la programmation de l'installateur.
[001]-[005] Attribution de la touche de fonction
Section
Attribution
de la
touche de
fonction
Bouton Plage
valide Défaut Fonction
[001] 1 00-68 03 Armer en mode à
domicile |____|____|
[002] 2 00-68 04 Armer en mode
absence |____|____|
[003] 3 00-68 06 Carillon Acti-
vé/Désactivé |____|____|
[004] 4 00-68 22 Active la sortie 2 |____|____|
[005] 5 00-68 16 Sortie rapide |____|____|
Touches de fonction de clavier
Veuillez consulter votre manuel d'installation pour plus de détails sur les options de touche de fonction
ci-dessous :
[00] - Sans effet [17] - Armer zone intérieure [39] - Affichage des pro-
blèmes
[02] - Armer en mode à domicile à effet
instantané [21] - Sortie de commande 1 [40] - Mémoire d'alarme
[03] - Armer en mode à domicile [22] - Sortie de commande 2 [61] - Sélection 1 de par-
tition
[04] - Armer en mode absence [23] - Sortie de commande 3 [62] - Sélection 2 de par-
tition
[05] - [*][9] Armer sans entrée [24] - Sortie de commande 4 [63] - Sélection 3 de par-
tition
[06] - Carillon de porte activé/désactivé [29] - Rappel de groupe de sus-
pension [64] - Sélection 4 de par-
tition
[07] - Test du système [31] - Activer PGM local [65] - Sélection 5 de par-
tition
[09] - Armer en mode nuit [32] - Mode de suspension [66] - Sélection 6 de par-
tition
[12] - Armer globalement en mode à domi-
cile [33] - Rappel de suspension [67] - Sélection 7 de par-
tition
[13] - Armer globalement en mode
absence [34] - Programmation d'uti-
lisateur [68] - Sélection 8 de par-
tition
[14] - Désarmer globalement [35] - Fonctions personnalisées
[16] - Sortie rapide [37] - Réglage de l'heure et de la
date
Programmation du clavier
Tapez [*][8][Code de l'installateur]
[860] Numéro d'emplacement du clavier
Ce n'est pas une valeur programmable; le numéro de l'emplacement à deux chiffres est affiché pour
seule information.
[861]-[876] Sections de programmation du clavier
Les sections [861]-[876] s’appliquent aux numéros d’emplacement de clavier 1-16 correspondants. Une
fois le numéro de section de clavier correct sélectionné, les options de programmation suivantes sont
disponibles :
[000] Adresse de la partition
Après avoir sélectionné [000], une valeur à 2 chiffres est nécessaire pour affecter le clavier à une par-
tition. Des saisies valides sont de 01 à 08. La valeur par défaut est 01.
[001]-[005] Affectation des touches de fonction 1 à 5
[011] Programmation d'entrée/sortie du clavier
Numéro de zone ou sortie PGM 00 |_____|_____|_____|
[012] Temps d'activation de l'impulsion de sortie PGM locale
|_____|_____| Minutes (00-99); |_____|_____| Secondes (00-99)

[021] Premières Options du clavier
Défaut Option Activé Désactivé
Activé |______| 1 Touche d'incendie activée Touche d'incendie désactivée
Activé |______| 2 Touche d'urgence médicale
activée Touche d'urgence médicale
désactivée
Activé |______| 3 Touche de demande d'aide
(panic) activée Touche de demande d'aide
(panic) désactivée
Activé |______| 4 Afficher le code d'accès en
programmation Masquer la programmation de
codes d'accès
Désactivé |______| 5 Réservé pour une utilisation
future Réservé pour une utilisation
future
Désactivé |______| 6 Réservé pour une utilisation
future Réservé pour une utilisation
future
Désactivé |______| 7 Réservé pour une utilisation
future Réservé pour une utilisation
future
Désactivé |______| 8 Réservé pour une utilisation
future Réservé pour une utilisation
future
[022] Deuxième Options du clavier
Défaut Option Activé Désactivé
Activé |______| 1 Affichage de l'horloge locale
activé Affichage de l'horloge locale désac-
tivé
Désactivé |______| 2 Horloge locale affichée au format
24 heures Horloge locale affichée au format
AM/PM
Activé |______| 3 Défilement automatique d'alarme
activé Défilement automatique d'alarme
désactivé
Désactivé |______| 4 Réservé pour une utilisation future Réservé pour une utilisation future
Désactivé |______| 5 Voyant d'alimentation activé Voyant d'alimentation désactivé
Activé |______| 6 Le voyant indique la présence de
l'alimentation secteur, Option acti-
vée
Le voyant d'alimentation indique la
présence du secteur, Option désac-
tivée
Activé |______| 7 Alarmes affichées en cas d'ar-
mement Alarmes non affichées en cas d'ar-
mement
Désactivé |______| 8 Défilement automatique des zones
ouvertes activé Défilement automatique des zones
ouvertes désactivé
[023] Troisièmes options du clavier
Défaut Option Activé Désactivé
Désactivé |______| 1 Voyant «Armé» activé
en mode veille Voyant «Armé» désactivé en mode veille
Activé |______| 2 L'état du pavé affiche
« Armer en mode à
domicile »
L'état du pavé affiche «Armer en mode à
domicile/absence »
Activé |____| 4 La balise de proximité
armera/désarmera le sys-
tème
La balise de proximité n’armera pas/ne
désarmera pas le système
Désactivé |______| 7 Affichage de la tem-
pérature activé Affichage de la température désactivé
Les options de programmation GRISÉES sont obligatoires pour les systèmes conformes aux normes
EN50131-1 et EN50131-3. Section [023] : 1 = désactivé
[030] Message ACL
|_____|_____|_____|_____|_____|_____|_____|_____|_____|_____|_____|_____|_____|_____|_____|_____|
REMARQUE:L’affichage de l’horloge (Option 1, Section [022]) doit être activé.
[031] Durée de message ACL téléchargé
Par défaut: 000 |______|______|______| (Les saisies valides sont de 000 à 255, 000 = Affichage illi-
mité du message). Ce numéro représente le nombre de fois que le message téléchargé doit être effacé
avant qu'il soit éliminé définitivement. Appuyez une touche quelconque pour supprimer le message.
[041] Affectation de la zone à détection de température intérieure
Défaut: 000 |______|______|______| Des saisies valides sont de 000-128)
[042] Affectation de la zone à détection de température extérieure
Par défaut: 000 |______|______|______| (Des saisies valides sont de 000 à 128)
[101]-[228] Carillon de porte pour les zones 1-128
Le clavier peut être programmé pour émettre quatre différents sons pour des zones individuelles. (par
exemple, pour la zone 1, accédez à la section [101], pour la zone 2 accédez à la section [102]). Par
défaut : 01 |_____|_____|
Option
01 6 bips sonores
02 Mélodie Bing-Bing
03 Mélodie Ding-Dong
04 Son d'alarme (durée de 4 secondes)
05 Nom de zone
[991] Réinitialisation de la programmation du clavier aux paramètres
d'usine par défaut
1. Tapez [*][8][Code de l'installateur].
2. Saisissez [991].
3. Utilisez les touches [<][>] pour défiler jusqu'au clavier en question.
4. Appuyez sur [*] pour sélectionnez le clavier.
5. Saisissez à nouveau le [Code de l’installateur].
6. Appuyez sur [*] pour réinitialiser le clavier sélectionné aux réglages par défaut d’usine.

Bibliothèque de mots
# Mot # Mot # Mot # Mot # Mot # Mot
001 Accès 041 Clavier 081 Exercice 121 Mouvement 161 sur 201 K
002 Actif 042 Clé 082 Extérieur 122 Niveau 162 Suspendu 202 L
003 Activité 043 Clôture 083 Faible 123 Non 163 Suspension 203 M
004 Aide 044 Code 084 Famille 124 Nord 164 Tapis 204 N
005 Alarme 045 Contrainte 085 Fenêtre 125 Numéro 165 Téléchargement 205 O
006 Alimentation 046 Contrôle 086 Fermé 126 Off 166 Téléphone 206 P
007 Animal 047 Coucher 087 Fermeture 127 OK 167 Tiroir 207 Q
008 Annulé 048 Coulissant 088 Feu 128 On 168 Totale 208 R
009 Appuyer 049 Couloir 089 Fille 129 Ordinateur 169 Touche 209 S
010 Après 050 Couvert 090 Fond 130 Ouest 170 Tous 210 T
011 Armé 051 Cuisine 091 Forcée 131 Ouvert 171 Transmission 211 U
012 Armement 052 D' 092 Fournaise 132 Ouverture 172 Usine 212 V
013 Armer 053 Dans 093 Gallerie 133 Oxyde 173 Véranda 213 W
014 Armoire 054 Date 094 Garage 134 Panique 174 Verre 214 X
015 Arrière 055 De 095 Gauche 135 Partition 175 Vers 215 Y
016 Au-revoir 056 Défaut 096 Gaz 136 Pas 176 Veuillez 216 Z
017 Auxiliaire 057 Degrés 097 Gel 137 Passage 177 Voie 217 à
018 Bain 058 Délai 098 Grenier 138 Patio 178 Voiture 218 é
019 Bar 059 Des 099 Gym 139 Père 179 Voyant 219 è
020 Bas 060 Désarmé 100 Haut 140 Pile 180 Zone 220 ô
021 Bébé 061 Détecteur 101 Inférieur 141 Piscine 181 0 221 ê
022 Bibliothèque 062 Détente 102 Invalide 142 Police 182 1 222 ç
023 Bonjour 063 Devant 103 Installer 143 Porte 183 2 223 î
024 Bonus 064 Dispositif 104 Intérieur 144 Premier 184 3 224 (Espace)
025 Buanderie 065 Domestique 105 Intrusion 145 Principal 185 4 225 ‘(Apostrophe)
026 Bus 066 Domicile 106 L' 146 Programme 186 5 226 - (Tiret)
027 Bureau 067 Droite 107 La 147 Progrès 187 6 227 _(Soulignement)
028 CA 068 Du 108 Le 148 Récepteur 188 7 228 *
029 Calendrier 069 Durée 109 Les 149 RF 189 8 229 #
030 Caméra 070 économie 110 Lumières 150 Salle 190 9 230 :
031 Canalisation 071 écran 111 Maintenant 151 Salon 191 A 231 /
032 Capteur 072 édifice 112 Maison 152 Saisie 192 B 232 ?
033 Caractéristiqu 073 élevé 113 Manger 153 Saisir 193 C 233
034 Carbonique 074 En 114 Matin 154 Seconde 194 D 234
035 Carillon 075 énergie 115 Médicaux 155 Sécurisé 195 E 235
036 Central 076 Enfants 116 Mémoire 156 Signalement 196 F 236
037 Chaleur 077 Entrée 117 Menu 157 Silencieux 197 G 237
038 Chambre 078 Erreur 118 Mère 158 Soins 198 H 238
039 Charge 079 Est 119 midi 159 Sortie 199 I 239
040 Chargement 080 étage 120 Monde 160 Sous-sol 200 J 240
- 6 -

Garantie Limitée
Digital Security Controls pendant une périodede douzemois à partirde ladated’achat, garantit le produit
contre toutedéfectuosité matérielleet d’assemblage dans des conditions normales d’utilisation. Dans
l’applicationdecette garantie, Digital Security Controls va,lorsqu’elle lejuge opportun, en cas de pro-
blèmes defonctionnement, réparer ou remplacerles équipements défectueux dès leur retourà son dépôt
de réparation. Cettegarantie s’appliqueseulement aux éléments défectueux et àla main-d’œuvre, et non
aux dommages causés lors de l’expédition ou dela manipulation, ni aux dommages dont les causes
dépassent le contrôlede Digital Security Controls telles quela foudre, les surtensions, les chocs méca-
niques, les dégâts d’eau ou tout domm age provenant d’abus, de modifications ou de mauvaises uti-
lisations de l’équipement. La garantie susditen’est valide que pour l’acheteuroriginal et n’est et ne sera
que laseule des garanties valables, qu’elle ait été exprimée ou implicite, rem plaçant touteautre obli-
gation ouresponsabilité dela part de Digital Security Controls. Laprésente garantiecontient la garantie au
complet. Digital Security Controls. n’autoriseaucune autrepersonne à agir ensonnom pour modifier ou
changer laprésentegarantieet n’enassum epas la responsabilité, ni a àassum eren son nom toute autre
garantieou responsabilitéconcernant le présent produit. En aucun cas, Digital Security Controls ne pourra
êtretenue responsabledes conséquences directes ou indirectes dedommages relativement à lapertede
profits prévus, à la pertede temps ou àtoute autre perte subiepar l’acheteuren rapport avec l’achat, l’ins-
tallationet le fonctionnement ou la défaillance du présent produit. MISE EN GARDE : DSC recom-
mandede testercomplètement l'ensembledu systèmerégulièrement. Cependant,en dépit d’essais
réguliers et àcause d’interventions criminelles, pannes de courant ouautres, il est possibleque le fonc-
tionnement du produit ne soit pas conforme aux spécifications. Informations importantes : Des chan-
gements ou des modifications de cet équipement, qui n'ont pas étéexpressément approuvés par DSC,
peuvent annulerle droit de l'utilisateur de mettreen servicel'équipement.
IMPORTANT À LIRE ATTENTIVEMENT : Le logiciel DSC achetéavec ou sans Produits et Com-
posants est protégé par ledroit d'auteur et il est acheté conformément aux modalités du contrat de
licence: CeContrat delicenced'utilisation (« CLU ») est une entente légale entreVous (l'entreprise, l'in-
dividu oul'entitéqui a achetéle Logiciel et tout Matériel connexe) et Digital Security Controls, une filiale
de TycoSafety Products Canada Ltd. (« DSC »), le fabriquant des systèmes de sécurité intégrés et le
développeur du logiciel et de tout produit ou composant connexe (MATÉRIELS)que Vous avez acquis.
Si leproduitlogiciel DSC (« PRODUIT LOGICIEL » ou «LOGICIEL »)aété conçupourêtre accom-
pagnépar du MATÉRIELet s'il N'est PAS accompagné parun nouveau MATÉRIEL, Vous n'avez
pas ledroitd'utiliser, decopierou d'installerlePRODUIT LOGICIEL. LePRODUIT LOGICIEL com-
prend lelogiciel, et peut aussi comprendredes médias connexes, des matériels imprimés et de la docu-
mentation«enligne» ouélectronique.
Tout logiciel fourni avec le PRODUIT LOGICIEL qui est lié àun contrat de licenced'utilisation séparé
Vous donne des droits conformément aux modalités de ce contrat de licence. En installant, copiant, télé-
chargeant, sauvegardant, accédant ou utilisant d'une manière quelconque le PRODUIT LOGICIEL,
Vous acceptez inconditionnellement d'êtrelié par les modalités de ce CLU, même si ceCLU est consi-
déré une modification detout accord ou contrat antérieur. Si vous n'acceptez pas les modalités du CLU,
DSC refuse deVous octroyerunelicence d'utilisation du PRODUIT LOGICIELet Vous n'avez pas le
droit del'utiliser.
Le PRODUIT LOGICIEL est protégé pardes lois sur ledroit d'auteuret des traités internationaux sur le
droit d'auteur, ainsi que par d'autres lois et traités de la propriété intellectuelle. Ledroit d'utilisation du
PRODUIT LOGICIEL est octroyé, pas vendu.
1. OCTROI DE LA LICENCE. Ce CLU vous donne les droits suivants :
(a) Installationet utilisation du logiciel -Pourchacune des licences acquises, Vous n'avez ledroit d'ins-
tallerqu'unseul exemplaireduPRODUIT LOGICIEL.
(b) Utilisationde stockage en réseau- LePRODUIT LOGICIELne peut pas êtreinstallé, accédé, affiché,
exécuté, partagé ouutilisé simultanément sur des ordinateurs différents, notamment une stationde tra-
vail, un term inal ouautre dispositif électroniquenumérique («Dispositif »). Autrement dit, si Vous avez
plusieurs postes de travail, Vous devrez acheterune licencepour chaqueposte detravail où leLOGICIEL
serautilisé.
(c)Copie desauvegarde -Vous pouvez faire descopies desauvegarde PRODUIT LOGICIEL, mais
vous ne pouvez avoir qu'uneseule copieinstallée par licence àtout moment. Vous pouvez utiliser une
copie desauvegarde. Hormis cequi est expressément prévudans ce CLU, Vous n'avez pas ledroit de
fairedes copies du PRODUIT LOGICIEL, les matériels imprimés accom pagnant leLOGICIEL com-
pris.
2. DESCRIPTIONS D'AUTRES DROITS ET LIMITES
(a) Limites relatives àla rétro-ingénierie, à ladécompilation et au désassemblage —Vous n'avez pas le
droit de désosser, décompiler ou désassembler le PRODUIT LOGICIEL, sauf et seulement dans la
mesuredans laquelle unetelle activité est explicitement permisepar laloi en vigueur, sans égards à ces
limites. Vous n'avez pas le droit de faire des changements ou des modifications, quels qu'ils soient,
sans la permission écrite d'un dirigeant de DSC. Vous n'avez pas le droit de retirer les notices, les
marques oules étiquettes privatives duProduit Logiciel. Vous devez instituerdes mesures raisonnables
pour assurerla conformitéaux modalités deceCLU.
(b) Séparationdes Composants — Le PRODUIT LOGICIELest fourni sous licenceen tant que produit
unique. Ses parties composantes ne peuvent pas être séparées pour être utilisée sur plus d'un
MATÉRIEL.
(c)PRODUIT INTÉGRÉ unique — Si vous avec acquis ce LOGICIEL avec du MATÉRIEL, le
PRODUIT LOGICIEL est autoriséà être utilisé avec le MA TÉRIELen tant que produit intégré unique.
Dans cecas, le PRODUIT LOGICIELne peut être utilisé qu'avec leMATÉRIELconformément à ce
CLU.
(d) Location— Vous n'avez pas le droit de louer, demettreen bail ou deprêter lePRODUIT LOGICIEL.
Vous n'avez pas ledroit delemettreàla disposition d'autres personnes ou de l'afficher sur unserveur ou
unsiteWeb.
(e) Transfert du Produit Logiciel — Vous pouvez transférer tous vos droits deceCLU uniquement dans le
cadre dela vente oudu transfert permanent du MATÉRIEL, à condition queVous ne conserviez aucune
copie, que Vous transfériez tout le PRODUIT LOGICIEL(tous les composants, les matériels imprimés
et autres, toutes les mises àniveau et ceCLU), et à condition que lerécipiendaire accepte les conditions
dece CLU.Si lePRODUIT LOGICIELest une miseà niveau, tout transfertdoit également inclure
toutes les versions antérieures duPRODUIT LOGICIEL.
(f)Résiliation — Sous réservede tous ses autres droits, DSC seréservele droit de résilier ceCLU si
Vous nerespectez pas les modalités de ce CLU. Dans cecas, Vous devez détruire toutes les copies du
PRODUIT LOGICIEL et toutes ses parties composantes.
(g) Marques de commerce —CeCLU ne Vous donneaucun droit relativement auxmarques de com-
merceou aux marques deservice deDSC ou deses fournisseurs.
3. DROIT D'AUTEUR -Tous les titres et droits de propriété intellectuelle associés au PRODUIT
LOGICIEL(notamment mais pas seulement aux images,photographies et textes incorporés dans le
PRODUIT LOGICIEL), les documents imprimés joints et tout exemplaire du PRODUIT LOGICIEL
sont la propriétéde DSC et de ses fournisseurs. Vous n'avez pas le droit de faire des copies des docu-
ments imprimés accompagnant le PRODUIT LOGICIEL. Tous les titres et droits de propriété intel-
lectuelleassociés au contenuqui peut êtreaccédépar lebiais duPRODUIT LOGICIELsont la propriété
du propriétaire respectif ducontenu et ils peuvent être protégés par ledroit d'auteurou autres lois et traités
surla propriété intellectuelle. CeCLU ne Vous octroie pas le droit d'utiliserces éléments. Tous les droits
qui ne sont pas expressément octroyés par cetteCLU, sont réservés par DSC et ses fournisseurs.
4. RESTRICTIONS POUR L'EXPORTATION Vous acceptez le fait que Vous n'exporterez pas ou
neréexporterez pas lePRODUIT LOGICIEL dans tout pays, personne ou entitésoumis à des res-
trictions canadiennes à l'exportation.
5. CHOIX DES LOIS Cecontrat de licence d'utilisation est régi par les lois dela Provincede l'Ontario,
Canada.
6. ARBITRATION Tous les conflits survenant relativement à ce contrat seront résolus par un arbitrage
définitif et sans appel conformém ent àla Loi sur l'arbitrage, et les parties acceptent d'êtreliées par ladéci-
sionde l'arbitre. Le lieude l'arbitrationsera Toronto, Canada, et le langagede l'arbitration sera l'anglais.
Garantie Restreinte
(a) PAS DE GARANTIE DSC FOURNIT LE LOGICIEL « EN L'ÉTAT » SANS GARANTIE.
DSC NE GARANTIT PAS QUE LE LOGICIEL SATISFERA VOS EXIGENCES OU QUE
L'EXPLOITATION DU LOGICIEL SERA ININTERROMPUE OU SANS ERREUR.
(b) CHANGEMENTS DU CADRE D'EXPLOITATION DSC ne sera pas responsable des pro-
blèmes provoqués par des changements dans les caractéristiques du M ATÉRIEL, ou des problèmes
d'interaction duPRODUIT LOGICIEL avec des LOGICIELS NON-DSC ou AUTRES MATÉRIELS.
(c) LIMITES DE RESPONSABILITÉ ; LA GARANTIE REFLÈTE L'AFFECTATION DU
RISQUE DANS TOUS LES CAS, SI UN STATUT QUELCONQUE SUPPOSE DES
GARANTIES OU CONDITIONS QUI NE SONT PAS POSTULÉES DANS CE CONTRAT DE
LICENCE, TOUTE LA RESPONSABILITÉ ASSUMÉE PAR DSC DANS LE CADRE D'UNE
DISPOSITION QUELCONQUE DE CE CONTRAT SERA LIMITÉE AU MONTANT LE PLUS
ÉLEVÉ QUE VOUS AVEZ PAYÉ POUR LE CONTRAT DE CE PRODUIT LOGICIEL ET
CINQ DOLLARS CANADIENS (5 CAN $). PARCE QUE CERTAINES JURIDICTIONS NE
PERMETTENT PAS L'EXCLUSION OU LES RESTRICTIONS DE RESPONSABILITÉ
POUR DOMMAGES INDIRECTS, CES RESTRICTIONS PEUVENT NE PAS
S'APPLIQUER DANS VOTRE CAS.
(d) STIPULATION D'EXONÉRATION DE GARANTIES CETTE GARANTIE CONTIENT
L'ENTIÈRE GARANTIE ET REMPLACE TOUTES LES AUTRES GARANTIES, QU'ELLES
SOIENT EXPLICITES OU IMPLICITES (NOTAMMENT TOUTES LES GARANTIES
IMPLICITES DE MARCHANDISE OU APTITUDE POUR UN USAGE PARTICULIER)ET DE
TOUTE AUTRE OBLIGATION OURESPONSABILITÉ DE DSC. DSC NE FAIT AUCUNE
AUTRE GARANTIE. DSC N'ASSUME PAS LA RESPONSABILITÉ ET N'AUTORISE
AUCUNE AUTRE PERSONNE PRÉTENDANT AGIR EN SON NOM DE MODIFIER OU DE
CHANGER CETTE GARANTIE, N'ASSUME POUR CELA AUCUNE AUTRE GARANTIE
OU RESPONSABILITÉ CONCERNANT CE PRODUIT LOGICIEL.
(e)RECOURS EXCLUSIF ET LIMITE DE GARANTIE DSC NE SERA EN AUCUN CAS
RESPONSABLE DES DOMMAGES PARTICULIERS, ACCIDENTELS OU INDIRECTS
BASÉS SUR UNE INOBSERVATION DE LA GARANTIE, UNE RUPTURE DE CONTRAT,
UNE NÉGLIGENCE, UNE RESPONSABILITÉ STRICTE OU TOUTE AUTRE THÉORIE
JURIDIQUE. DE TELS DOMMAGES INCLUENT NOTAMMENT, MAIS PAS
EXCLUSIVEMENT, UNE PERTE DE PROFITS, UN ENDOMMAGEMENT DU PRODUIT
LOGICIELOU TOUT AUTRE ÉQUIPEMENT ASSOCIÉ, LE COÛT DU CAPITAL, LE COÛT
DE REMPLACEMENT OU DE SUBSTITUTION, DES INSTALLATIONS OU SERVICES, UN
TEMPS D'ARRÊT,LE TEMPS DE L'ACHETEUR,LES REVENDICATIONS DE TIERS, Y
COMPRIS LES CLIENTS ET LES DOMMAGES À LA PROPRIÉTÉ. MISE EN GARDE :
DSC recommande detester complètement l'ensemble du systèmerégulièrement. Toutefois, malgré
des essais réguliers,il peut arriver que lefonctionnement duPRODUIT LOGICIEL ne soit pas conforme
aux attentes en raisonnotamment, mais pas exclusivement, d'interventions criminelles ou de pannes
decourant.
Cette fiche d'installation s'applique aux modèles suivants:HS2LCDWF, HS2LCDWFP,
HS2LCDWFPV.
Les modèles de clavier HS2LCDWF, HS2LCDWFP, HS2LCDWFPV ont été certifiés par Tele-
fication selon les normes EN50131-1:2006 + A1:2009, EN50131-3:2009 pour la catégorie 2, classe II.
EN50131-1Catégorie2/ClasseII
ATTENTION: Ne pas déposer les batteries usagées dans les déchetteries non différenciés com-
munales. Consultez vos lois et/ou réglementations locales au sujet du recyclage des batteries au
lithium.
L'utilisationde l'adaptateur d'alimentationexterne est optionnel et elle n'a pas été évaluée par Tele-
fication pour EN50131installations certifiées.
Pour les applications certifiées INCERT les claviers sans fil ont étéévaluées selon les exigences de
T014A en utilisant letype d'alimentation C.
© 2016 TycoSecurity Products. Tous droits réservés. Toronto, Canada• www.dsc.com
Support technique: 1-800-387-3630(Canada, U.S.) ou 905-760-3000

Inleiding
Deze instructies moeten worden gebruikt in combinatie met de installatiehandleiding van de centrale
waarvoor deze apparatuur is bestemd om te worden gebruikt. De bedieningsinstructies moeten beschik-
baar zijn voor de gebruiker. Het HS2LCDWF draadloos bedienpaneel is compatibel met de draadloze
transceivers HSM2HOST en HS2LCDRF-bedienpanelen.
Specificaties
lTemperatuursbereik: - 10°C tot +55°C (14°F tot 131°F) UL/ULC: 0°C tot +49°C (32°F tot
120°F)
lLuchtvochtigheid (MAX): 93%R.H. niet-condenserend
lBeschermingsgraad plastic behuizing: IP30, IK04
lUitvoer voltage stroomadapter: 9,0Vdc @ 1, 25A. Modellen - VS/Latijns- Amerika: HK-
XX11-U09N (UL), Canada: HK-XX11-U09NC (ULC), EU: HK-XX11- U09EU, VK: HK-
XX11-U09NGB, AUS/ NZ, China.: HK- XX11-U09NAU gelimiteerde voeding, acceptabel
voor de autoriteit die bevoegdheid heeft.
lEr gelden beperkingen voor UL-installaties.
lDit product mag niet worden aangesloten op een stopcontact dat wordt bediend met een scha-
kelaar.
lBatterij. 4 AA, 1,5V, Energizer alkaline consumentenkwaliteit (E91)
lIndicatie lage batterij: 4,5V
lHS2LCDWF stroomverbruik: 30mA(min.)/105mA(max)
lMuur- gemonteerde sabotagebeveiliging (aangesloten wanneer geïns talleerd in UL- com-
merciële toepassingen)
l5 programmeerbare functietoetsen
lGereed (groene LED), Inschakeling (rode LED), Probleem/RF-storing (rood/gele LED), AC
(groene LED)
lFrequentie: 433MHz (Brazilië, China, Aus. (CE), NZ (NA), Zuid Afrika (ICASA), MEA,
India (WPC)
lFrequentie: 868MHz (EN + Local, MEA (CE))
lFrequentie: 912 - 919MHz (NA/LATAM, Argentinië)
lDimensies (L x B x D): 168mm x 122mm x 25 mm
lGewicht: 370g (batterijen meegeleverd)
OPMERKING: Voor UL-commerciële installaties zijn de sabotageschakelaars ingeschakeld.
Uitpakken
Het HS2LCDWF-bedienpaneelpakket is verkrijgbaar in drie configuraties. Het bedienpaneel bevat
gepatenteerde technologie voor de (prox)-tag.
HS2LCDWF - Muurmontage HS2LCDWFP - prox
1 HS2LCDWF muursteun 1 HS2LCDWF muursteun
1 installatiehandleiding 1 installatiehandleiding
1 binnendeursticker 1 binnendeursticker
4 AA-batterijen 4 AA-batterijen
1 pakket montage-elementen 1 pakket montage-elementen
1 prox-tag
HS2LCDWFPV - Prox tag m/ verbale aankondiging
1 HS2LCDWF muursteun
1 installatiehandleiding
1 binnendeursticker
4 AA-batterijen
1 pakket montage-elementen
1 prox-tag
Monteer het bedienpaneel
Schroef-openingen
Schroef-
openingen
Schroef-
openingen
Schroef-openingen
Montagelipje
Montagelipje
Bevestig het bedienpaneel op een plaats waar het toegankelijk is vanaf locaties die aangewezen zijn
als ingang en uitgang. Doorloop de volgende stappen om het bedienpaneel te monteren nadat een droge
en veilige locatie is geselecteerd.
Muurbevestigingsplaat
Zoek de schroefgaten (4) op, bij elke hoek van de bevestigingsplaat.
Gebruik de vier meegeleverde schroeven om de bevestigingsplaat op de muur te monteren. Zorg ervoor
dat de ophangpunten voor bevestiging uw kant op wijzen (zie diagram hieronder). Gebruik plastic plug-
gen wanneer het bedienpaneel op de muur wordt bevestigd.
Lijn zodra de batterijen zijn geïnstalleerd de vier montagesleuven in de HS2LCDWF-behuizing uit met
de vier montagelipjes die uitsteken van de montageplaat.
Klap het bedienpaneel voorzichtig maar stevig naar beneden op de montageplaat.
Bureausteun - HS2LCDWFDMK (Optioneel)
1. Bevestig de vier rubberen voetjes (uit het pakket met montage-elementen) in de uitsparingen aan de
onderkant van de bureausteun.
2. Plaats de bureausteun op een solide oppervlak zonder obstakels.
3. Lijn de vier bevestigingspunten in de HS2LCDWF-behuizing uit met de vier
ophangpunten die uit de bureausteun steken.
4. Schuif het bedienpaneel op zijn plek. Klap het bedienpaneel voorzichtig
maar stevig naar beneden op de bureausteun.
5. Zoek het gat in het midden van de onderkant van de bureausteun op en zet
het bedienpaneel stevig vast op de bureausteun. Schroef het bedienpaneel vast
op de bureausteun met de bijgeleverde schroeven.
Batterijen gebruiken
Waarschuwing: Als er een probleemsignaal batterij bijna leeg wordt gemeld, werkt het apparaat niet
langer dan 30 dagen. Als er een probleemsignaal batterij bijna leeg wordt gemeld, moeten de batterijen
worden vervangen om de goede werking van het apparaat te verzekeren.
1. Schuif het bedienpaneel omhoog en uit de montageplaat/bureausteun indien nodig. (verwijder eerst
de schroeven indien nodig). Het vak voor de vier AA-batterijen is open en zichtbaar aan de achterkant
van het bedienpaneel.
2. Plaats de batterijen zoals aangegeven op de achterkant van het bedienpaneel. Zorg voor de juiste
polariteit.
3. Plaats het bedienpaneel terug op de montageplaat/bureausteun.

VOORZICHTIG: Gebruik geen oude batterijen samen met nieuwe.
Stekker
Bevestigingsgaten
Bevestigingsgaten
Wire-
kanaal
AC-stroom gebruiken
VOORZICHTIG: Het stopcontact waarop de recht-
streekse stekkeradapter wordt aangesloten moet dicht-
bij het bedienpaneel zijn, en gemakkelijk
toegankelijk zijn. De stekker van de adapter fungeert
als afsluiting van het stroomnet.
1. Schuif het bedienpaneel naar boven en uit de mon-
tageplaat/bureaustandaard.
2. Zoek de adapteraansluiting aan de achterkant van
de behuizing van het bedienpaneel.
3. Plaats de stekker van de adapter in de uitsparing
van de behuizing, loodrecht op van het bedienpaneel.
Steek de stekker van de adapter stevig in de aan-
sluiting.
4. Draai de adapterstekker naar beneden zodat deze goed past in de behuizing. Leid de AC-draad langs
het kanaal in de behuizing van het bedienpaneel. De draad loopt door de onderkant van de behuizing.
5. Plaats het bedienpaneel terug op de montageplaat/bureausteun (in het laatste geval is voorzien in
een verder kanaal aan de onderkant van de bureausteun. Leid de AC-draad langs dit kanaal. De draad
loopt door in de opening aan de achterzijde van de steun).
6. Steek de adapter in een stopcontact.
Gebruik alleen de stroomadapter (9,0VDC, @1,25A, 2,25W, gelimiteerde stroomtoevoer voor model-
len: HK-XX11-U09N (UL) en HK-XX11-U09NC (ULC).
Het bedienpaneel programmeren
Er zijn verschillende programmeringsopties beschikbaar voor het bedienpaneel (zie de volgende tabel).
Het programmeren van het bedienpaneel lijkt op het programmeren van de rest van het systeem. Het
installatiemenu is tekstgedreven. Voor meer informatie over het programmeren van de rest van uw
beveiligingssysteem, zie de installatiehandleiding van uw systeem.
1. Druk op [*][8][installatiecode].
2. Gebruik de [<][>]-toetsen om door de menu’s te navigeren of spring rechtstreeks naar een specifieke
sectie door het sectienummer in te voeren.
Taal programmering
Druk op [000]>[000] om naar de taalprogrammering te gaan. Voer vervolgens het tweecijferige nummer
in dat overeenkomt met de gewenste taal:
01 = Engels (standaard)
02 = Spaans
03 = Portugees
04 = Frans
05 = Italiaans
06 = Nederlands
07 = Pools
08 = Tsjechisch
09 = Fins
10 = Duits
11 = Zweeds
12 = Noors
13 = Deens
14 = Hebreeuws
15 = Grieks
16 = Turken
17 = FFU
18 = Kroatisch
19 = Hongaars
20 = Roemeens
21 = Russisch
22 = Bulgaars
23 = Lets
24 = Litouws
25 = Oekraïens
26 = Slowaaks
27 = Servisch
28 = Ests
29 = Sloveens
Bedienpaneelsymbolen
Symbool Beschrijving
Gereed-lampje (Groen) Als het gereed-lampje brandt, is het systeem klaar
om te worden ingeschakeld.
Ingeschakeld-lampje (rood) Als het ingeschakeld-lampje AAN is of knippert, is
het systeem ingeschakeld.
Systeemprobleem (geel) AAN - geeft aan dat er een systeemprobleem is.
Knipperend - lage batterijspanning keypad.
AC (groen) AAN - Geeft aan dat de keypad voorzien wordt van
AC-stroom.
Registreren HSM2HOST
De HSM2HOST draadloze transceiver of het HS2LCDRF/HS2ICNRF-bedienpaneel moet zijn gere-
gistreerd op het alarmpaneel voordat er draadloze apparaten kunnen worden geregistreerd. Wanneer het
alarmsysteem voor de eerste keer opgestart wordt, kan de eerste bedienpaneel of de HSM2HOST (bij
gebruik van een draadloze bedienpaneel als de eerste bedienpaneel) worden geregistreerd. Om dit te
doen:
1. Start zodra de HSM2HOST wordt aangesloten op de alarmcentrale en van stroom is voorzien, een
willekeurige bedienpaneel op.
2. Druk op een willekeurige toets op het bedienpaneel te registreren op de HSM2HOST. De
HSM2HOST wordt dan automatisch geregistreerd op de alarmcentrale.
Registratie bedienpaneel
1. Voer [*][8][installatiecode] in en vervolgens [804][000].
2. Wanneer u hierom wordt gevraagd, activeert u het apparaat om onmiddellijk te registreren, of voert u
een serienummer van het apparaat in. Doe het laatste om apparaten vooraf te registreren en registreer
ze vervolgens later op de locatie van de klant.
3. Gebruik de bladertoetsen [<][>] of typ het corresponderende nummer in om een optie te selecteren.
4. Blader door de beschikbare keuzes, en toets een nummer of tekst in waar nodig.
5. Druk op [*] om een keuze te accepteren en door te gaan naar de volgende optie.
6. Als alle opties worden geconfigureerd, vraagthet systeem om het volgende apparaat te registreren.
7. Herhaal dit process totdat alle draadloze apparaten zijn geregistreerd.
Voor UL/ULC residentiële brandtoepassingen moeten HS2LCDWF9-, HS2LCDWFP9-,
HS2LCDWFPV9-bedienpanelen worden ingesteld voor 200 seconden draadloos toezicht, door scha-
keloptie 4 (200s brand toez.), in sectie [804][810] in te schakelen.
Een bedienpaneelverwijderen
1. Voer [*][8][installatiecode] in en vervolgens [804][905].
2. Gebruik de bladertoetsen [<][>] om de keypad te selecteren of druk op [#] om af te sluiten.
3. Druk op [*] om te verwijderen. Het scherm meldt "Bedienpaneel verwijderd".

Programmalabels
Gebruik deze sectie om eenbeschrijving (bijvoorbeeld, voordeur, hal, enz.) toe te wijzen aan elke zone.
1. Druk op [*][8][Mastercode].
2. Druk op [*] en gebruik de [<][>]-toetsen om naar zonelabels te scrollen en druk nogmaals op [*]. De
eerste zone wordt weergegeven. U kunt ook [000] [001] invoeren.
3. Blader naar het zonelabel dat moet worden geprogrammeerd en druk op [*] of voer het zonenummer
(bijv. 001 voor zonelabel 1).
4. Blader naar de locatie van het gewenste teken met behulp van de [<][>]-toetsen.
5. Voer het nummer van de corresponderende tekengroep in totdat het gewenste teken wordt weer-
gegeven (zie onderstaande tabel) bijvoorbeeld: Druk 3 keer op de "2"-toets 3 om de letter "F" in te voe-
ren. Druk 4 keer op de "2"-toets om het cijfer "2" in te voeren.
[1] - A, B, C, 1 [4] - J, K, L, 4 [7] - S, T, U, 7 [0] - Spatie
[2] - D, E, F, 2 [5] - M, N, O, 5 [8] - V, W, X, 8 [*] - Selecteer
[3] - G, H, I, 3 [6] - P, Q, R, 6 [9] - Y, Z, 9,0 [#] - Escape
6. Om het label op te slaan, drukt u op [#]. HYet label wordt automatisch opgeslagen. Om een teken
te verwijderen, gebruikt u de [<][>]-toetsen om de cursor onder het teken te zetten, en drukt u ver-
volgens op [0]. Als een andere toets dan [<] of [>] wordt ingedrukt vóór [0], springt de cursor een posi-
tie naar rechts en verwijdert het teken daar.
ASCII-tekens
Labelbibliotheek
De labelbibliotheek is een database met woorden die doorgaans wordt gebruikt bij het programmeren
van labels. Afzonderlijke woorden kunnen worden gecombineerd zoals. Voorkant + Deur. Elke regel
van het scherm ondersteunt maximaal 14 tekens. Als een woord niet op een lijn past, scrolt u naar
rechts tot de cursor verschijnt bij het eerste teken van de tweede lijn. Voeg vervolgens het woord toe.
Om eenaangepast etiket met de labelbibliotheek te programmeren:
1. Druk op [*][8][installatiecode][000][001] (om het label voor zone 01 te programmeren).
2. Druk op [*] om het menu te openen.
3. Druk nogmaals op [*] om de optie "Woordinvoer" te selecteren.
4. Voer het 3-cijferige nummer in dat overeenkomt met een woord (zie woordenbibliotheek) of gebruik
de scrolltoetsen [<][>] om woorden te bekijken in de bibliotheek.
5. Druk op [*] om het woord te selecteren.
6. Als u nog een woord wilt toevoegen, herhaalt u de bovenstaande procedure vanaf stap 2.
7. Om een spatie toe te voegen, drukt u op de rechter navigatietoets [>].
8. Om tekens te wissen, selecteert u "Wissen tot einde" of "Display wissen" in het menu "Opties
selecteren".
9. Om het label op te slaan, drukt u op [#]. HYet label wordt automatisch opgeslagen.
Doorsturen van LCD-labels
Indien meer dan één LCD-keypad op het systeem aanwezig is, worden labels die geprogrammeerd zijn
op een keypad uitgezonden naar alle andere LCD-bedienpanelen direct na de wijziging wordt bevestigd.
Stemmelding/stem bel
Beheer stemmelding (alleen voor draadloze bedienpanelen)
Menu: [*][6][Toegangscodes] > Stemmelding
Deze functie wordt gebruikt om het volume van de gesproken aanwijzingen van het bedienpaneel te wij-
zigen, zoals bijvoorbeeld, 'Gebruikersinschakeling wordt uitgevoerd.' De gesproken aanwijzingen spre-
ken de zonelabels uit die zijn geprogrammeerd voor zone-openingen/-sluitingen. Gebruik de
bladertoetsen [<][>] om het volume te verhogen of te verlagen van 0-10. Wanneer u 00 selecteert wor-
den stemmeldingen uitgeschakeld.
Beheer stembel
Menu: [*][6][Toegangscodes] > Belbeheer
Deze functie wordt gebruikt voor het wijzigen van het volumeniveau van de stembel van de keypad.
Gebruik de bladertoetsen [<][>] om het volume te verhogen of te verlagen van 0-10. Wanneer u 00
selecteert wordt stembel uitgeschakeld.
Veranderen helderheid/contrast/buzzer
LCD-bedienpanelen
1. Druk op [*][6][Mastercode].
2. Gebruik de [<][>]-toetsen om naar helderheidsbeheer, contrastbeheer, of zoemerbeheer te scrollen.
3. Druk op [*] om de instelling die u wilt aanpassen te selecteren.
4. (a) Helderheid/LED-balkbeheer: Er zijn 15 achtergrondlichtniveaus. Gebruik de toetsen [<][>] om
naar het gewenste niveau te bladeren. Verandering van dit niveau past de LED-balk dien-
overeenkomstig aan.
b) Contrastbeheer: Er zijn 15 verschillende contrastniveaus. Gebruik de toetsen [<][>]om naar het
gewenste contrastniveau te bladeren.
c) Zoemerbeheer: Er zijn 15 verschillende zoemerbeheerniveaus. Gebruik de [<][>]-toetsen om naar het
gewenste zoemerniveau te scrollen.
Proximity-tags (alleen HS2LCDWFP, HS2LCDWFPV)
3. Het nabijheidslabel kan worden gebruikt voor het uitvoeren van iedere functie van het toetsenpaneel,
waarvoor normaal gesproken een toegangscode van een gebruiker nodig is, of om een programmeerbare
uitvoer te activeren. Presenteer het label aan de labellezer ( ) of aan de linkerkant van het LCD-
scherm van het toetsenpaneel. Wanneer het bedienpaneel wordt voorzien van AC-stroom, is de trans-
ceiver altijd ingeschakeld zodat nabije prox-tags kunnen worden gedetecteerd. Wanneer het bedien-
paneel van stroom wordt voorzien door de batterij en de slaapstand actief is, kan de gebruiker op een
willekeurige toets drukken om de keypad uit de slaapstand te halen, en vervolgens de prox-tag laten
detecteren.
Proximity-tags registreren
Wanneer een tag op een bedienpaneel wordt geregistreerd zal deze automatisch worden geregistreerd
op alle HS2LCDWFP- of HS2LCDWFPV-bedienpanelen die geregistreerd zijn op het systeem. Mas-
tercode (code 1) kan geen prox.tag hebben toegewezen.
1. Druk op [*][5][Mastercode].
2. Gebruik de [<][>]-toetsen om naar de juiste gebruiker te scrollen en druk op [*].
3. Gebruik de [<][>]-toetsen om naar de Prox-tag te scrollen en druk op [*]. Het scherm toont: 'Huidige
tag'.
4. Stuur de ingeschreven tag door naar de tag-lezer op het bedienpaneel. Een prox-tag kan slechts wor-
den toegewezen aan één gebruiker tegelijk.
5. Wanneer de registratie is gelukt, zullen er herkenningspieptonen klinken en wordt op de LCD van
het bedienpaneel "Tagregistratie voltooid" weergegeven. Indien de inschrijving is mislukt, zal een fout
toon klinken en zal het bedienpaneel "Ongeldige tag, niet geregistreerd" weergeven. Als de tag al eer-
der is geregistreerd, zal er een fouttoon klinken en zal het bedienpaneel 'Dubbele tag niet geregistreerd'
weergeven.
Proximity Tags verwijderen
Verwijder de prox-tags uit het systeem wanneer deze verloren zijn of niet langer meer nodig zijn.
1. Druk op [*][5][Mastercode].
2. De keypad zal het gebruikersnummer weergeven, samen met de letter 'T' als er een prox-tag is gepro-
grammeerd.

3. Gebruik de [<][>]-toetsen om de gewenste gebruiker te vinden en druk op zoek [*]. Blader naar prox
tag en druk op [*].
4. Het bedienpaneel geeft "Druk op [*] om tag te verwijderen" weer. Na het indrukken van [*], ver-
schijnt de melding "Tag verwijderd".
Programmeren van de functietoetsen van het bedien-
panelen
Om eenfunctietoets te programmeren:
1. Druk op [*][8][installatiecode].
2. Voer [861] voor programmering van de keypad. Sectie [860] is alleen-lezen en toont het plaats num-
mer van het bedienpaneel dat wordt gebruikt.
3. Voer [001]-[005] in voor functietoetsen 1-5.
4. Voer een 2-cijferig nummer in om een functietoetsbewerking aan toe te wijzen - [00]-[68]. Zie de
volgende tabellen.
5. Ga verder vanaf stap 3 tot alle functietoetsen zijn geprogrammeerd.
6. Druk tweemaal op de [#]-toets om de programmering van het installatieprogramma af te sluiten.
[001]-[005] Functieknoptoewijzing
Sectie Functietoets Knop Geldig
bereik Standaard Functie
[001] 1 00-68 03 Aanwezig Inschakeling |____|____|
[002] 2 00-68 04 Afwezig Inschakeling |____|____|
[003] 3 00-68 06 Gong AAN/UIT |____|____|
[004] 4 00-68 22 Commando uitgang 2 |____|____|
[005] 5 00-68 16 Versn Uitl |____|____|
Functietoetsen bedienpaneel
Raadpleeg de installatiehandleiding van uw systeem voor meer informatie over de functietoetsopties
die hieronder zijn beschreven:
[00] - Nul [17] - Binnenshuis inschakelen [39] - Probleemweergave
[02] - Onmiddellijk Aanwezig Inscha-
keling [21] - Opdrachtuitgang 1 [40] - Alarmen in geheu-
gen
[03] - Aanwezig Inschakeling [22] - Opdrachtuitgang 2 [61] - Blokselectie 1
[04] - Afwezig Inschakeling [23] - Opdrachtuitgang 3 [62] - Blokselectie 2
[05] - [*][9] Geen toegang inschakelen [24] - Opdrachtuitgang 4 [63] - Blokselectie 3
[06] - Bel AAN/UIT [29] - Groep terugbrengen onder-
drukken [64] - Blokselectie 4
[07] - Systeemtest [31] - Lokale PGM activeren [65] - Blokselectie 5
[09] - Nachtstand Inschakeling [32] - Overbruggingsmodus [66] - Blokselectie 6
[12] - Overal Aanwezig Inschakeling [33] - Terugbrengen onderdrukken [67] - Blokselectie 7
[13] - Overal Afwezig Inschakeling [34] - Gebruikersprogrammering [68] - Blokselectie 8
[14] - Overal Uitschakeling [35] - Gebruikersfuncties
[16] - Snel afsluiten [37] - Tijd- en datumprogrammering
Bedienpaneel programmering
Druk op [*][8][installatiecode]
[860] Bedienpaneel plaats nummer
Dit is niet voor de programmering, het twee-cijferige plaats nummer wordt uitsluitend ter informatie
weergegeven.
[861]-[876] Secties voor bedienpaneel programmering
Secties [861]-[876] zijn toepassing voor sleufnummers 1-16 van het bedienpaneeli. Na het selecteren
van het juiste sectienummer van het bedienpaneel, zijn de volgende programmeringsopties beschikbaar:
[000] Blokadres
Na het selecteren van [000], is een 2-cijferige invoer vereist om het bedienpaneel toe te wijzen aan
een blok. Geldige invoeren zijn 01-08. De standaardwaarde is 01.
[001]-[005] Toewijzing functieknoppen 1-5
[011] Bedienpaneel ingang/uitgang programmeren
Zone of PGM-nummer 00 |_____|_____|_____|
[012] Activeringstijd lokale PGM-uitvoerpuls
|_____|_____| Minuten (00-99); |_____|_____| Seconden (00-99)
[021] Eerste Bedienpaneel opties
Standaard Opt. AAN UIT
AAN |______| 1 Brandtoets ingeschakeld Brandtoets uitgeschakeld
AAN |______| 2 Medische toets ingeschakeld Medische toets uitgeschakeld
AAN |______| 3 Paniektoets ingeschakeld Paniektoets uitgeschakeld
AAN |______| 4 Toegangscode weergeven tij-
dens het programmeren
X-en weergeven bij het pro-
grammeren van toegangscodes
UIT |______| 5 Voor toekomstig gebruik Voor toekomstig gebruik
UIT |______| 6 Voor toekomstig gebruik Voor toekomstig gebruik
UIT |______| 7 Voor toekomstig gebruik Voor toekomstig gebruik
UIT |______| 8 Voor toekomstig gebruik Voor toekomstig gebruik
[022] Opties tweehet bedienpaneel
Standaard Opt. AAN UIT
AAN |______| 1 Lokale klokweergave AAN Lokale klokweergave UIT
UIT |______| 2 Lokale klok toont 24-uurstijd Lokale klok geeft AM/PM weer
AAN |______| 3 Scrollen autoalarm AAN Scrollen auto. alarm UIT
UIT |______| 4 Voor toekomstig gebruik Voor toekomstig gebruik
UIT |______| 5 Stroom-LED ingeschakeld Stroom-LED uitgeschakeld
AAN |______| 6 Stroom-LED wisselstroom aan-
wezig AAN
Stroom-LED wisselstroom aanwezig
UIT
AAN |______| 7 Alarmen weergeven wanneer inge-
schakeld
Alarmen niet weergegeven wanneer
ingeschakeld
UIT |______| 8 Auto. scrollen open zones AAN Auto. scrollen open zones UIT

[023] Opties derhet bedienpaneel
Standaard Opt. AAN UIT
UIT |______| 1 Inschakelings-LED aan in
de slaapstand Inschakelings-LED uit in de slaapstand
AAN |______| 2
Bedienpaneel status geeft
aanwezig ingeschakeld
weer
Bedienpaneel status geeft aan-
wezig/afwezig ingeschakeld weer
AAN |______| 4 Nabijheidslabel schakelt
in/uit Nabijheidslabel schakelt niet in/uit
UIT |______| 7 Temperatuurweergave inge-
schakeld Temperatuurweergave uitgeschakeld
Programmeermogelijkheden aangegeven in GRIJS zijn vereist voor systemen die voldoen aan de
EN50131-1 en EN50131-3-normen. Sectie [023]: 1 = UIT
[030] LCD-melding
|_____|_____|_____|_____|_____|_____|_____|_____|_____|_____|_____|_____|_____|_____|_____|_____|
[031] Duur gedownload LCD-bericht
Standaard: 000 |______|______|______| (Geldige invoer is 000-255), 000=Weergave ongelimiteerd aantal
berichten. Dit getal geeft het aantal keren weer dat het gedownloade bericht moet worden gewist voor-
dat het permanent wordt verwijderd. Druk op een toets voor het verwijderen van bericht .
[041] Toewijzingen temperatuurzone binnenshuis
Standaard: 000 |______|______|______| (Geldige waarden zijn 000-128)
[042] Toewijzingen temperatuurzone buitenshuis
Standaard: 000 |______|______|______| (Geldige waarden zijn 000-128)
[101]-[228] Deurbel voor zones 1-128
Het bedienpaneel kan worden geprogrammeerd om maximaal vier verschillende belklanken te luiden
voor individuele zones. (Bijvoorbeeld, voor zone 1, voer sectie [101] in, voor zone 2 voer sectie [102]
in). Standaard: 01 |_____|_____|
Optie
01 6 pieptonen
02 Plingpling-toon
03 Dingdong-toon
04 Alarmtoon (4 seconden lang)
05 Zonenaam
[991] Programmering van het bedienpaneel terugzetten naar de
fabrieksinstellingen
1. Druk op [*][8][installatiecode].
2. Voer [991] in.
3. Gebruik de [<][>]-toetsen om naar het betreffende bedienpaneel te scrollen.
4. Druk op [*] om het bedienpaneel te selecteren.
5. Voer opnieuw [installieprogrammacode] in.
6. Druk op [*] om het geselecteerde bedienpaneel te resetten naar de fabrieksinstellingen.
Other manuals for PowerSeries Neo
10
This manual suits for next models
3
Table of contents
Languages:
Other DSC Control Panel manuals

DSC
DSC PC1580BABT User manual

DSC
DSC PowerSeries PC1555RKZ User manual

DSC
DSC PowerSeries PC1616 User manual

DSC
DSC MAXSYS PC4020NK User guide

DSC
DSC LCD 5500 User manual

DSC
DSC PowerSeries Neo User manual

DSC
DSC PC5508 User manual

DSC
DSC PowerSeries Neo User manual

DSC
DSC CP-5M User manual

DSC
DSC Power Series User manual