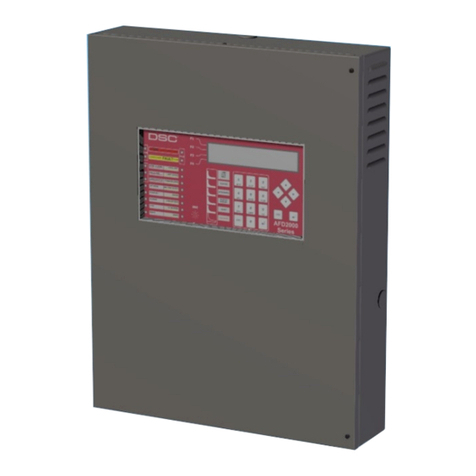
DSC Maxsys PC6010 Owner's manual

Programming Manual
PC6O1O Software Version 2.1
®


1
Using PC6010 Manuals
There are 3 main manuals for PC6010 installers:
•System Manual
•Programming Manual
•Programming Worksheets
Before beginning your installation, you should read the
System Manual carefully. The System Manual contains:
• a complete description of how to program the system
• wiring information
• information about user types and the user interface
• information on enrolling the keypads and modules
• an overview of the main system programming sections
• information on setting up a serial printer to print out
system events
• information on setting up the panel for downloading
• a section on diagnostics and troubleshooting.
Introduction
This manual (Programming Manual) contains a description of
all the PC6010 v2.1 programming sections. Use this manual
when you want to know what a programming section is for,
and what kind of data to enter in the section. See the “Main
Programming Sections” section on page 2, for an overview of
PC6010 programming.
Be sure to record all your system programming in the
Programming Worksheets.
If you will be adding modules to your PC6010 system, please
read the Installation Instructions that come with each module.

2
The PC6010 Installer’s Programming is broken down into 5 major sections:
System Section: You will find programming options which affect the operation of the entire system in this section. For
example communications, downloading, printer options etc. are options which affect the overall system
and are programmed in the system area.
Area Section: You will find programming options which pertain to individual areas in this section. For example the zone
assignment, entry delay time and exit delay time are all options which can be programmed for each of the areas.
Backbone Section: You will find programming options for the backbone modules in this section.
Module Hardware: Use this section for enrolling and deleting modules. See the System Manual for a complete description of
how to enroll modules.
Event Buffer: Use this section to print the entire event buffer. See the System Manual for a complete description of how
to set up a serial printer on the system.
Diagnostics: Use this section to view trouble conditions reported by the modules. See the System Manual for a more
detailed description of diagnostics and fault conditions.
Programming Section Page
SYSTEM SECTION
INSTALLER OPT’S ........................................................................................................ 3
SYSTEM OPTIONS .......................................................................................................... 4
DLS SECTION ................................................................................................................ 7
COMMUNICATOR .............................................................................................................. 9
LINKS MODULE ............................................................................................................ 20
SW AUX OUTPUT .......................................................................................................... 21
MAIN BELL OUTPUT .................................................................................................... 21
PGM OUTPUTS .............................................................................................................. 22
EVENT SCHEDULING .................................................................................................... 28
6820 OPTIONS ............................................................................................................ 33
KP/RD ASSIGNMENT .................................................................................................... 36
AREA SECTION
ADD/EDIT AREA .......................................................................................................... 37
DELETE AREA .............................................................................................................. 43
COPY AREA .................................................................................................................. 43
BACKBONE SECTION
ORIGINATOR ID .......................................................................................................... 44
MODULE HARDWARE
EBUS MODULE .............................................................................................................. 45
BACKBONE MODULE ...................................................................................................... 45
EVENT BUFFER
PRN ENTIRE BUFF ...................................................................................................... 46
DIAGNOSTICS
DIAGNOSTICS .............................................................................................................. 46
BINARY PROGRAM ........................................................................................................ 46
FACTORY DEFAULT ...................................................................................................... 46
Main Programming Sections

3
SYSTEM RESETSYSTEM RESET
SYSTEM RESET
(2(2
(2(2
(2
SYSTEM SECTION SYSTEM SECTION
SYSTEM SECTION
INSTALLER OPTSINSTALLER OPTS
INSTALLER OPTS
This section contains the Installer’s Code, Walk Test Code and System Reset options.
Installer’s Code. You can program a new Installer’s Code. The default setting is ‘5555’ for the 4-digit
option, or ‘555555’ for the 6-digit option. Enter a new code, using numbers from 0 to 9 only. Use the
installer’s code to enter the [*][8] Installer’s Programming menu. Change this code from the default
setting before programming is complete, to ensure the security of the system.
The Walk Test code gives a user access to the Walk Test Mode. When a user enters the Walk Test code at
a system keypad, they will have access to the following menu options.
Local Walk Test, Local + Com Test, Silent Com Test, Disable Walk Test, Seismic Test
Perform a “System Reset” if a “Module Comm Fault” occurs. This turns off power to the Ebus (Module
Communication Bus) for 5 seconds. No programming will be lost and the time does not have to be
reprogrammed.
The system uses the Private key, together with a randomly generated Public key, to encrypt
communications over the Ebus (Module Communication Bus), making them more secure.
Enter an 8-digit code for the private key. See also “Public Key Cycle” under System Times.
INSTALLER CODEINSTALLER CODE
INSTALLER CODE
(0(0
(0(0
(0
INSTALLER OPTSINSTALLER OPTS
INSTALLER OPTS
(00(00
(00(00
(00
Installer Options
WALK TEST CODEWALK TEST CODE
WALK TEST CODE
(1(1
(1(1
(1
PRIVATE KEYPRIVATE KEY
PRIVATE KEY
(3(3
(3(3
(3

4
SYSTEM AREASYSTEM AREA
SYSTEM AREA
SYSTEM OPTIONSSYSTEM OPTIONS
SYSTEM OPTIONS
SYS TOGGLE OPTSYS TOGGLE OPT
SYS TOGGLE OPT
System Options
This section contain options that are relevant to the entire system. System Toggle options, Keypad
Lockout options and System Times can all be programmed in this section.
Sys Toggle Options
Toggle options are in question form. Use the [*] key to toggle between Yes and No to enable or disable
the feature. Use the [<] [>] keys to scroll through the options.
60 Hz AC?
YES = The incoming AC power from the transformer cycles at 60 Hz. The North American
standard is 60 Hz.
NO = The incoming AC power cycles at 50 Hz.
Crystal Time Base?
YES = The timebase is the internal crystal oscillator.
NO = The timebase is the AC power input.
Timing for the clock in the PC6010 can come from two sources. The frequency of the AC power, or
a crystal oscillator on the circuit board. The default is to use the frequency of the incoming AC
because it is normally very stable. However, in some locations, the stability of the AC frequency is
less reliable. If this is the case then the crystal oscillator should be used.
Follows includes Alarms?
YES = Enables all outputs programmed to follow zones to also annunciate alarms when those zones
are armed.
When the zone is disarmed, the output will follow the zone status (i.e. when the zone is violated
the output will activate; when the zone is restored the output will deactivate).
When the zone is armed the output follows the zone’s alarm status (i.e. the output will not
activate until the zone is violated. The output remains active until a user clears the alarm
memory).
NO = Disables the ability to latch alarm status. The output only follows zone activity, whether the zone
is armed or disarmed.
Six digit access codes?
YES = All access codes on the system will be 6 digits in length, except for the DLS access code.
NO = Regular 4 digit codes to be used.
NOTE: When you change from 4-digit to 6-digit codes, you should use DLS-3 to upload the user codes,
and then perform a Duplicate Code and Card check. Please refer to the DLS-3 manual for more
information.
Keypad tamper enabled?
YES = Keypad Tampers are used. This option should be enabled only if keypad tamper plates are
attached to the keypad.
NO = Keypad Tampers are disabled.
Access Log On?
YES = The system will always make a log entry when it grants access to a user with an access card
NO = The system will not make a log entry when it grants access to a user with an access card, where
the user does not also enter an access code on the reader.
YES = The battery charging current will be 1.4A.
NO = The battery charging current will be 360mA.
Duplicate Code Check?
YES = The system will not allow the programming of duplicate user codes. If a user code is entered
that matches any of the other 1000 users, the Installer code, or any other user code (or the
Duress derivative of any code), the keypad will sound an error tone and the data will not be
saved.
NO = The system will allow duplicate user codes to be programmed.
ACCESS LOG ONACCESS LOG ON
ACCESS LOG ON
YY
YY
Y
SYSTEM OPTIONSSYSTEM OPTIONS
SYSTEM OPTIONS
(01(01
(01(01
(01
SYS TOGGLE OPTSYS TOGGLE OPT
SYS TOGGLE OPT
(0(0
(0(0
(0
XTAL TIMEBASEXTAL TIMEBASE
XTAL TIMEBASE
NN
NN
N
6 DIGIT CODES6 DIGIT CODES
6 DIGIT CODES
NN
NN
N
KEYPAD TAMPERSKEYPAD TAMPERS
KEYPAD TAMPERS
NN
NN
N
FOLLOWS + ALARMSFOLLOWS + ALARMS
FOLLOWS + ALARMS
NN
NN
N
HI BATT CHARGHI BATT CHARG
HI BATT CHARG
YY
YY
Y
60 HZ AC60 HZ AC
60 HZ AC60 HZ AC
60 HZ AC
YY
YY
Y
DUPLICATE CODEDUPLICATE CODE
DUPLICATE CODE
NN
NN
N
5
SYSTEM AREASYSTEM AREA
SYSTEM AREA
SYSTEM OPTIONSSYSTEM OPTIONS
SYSTEM OPTIONS
SYSTEM TIMESSYSTEM TIMES
SYSTEM TIMES
Keypad Lockout Options
This section contains programming for the keypad and reader lockout features. After a programmed
number of incorrect attempts to enter an access or installer’s code, the keypad will lock users out.
This prevents users from performing any system function. A message “Keypad Lockout is Active” will
be displayed for the lockout duration. Keypad lockout is automatically enabled on all system
keypads. See “READER LOCKOUT” under “System Options” to enable the keypad lockout feature
on PC6820 readers.
Enter the number of incorrect code entries (from 000 to 255) required to activate keypad lockout.
The default setting is 005.
This section determines the number of minutes the keypad lockout will be active. Enter the duration
of the keypad lockout. Valid entries are from 000 to 255. The default setting is 015.
System Times
These times apply to the whole system.
Program the amount of time (from 000 to 255 minutes) the bell output will activate for when an
alarm occurs. The factory default setting is 004 (4 minutes). Bell Cutoff is for any output (Bell, SW
Aux or PGM) that is programmed for Fire and Burg, Inv Fire and Burg, Burg Only, Inv Burg Only, Fire
Only, Inv Fire Only, and Tamper.
Program the amount of time (from 000-255 seconds) that a TLM Trouble will be delayed before it is
annunciated on the trouble group. The default is 060.
Program the amount of time (000-255 minutes) before an AC Trouble will be annunciated on the
trouble group. The default is 060.
Program the time (000-255 minutes) before the keypad will display an AC trouble in the fault list.
This will delay the “Trouble Group” annunciation and the “AC Fail TX Delay”. This delay does not
apply to the keypad Power light. If there is an AC trouble, the Power light on the keypad will turn off
immediately. The default is 000 minutes.
Program the time (000-255 minutes) before a “Ebus Low PWR” trouble will occur. The default is
000 minutes.
Program the time (000-255 minutes) before a TLM trouble will be logged and displayed in the fault
list. The default is 000 minutes.
Program the amount of time (000 - 255 Minutes) before a Police Code Alarm reporting code will be
sent to the central station. A Police Code Alarm is sent when 2 zone alarms occur within the
programmed time. Default is 060 minutes.
Program the time in minutes that automatic arming can be delayed. Users can delay automatic
arming on assigned areas from a system keypad, or an PC6820 reader with a POST input. When the
programmed delay time expires, automatic arming will begin again. Users may delay automatic
arming as many times as desired. To delay automatic arming at a system keypad, users must enter
their access code, and then follow the available choices displayed on the keypad. To delay automatic
arming at an PC6820 reader, users must first pass an access card through the reader, and then
activate the POST input. The default delay is 030 minutes.
KYPD LOCKOUT OPTKYPD LOCKOUT OPT
KYPD LOCKOUT OPT
(1(1
(1(1
(1
TOTAL BAD CODESTOTAL BAD CODES
TOTAL BAD CODES
(0(0
(0(0
(0
LOCKOUT DURATIONLOCKOUT DURATION
LOCKOUT DURATION
(1(1
(1(1
(1
SYSTEM TIMESSYSTEM TIMES
SYSTEM TIMES
(2(2
(2(2
(2
BELL CUTOFFBELL CUTOFF
BELL CUTOFF
(00(00
(00(00
(00
TLM DELAYTLM DELAY
TLM DELAYTLM DELAY
TLM DELAY
(01(01
(01(01
(01
AC FAIL DELAYAC FAIL DELAY
AC FAIL DELAY
(02(02
(02(02
(02
AC DELAYAC DELAY
AC DELAYAC DELAY
AC DELAY
(03(03
(03(03
(03
LOW EBUS DELAYLOW EBUS DELAY
LOW EBUS DELAY
(04(04
(04(04
(04
TLM TROUB. DELAYTLM TROUB. DELAY
TLM TROUB. DELAY
(05(05
(05(05
(05
POLICE CODE TIMEPOLICE CODE TIME
POLICE CODE TIME
(06(06
(06(06
(06
DELAY AUTOARMDELAY AUTOARM
DELAY AUTOARM
(07(07
(07(07
(07

6
The system uses the Public key, together with the programmed Private key, to encrypt communications
over the Ebus, making them more secure. The Public key is generated randomly by the system. Program
how often the system changes the Public key. Valid entries are from 000-255 minutes. The default is 020
minutes. See also “Private Key” under Installer Options.
Program the dates on which Daylight Savings time begins. You can program the dates for up to three
years. Program the dates in the YY/MM/DD format. At 0200 on the programmed day, the time will
automatically move ahead one hour to 0300. The default dates that are programmed are 00/03/26, 01/
03/25, and 02/03/31.
NOTE: All scheduled events that would have occurred during the hours of 0200 to 0300 will not
occur on these days.
Program the dates on which Standard time begins. You can program the dates for up to three years.
Program the dates in the YY/MM/DD format. At 0300 on the programmed day, the time will automatically
move back one hour to 0200). The default dates that are programmed are 00/10/29, 01/10/28, and 02/
10/27.
Arm/Disarm Mask
All areas are toggled to YES, by default. Areas toggled to NO in the mask cannot be armed from a
keypad. Areas toggled to NO can only be armed by automatic arming, keyswitch arming, over the infranet,
or via the DLS-3 software. The default is YES for all areas. Only areas which have been added to the system
can be programmed in the Arm/Disarm Mask. See “Area Section” programming.
Zone Supervision
The zone is a normally closed loop to ground. The zone will be violated when it is open.
All zones must have a 5600 ohm resistor across them. If the zone is shorted or open, it will be in a
violated condition. If the zone is open and programmed as a fire zone, it will be in a trouble condition.
NOTE: If zones are programmed for Fire or Links Supervisory, EOL resistors must be used.
This configuration will allow the panel to detect zone Faults (zone loop is shorted), zone tampers (zone
loop is open), open zones (alarm condition 11200 Ohms) and restored zones (5600 Ohms). If the zone is
disarmed and placed in the Tamper or Fault state, the keypad buzzer will sound from all partition keypads
(that the zone belongs to) for the length of Bell Time out or until the alarm is silenced (by user code or
Keyswitch zone). A zone trouble reporting code will be sent to the monitoring station (if programmed).
When the partition is armed and a zone is Tampered or Faulted, the keypad buzzer will sound from all
partition keypads (that the zone belongs to) for the length of Bell Time out or until the alarm is silenced,
but no burglary outputs will be activated and only the Trouble reporting code will be transmitted to the
monitoring station (if programmed). Refer to the System Manual for details on the hookup procedure.
All zones on the PC6010 can use Double End of Line resistors except Fire Zones (all types - Standard Fire
and Auto Verify Fire), Links Supervisory, and Links Answer zone types. These zones must only use Single
EOL.
ARM/DISARM MASKARM/DISARM MASK
ARM/DISARM MASK
(3(3
(3(3
(3
PUBLIC KEY CYCLEPUBLIC KEY CYCLE
PUBLIC KEY CYCLE
(08(08
(08(08
(08
SYSTEM AREASYSTEM AREA
SYSTEM AREA
SYSTEM OPTIONSSYSTEM OPTIONS
SYSTEM OPTIONS
SYSTEM TIMESSYSTEM TIMES
SYSTEM TIMES
SYSTEM AREASYSTEM AREA
SYSTEM AREA
SYSTEM OPTIONSSYSTEM OPTIONS
SYSTEM OPTIONS
ARM/DISARM MASKARM/DISARM MASK
ARM/DISARM MASK
DAYLIGHT SAVINGSDAYLIGHT SAVINGS
DAYLIGHT SAVINGS
(09(09
(09(09
(09
STANDARD TIMESTANDARD TIME
STANDARD TIME
(10(10
(10(10
(10
ZONE SUPERVISIONZONE SUPERVISION
ZONE SUPERVISION
(4(4
(4(4
(4
NO EOLNO EOL
NO EOLNO EOL
NO EOL
SINGLE EOLSINGLE EOL
SINGLE EOL
DOUBLE EOLDOUBLE EOL
DOUBLE EOL

7
PERIODIC CALLUPPERIODIC CALLUP
PERIODIC CALLUP
(1(1
(1(1
(1
SET CYCLE DAYSSET CYCLE DAYS
SET CYCLE DAYS
(0(0
(0(0
(0
SET 24HR TIMESET 24HR TIME
SET 24HR TIME
(1(1
(1(1
(1
SYSTEM AREASYSTEM AREA
SYSTEM AREA
DLS SECTIONDLS SECTION
DLS SECTION
DLS TOGGLESDLS TOGGLES
DLS TOGGLES
SYSTEM AREASYSTEM AREA
SYSTEM AREA
DLS SECTIONDLS SECTION
DLS SECTION
PERIODIC CALLUPPERIODIC CALLUP
PERIODIC CALLUP
This section will allow you to program all options related to downloading.
Download Toggles
Downloading Toggle Options. Toggle options are in the form of questions. Use the [*] key to toggle
between Yes and No to enable or disable the feature. Use the [<][>] keys to scroll through the options.
YES = The panel will answer after the programmed number of rings (program in the “# of Rings”
section, see below).
NO = Ring detect disabled. The only way downloading can occur is by using either the Usr Allows Srv
feature, or the Periodic Callup feature (see below).
YES = If the system detects 1 or 2 rings on the first call and then is called again within the programmed
period of time (000 to 255 seconds, see “2 Call Timer”), the system will answer the second call on the
first ring. This is useful for bypassing an answering machine that is sharing a telephone line with the
system.
NO = The system will only answer after the programmed number of rings is reached. See “# of Rings”.
YES = Callback is enabled. After the first connection to the system, both the computer and the system will
hang up. The computer will then wait for the system to call. If there is more than one downloading
computer, callback should be disabled.
NO = Callback is disabled. The downloading computer will have immediate access to the system, once
connected and accepted as valid.
YES = Periodic Downloading is enabled. Periodic downloading is used to allow the computer to execute
batch files. The computer must be waiting for a call for this feature work. See “Periodic Callup” for
programming the time of day, and the number of days in between periodic downloads.
NO = Periodic Downloading is disabled.
User Allows System Service?
YES = When this option is enabled, a Master user will have to turn on the “Allow System Service” option, for
Installer’s Programming to be accessible from either the DLS software, or a system keypad. Once the
Allow System Service option has been turned on, the system will answer incoming telephone calls for
60 minutes. If the “Ring Detect” option is also turned on, the panel will always answer incoming
telephone calls, but a Master user will still have to Allow System Service before a DLS-3 user can access
Installer’s Programming.
NO = Users will not have to turn on the Allow System Service option for Installer’s Programming to be
accessible from the DLS software or from a system keypad. The Allow System Service option will
not be available on the Master user menu. The control panel will not answer incoming telephone
calls unless the Ring Detect option is turned on.
YES = The DLS-3 will display all user codes, user options and user schedules.
NO = When this option is disabled, the PC6010 will send user codes, user options and user schedules
to the DLS-3 as %FF Hex. The rest of the programming options are uploaded normally.
Periodic Callup
Program the time and number of days between periodic downloads. (See “Periodic DLS” for enabling
Periodic Downloading.)
Program the number of days (from 001 to 255 days) between periodic downloads. The default setting is
030.
Program, in 24 hour time, the time of day the panel will call the computer for periodic downloading. The
default setting is 0000.
DLS SECTIONDLS SECTION
DLS SECTION
(02(02
(02(02
(02
DLS TOGGLESDLS TOGGLES
DLS TOGGLES
(0(0
(0(0
(0
RING DETECTRING DETECT
RING DETECT
NN
NN
N
DOUBLE CALLDOUBLE CALL
DOUBLE CALL
NN
NN
N
DLS CALLBACKDLS CALLBACK
DLS CALLBACK
NN
NN
N
PERIODIC DLSPERIODIC DLS
PERIODIC DLS
NN
NN
N
USER ALLOWS SERVUSER ALLOWS SERV
USER ALLOWS SERV
NN
NN
N
Download Section
SND USR CDSSND USR CDS
SND USR CDS
YY
YY
Y

8
SYSTEM AREASYSTEM AREA
SYSTEM AREA
DLS SECTIONDLS SECTION
DLS SECTION
Other DLS Programming
Enter the telephone number for the DLS computer, if either Periodic DLS, or DLS Callback is enabled.
Programming Telephone Numbers
The total number of digits including the dial tone search and pauses must not exceed 31. Press the [*] key to
enter the telephone entry options menu. A “D” for dial tone search is already programmed as the first digit.
[0] Save [1] Dial tone [2] Pause 2 Seconds [3] Pause 4 Seconds
[4] DTMF[*] [5] DTMF[#] [6] Clear Display [7] Clear to End
[0]Select Save when you are finished programming the telephone number, to store it into the system’s
memory, or press [#] when finished entering the number.
[1]Select Dial Tone to add a 2 second dial tone search to the telephone number, which will be
represented by a letter “D” on the display. When the panel does a dial tone search, it looks for dial tone
before dialing the programmed telephone number.
[2]Select Pause 2 Seconds to add a 2 second pause to the dialing sequence, which will be represented by
the letter “E” on the display.
[3]Select Pause 4 Seconds to add a 4 second display to the dialing sequence, which will be represented
by the letter ‘A‘ on the display.
[4]Select DTMF [*] to input an asterisk, represented by a ‘B‘ on the display. The dialer will output the
same frequencies as a touch tone telephone would if the [*] key were pressed. (Frequency required to
disable call waiting.)
[5]Select DTMF [#] to add a ‘#’ represented by a ‘C’ on the display. The dialer will output the same
frequencies as a touch tone telephone would if the [#] key were pressed.
[6]Select Clear Display to clear the entire telephone number.
[7]Select Clear to End to clear the display from the character where the cursor was located to the end of
the display.
Panel Identifier Code. This six digit code will allow the computer to identify the panel that is calling. Each
system must have a different Panel ID code if Periodic DLS or DLS Callback is used. The default setting is
492100.
This 4 digit code must be the same on the DLS-3 computer and on the PC6010 system. If the code is
different, the system will NOT allow any uploading or downloading to take place. The default setting is
4920.
This is the maximum allowable time in seconds between two telephone calls when the “Double Call”
option has been enabled. Valid entries are between 000 and 255 seconds. The default setting is 060. (See
“Double Call” for enabling the double call feature.)
This is the number of consecutive rings the panel must detect before answering the call. (See “Ring
Detect” or “User Allows Serv” for enabling ring detect.) Valid entries are between 001 and 255 rings. The
default setting is 008.
The PC-LINK module allows a direct connection between an on-site computer and the control panel. With
the PC-LINK, the computer can communicate with the panel at 9600 baud. Use a serial cable to link the
computer with the control panel. To download using PC-LINK:
1. Connect the PC-LINK connector to the header on the PC6010 board, as shown.
2. Enable PC-LINK in the Modem Configuration section of the DLS-3 software. The
software will display “PC-LINK Active” in the Status Bar of the Communications
window.
3. Open the appropriate account in the DLS-3, and select the function to be
performed (upload, download, etc.)
4. Go to any system keypad and enter Installer’s Programming and select “System”, then “DLS Section”,
then “Enable PC-LINK”. The keypad displays the message “PC-LINK Active (#) To Exit”.
5. Once the DLS communication is in progress, the panel will automatically exit the Installer Programming
mode.
6. When the desired DLS function(s) are complete, press the hang-up button on the Communications
window. This will disconnect the DLS from the panel.
7. If you are finished, remove the PC-LINK connector from the PC6010.
PHONE NUMBERPHONE NUMBER
PHONE NUMBER
(2(2
(2(2
(2
PANEL ID CODEPANEL ID CODE
PANEL ID CODE
(3(3
(3(3
(3
ACCESS CODEACCESS CODE
ACCESS CODE
(4(4
(4(4
(4
2 CALL TIMER2 CALL TIMER
2 CALL TIMER
(5(5
(5(5
(5
# OF RINGS# OF RINGS
# OF RINGS
(6(6
(6(6
(6
ENABLE PC-LINKENABLE PC-LINK
ENABLE PC-LINK
(7(7
(7(7
(7

9
SYSTEM AREASYSTEM AREA
SYSTEM AREA
COMMUNICATORCOMMUNICATOR
COMMUNICATOR
MAIN ITEMSMAIN ITEMS
MAIN ITEMS
All options concerning telephone line communications can be programmed, including telephone
numbers, reporting codes, account numbers and communicator options.
Main Items - Telephone #’s/Comm Format/Dialer Direction
Programming for the telephone numbers of central stations the system will communicate with. The
PC6010 can call up to 3 different telephone numbers when reporting any event to a central station. The
second and third numbers can be used as backups if the first or second fail.
The panel will send the events programmed in the Dialer Direction section to the first telephone number.
By default, the panel sends all events through the first telephone number. See “Communicator Toggles”
for more details on the backup telephone numbers.
The panel will send the events programmed in the Dialer Direction section to the second telephone
number. The second telephone number can be used to as a backup for the first telephone number. See
“Communicator Toggles” for more details on the backup telephone numbers.
The panel will send the events programmed in the Dialer Direction section to the third telephone number.
The third telephone number can also be used as a backup for the first and/or second telephone numbers.
See “Communicator Toggles” for more details on the backup telephone numbers.
Programming Telephone Numbers
The total number of digits including the dial tone search and pauses must not exceed 31. Press the [*] key
to enter the telephone entry options menu. A “D” for dial tone search is already programmed as the first
digit.
[0] Save [1] Dial tone [2] Pause 2 Seconds [3] Pause 4 Seconds
[4] DTMF[*] [5] DTMF[#] [6] Clear Display [7] Clear to End
[0]Select Save when you are finished programming the telephone number, to store it into the system’s
memory, or press [#] when finished entering the number.
[1]Select Dial Tone to add a 2 second dial tone search to the telephone number, which will be
represented by a letter “D” on the display. When the panel does a dial tone search, it looks for dial tone
before dialing the programmed telephone number.
[2]Select Pause 2 Seconds to add a 2 second pause to the dialing sequence, which will be represented by
the letter “E” on the display.
[3]Select Pause 4 Seconds to add a 4 second display to the dialing sequence, which will be represented
by the letter ‘A‘ on the display.
[4]Select DTMF [*] to input an asterisk, represented by a ‘B‘ on the display. The dialer will output the
same frequencies as a touch tone telephone would if the [*] key were pressed. (Frequency required to
disable call waiting.)
[5]Select DTMF [#] to add a ‘#’ represented by a ‘C’ on the display. The dialer will output the same
frequencies as a touch tone telephone would if the [#] key were pressed.
[6]Select Clear Display to clear the entire telephone number.
[7]Select Clear to End to clear the display from the character where the cursor was located to the end of
the display.
NOTE: The PC6010 will only seize the telephone line if a telephone number has been programmed and
a reporting code has been entered for the event.
COMMUNICATORCOMMUNICATOR
COMMUNICATOR
(03(03
(03(03
(03
MAIN ITEMSMAIN ITEMS
MAIN ITEMS
(0(0
(0(0
(0
1ST NUMBER1ST NUMBER
1ST NUMBER
(0(0
(0(0
(0
2ND NUMBER2ND NUMBER
2ND NUMBER
(1(1
(1(1
(1
3RD NUMBER3RD NUMBER
3RD NUMBER
(2(2
(2(2
(2
PGM TEL NUMBERPGM TEL NUMBER
PGM TEL NUMBER
(0(0
(0(0
(0
Communicator Section

10
There are 2 formats in the PC6010 for communicating with the central station: SIA and Contact ID. The
system must be programmed to use the same communications format as the receiver at the central
station. Each format can be programmed to use automatically generated reporting codes. Please see the
“Communicator Toggles” section. The default format is SIA.
NOTE: When using the Contact ID format, only the first four digits of the account code will be used.
When using this format make sure to program the last two digits of the account code as “FF”.
Please note that any ‘0’ must be replaced with ‘A’ for any account/system ID codes.
SIA 1986 Format
The system ID codes and the customer ID codes must be six decimal digits in length. The reporting codes must be 2 digits.
NOTE: Do not program the keypad lockout reporting code or the printer buffer nearly full reporting code.
The SIA format will transmit a 6 digit account code, a 2 digit identifier code and a 2 digit reporting code. The 2 digit identifier is
preprogrammed by the PC6010. The 2 digit reporting code is programmed by the installer with any hex number from 01 to FE.
You can also program the system to automatically generate SIA reporting codes (see the Communicator Toggles section).
Please see Appendix B Reporting Codes, for a list of SIA reporting codes.
Contact ID
The System ID code and Customer ID codes must be 4 decimal digits. The reporting codes must be 2 digits. Substitute the HEX
digit “A” for the zero (0). To prevent the panel from reporting an event, the reporting code should be programmed as [00] or [FF].
NOTE: Do not program the Opening After Alarm, Buffer Nearly Full, Installer Lead In and Installer Lead Out reporting
codes.
Zone Alarms and Restorals can be programmed to send different messages to the monitoring station. For example, if the
Reporting code for zone 5 is programmed with ‘34’, the monitoring station will receive the message ‘*BURG* - ENTRY/EXIT - 5’,
where 5 is the number of the zone which has been activated. Please see Appendix B Reporting Codes, for a list of Contact ID
reporting codes.
You can also program the system to automatically generate Contact ID reporting codes (see the Communicator Toggles section).
COMMS FORMATCOMMS FORMAT
COMMS FORMAT
(1(1
(1(1
(1

11
This section determines which reporting codes are sent to the selected telephone number. All reporting
codes can be programmed to communicate to any or all of the telephone numbers. By default, all
reporting codes are sent to telephone number 1 only. See “Comms Toggles” for using telephone
numbers 2 and 3 as backup telephone numbers.
YES = The following reporting codes are transmitted to the selected telephone number. See
“Reporting Codes” for a description of these groups of reporting codes.
• Zone Alarms & Restorals
• Zone Troubles & Restorals
• Duress Alarms & Restorals
• Module Tamper Alarms & Restorals
• Police Code Alarms & Restorals
NO = Alarm and Restoral reporting codes are not sent.
YES = The following reporting codes are transmitted to the selected telephone number. See
“Reporting Codes” for a description of these groups of reporting codes.
• Openings and Closings by Users 001-128, Users 129-1000
• Miscellaneous Openings & Closings
• Momentary / Maintained Keyswitch Openings & Closings
NO = Opening and Closing reporting codes are not sent.
YES = The following reporting codes are transmitted to the selected telephone number. See
“Reporting Codes” for a description of these groups of reporting codes.
• System Maintenance
• 6400 Maintenance
• 6204 Maintenance
• 6820 Maintenance
• 6442 Maintenance
• 6443 Maintenance
NO = All other codes are not sent.
When a reporting code is sent to the central station, a six digit account code is also sent to identify the
customer. Each area has its own account code (See “Customer ID Code”). But for reporting codes that
do not pertain to a particular area, such as AC line trouble etc., the system ID code is sent to identify the
panel. The system ID codes and the customer ID codes must be six decimal digits. The reporting code
groups that send the system ID code are:
• Module Tamper Alarms & Restorals
• System Maintenance
• 6400 Maintenance
• 6204 Maintenance
• 6820 Maintenance
• 6442 Maintenance
• 6443 Maintenance
Note: 6442 events may use the Customer ID Code or the System ID Code depending on if the event
is an area or system event.
SYSTEM AREASYSTEM AREA
SYSTEM AREA
COMMUNICATORCOMMUNICATOR
COMMUNICATOR
MAIN ITEMSMAIN ITEMS
MAIN ITEMS
OPEN/CLOSEOPEN/CLOSE
OPEN/CLOSE
NN
NN
N
DIALER DIRECTIONDIALER DIRECTION
DIALER DIRECTION
(1(1
(1(1
(1
ALARALAR
ALARALAR
ALARM/M/
M/M/
M/RESTORERESTORE
RESTORERESTORE
RESTORE
YY
YY
Y
ALL OTHERSALL OTHERS
ALL OTHERS
NN
NN
N
SYSTEM ID CODESYSTEM ID CODE
SYSTEM ID CODE
(3(3
(3(3
(3

12
SYSTEM AREASYSTEM AREA
SYSTEM AREA
COMMUNICATORCOMMUNICATOR
COMMUNICATOR
COMMS TOGGLESCOMMS TOGGLES
COMMS TOGGLES
Communicator Toggles
Select options relevant to the telephone line communications of the panel. Toggle options are given in
the form of a question. Use the [*] key to toggle between [Y]es and [N]o to enable or disable the feature.
Use the [<][>] keys to scroll through the options.
Communications are enabled?
YES = The communications function is enabled.
NO = The communications function is disabled. No reporting codes will be transmitted to the central
station. Downloading using DLS-3 software will work with the communicator disabled.
DTMF dialing enabled?
YES = The dialer will use DTMF dialing.
NO = The dialer will use pulse dialing.
Partial Closings Identified?
YES = When using SIA, and when a zone is bypassed, unbypasssed, disabled, or enabled, the panel will
log and transmit the appropriate SIA identifier for the event, along with the zone alarm reporting
code. This will occur whether the zone was bypassed, unpassed, disabled, or enabled manually, or
automatically when the panel is armed or disarmed. The partial closing reporting code must be
programmed for this feature to work.
NO = The panel will only send the partial closing reporting code when zones are bypassed, unbypassed,
disabled, or enabled when the area is armed. However, it will still identify the zones in the event
buffer.
NOTE: If Partial Closings are used to identify alarms or restorals, the Alarm or Restoral reporting code
must be programmed for the feature to function properly.
Partial Closings on Auto Arming?
YES = The panel will send the partial closing reporting code to the central station when a zone is force
armed (temporarily bypassed) by an auto arm. If the option “PC ID” is enabled, and if the panel is
programmed to transmit using SIA, the force armed zone will be identified by sending the bypass
identifier and the zone alarm reporting code after the partial closing reporting code. See the
“Zone Operation” section in the System Manual for more information on force arming.
NO = No partial closing reporting code will be sent when zones are force armed during auto arming.
Telephone Line Monitoring Enabled?
YES = The system tests for telephone line faults. If a fault is detected, the trouble is annunciated on the
keypads. A telephone line trouble is generated when the line voltage drops below 3 volts for more
than 30 seconds.
NO = Does not test for telephone line faults.
Telephone Line Monitoring has Audible Bell Alarm?
YES = If there is a Telephone Line trouble and an area is armed, the bell outputs for the armed area will
be activated, along with the keypad annunciation. The bell outputs are any outputs (Bell, SW Aux
or PGM) programmed for “FIRE AND BURG”, “INV FIRE/ BURG”, “BURG ONLY” and “INV BURG
ONLY”.
NO = If there is a Telephone Line trouble, the panel will annunciate the trouble at the keypad only.
Should a Failure to Communicate sound the Bells?
YES = If an area is armed, the bell outputs for the armed area will sound when the PC6010 fails to
communicate with the central station.
NO = A failure to communicate will not cause the PC6010 to sound the bells.
Enable Ringback?
YES = The Ringback option is enabled. A successful communication of a closing to the central station will
be annunciated by the keypads beeping 5 times. Only the keypads belonging to the area that sent
the communication will beep.
If communications are being sent to more than one telephone number, keypads will sound the
ringback after the event(s) have been successfully communicated to each telephone number.
NO = The Ringback option is disabled.
NOTE: Ringback must be enabled on a commercial burglar alarm system.
COMMS TOGGLESCOMMS TOGGLES
COMMS TOGGLES
(1(1
(1(1
(1
DTMF DIALINGDTMF DIALING
DTMF DIALING
YY
YY
Y
COMMS ENABLEDCOMMS ENABLED
COMMS ENABLED
YY
YY
Y
PC IDPC ID
PC IDPC ID
PC ID
NN
NN
N
PC ON AUTO ARMPC ON AUTO ARM
PC ON AUTO ARM
YY
YY
Y
TLM ENABLEDTLM ENABLED
TLM ENABLED
YY
YY
Y
TLM AUD BELLTLM AUD BELL
TLM AUD BELL
YY
YY
Y
FTC AUD BELLFTC AUD BELL
FTC AUD BELL
NN
NN
N
RINGBACKRINGBACK
RINGBACKRINGBACK
RINGBACK
NN
NN
N

13
PH 1-2 BACKUPPH 1-2 BACKUP
PH 1-2 BACKUP
NN
NN
N
PH 1-3 BACKUPPH 1-3 BACKUP
PH 1-3 BACKUP
NN
NN
N
PH 2-3 BACKUPPH 2-3 BACKUP
PH 2-3 BACKUP
NN
NN
N
SYSTEM AREASYSTEM AREA
SYSTEM AREA
COMMUNICATORCOMMUNICATOR
COMMUNICATOR
COMMS TOGGLESCOMMS TOGGLES
COMMS TOGGLES
SYSTEM AREASYSTEM AREA
SYSTEM AREA
COMMUNICATORCOMMUNICATOR
COMMUNICATOR
COMMS MISCCOMMS MISC
COMMS MISC
Ringback squawk enabled?
YES = Ringback Squawk option is enabled. If both Ringback and Ringback Squawk are enabled, then after
a successful communication of a closing, the Fire/Burg, Inv Fire/Burg, Burg and Invert Burg outputs
for that area will squawk 4 times.
NO = Ringback Squawk option is disabled.
NOTE: Ringback must be enabled for this feature to function.
Periodic Test Transmission?
YES = The panel will send a test transmission to the central station. See “TEST CODE TX” for information
on programming the time of day, and the frequency the code is sent. See “SYSTEM MAINT” for
programming the reporting code.
NO = The panel will not send a test transmission.
European Dialing?
YES = When the communicator is pulse dialing, the contact closure to the telephone line is made in a 67/33
make/break ratio. This is the European and ACA standard method of dialing.
NO = The contact closure to the telephone line is made in a 60/40 make/break ratio. This is the American/
Canadian standard method of dialing.
Dial if No Dial Tone Present?
YES = If the first attempt by the panel to call the central station fails, on every subsequent attempt the
panel will dial regardless of the presence of dial tone.
NO = If a ‘D’ for dial tone search precedes the telephone number, the panel will not dial if a dial tone is
not present. See “PGM TEL NUMBER” for programming the telephone numbers with dial tone
search.
Telephone #2 backs up Telephone #1?
YES = The PC6010 will send the reporting codes to the 2nd telephone number if the 1st telephone
number fails to communicate with the central station after the programmed number of attempts. If
you enable this option, you should disable the dialer directions for the 2nd telephone number.
Otherwise the reporting codes will be sent to the 2nd telephone number, whether the 1st number
failed or not.
NO = Disabled. The 2nd telephone number does NOT back up the 1st telephone number.
Telephone #3 backs up Telephone #1?
YES = The PC6010 will send reporting codes to the 3rd telephone number, if the 1st telephone number
fails to communicate with the central station after the programmed number of attempts. If you
enable this option, you should disable the dialer directions for the 3rd telephone number.
Otherwise the reporting codes will be sent to the 3rd telephone number, whether the 1st number
failed or not. If “PH 1-2 BACKUP” is also enabled, then when 1st telephone number fails the
reporting codes will be sent to both the 2nd and 3rd telephone number.
NO = Disabled. The 3rd telephone number does NOT back up the 1st telephone number.
Telephone #3 backs up Telephone #2?
YES = The PC6010 will send the reporting codes to the 3rd telephone number, if the 2nd telephone
number fails to communicate with the central station after the programmed number of attempts. If
you enable this option, you should disable the dialer directions for the 3rd telephone number.
Otherwise the reporting codes will be sent to the 3rd telephone number, whether the 2nd number
failed or not. If “PH 1-2 BACKUP” is also enabled, then when 1st telephone number fails, the
reporting codes will be sent to the 2nd telephone number. If the 2nd telephone number fails, the
reporting codes will then be sent to the 3rd telephone number.
NO = Disabled. The 3rd telephone number does NOT back up the 2nd telephone number.
Auto SIA?
YES = If the SIA format is selected, the panel can be programmed to automatically generate all zone and
user code numbers, thus eliminating the need to program these items.
If the “Auto SIA” toggle option is enabled, the panel will operate as follows: If an event’s reporting
code is programmed as [00], the panel will not attempt to call the central station. If the reporting
code for an event is programmed as anything from [01] to [FF], the panel will automatically generate
the zone or user code number. See Appendix B for a list of the codes which will be transmitted.
The Communicator Call Direction options can be used to disable the reporting of events such as
openings and closings.
NO = The panel will operate as follows: If an event’s reporting code is programmed as [00] or [FF], the
panel will not attempt to call central station. If the reporting code for an event is programmed as
anything from [01] to [FE], the panel will send the programmed reporting code.
EUROPE DIALEUROPE DIAL
EUROPE DIAL
NN
NN
N
RINGBACK SQUAWKRINGBACK SQUAWK
RINGBACK SQUAWK
NN
NN
N
PERIODIC TX ?PERIODIC TX ?
PERIODIC TX ?
NN
NN
N
DEFAULT DIALDEFAULT DIAL
DEFAULT DIAL
YY
YY
Y
AUTO SIAAUTO SIA
AUTO SIAAUTO SIA
AUTO SIA
NN
NN
N

14
SET CYCLE DAYSSET CYCLE DAYS
SET CYCLE DAYS
(0(0
(0(0
(0
SET 24HR TIMESET 24HR TIME
SET 24HR TIME
(1(1
(1(1
(1
Auto Contact ID?
YES = If the Auto Contact ID option is enabled, the panel will operate as follows: If an event’s reporting
code is programmed as [00], the panel will not attempt to call the central station. If the reporting
code for an event is programmed as anything from [01] to [FF], the panel will automatically generate
the zone or access code number. See Appendix B for a list of the codes which will be transmitted.
The panel will automatically generate all zone and access code numbers, eliminating the need to
program these items.
NO = The panel will operate as follows: If an event’s reporting code is programmed as [00] or [FF], the
panel will not attempt to call central station. If the reporting code for an event is programmed as
anything from [01] to [FE], the panel will send the programmed reporting code.
Communicator Miscellaneous
Program other options relating to the communications of the panel.
Program the number of dialing attempts from 000 to 255 that the panel will make before a Failure To
Communicate (FTC) trouble occurs for telephone number one. The default number of attempts is 010.
NOTE: Do not program this section with 000.
Program the number of dialing attempts from 000 to 255 that the panel will make before a Failure To
Communicate (FTC) trouble occurs for telephone number two. The default number of attempts is 010.
NOTE: Do not program this section with 000.
Program the number of dialing attempts from 000 to 255 that the panel will make before a Failure To
Communicate (FTC) trouble occurs for telephone number three. The default number of attempts is 010.
NOTE: Do not program this section with 000.
Enter the time in minutes, that an AC trouble on the main panel must be present, before the AC trouble
reporting code will be logged or communicated. Valid entries are from 000 to 255. The default setting is
060.
Enter the time in seconds that the panel will delay the communication of a zone alarm. Valid entries are
from 000 to 255. The default setting is 000. If the panel is disarmed within the programmed time, no alarm
communication will be sent. See “TX DELAY?” under zone toggle options to enable the transmission delay
on each zone.
Test Code Transmission
Test Code Transmission. To have the panel send test transmissions, you must program the time of day, the
number of days between test transmissions and the test transmission reporting code. You must also enable
the “PERIODIC TX?” communications toggle option.
Enter the number of days between test code communications. Valid entries are from 001 to 255. The
default setting is 030.
Enter the time of day the panel will send the test code. Program the time in 24-hour format HH:MM. The
default setting is 0000.
AC FAIL TX DELAYAC FAIL TX DELAY
AC FAIL TX DELAY
(3(3
(3(3
(3
MAX. ATTEMPTS 3MAX. ATTEMPTS 3
MAX. ATTEMPTS 3
(2(2
(2(2
(2
ZONE TX DELAYZONE TX DELAY
ZONE TX DELAY
(4(4
(4(4
(4
TEST CODE TXTEST CODE TX
TEST CODE TX
(5(5
(5(5
(5
COMMS MISCCOMMS MISC
COMMS MISC
(2(2
(2(2
(2
MAX. ATTEMPTS 2MAX. ATTEMPTS 2
MAX. ATTEMPTS 2
(1(1
(1(1
(1
MAX. ATTEMPTS 1MAX. ATTEMPTS 1
MAX. ATTEMPTS 1
(0(0
(0(0
(0
AUTO CONTACT IDAUTO CONTACT ID
AUTO CONTACT ID
NN
NN
N
SYSTEM AREASYSTEM AREA
SYSTEM AREA
COMMUNICATORCOMMUNICATOR
COMMUNICATOR
COMMS MISC COMMS MISC
COMMS MISC
TEST CODE TXTEST CODE TX
TEST CODE TX

15
PC6216 16 PC6216 16
PC6216 16 PC6216 16
PC6216 16 O/O/
O/O/
O/PP
PP
P
(3(3
(3(3
(3
PC6108 ZONE EXPPC6108 ZONE EXP
PC6108 ZONE EXP
(2(2
(2(2
(2
PC6204 O/PPC6204 O/P
PC6204 O/P
(4(4
(4(4
(4
PC6820 ACCESSPC6820 ACCESS
PC6820 ACCESS
(5(5
(5(5
(5
Reporting Codes
Reporting codes are 2 digit codes which are sent to the receiver at the central station, along with the area ID
code for each transmission. They identify the type of alarm, and other events to the central station. Once you
have selected which group of reporting codes to program, use the arrow keys to scroll through the
reporting codes. Please see Appendix B for a table of recommended Contact ID reporting codes, and
automatically generated SIA reporting codes.
Enter a 2-digit number for each code you need to program. To disable a reporting code, program it with FF
(default setting). To enter Hex digits, press the [*] key when entering the code, to call up the Hex digit entry
menu, and to “Save and Exit” from the Reporting Codes menu.
For example: to enter AB, press [*][1][*][2]
to enter A2, press [*][1][2]
Alarm Reporting Codes for Zones 001 to 256. Momentary and maintained arm zones will send the
reporting code programmed in this section for a closing. All reporting codes are programmed as [FF] at
default.
Restoral Reporting Codes for Zones 001 to 256. The zone restoral will be sent to the central station when a user
clears the alarm. Momentary and maintained arm zones will send the reporting code programmed in this section
for an opening. All reporting codes are programmed as [FF] at default.
Zone Trouble Reporting codes for zones 001 to 256. The system will send zone trouble reporting codes (if
programmed) when there is a zone trouble on standard fire and auto verifying fire zones, or when a tamper
occurs on other zone types. All reporting codes are programmed as [FF] at default.
Zone Trouble Restoral Reporting codes for zones 001 to 256. The system will send zone trouble reporting
codes (if programmed) when zone troubles are restored on standard fire and auto verifying fire zones, or when
tampers are restored on other zone types. All reporting codes are programmed as [FF] at default.
Program reporting codes for tamper alarms on modules.
There are 64 keypad tamper alarm reporting codes, one for each keypad that can be enrolled on the
system.
This is the PC6400 tamper alarm reporting code.
There are 30 reporting codes for tamper alarms on PC6108 zone expansion modules. The maximum
number of expansion modules you will use is 30. (30 x 8 zones = 240 zones + 16 zones on the main panel
= 256 zones)
There are 9 module tamper alarm reporting codes, one for each PC6216 module that can be enrolled onto
the system.
There are 16 module tamper alarm reporting codes, one for each PC6204 module that can be enrolled onto
the system.
There are 16 module tamper alarm reporting codes sections, one for each PC6820 Access Control module
that can be enrolled on the system.
This is the PC6442 tamper alarm reporting code.
This is the PC6443 tamper alarm reporting code.
ZONE RESTOREZONE RESTORE
ZONE RESTORE
(01(01
(01(01
(01
ZONE TROUBLEZONE TROUBLE
ZONE TROUBLE
(02(02
(02(02
(02
ZONE TROB.RESTZONE TROB.REST
ZONE TROB.REST
(03(03
(03(03
(03
MOD TAMP ALARMMOD TAMP ALARM
MOD TAMP ALARM
(04(04
(04(04
(04
PC6501 KEYPADSPC6501 KEYPADS
PC6501 KEYPADS
(0(0
(0(0
(0
PC6400 RS-232PC6400 RS-232
PC6400 RS-232
(1(1
(1(1
(1
REPORTING CODESREPORTING CODES
REPORTING CODES
(3(3
(3(3
(3
ZONE ALARMZONE ALARM
ZONE ALARM
(00(00
(00(00
(00
SYSTEM AREASYSTEM AREA
SYSTEM AREA
COMMUNICATORCOMMUNICATOR
COMMUNICATOR
REPORTING CODESREPORTING CODES
REPORTING CODES
PC6442 APUPC6442 APU
PC6442 APU
(6(6
(6(6
(6
PC6443 ODSPC6443 ODS
PC6443 ODS
(7(7
(7(7
(7

16
PC6216 16 PC6216 16
PC6216 16 PC6216 16
PC6216 16 O/O/
O/O/
O/PP
PP
P
(3(3
(3(3
(3
PC6108 ZONE EXPPC6108 ZONE EXP
PC6108 ZONE EXP
(2(2
(2(2
(2
PC6204 O/PPC6204 O/P
PC6204 O/P
(4(4
(4(4
(4
PC6820 ACCESSPC6820 ACCESS
PC6820 ACCESS
(5(5
(5(5
(5
Reporting Codes for the restoral of module tampers.
There are 64 keypad tamper restoral reporting codes, one for each keypad that can be enrolled onto
the system.
This is the PC6400 tamper restoral reporting code.
There are 30 reporting codes for tamper restorals on PC6108 zone expansion modules. The maximum
number of expansion modules you will use is 30.
There are 9 tamper restoral reporting codes, one for each PC6216 module that can be enrolled onto the
system.
There are 16 module tamper restoral reporting codes, one for each PC6204 module that can be enrolled
onto the system.
There are 16 module tamper alarm restoral reporting codes sections, one for each PC6820 Access Control
module that can be enrolled on the system.
This is the PC6442 tamper restoral reporting code.
This is the PC6443 tamper restoral reporting code.
Reporting Codes for Closings.
Reporting codes for users 0001-0128. See “Miscellaneous Closings” for additional users.
Miscellaneous Reporting Codes for Closings.
Closing 129 - 1000 - This reporting code will be sent when any user code from 0129-1000 is used to
arm an area. In order to identify the user which armed the area the panel will first perform a “User
Log” for the user that armed the area and then log/transmit the Closing 129-1000 reporting code.
If an area auto-arms, and some zones were open, the system will force arm the open zones. The
system will send the partial closing reporting code to the central station, along with the alarm
reporting codes of the zones that are open. The partial closing reporting code will also be transmitted
if zones were manually bypassed.
If automatic arming is cancelled, this reporting code will be sent.
When the system auto-arms, the panel will send the auto-arm reporting code to the central station.
The system sends this reporting code when area(s) are closed by the APS software.
The system sends this reporting code when area(s) are closed by the ODS software.
CLOSINGSCLOSINGS
CLOSINGSCLOSINGS
CLOSINGS
(06(06
(06(06
(06
USERS 1-128USERS 1-128
USERS 1-128
MISC CLOSINGSMISC CLOSINGS
MISC CLOSINGS
(07(07
(07(07
(07
CLOSING 129-1000CLOSING 129-1000
CLOSING 129-1000
PARTIAL CLOSINGPARTIAL CLOSING
PARTIAL CLOSING
AUTOARM ABORTAUTOARM ABORT
AUTOARM ABORT
AUTOARM CLOSINGAUTOARM CLOSING
AUTOARM CLOSING
6442 APS CLOSING6442 APS CLOSING
6442 APS CLOSING
MOD TAMP RESTOREMOD TAMP RESTORE
MOD TAMP RESTORE
(05(05
(05(05
(05
PC6501 KEYPADSPC6501 KEYPADS
PC6501 KEYPADS
(0(0
(0(0
(0
PC6400 RS-232PC6400 RS-232
PC6400 RS-232
(1(1
(1(1
(1
PC6442 APUPC6442 APU
PC6442 APU
(6(6
(6(6
(6
PC6443 ODSPC6443 ODS
PC6443 ODS
(7(7
(7(7
(7
6443 ODS CLOSING6443 ODS CLOSING
6443 ODS CLOSING

17
SYSTEM AREASYSTEM AREA
SYSTEM AREA
COMMUNICATORCOMMUNICATOR
COMMUNICATOR
REPORTING CODESREPORTING CODES
REPORTING CODES
If a user enters too many incorrect access codes (see “Total Bad Codes” under “Keypad Lockout
Options” for programming the number of incorrect code entries), the keypad will be locked out,
preventing anyone from attempting to enter any more access codes. When keypad lockout occurs, the
keypad lockout reporting code is sent to the central station.
Reporting Codes for Openings.
Reporting codes for users 0001-0128. See “Miscellaneous Openings” for additional users.
Miscellaneous Reporting Codes for Openings.
Opening 129 - 1000 - This reporting code will be sent when any user code from 0129-1000 is used to
disarm an area. In order to identify the user which disarmed the area the panel will first perform a
“User Log” for the user, and then log/transmit the Opening 129-1000 reporting code.
Miscellaneous Reporting Codes for Openings.
Opening After Alarms Reporting Code -The system sends this code to the central station when the
system is disarmed after there was an alarm.
Open Automatic - This reporting code will be sent any time an area on the system is autodisarmed.
The system sends this reporting code when area(s) are opened by the APS software.
The system sends this reporting code when area(s) are opened by the ODS software.
System Maintenance Reporting Codes. There are 27 reporting codes for events relating to the operation and
maintenance of the system. The reporting codes are:
•Battery Trouble and Battery Restoral - If the battery voltage on the PC6010 main panel is weak,
disconnected or if the battery fuse fails, a battery trouble occurs, and the battery trouble reporting code is
sent. When the battery voltage and fuse are restored, the battery restoral code is sent. See the “Viewing
Fault Conditions” section in the System Manual.
•AC Line Trouble and AC Line Restoral - If the incoming AC voltage to the AC terminals fails, an AC
trouble occurs and the AC trouble reporting code is sent to the central station after the AC Fail Tx Delay
has elapsed (see “AC FAIL TX DELAY”). When the incoming AC is restored, the AC restoral reporting code
is sent to the central station. See the “Viewing Fault Conditions” section in the System Manual.
•Main Bell Trouble and Main Bell Restoral - If a bell trouble occurs, either from the bell fuse failure or the
open bell terminals, the Main Bell Trouble reporting code will be sent to the central station. When the
trouble condition is restored, the Main Bell Restoral reporting code will be transmitted.
•Main Aux Trouble and Main Aux Restoral - If an auxiliary voltage supply trouble occurs, the Main Aux
Trouble reporting code is transmitted, and when the auxiliary voltage supply is restored, the Main Aux
Restoral code is transmitted.
•Ebus Low Power and Ebus Low Power Restoral - When a module on the system has low power, the
Ebus Low Pwr reporting code will be transmitted. When the power is fully restored, the Ebus Restoral
reporting code will be sent.
•Ebus Comm Fault and Ebus Comm Restoral - When the system loses communication with a module, the
Ebus Trouble reporting code will be transmitted, and when communications resume the Ebus Restoral
reporting code will be sent.
•Backbone Trouble and Backbone Restoral - When the system loses communication with a backbone
module, the Backbone Trouble reporting code will be transmitted, and when communications resume the
Backbone Restoral reporting code will be sent.
•TLM Failure - A TLM reporting code will be sent over the backbone when a TLM trouble occurs.
OPEN AFTER ALARMOPEN AFTER ALARM
OPEN AFTER ALARM
OPEN AUTOMATICOPEN AUTOMATIC
OPEN AUTOMATIC
6442 APS OPENING6442 APS OPENING
6442 APS OPENING
SYSTEM MAINTSYSTEM MAINT
SYSTEM MAINT
(10(10
(10(10
(10
OPENINGSOPENINGS
OPENINGSOPENINGS
OPENINGS
(08(08
(08(08
(08
USERS 1-128USERS 1-128
USERS 1-128
MISC OPENINGSMISC OPENINGS
MISC OPENINGS
(09(09
(09(09
(09
OPENING 129-1000OPENING 129-1000
OPENING 129-1000
KEYPAD LOCKOUTKEYPAD LOCKOUT
KEYPAD LOCKOUT
6443 ODS OPENING6443 ODS OPENING
6443 ODS OPENING

18
•TLM Restoral - If there is a telephone line trouble, the PC6010 will not be able to communicate with the
central station until the telephone line is restored. When the line is restored, the system sends TLM
Restoral reporting code.
•FTC Restoral - If a failure to communicate trouble occurs, where the PC6010 could not get through to the
central station, the next time the panel attempts to communicate and is successful, it will also transmit the
FTC restoral reporting code.
•Periodic Test - This is the reporting code that is sent to the central station to test communications.
•Buf Near Full - This reporting code is sent only if a printer is not being used, or the printer is off line for
2500 events.
•User System Test - When the user does a communications test, the User System Test reporting code is
sent to the central station to test communications.
•Walk Test Enable and Walk Test Disable - When Walk Test mode is entered the system sends the walk
test enable code. When the walk test is ended, the system sends the walk test disable code.
•DLS Lead In and DLS Lead Out - If the DLS Lead In reporting code is to be used the DLS callback feature
must be enabled. (See “DLS callback” under “DLS Toggles”).
When a computer calls the PC6010 panel, after connection is made, both the panel and the computer will
hang up the telephone line. The panel will then transmit the DLS Lead In reporting code to the central
station. The panel will then call the computer and begin downloading. When the computer is finished
downloading to the panel, they will both hang up the telephone line, and the PC6010 will transmit the
DLS Lead Out reporting code to the central station.
NOTE: DLS Lead In/Out reporting code is only sent for DLS Call Back.
•Ins Lead In and Ins Lead Out - The Installer's Lead In reporting code is sent to the central station when an
installer enters the [*][8] installer’s programming mode. The Lead Out code is sent when the installer leaves
[*][8] installer’s programming.
•Links Test - If this code is programmed and Links Test Transmission is enabled (see Links Toggles), this
reporting code will be sent via the Links unit. This code will never be sent through the regular telephone
line.
The PC6204 module maintenance reporting code section has reporting codes for sixteen modules, with 6
codes for each module, for a total of 96 reporting codes. The 6 codes for each module are Battery Trouble,
AC Line Trouble, Aux Supply Trouble, Battery Restoral, AC Line Restoral and Aux Supply Restoral. These
reporting codes are similar to the system maintenance reporting codes for the PC6010 main panel.
The PC6820 module maintenance reporting code section contains reporting codes for sixteen modules,
with 6 codes for each module, in total 96 reporting codes. The reporting codes for each module are: Battery
Trouble, AC Line Trouble, AUX Supply Trouble, Battery Trouble Restore, AC Line Restore, and AUX Suuply
Restore. The AC and DC trouble reporting codes will be transmitted when those trouble conditions occur.
The PC6820 trouble will be transmitted for any of the following conditions - Lock Device Failure, Aux Supply
Trouble, Reader supply trouble. These events are individually logged to the event buffer but this reporting
code will be sent to identify that one of these trouble conditions exists for the module. In order for the
specific problem to be located the event buffer should be uploaded or checked with the on-site printer/
viewable keypad buffer.
The PC6400 module maintenance reporting code section has 2 reporting codes, RS-232 Trouble and RS-
232 Restoral. If there is a problem that the RS-232 cannot transmit, the RS-232 Trouble reporting code is
sent to the central station. When the problem is cleared, and the RS-232 has successfully transmitted, the
RS-232 restoral is sent to the central station.
The PC6442 module maintenance reporting code section has 8 reporting codes for the PC6442 module.
The 8 codes are Battery Trouble, AC Line Trouble, Aux Supply Trouble, Battery Restoral, AC Line Restoral,
Aux Supply Restoral, RS232 Communications Trouble, and RS232 Communications Restoral. These
reporting codes are similar to the system maintenance reporting codes for the PC6010 main panel.
The PC6443 module maintenance reporting code section has 8 reporting codes for the PC6443 module.
The 8 codes are Battery Trouble, AC Line Trouble, Aux Supply Trouble, Battery Restoral, AC Line Restoral,
Aux Supply Restoral, RS232 Communications Trouble, and RS232 Communications Restoral. These
reporting codes are similar to the system maintenance reporting codes for the PC6010 main panel.
6400 MOD MAINT6400 MOD MAINT
6400 MOD MAINT
(13(13
(13(13
(13
6204 MOD MAINT6204 MOD MAINT
6204 MOD MAINT
(11(11
(11(11
(11
6820 MOD MAINT6820 MOD MAINT
6820 MOD MAINT
(12(12
(12(12
(12
6442 MOD MAINT6442 MOD MAINT
6442 MOD MAINT
(14(14
(14(14
(14
6443 MOD MAINT6443 MOD MAINT
6443 MOD MAINT
(15(15
(15(15
(15
Other manuals for Maxsys PC6010
4
Table of contents
Other DSC Control Panel manuals

DSC
DSC WP8010 Assembly instructions

DSC
DSC CLASSIC PC1555 User manual

DSC
DSC PowerSeries PC1616 User manual

DSC
DSC PowerSeries Neo User manual

DSC
DSC PowerSeries PC1616 User manual

DSC
DSC WP8033 Assembly instructions

DSC
DSC PC2550 User manual

DSC
DSC Power Series PC1616 User manual

DSC
DSC Power Series User manual

DSC
DSC PowerSeries PC1616 User manual