manuals.online logo
Brands
  1. Home
  2. •
  3. Brands
  4. •
  5. DT Research
  6. •
  7. Tablet
  8. •
  9. DT Research DT390 Assembly instructions

DT Research DT390 Assembly instructions

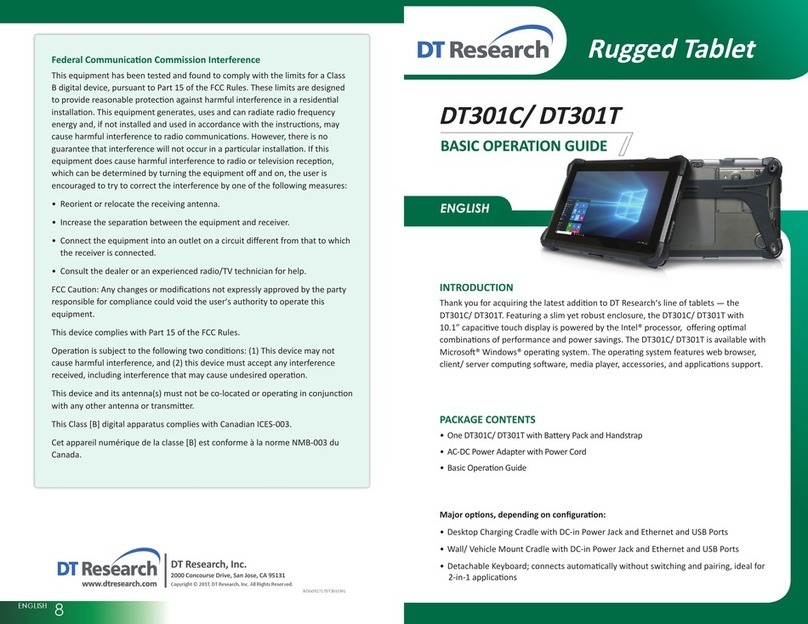
DT390/ DT390c
ENGLISH
Mobile POS Tablet
BASIC OPERATION GUIDE
DT390/ DT390c
ENGLISH 8
signage dtri com
DT Research, Inc.
2000 Concourse Drive, San Jose, CA 95131 hp://www.dtresearch.com
Copyright © 2012, DT Research, Inc. All Rights Reserved.
DT Research is a registered trademark of DT Research, Inc.
INTRODUCTION
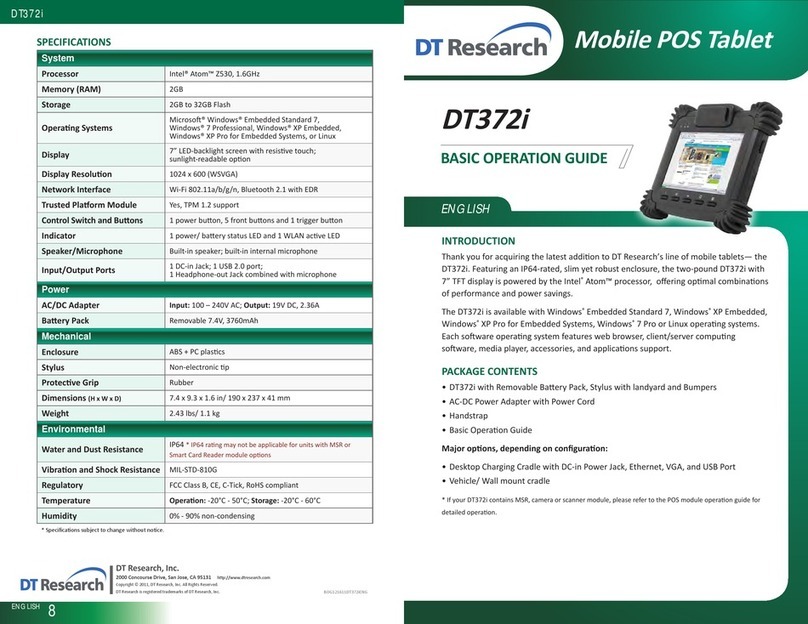
Thank you for acquiring the latest addion to DT Research’s line of mobile tablets—the
DT390/ DT390c. Featuring an IP64-rated, slim yet robust enclosure, the two-pound
DT390/ DT390c with 8.9”TFT display is powered by the Intel®Atom™ processor, offering
opmal combinaons of performance and power savings. An external baery expansion
opon provides approximately 3-4 hours of addional baery operaon for up to eight
hours of mobile usage.
The DT390/ DT390c is available with Windows®Embedded Standard 7, Windows®XP
Embedded, Windows®XP Pro for Embedded Systems, Windows®7 Pro or Linux operang
systems. Each soware operang system features web browser, client/server compung
soware, media player, accessories, and applicaons support.
PACKAGE CONTENTS
DT390/ DT390c with Internal Baery Pack, Stylus and Bumpers•
AC-DC Power Adapter with Power Cord•
Basic Operaon Guide•
Major opons, depending on configuraon:
Desktop Charging Cradle with DC-in Power Jack and Ethernet/ USB Ports•
Handstrap•
External External Baery Pack and Baery Charger Kit•
Vehicle/ Wall Mount Cradle•
5-System Gang Charger•
* If your DT390/ DT390c contains MSR, camera or scanner module, please refer to the POS module operaon
guide for detailed operaon.
BOG111312DT390/ DT390cENG
SPECIFICATIONS
System
Processor Intel® Atom™ Z530, 1.6GHz
Memory (RAM) 2GB DDR2 533MHZ
Storage 8GB to 64GB Flash
Operang Systems
Microso® Windows® Embedded Standard 7,
Windows® 7 Professional, Windows® XP Embedded,
Windows® XP Pro for Embedded Systems, or Linux
Display
8.9”LED-backlight screen with resisve touch;
DT390: outdoor-viewable (opon);
DT390c: sunlight-readable (standard)
Display Resoluon 1024 x 600 (WSVGA)
Network Interface Wi-Fi 802.11a/b/g/n, Bluetooth 2.1 with EDR, 3G (Oponal)
Control Switch and Buons 1 power buon, 7 front buons and 1 trigger buon
Indicator 1 power/ baery status LED and 1 WLAN acve LED
Speaker/Microphone Built-in speaker; built-in internal microphone
Input/Output Ports 1 DC-in Jack; 1 USB 2.0 port;
1 Headphone-out Jack combined with microphone
Power
AC/DC Adapter Input: 100 – 240V AC; Output: 19V DC, 2.36A
Baery Pack Internal 7.4V, 3760mAh/
Oponal: External 7.4V,3760mAh/ 7.2V,3900mAh
Mechanical
Enclosure ABS + PC plascs
Stylus Non-electronic p
Protecve Bumpers Rubber bumpers on each corner for handling protecon
Dimensions (H x W x D) 7.7 x 10 x 1.25 in/ 196 x 256 x 32 mm
Weight 2.43 lbs/ 1.1 kg
Environmental
Water and Dust Resistance IP64 * IP64 rang may not be applicable for units with module
opons
Vibraon and Shock Resistance MIL-STD-810G
Regulatory FCC Class B, CE, C-Tick, RoHS compliant
Temperature Operaon: 0°C - 40°C; Storage: -20°C - 60°C
Humidity 0% - 90% non-condensing
* Specificaons subject to change without noce.
DT390/ DT390c
ENGLISH 23ENGLISH
Buon Funcons (with Windows XP Operang System)
BUTTON ACTION
Programmable
Programmable, launch so(on-screen) keyboard (default)
Launch SAS (Secure Aenon Sequence)
Generate Ctrl+Alt+Del keys to invoke the security windows defined under Windows XP
Programmable,
Change display orientaon (portrait/ landscape) (default)
Programmable, system ulity menu (default)
Programmable,
As scanner trigger when equipped with the scanner module
Power on,
Push/release typically enters Standby mode, or Push/release exits Standby mode or
restarts device (soware dependent)
Push and hold (over 4 seconds) invokes hardware shutdown
The DT390/ DT390c (with Windows XP Operang System)
Baery/Power LED
Wireless LEDMicrophone
Stylus
Buon ManagementWireless Network Sengs
Calibraon
Power/Baery LED Status:
Blue indicates the baery is 25% to 100% charged•
Blinking blue indicates the baery is charging•
Orange indicates that the baery is between 11% to 25%•
Blinking Orange indicates that the baery is below 10%•
Precauons
Always exercise care when operang and handling the DT390/ DT390c.
•
Do NOT apply excessive pressure to the display screen.
•
We recommend using the Stylus provided to keep the screen clean.
•
Avoid prolonged exposure of the display panel to any strong heat source. Wherever
•
possible, the DT390/ DT390c should face away from direct light to reduce glare.
If the AC-DC power adapter is used to recharge or power the device, do NOT use any
•
AC-DC adapter other than the one provided with the device or acquired from the
manufacturer or its partners.
In the unlikely event that smoke, abnormal noise, or strange odor is present,
•
immediately power offthe DT390/ DT390c and disconnect all power sources. Report
the problem to your device provider immediately.
Never aempt to disassemble the DT390/ DT390c, as this will void the warranty.
•
THE DT390/ DT390c
Basic Features
The DT390/ DT390c wireless tablet integrates a bright and responsive touch display, 1
USB port, and embedded networking elements such as wireless LAN or oponal 3G. The
primary device is complemented by a suite of accessories, including baery expansion,
docking cradles, and carrying cases, for a comprehensive user experience.
A DT390/ DT390c typically integrates an 802.11a/b/g/n wireless LAN (WLAN) adapter
that may connect to other wireless devices or access points. If your DT390/ DT390c does
not come with such a network adapter, please consult your device provider to establish
the desired network connecvity.
1
8
9
2 3
4
5
6
8
9
7
Input/ Output Ports
Headphone Jack
USB Port
DC Power Input
A
C
B
A
B
C
1234567
Baery and Power Meter
DT390/ DT390c
ENGLISH 45ENGLISH
OPERATION
Internal Baery
Warning!
The Internal baery pack should only be replaced by an authorized DT Research service
representave. Please contact your product and/or service provider for internal baery
replacement service.
Powering ON and OFF
To acvate the DT390/ DT390c, push and quickly release the Power Buon. The display
will come on in a few seconds. To put the DT390/ DT390c in Standby mode, push and
quickly release the Power Buon. To turn the DT390/ DT390c offfor extended storage,
power offthe device safely using any soware funcon that “shuts down computer”
provided in the soware operang system.
NOTE: The baery packs shipped with your device may be low in power—please use the
AC-DC adapter with the DT390/ DT390c when seng up the device for the first me to
fully charge the internal baery pack. You may charge the external baery pack with it
aached to the DT390/ DT390c, or with the oponal external baery charger kit.
NOTE: When the baery pack(s) is (are) charging, the blue-colored Baery LED should
blink slowly. If plugging in the AC-DC adapter does not trigger this blinking acvity
and the LED stays dark, the baery pack(s) may have been drained substanally. Try
unplugging/ replugging the AC-DC adapter to the DT390/ DT390c a few mes to acvate
the charging process.
NOTE: To conserve power, use (push and quick release) the Power Buon to put the
device in “Standby”mode while not in use. Pushing briefly on the same buon will wake
up the system within seconds.
NOTE: Avoid using the Power Buon (“hold 4+ seconds”feature) to turn offthe
device—this form of hardware shutdown is intended to be a means of recovery from
device lockups, and not as normal operaon.
Start Up
If the power up (from Standby or otherwise) is successful, the appropriate interface will
be displayed aer a launch sequence of several seconds. The wireless LAN connecon
may take 10-15 seconds to be established.
Configuring the DT390/ DT390c
The device may be configured using the ulies and methods dictated by the soware
operang system. The DT390/ DT390c should be configurable for various properes such
as user profiles, network features, and several system elements.
Calibraon
The touch display for the DT390/ DT390c is calibrated before shipping. In the event that
the calibraon has been modified or is unsasfactory, the respecve calibraon rounes
(e.g., PenMount (PM) for Windows XP) to calibrate the touch interface may be used.
Such applicaons are typically executed through touch input via Stylus or through mouse
click via a USB mouse.
Wireless Networking
Wireless LAN
The DT390/ DT390c is oen delivered with an embedded (user-inaccessible) 802.11a/b/
g/n WLAN adapter equipped with a hidden custom antenna.
T
•hrough the support of typical WLAN adapters, the DT390/ DT390c should be able
to detect all 802.11 access points in the vicinity for you to select the access point of
your choice for connecon.
T
•he SSID and WEP/WPA/WPA2 (if enabled) parameters on the DT390/ DT390c and
the access points have to match. The SSID is case-sensive and it is recommended
that you enable WEP/WPA/WPA2 encrypon (or advanced alternaves) for secure
access.
W
•hen WEP/WPA/WPA2 is enabled, you may need to consult your network admin-
istrator or your networking equipment literature to properly configure associated
sengs such as Authencaon mode, etc.
R
•efer to the access point operang manuals for seng up the 802.11 access points.
!
DT390/ DT390c
ENGLISH 67ENGLISH
Buon Management
Where supported by soware, many of the hard buons on the DT390/ DT390c are
programmable to perform a funcon of the user’s choice. The excepon is the Power
Buon and the SAS Buon. To acvate the buon re-assignment applicaon, invoke the
Buon Manager applicaon, e.g., in Windows XP Embedded .
Brightness Control
Where supported by device firmware and soware, a hard buon may be engaged to
manipulate the display brightness. Press the System Menu buon (Buon 7) on the front
of the DT390/ DT390c. The System screen will display a Brightness control secon with
up and down arrows that can be acvated with the stylus.
Baery and Power Management
The DT390/ DT390c is equipped with an internal 3760mAh Li-Ion baery pack that is
capable of supporng approximately 3 - 4 hours of connuous operaon. With the
internal baery and an external baery pack that clips (hot-pluggable) onto the back
of the device, the maximum period of connuous operaon will be approximately 6 - 8
hours. The period between baery recharges can be significantly lengthened by pung
the device into Standby mode through the Power Buon (see Buons Funcon Table)
whenever the device is not in use. Depending on the operang soware, the DT390/
DT390c may also be configured to enter various power-saving modes via the Power
Buon or through med entry.
Desktop Cradle
The DT390/ DT390c is complemented by an oponal Desktop Cradle for support, pass-
through charging, and connecon to a range of USB peripherals, including keyboard and
mouse. The Cradle offers the following interfaces: a DC-in port for the AC-DC adapter, an
Ethernet port, and USB ports. Always seat the DT390/ DT390c securely onto the cradle.
The cradle must be powered by the AC-DC adapter for the Ethernet and USB ports to
funcon. The baery packs on the DT390/ DT390c may be recharged by connecng the
AC-DC adapter directly to the DC-in port on the DT390/ DT390c or through the DC-in
port on the Desktop Cradle while the DT390/ DT390c is docked to the Cradle.
USING THE DT390/ DT390c
Memory & Storage configuraon
The DT390/ DT390c is available with 2GB memory configuraon. Storage opons
currently range from: 2GB to 32GB flash memory or 32GB to 64GB SSD.
Peripherals Support
Through its USB ports, the DT390/ DT390c supports a wide range of USB-based
peripherals. These peripherals are applicable for soware installaon, applicaons
storage, data storage, and system soware recovery and updates. The DT390/ DT390c is
also compable with custom mountable cradle opons. These securable and mountable
cradles provide an interface to VESA mounts and arms, and to ports that may include
USB, Ethernet and pass-through power.

This manual suits for next models

1

Other DT Research Tablet manuals

DT Research DT315CR Assembly instructions

DT Research

DT Research DT315CR Assembly instructions

DT Research DT361DM Assembly instructions

DT Research

DT Research DT361DM Assembly instructions

DT Research DT301X-TR Assembly instructions

DT Research

DT Research DT301X-TR Assembly instructions

DT Research 301Y/MD Assembly instructions

DT Research

DT Research 301Y/MD Assembly instructions

DT Research DT311YR Assembly instructions

DT Research

DT Research DT311YR Assembly instructions

DT Research DT307SC Assembly instructions

DT Research

DT Research DT307SC Assembly instructions

DT Research DT380CR Assembly instructions

DT Research

DT Research DT380CR Assembly instructions

DT Research DT363GL Assembly instructions

DT Research

DT Research DT363GL Assembly instructions

DT Research DT395 Assembly instructions

DT Research

DT Research DT395 Assembly instructions

DT Research 590SC Assembly instructions

DT Research

DT Research 590SC Assembly instructions

DT Research DT318CR Assembly instructions

DT Research

DT Research DT318CR Assembly instructions

DT Research DT372 Assembly instructions

DT Research

DT Research DT372 Assembly instructions

DT Research DT390i Assembly instructions

DT Research

DT Research DT390i Assembly instructions

DT Research DT395BT Assembly instructions

DT Research

DT Research DT395BT Assembly instructions

DT Research DT372i Assembly instructions

DT Research

DT Research DT372i Assembly instructions

DT Research DT313SC-MD Assembly instructions

DT Research

DT Research DT313SC-MD Assembly instructions

DT Research DT301Q Assembly instructions

DT Research

DT Research DT301Q Assembly instructions

DT Research DT318CR Assembly instructions

DT Research

DT Research DT318CR Assembly instructions

DT Research 507T Assembly instructions

DT Research

DT Research 507T Assembly instructions

DT Research DT310CR Assembly instructions

DT Research

DT Research DT310CR Assembly instructions

DT Research DT313H Assembly instructions

DT Research

DT Research DT313H Assembly instructions

DT Research 301MD Assembly instructions

DT Research

DT Research 301MD Assembly instructions

DT Research 502T Assembly instructions

DT Research

DT Research 502T Assembly instructions

DT Research DT365 Assembly instructions

DT Research

DT Research DT365 Assembly instructions

Popular Tablet manuals by other brands

Huawei MatePad Pro user manual

Huawei

Huawei MatePad Pro user manual

Pepperl+Fuchs Ecom Tab-Ex 03 DZ1 operating instructions

Pepperl+Fuchs

Pepperl+Fuchs Ecom Tab-Ex 03 DZ1 operating instructions

Monoprice 10593 user manual

Monoprice

Monoprice 10593 user manual

Venturer Voyager 7 user manual

Venturer

Venturer Voyager 7 user manual

Trust Flex Design 16937 user manual

Trust

Trust Flex Design 16937 user manual

Venturer CT9273W26 user manual

Venturer

Venturer CT9273W26 user manual

Aaeon RTC-1000A1 manual

Aaeon

Aaeon RTC-1000A1 manual

Emdoor EM-I10J user manual

Emdoor

Emdoor EM-I10J user manual

Huawei MatePad 11 quick start guide

Huawei

Huawei MatePad 11 quick start guide

Manta DUO POWER MID713 user manual

Manta

Manta DUO POWER MID713 user manual

Kinesia ONE Setup guide

Kinesia

Kinesia ONE Setup guide

Prestigio MultiPad 4 Ultra Quad 8.0 3G quick guide

Prestigio

Prestigio MultiPad 4 Ultra Quad 8.0 3G quick guide

Samsung NP-Q1U - Q1U XP - A110 800 MHz Getting started guide

Samsung

Samsung NP-Q1U - Q1U XP - A110 800 MHz Getting started guide

Sharp WX01SH Operation user's manual

Sharp

Sharp WX01SH Operation user's manual

LENCO TAB-705 user manual

LENCO

LENCO TAB-705 user manual

RHINO T100 quick start guide

RHINO

RHINO T100 quick start guide

Samsung GALAXY TAB user guide

Samsung

Samsung GALAXY TAB user guide

ViewSonic VPAD10 VS13790 user guide

ViewSonic

ViewSonic VPAD10 VS13790 user guide

manuals.online logo
manuals.online logoBrands
  • About & Mission
  • Contact us
  • Privacy Policy
  • Terms and Conditions

Copyright 2025 Manuals.Online. All Rights Reserved.