manuals.online logo
Brands
  1. Home
  2. •
  3. Brands
  4. •
  5. DT Research
  6. •
  7. Tablet
  8. •
  9. DT Research DT303CI Assembly instructions

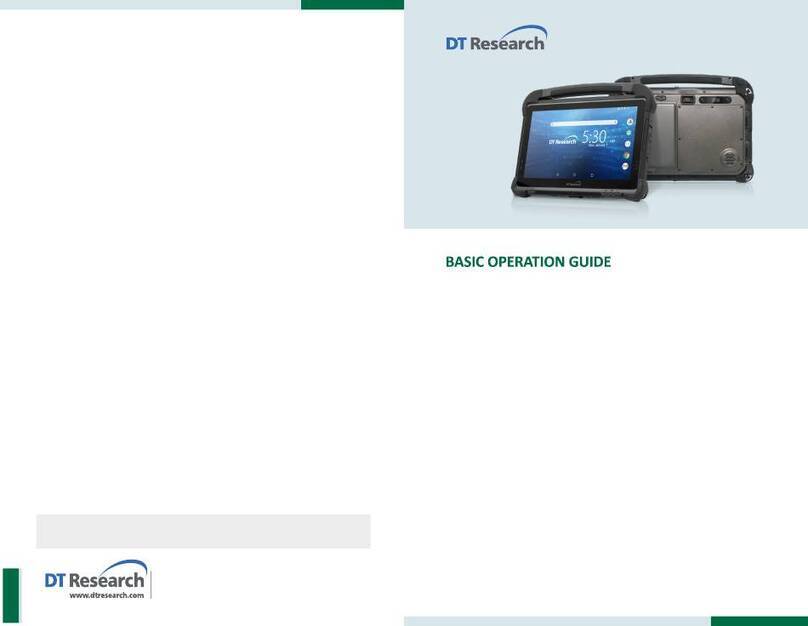
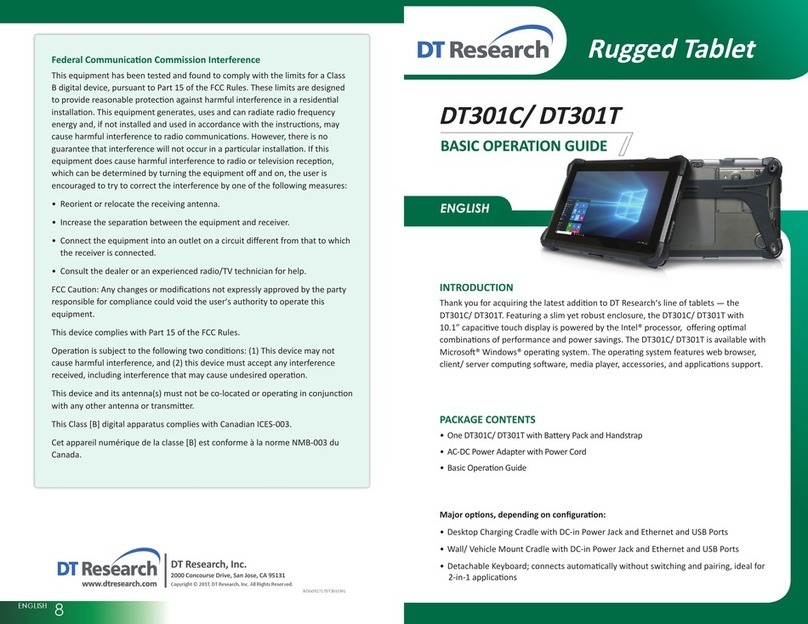
DT Research DT303CI Assembly instructions

Rugged Tablet
DT Research, Inc.
2000 Concourse Drive, San Jose, CA 95131
Copyright © 2022, DT Research, Inc. All Rights Reserved. BOG092622 DT303CI ENG
INTRODUCTION
Thank you for acquiring the DT303CI Rugged Tablet. Featuring a slim yet robust
enclosure, the DT303CI with 10.1” touchscreen is powered a Qualcomm® 8-core
processor, oering opmal combinaon of performance and power savings.
The DT303CI is available with Android operang system and features streamline
operaons for improved producvity, data accuracy, and other related services.
PACKAGE CONTENTS
• One DT303CI with a Handstrap
• AC-DC Power Adapter with Power Cord
• Basic Operaon Guide
* If your DT303CI contains camera or barcode scanner, please refer to the Tablet
Modules Basic Operaon Guide for detailed operaon.
DT303CI
2
Button Functions
BUTTON ACTION
Power Buon
Programmable Buon
Input/Output Ports
DC-In Jack
USB 3.0 Port
Docking Port
Barcode Scanner (Oponal)
Back Camera (Oponal)
Flash LED
NFC/RFID Reader (Oponal)
1
2
A
B
C
D
F
G
E
Baery/Power LED
2
1
A
B
3
PRECAUTIONS
• Always exercise care when operang and handling the DT303CI.
• Do NOT apply excessive pressure to the display screen.
• We recommend using the Digital Pen (oponal) to keep the screen clean.
• Avoid prolonged exposure of the display panel to any strong heat source.
Wherever possible, the DT303CI should face away from direct light to reduce
glare.
• If the AC-DC power adapter is used to recharge or power the tablet, do NOT use
any AC-DC adapter other than the one provided or acquired from the manufac-
turer or its partners.
• In the unlikely event that smoke, abnormal noise, or strange odor is present,
immediately power o the DT303CI and disconnect all power sources. Report the
problem to your device provider immediately.
• Never aempt to disassemble the DT303CI, as this will void the warranty.
BASIC FEATURES
The DT303CI rugged tablet integrates a bright display, USB ports, and embedded
networking elements such as wireless LAN or oponal 4G.
A DT303CI typically integrates an 802.11ac wireless LAN (WLAN) adapter that may
connect to other wireless devices or access points. If your DT303CI does not come
with such a network adapter, please consult your device provider to establish the
desired network connecvity.
NOTE:
To obtain protecon consistent with any IP rang for the device, the I/O (audio,
power, USB, card reader, etc.) port doors must be closed. If the IP protecon is
compromised by mishandling or misuse, such as by leaving port doors open or
improperly closed, any resulng product damage will not be covered under any
DT Research warranty.
D E F G
C
OPERATION
Powering ON and OFF
To acvate the DT303CI, push and quickly release the Power Buon. The display will
come on in a few seconds. To put the DT303CI in Standby mode, push and quickly
release the Power Buon. To turn the DT303CI o for extended storage, power o
safely using any soware funcon that “shuts down computer” provided in the
soware operang system.
NOTE:
The baery pack shipped with your tablet may be low in power—please use
the AC-DC adapter with the DT303CI when seng up for the rst me to fully
charge the baery pack, or use the oponal baery charger kit.
NOTE:
When the baery pack is charging, the blue-colored Baery LED should blink
slowly. If plugging in the AC-DC adapter does not trigger this blinking acvity
and the LED stays dark, the baery pack(s) may have been drained substanally.
Try unplugging/ replugging the AC-DC adapter to the DT303CI a few mes to
acvate the charging process.
NOTE:
To conserve power, use (push and quick release) the Power Buon to put the
tablet in “Standby” mode while not in use. Pushing briey on the same buon
will wake up the system within seconds.
NOTE:
For DT303CI, avoid using the Power Buon (“hold 9+ seconds” feature) to turn
o the tablet—this form of hardware shutdown is intended to be a means of
recovery from lockups, and not as normal operaon.
4
Start Up
If the power up (from Standby mode or otherwise) is successful, the appropriate
interface will be displayed aer a launch sequence of several seconds. The wireless
LAN connecon may take 10-15 seconds to be established.
Configuring the Mobile Tablet
The DT303CI may be congured using the ulies and methods dictated by
the soware operang system. The DT303CI should be congurable for various
properes such as user proles, network features, and several system elements.
Wireless Networking
Wireless LAN
The DT303CI is oen delivered with an embedded (user-inaccessible) 802.11ac
WLAN adapter equipped with a hidden custom antenna.
• Through the support of typical WLAN adapters, the DT303CI should be able to
detect all 802.11 access points in the vicinity for you to select the access point of
your choice for connecon.
• The SSID and WEP/WPA/WPA2 (if enabled) parameters on the DT303CI and the
access points have to match. The SSID is case-sensive and it is recommended
that you enable WEP/WPA/WPA2 encrypon (or advanced alternaves) for
secure access.
• When WEP/WPA/WPA2 is enabled, you may need to consult your network
administrator or your networking equipment literature to properly congure
associated sengs such as Authencaon mode, etc.
• Refer to the access point operang manuals for seng up the 802.11 access
points.
5
USING THE TABLET
To Hold the Tablet
Le hand: grip the le back side of the tablet with your
le hand four index ngers, with thumb resng on the
top of the back side of the tablet and palm securely
against the back.
Right hand: grip the right back side of the tablet with
your right hand four index ngers, with thumb resng
on the top of the back side of the tablet and palm
securely against the back.
Battery Usage and Maintenance
DT Research tablets and laptops are powered by lithium polymer baery packs in
proprietary form factors. Baery conguraons for the DT Research devices include
internal (bridge or backup), removable or swappable implementaons.
Baery usage cycles, or duraon between necessary re-charge, vary with a number
of factors, including device model, device usage paern and baery health/aging.
The DTR baery packs may be charged while aached to the device or when sepa-
rated from the device and docked in proprietary baery charging cradles. Following
the guidelines on good pracce below can help to keep a baery pack healthy and
prolong baery usage cycles and baery lifespan.
• Avoid high heat condions during operaon, idle, charging, and storage states.
• Avoid leng the baery pack remain in very highly charged state or overly
low charged state for extensive periods of me. Keeping the baery capacity
between 30% and 80% of maximum capacity is recommended. The prevailing
baery level(s) can be read from the Baery ulity within the Windows operat-
ing system.
• Avoid leng the baery be over-discharged or depleted. Over-discharge can
occur when a fully-discharged (0% level or thereabouts) baery pack is allowed
to remain in such a state for an extended period of me (weeks or months).
The embedded baery controls enter a protecon mode and recharging will be
prevented for safety reasons. To reduce the likelihood of over-discharge, consider
recharging idle baeries regularly to some level between 30%-80% of capacity.
67
Product End-of-Life Notice
For reuse and recycling facilies, please visit below link to get disassembly
instrucons:
hp://www.dtresearch.com.tw/zh/About/csr.html or
hp://www.dtresearch.com.tw/EPEAT/DT301Y_Product_End-of-Life_Disassembly_
Instrucons.pdf
Federal Communication Commission Interference
This equipment has been tested and found to comply with the limits for a
Class B digital device, pursuant to Part 15 of the FCC Rules. These limits are
designed to provide reasonable protecon against harmful interference in
a residenal installaon. This equipment generates, uses and can radiate
radio frequency energy and, if not installed and used in accordance with
the instrucons, may cause harmful interference to radio communicaons.
However, there is no guarantee that interference will not occur in a parcular
installaon. If this equipment does cause harmful interference to radio or
television recepon, which can be determined by turning the equipment o
and on, the user is encouraged to try to correct the interference by one of the
following measures:
• Reorient or relocate the receiving antenna.
• Increase the separaon between the equipment and receiver.
• Connect the equipment into an outlet on a circuit dierent from that to
which the receiver is connected.
• Consult the dealer or an experienced radio/TV technician for help.
FCC Cauon: Any changes or modicaons not expressly approved by the
party responsible for compliance could void the user’s authority to operate
this equipment.
This device complies with Part 15 of the FCC Rules.
Operaon is subject to the following two condions: (1) This device may not
cause harmful interference, and (2) this device must accept any interference
received, including interference that may cause undesired operaon.
This device and its antenna(s) must not be co-located or operang in
conjuncon with any other antenna or transmier.
This Class [B] digital apparatus complies with Canadian ICES-003.
Cet appareil numérique de la classe [B] est conforme à la norme NMB-003 du
Canada.
For the product take-back service informaon, please visit:
hp://www.dtresearch.com.tw/zh/About/csr.html
Peripherals Support
Through its USB ports, the DT303CI supports a wide range of USB-based peripherals.
These peripherals are applicable for soware installaon, applicaons storage, data
storage, and system soware recovery and updates.
Other DT Research Tablet manuals

DT Research 316T/MD Assembly instructions

DT Research

DT Research 316T/MD Assembly instructions

DT Research 301Y/MD Assembly instructions

DT Research

DT Research 301Y/MD Assembly instructions

DT Research DT307SC Assembly instructions

DT Research

DT Research DT307SC Assembly instructions

DT Research DT312 Assembly instructions

DT Research

DT Research DT312 Assembly instructions

DT Research DT391GS Assembly instructions

DT Research

DT Research DT391GS Assembly instructions

DT Research DT391UF User manual

DT Research

DT Research DT391UF User manual

DT Research DT310CR Assembly instructions

DT Research

DT Research DT310CR Assembly instructions

DT Research DT301X-TR Assembly instructions

DT Research

DT Research DT301X-TR Assembly instructions

DT Research DT313SC-MD Assembly instructions

DT Research

DT Research DT313SC-MD Assembly instructions

DT Research DT340T Assembly instructions

DT Research

DT Research DT340T Assembly instructions

DT Research DT313YR Assembly instructions

DT Research

DT Research DT313YR Assembly instructions

DT Research DT395BV Assembly instructions

DT Research

DT Research DT395BV Assembly instructions

DT Research DT363GL Assembly instructions

DT Research

DT Research DT363GL Assembly instructions

DT Research 301SY Assembly instructions

DT Research

DT Research 301SY Assembly instructions

DT Research DT315BT Assembly instructions

DT Research

DT Research DT315BT Assembly instructions

DT Research 302MD Assembly instructions

DT Research

DT Research 302MD Assembly instructions

DT Research 316T Assembly instructions

DT Research

DT Research 316T Assembly instructions

DT Research 524T Assembly instructions

DT Research

DT Research 524T Assembly instructions

DT Research 301MD Assembly instructions

DT Research

DT Research 301MD Assembly instructions

DT Research DT395GS Assembly instructions

DT Research

DT Research DT395GS Assembly instructions

DT Research DT365 Assembly instructions

DT Research

DT Research DT365 Assembly instructions

DT Research DT301Y Assembly instructions

DT Research

DT Research DT301Y Assembly instructions

DT Research DT395CR Assembly instructions

DT Research

DT Research DT395CR Assembly instructions

DT Research 311Q Assembly instructions

DT Research

DT Research 311Q Assembly instructions

Popular Tablet manuals by other brands

Laser MID-787 Quick operation guide

Laser

Laser MID-787 Quick operation guide

myPhone myTab 10 user manual

myPhone

myPhone myTab 10 user manual

Manta DUO POWER MID705DC user manual

Manta

Manta DUO POWER MID705DC user manual

Gigaset QV830 quick start guide

Gigaset

Gigaset QV830 quick start guide

Google Nexus 7 Visual quickstart guide

Google

Google Nexus 7 Visual quickstart guide

TrekStor SurfTab ventos 7.0 manual

TrekStor

TrekStor SurfTab ventos 7.0 manual

AAVA MOBILE Inari 8 quick start guide

AAVA MOBILE

AAVA MOBILE Inari 8 quick start guide

Prestigio PMT3708-3G user manual

Prestigio

Prestigio PMT3708-3G user manual

Emdoor EM-Q86 user manual

Emdoor

Emdoor EM-Q86 user manual

Cowon i10 user guide

Cowon

Cowon i10 user guide

Coby Kyros MID7012 quick start guide

Coby

Coby Kyros MID7012 quick start guide

Soy Momo PRO10 user manual

Soy Momo

Soy Momo PRO10 user manual

Samsung Galaxy Tab S2 user guide

Samsung

Samsung Galaxy Tab S2 user guide

Allview WI8G user manual

Allview

Allview WI8G user manual

Samsung SM-P613 user manual

Samsung

Samsung SM-P613 user manual

Lenovo IdeaPad A1-07 user guide

Lenovo

Lenovo IdeaPad A1-07 user guide

Lenovo IdeaTab A1000 Important product information guide

Lenovo

Lenovo IdeaTab A1000 Important product information guide

Samsung SM-P585Y user manual

Samsung

Samsung SM-P585Y user manual

manuals.online logo
manuals.online logoBrands
  • About & Mission
  • Contact us
  • Privacy Policy
  • Terms and Conditions

Copyright 2025 Manuals.Online. All Rights Reserved.