manuals.online logo
Brands
  1. Home
  2. •
  3. Brands
  4. •
  5. DURAVIT
  6. •
  7. Bathroom Fixture
  8. •
  9. DURAVIT MW 9832 User manual

DURAVIT MW 9832 User manual

Other DURAVIT Bathroom Fixture manuals

DURAVIT WD5008 011 090 User manual

DURAVIT

DURAVIT WD5008 011 090 User manual

DURAVIT Fogo User manual

DURAVIT

DURAVIT Fogo User manual

DURAVIT HP 4941 User manual

DURAVIT

DURAVIT HP 4941 User manual

DURAVIT B34210 0100 10 Manual

DURAVIT

DURAVIT B34210 0100 10 Manual

DURAVIT EasyClick 2F 8772 User manual

DURAVIT

DURAVIT EasyClick 2F 8772 User manual

DURAVIT Circle CE1070 0040 Manual

DURAVIT

DURAVIT Circle CE1070 0040 Manual

DURAVIT C.1 C14280 00 80 10 Manual

DURAVIT

DURAVIT C.1 C14280 00 80 10 Manual

DURAVIT 700403 00 0 10 0000 Installation guide

DURAVIT

DURAVIT 700403 00 0 10 0000 Installation guide

DURAVIT Nahho User manual

DURAVIT

DURAVIT Nahho User manual

DURAVIT Delos DL 030C User manual

DURAVIT

DURAVIT Delos DL 030C User manual

DURAVIT C.1 C15240 0090 Manual

DURAVIT

DURAVIT C.1 C15240 0090 Manual

DURAVIT SensoWash Slim 611000 00 1 10 1300 User manual

DURAVIT

DURAVIT SensoWash Slim 611000 00 1 10 1300 User manual

DURAVIT Universal Series User manual

DURAVIT

DURAVIT Universal Series User manual

DURAVIT D-Code User manual

DURAVIT

DURAVIT D-Code User manual

DURAVIT SensoWash Slim 611000 00 2 00 2300 User manual

DURAVIT

DURAVIT SensoWash Slim 611000 00 2 00 2300 User manual

DURAVIT DuraSquare 0031144600 Installation guide

DURAVIT

DURAVIT DuraSquare 0031144600 Installation guide

DURAVIT Happy D.2 Plus HP 4936 User manual

DURAVIT

DURAVIT Happy D.2 Plus HP 4936 User manual

DURAVIT DuraStyle DS 0061 User manual

DURAVIT

DURAVIT DuraStyle DS 0061 User manual

DURAVIT init 7501 User manual

DURAVIT

DURAVIT init 7501 User manual

DURAVIT OpenSpace B 770009000 User manual

DURAVIT

DURAVIT OpenSpace B 770009000 User manual

DURAVIT DuraSystem WD5004 000 000 User manual

DURAVIT

DURAVIT DuraSystem WD5004 000 000 User manual

DURAVIT XSquare XS 7012 User manual

DURAVIT

DURAVIT XSquare XS 7012 User manual

DURAVIT Happy D.2 Plus HP 4972 User manual

DURAVIT

DURAVIT Happy D.2 Plus HP 4972 User manual

DURAVIT C.1 C14230000010 Manual

DURAVIT

DURAVIT C.1 C14230000010 Manual

Popular Bathroom Fixture manuals by other brands

Kohler Mira Sport Max J03G Installation and user guide

Kohler

Kohler Mira Sport Max J03G Installation and user guide

Moen 186117 Series installation guide

Moen

Moen 186117 Series installation guide

Hans Grohe Raindance Showerpipe 27235000 Instructions for use/assembly instructions

Hans Grohe

Hans Grohe Raindance Showerpipe 27235000 Instructions for use/assembly instructions

Signature Hardware ROUND SWIVEL BODY SPRAY 948942 Install

Signature Hardware

Signature Hardware ROUND SWIVEL BODY SPRAY 948942 Install

fine fixtures AC3TH installation manual

fine fixtures

fine fixtures AC3TH installation manual

LIXIL HP50 Series quick start guide

LIXIL

LIXIL HP50 Series quick start guide

KOLO ATOL PLUS installation manual

KOLO

KOLO ATOL PLUS installation manual

Hans Grohe PuraVida 15073000 Instructions for use/assembly instructions

Hans Grohe

Hans Grohe PuraVida 15073000 Instructions for use/assembly instructions

Toto TS111B8 Installation and owner's manual

Toto

Toto TS111B8 Installation and owner's manual

Kohler K-1158-H2 Homeowner's guide

Kohler

Kohler K-1158-H2 Homeowner's guide

Coram Showers OFFSET QUADRANT manual

Coram Showers

Coram Showers OFFSET QUADRANT manual

baliv DU-2010 manual

baliv

baliv DU-2010 manual

odass OD-1710 instruction manual

odass

odass OD-1710 instruction manual

Oxygenics Evolution Easy installation instructions

Oxygenics

Oxygenics Evolution Easy installation instructions

Bradley Express SS Series installation instructions

Bradley

Bradley Express SS Series installation instructions

Helvex TH-974 installation guide

Helvex

Helvex TH-974 installation guide

Sunshower PURE SOLO manual

Sunshower

Sunshower PURE SOLO manual

Heatstore HSTRL500WTN Installation and operating instructions

Heatstore

Heatstore HSTRL500WTN Installation and operating instructions

manuals.online logo
manuals.online logoBrands
  • About & Mission
  • Contact us
  • Privacy Policy
  • Terms and Conditions

Copyright 2025 Manuals.Online. All Rights Reserved.

Pre-installation_Product Information 1
Placeofinstallation
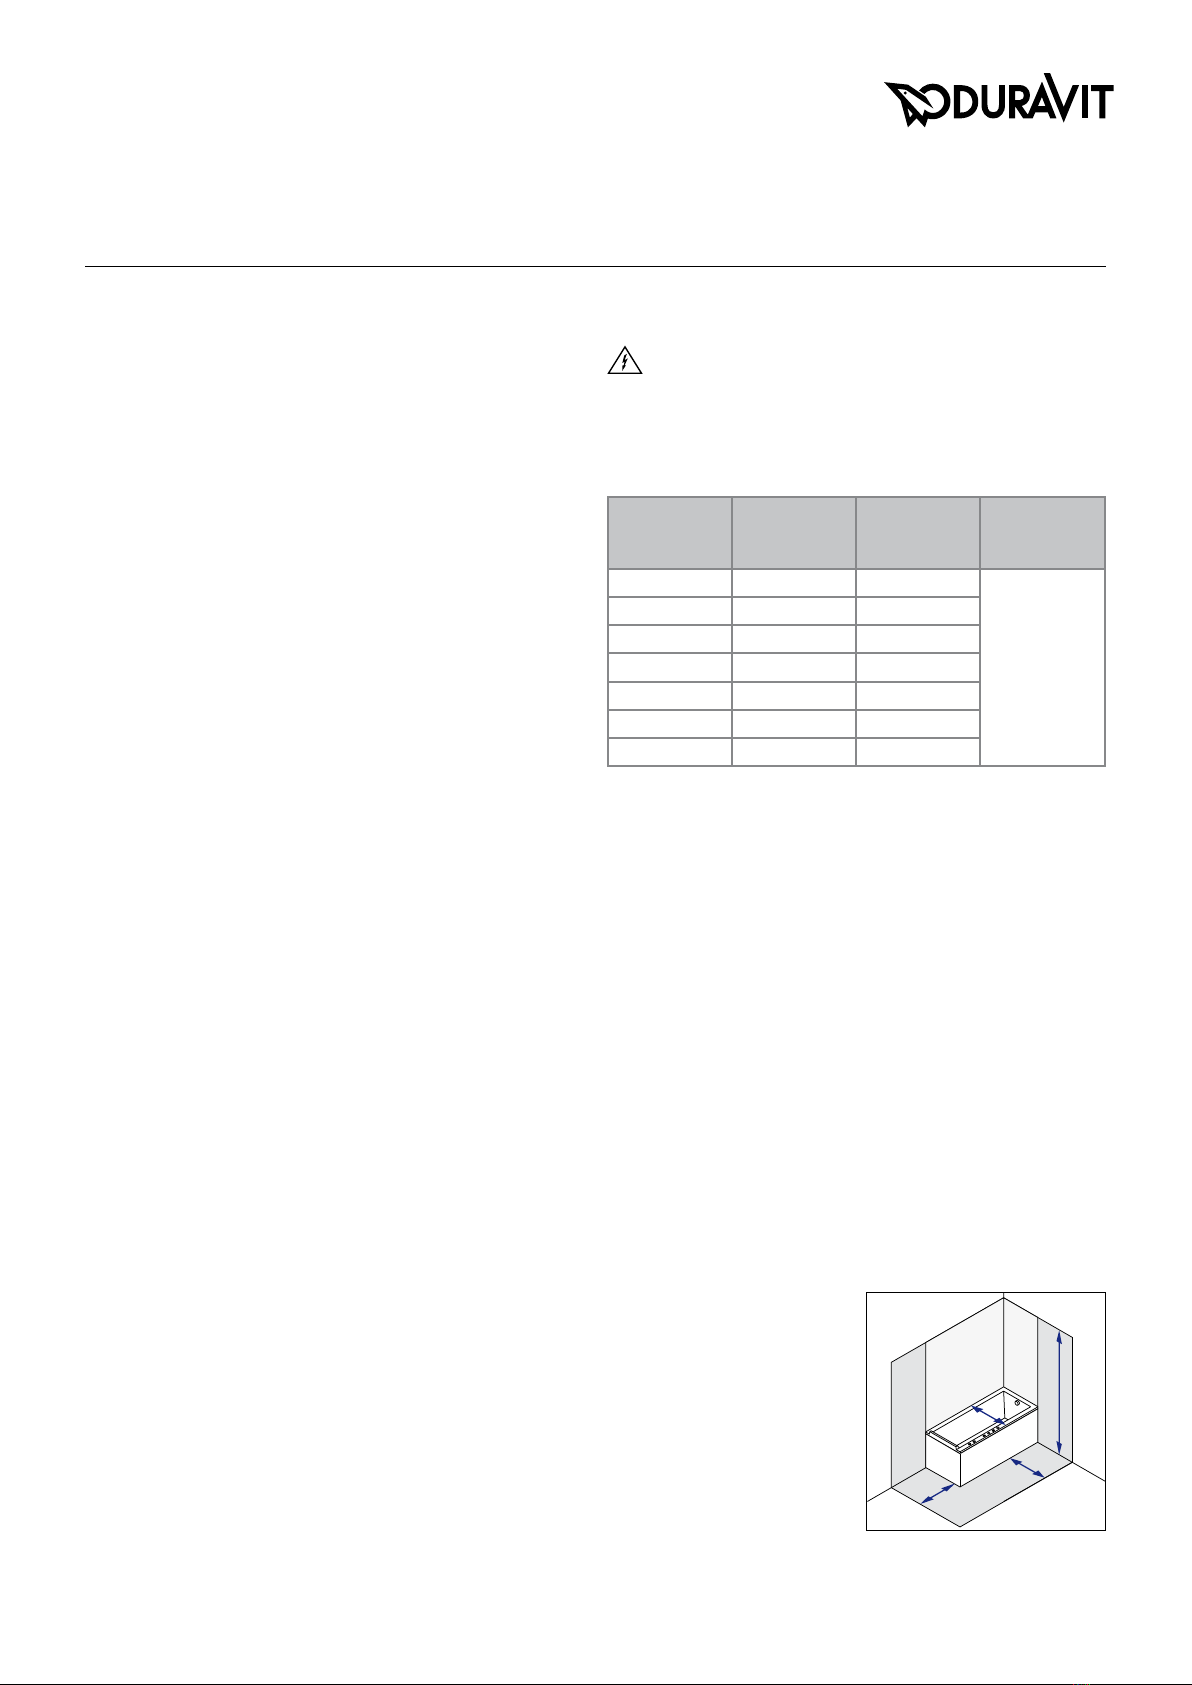
Check the width of the doors to ensure that the bathtub will fit •
through and into the bathroom.
There must be no floor heating below the bathtub.•
The floor must be absolutely flat and horizontal.•
I n s t a l l• bathtubswithpanellingafter tiling.
I n s t a l l• bathtubswithoutpanellingeither before or after tiling.
• Whirltubs:depending on the combination of bathtub and whirl-
system, system components might protrude beyond the rim of the
bathtub. This is why we recommend installation in a bathtub casing.
Toleranceswithacrylic:• as a result of the manufacturing process,
deviations from the specified nominal dimensions are possible within
the scope of the tolerances as per DIN 198. Please take this into
account during planning.
Inspectionopeningsandventilationgrates
Tilingthebath
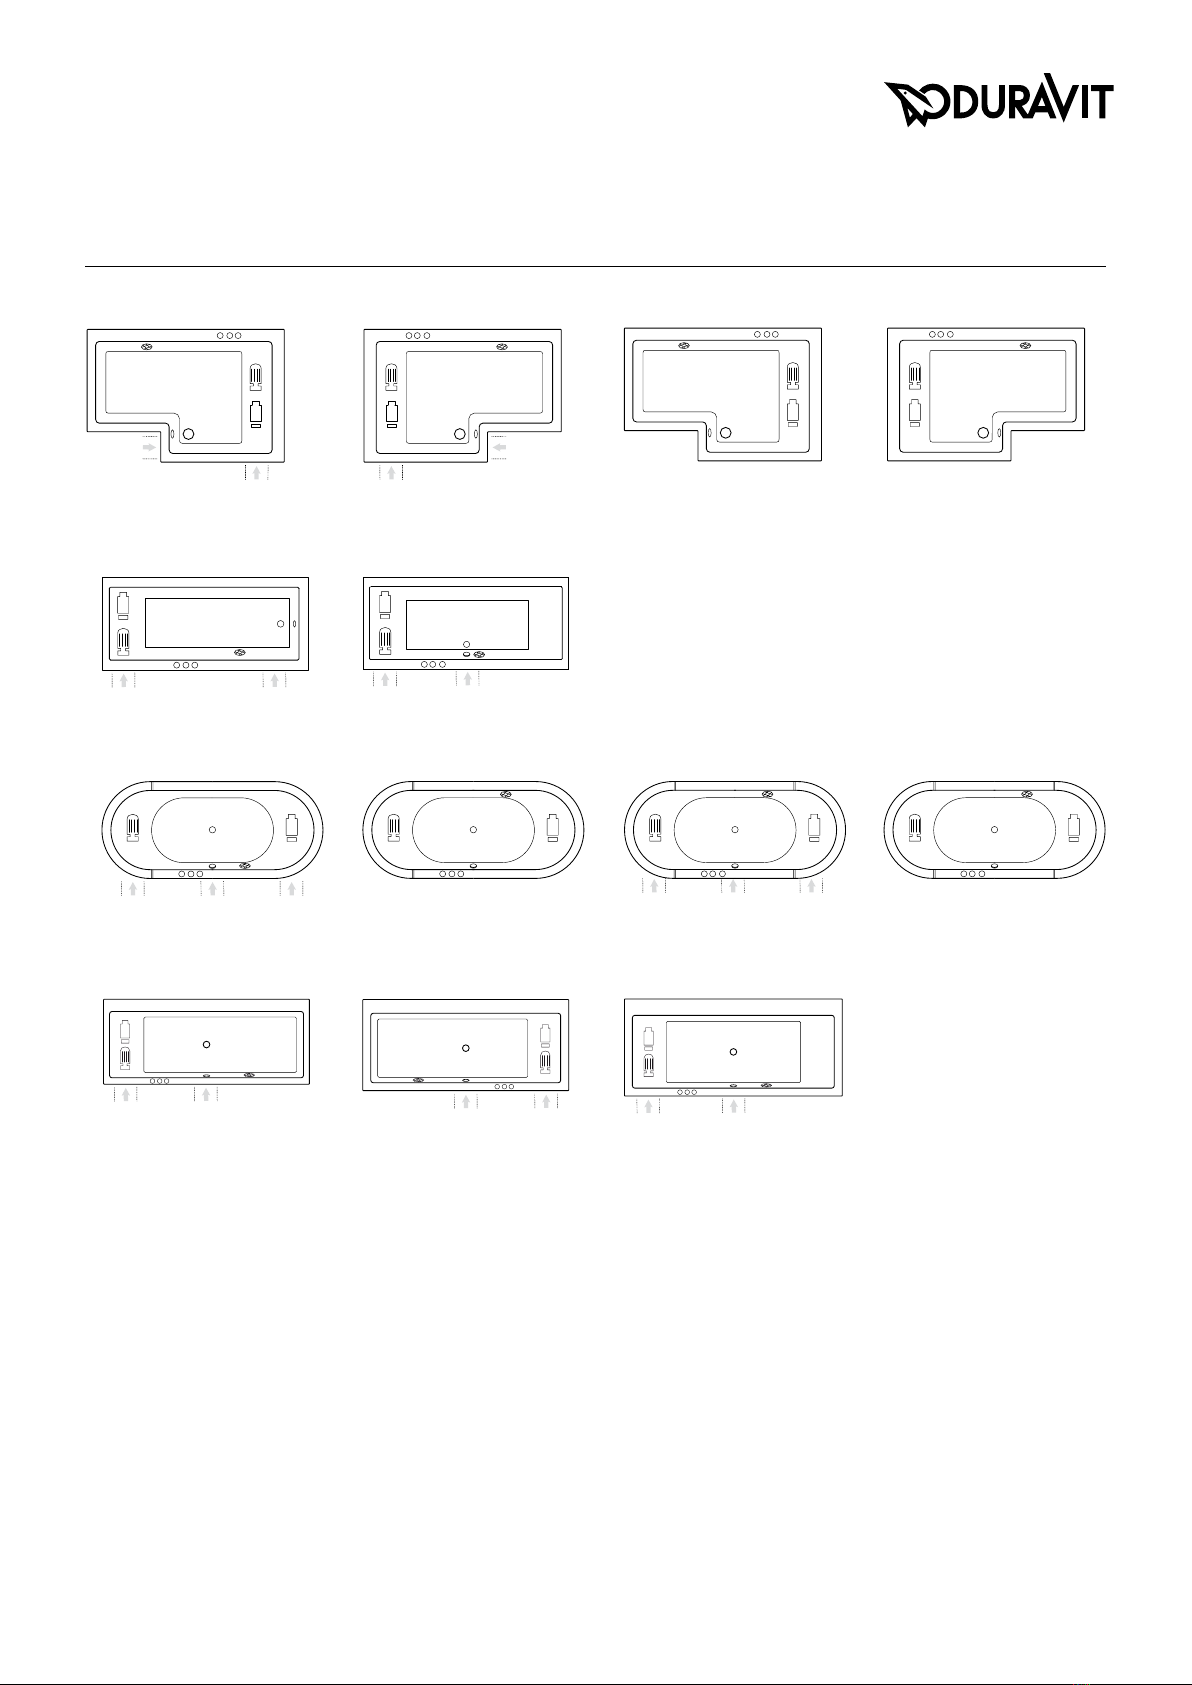
Provision must be made for the following inspection openings:•
Outlet and overflow fitting 200 x 200 mm•
Aggregates 500 x 500 mm•
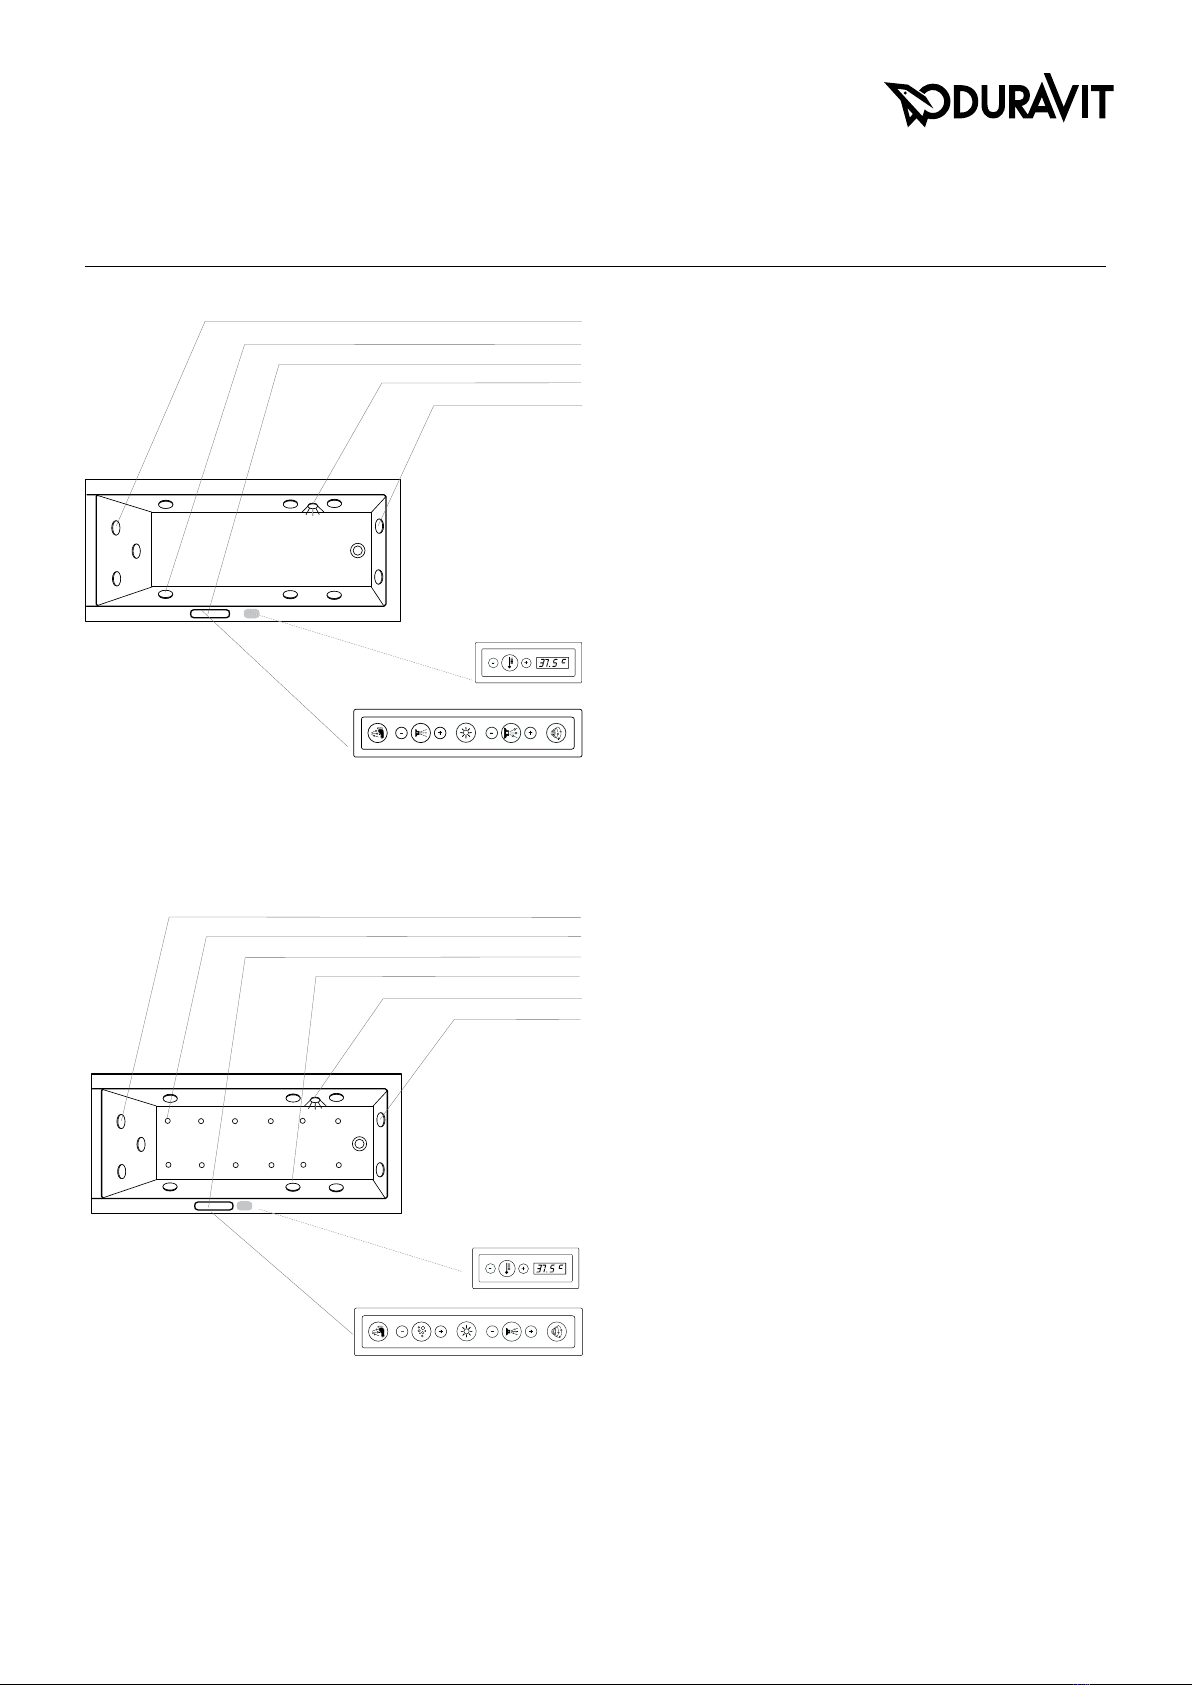
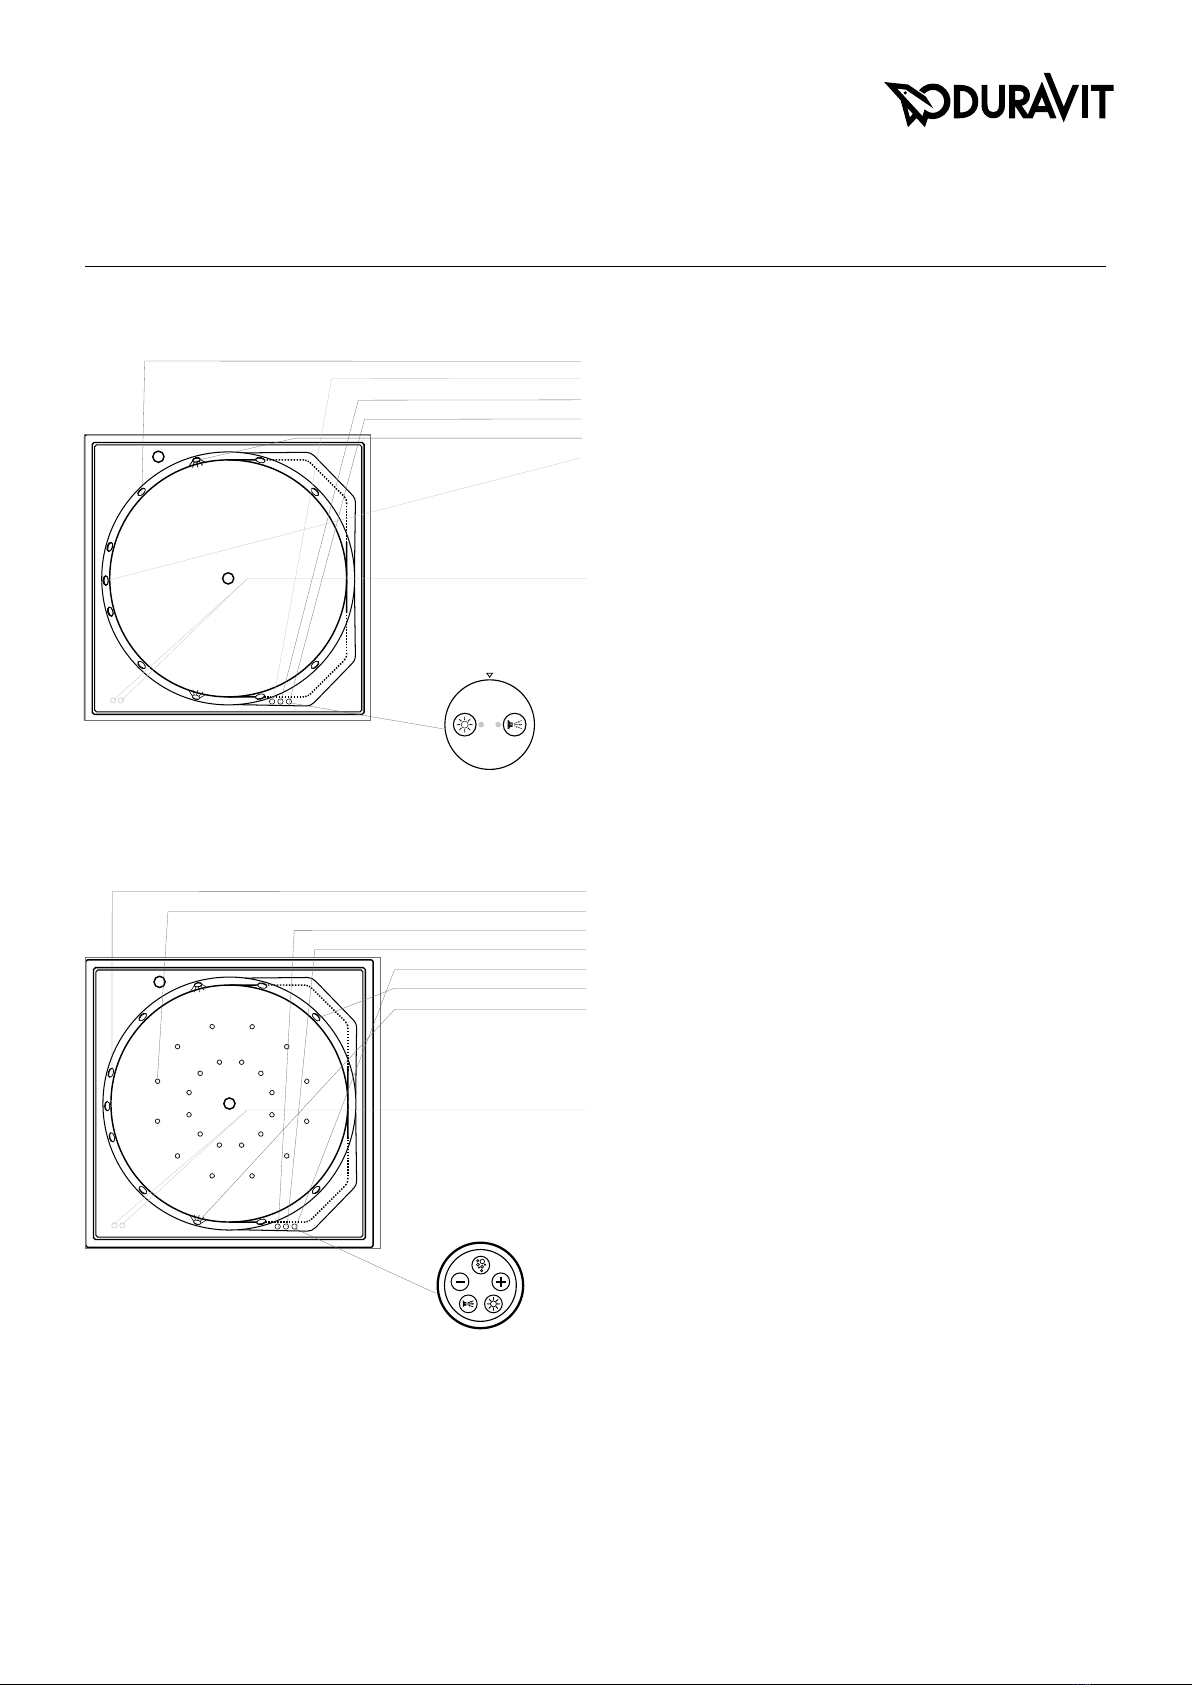
For the position, see chapter “Whirl systems product information”.•
Whirl tub or bathtub with coloured light: for the air supply, allow an •
opening with an area of approx. 15 cm2 (e.g. 3 x 5 cm or 2 x 7.5 cm)
in the panel.
BathtubwithDuravitpanelling
It must be possible to remove the panelling for inspection purpo-•
ses. For this reason, allow a certain amount of space in front of the
panelling.
For the air supply, an opening is pre-installed in the panelling; this •
must not be covered.
Waterconnection
The water may only be connected by a qualified plumber. Country-spe-
cific standards and local regulations must be observed in full.
Waterconnection
Connect the inlet and outlet according to current standards and local •
regulations.
Ensure that the connecting sleeve is flush with the floor.•
Electricalinstallationforbathtubswithcolouredlight
andwhirltubs
The electricity may only be connected by a qualified electrician.
Country-specific standards, local regulations and low-voltage guide-
lines must be observed in full.
Electricalconnection
Electrical data
Whirlsystem Max. rated
power without
heating
Max. rated
power with
heating
Frequency
Voltage
Air 1,08 kW -
50 Hz:
2 3 0 V ~ A C
60 Hz:
2 2 0 V ~ A C
Jet 0,74 kW -
Combi P 2,19 kW -
Combi E 2,74 kW 3,50 kW
Combi L 2,38 kW 5,34 kW
Jet E 1,69 kW 2,69 kW
Jet L 1,36 kW 4,36 kW
Pote• ntial equalisation installed, 3000 mm
Install supply line in acc. with the following requirements (two supply •
lines for combi system L with temperature module):
Fuse protection I• N = 16 A,
RCD max. 30 mA
Switched via all-pole disconnecting mains switch, outside zones 0, •
1 and 2 (see Fig. I)
Cable length 3000 mm•
Importantplanninginformationforbathtubsandwhirltubs
I
2250
600
600
2 1
0
2Pre-installation_Product Information
Whirl-SystemsProductInformation
Equipment
6 side mounted jets (air + water)
12 jets embedded in the oor (air)
Air control regulator back-massage
Control panel Combi-System E
Air control regulator Jet-System
1 underwater light, 50W
3 adjustable rotating back-massage jets
Additionalmodules(optional)
Inline heater (without image)
Control panel electronic cleaning system
Accessories(optional)
Cable-driven waste and overow with integrated water inlet
(without image)
Coloured Light with remote control for whirltubs (without image)
ControlpanelCombi-SystemE
The system is operated by pressing the raised symbol on the control
panel.
Combi-SystemE
JetESystem Equipment
6 side mounted jets (air + water)
Control panel Jet E
Air control regulator Jet-System
1 underwater light, 50W
3 adjustable rotating back-massage jets
Additionalmodules(optional)
Inline heater (without image)
Control panel electronic cleaning system
Accessories(optional)
Cable-driven waste and overow with integrated water inlet
(without image)
Coloured Light with remote control for whirltubs (without image)
ControlpanelJetE
The system is operated by pressing the raised symbol on the control
panel.
Equipment
6 side mounted jets (air + water)
Operating unit + Air control regulator
JetSystem(D-Code)
Pre-installation_Product Information 3
Whirl-SystemsProductInformation
JetLSystem
Combi-SystemL
Equipment
3 adjustable rotating back-massage jets
6 side mounted jets (Air + water)
Control panel Jet L
1 underwater light, 50 W
2 adjustable rotating foot-massage jets
Additionalmodules(optional)
Coloured light (instead of underwater light) (without image)
UV Hygiene Management (without image)
Temperature L (without image)
Accessories(optional)
Cable-driven waste and overow with integrated water inlet (without
image)
ControlpanelTemperatureL(optional)
ControlpanelJetL
The operating symbols are almost invisible at rst. By gently pressing the
area within the stainless steel frame, the lighting comes on gradually.
The functions are controlled via the now visible symbols.
Once the whirl action is over, the lighting dims completely.
Equipment
3 adjustable rotating back-massage jets
12 jets embedded in the oor (Air)
Control panel Combi-System L
6 side mounted jets (Air + water)
1 underwater light, 50 W
2 adjustable rotating foot-massage jets
Additionalmodules(optional)
Coloured light (instead of underwater light) (without image)
UV Hygiene Management (without image)
Temperature L (without image)
Accessories(optional)
Cable-driven waste and overow with integrated water inlet (without image)
ControlpanelTemperatureL(optional)
ControlpanelCombi-SystemL
The operating symbols are almost invisible at rst. By gently pressing the
area within the stainless steel frame, the lighting comes on gradually.
The functions are controlled via the now visible symbols.
Once the whirl action is over, the lighting dims completely.
4Pre-installation_Product Information
Whirl-SystemsProductInformation
Equipment
3 adjustable rotating back-massage jets (arranged in different heights)
24 jets embedded in the oor (air)
Air control regulator back-massage
Air control regulator Jet-System
Control panel Jet E
6 side mounted jets (air + water)
2 underwater lights, 50 W
Additionalmodules(optional)
Inline Heater (without image)
Control panel electronic cleaning system
Accessories(optional)
Coloured Light with remote control for whirltubs (without image)
ControlpanelCombi-SystemE
The system is operated by pressing the raised symbol on the control pa-
nel.
Combi-SystemE
JetE-System Equipment
6 side mounted jets (air + water)
Air control regulator back-massage
Air control regulator Jet-System
Control panel Jet E
2 underwater lights, 50 W
3 adjustable rotating back-massage jets (arranged in different heights)
Additionalmodules(optional)
Inline heater (without image)
Control panel electronic cleaning system
Accessories(optional)
Coloured Light with remote control for whirltubs (without image)
ControlpanelJetE
The system is operated by pressing the raised symbol on the Control panel.
BlueMoon
Pre-installation_Product Information 5
Whirl-SystemsProductInformation
Equipment
3 adjustable rotating back-massage jets (arranged in different heights)
24 jets embedded in the oor (air)
Control panel Combi-System L
6 side mounted jets (air + water)
2 underwater lights, 50 W
2 adjustable rotating foot-massage jets
Additionalmodules(optional)
Coloured Light (instead of underwater light) (without image)
UV Hygiene Management (without image)
Temperature L (to heat the whirltub to the desired temperature)
(without image)
ControlpanelTemperatureL(optional)
ControlpanelCombi-SystemL
The operating symbols are almost invisible at rst. By gently pressing the
area within the stainless steel frame, the lighting comes on gradually.
The functions are controlled via the now visible symbols.
Once the whirl action is over, the lighting dims completely.
Combi-SystemL
JetL-System Equipment
6 side mounted jets (air + water)
2 underwater lights, 50 W
Control panel Jet L
3 adjustable rotating back-massage jets (arranged in different heights)
2 adjustable rotating foot-massage jets
Additionalmodules(optional)
Coloured Light (instead of underwater light) (without image)
UV Hygiene Management (without image)
Temperature L (without image)
ControlpanelTemperatureL(optional)
ControlpanelJetL
The operating symbols are almost invisible at rst. By gently pressing the
area within the stainless steel frame, the lighting comes on gradually.
The functions are controlled via the now visible symbols.
Once the whirl action is over, the lighting dims completely.
6Pre-installation_Product Information
Whirl-SystemsProductInformation
Whirlsystemsandadditionalmodules
Air-System
Warm air is injected into the bath by 12 (24 in Blue Moon) jets
embedded in the oor of the tub.
Jet-System
6 side mounted jets create maximum hydrotherapeutic action
with actuated intensity of the massage, freely regulated via an
air control regulator which is integrated in the rim of the tub.
Back-massage
Water-Air-jet
3 adjustable rotating jets have a benecial effect on the back.
Foot-massage
Water-Air-jet
2 adjustable rotating jets are stimulating the reex zones of
the foot.
LIght
1 (2 in Blue Moon) underwater light, 50 W halogen, creates a
cosy atmosphere in the bathroom.
Temperature
Electronically controlled thermal system to compensate for
loss of temperature during whirl action.
HygieneManagement
Electronically controlled cleaning system for the
desinfection of the jets and pipes of the whirlsystem.
ColouredLight
Light from 5 (10 in Blue Moon) LED-spotlights set into the
side walls suffuses the water in alternating, bright colours.
A colour in accordance with the atmosphere. Halogen spot is
going to be replaced.
ColouredLightwithremotecontrolforbathtubsand
whirltubs
Light from 5 (10 in Blue Moon) LED-spotlights set into the
side walls suffuses the bath water in alternating, bright co-
lours. The 6 colours and white light plus 5 coloured lighting
programmes can be selected using the remote control. The
brightness of the colours can be dimmed. The LED coloured
lighting is not available for Combi L.
TemperatureL
Heating module with blue backlit LCD display and
control. This system can be used to adjust the whirltub to the
desired temperature.
UVHygieneManagement
Simple, environmentally-friendly hygiene by means of auto-
matic UV disinfection. Permanent monitoring of operation by
optical sensor.
Standard equipment: Full system drainage, cable-driven waste and overflow, chrome, support frame.
Pre-installation_Product Information 7
Whirl-SystemsProductInformation
Back
Back
# 710077
Back
# 710082
Back
Back
# 710023, # 710024 # 710156
# 710143 with Panel
Back
Back
2ndoor
Back
# 710081, # 710162, # 710163
Back
# 710073, # 710074, # 710075 # 710078, # 710079, # 710080# 710076, # 710160, # 710161
Back
PositioningoftheControlpanel
The directions are taken from the perspective of a person bathing.
In the standard conguration, the Control panel is always on the right
hand side, as are the drain and overow ttings in 2-seater baths
(c.f. Image.).
On request, alternative positioning of the Control panel or aggregates is
however possible. Please send us a sketch showing the desired layout.
Duravit will check and wherever possible conrm the feasibility.
1930Series2x3
# 740138
# 740137
# 710143 Built-in version
Back Back
BlueMoon
D-Code
Back
Back
# 740095, # 740096,
# 740098, # 740100
# 740097, # 740099
Back
# 740101
8Pre-installation_Product Information
Whirl-SystemsProductInformation
Paiova
Back
Back
Back
Back
Back
Back
# 710015
Back
# 710020
Back Back
Back
Back
# 710018# 710017# 710016
Back
Back
# 710035, # 710037
# 710039, # 710041
# 710190, # 710191
# 710173
Back
# 710172# 71∫19
Back
Back
# 710180
Back
# 710179# 710174 # 710178
# 710090# 710089 # 710028, # 710052# 710027, # 710141, # 710050
# 710036, # 710038
# 710040, # 710042
# 710191, # 710192
InstallationforPaiovawithfurniturepanelling
Paiova Whirltub with furniture panelling:
Lower edge of siphon lies 45 mm below upper edge of tiles
Daro,StarckX
HappyD.
Pre-installation_Product Information 9
Whirl-SystemsProductInformation
Vero
Starck
Back
# 710010
Back
# 710009
Back
# 710011
Back
# 710012
Back
# 710001, # 710002, # 710003,
# 710117, # 710118, # 700091,
# 700092
Back
Back
# 710133
# 710111
Back
# 710004, # 710031, # 710032,
# 710119
Back
# 710135, # 710136
Back
# 710134
Seadream
Back
# 710112 # 710114
Back
# 710113
Back
10 Pre-installation_Product Information
Whirl-SystemsProductInformation
Sundeck
Back
# 710066, # 710128
# 710127
Whirl-Pump Blower Controlpanel SuctionScreen necessaryequipmentcovers
Please note that in case of combinating tubs and whirlsystems, single components may reach over the rim of the tub. Therefore, we suggest installation into a bathtub case.
Back
# 710127
Back
# 710066, # 710128
PositioningoftheControlpanelonthepillar:
Furniturepanellingforfreestandingversion,cornerrightand
back-to-wallversion:
Directions are as seen from the perspective of a person in the
tub. In the standard conguration, the right hand always ope-
rates the Control panel (see Fig. 1).
Custom version on request. In this case, a sketch showing
the desired layout is required. Duravit will check and conrm
whether the desired location is possible.
Furniturepanelforcornerleft:
Directions are as seen from the perspective of a person in the
tub. In the standard conguration, the left hand always operates
the Control panel (see Fig. 2).
Custom version on request. In this case, a sketch showing
the desired layout is required. Duravit will check and conrm
whether the desired location is possible.
Numberofcontrolpanelsonthepillar:
The number of control panels is determined by the system and
the additional modules selected.
Fig. 1 Freestanding version, corner
right, and back-to-wall version
Fig. 2 Corner left
Back
Legend