manuals.online logo
Brands
  1. Home
  2. •
  3. Brands
  4. •
  5. Duronic
  6. •
  7. Heater
  8. •
  9. Duronic Mica HV180 User manual

Duronic Mica HV180 User manual

Creative
Consumer
Products
Mica Heater - HV180
2 3
Features and Specications
Introduction
Remove Packaging
Assembly Instructions
Operation
Important Safeguards
Cleaning, Storage & Warnings
Troubleshooting
4
4
5
6
7-8
9-10
11
12
Contents
4 5
Features & Specications Removing Packaging
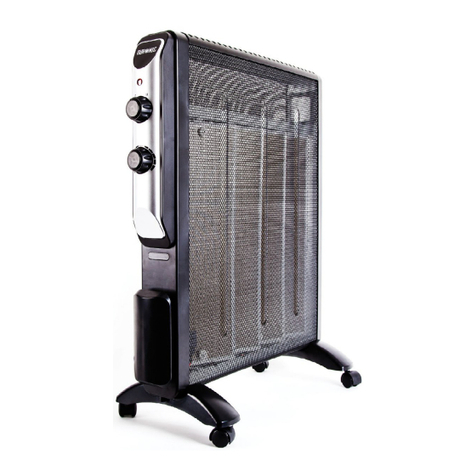
The Duronic HV180 uses a Mica heating element, which is a leading technology in the
world of heating. Our model is oil-free and offers more much more than a standard heater.
The HV180 heats up within one minute, making it a very cost-effective and energy efcient
heater.
Equipped with caster wheels and handles, moving and relocating this portable heater from
one place to another is easy to do.
Special Features
• Heats up in 1 minute
• Two power settings
• Cover sensor (overheat protection)
• Tip-over protection
• Anti-frost
• Lightweight portable design
• Quiet operation
• Oil-free
• Does not dehumidify
• Power cable storage on the side
• IP24 rated: dust-proof and splash-proof
Specications
1. Take the heater and the packaging out of
the box.
2. Remove any foam or packaging from the
heater body. Remove the poly bag which
is covering the heater and store away for
future storage use. Keep any bags and
foam away from children.
3. Remove the legs and caster wheels from
the packaging.
4. Keep your packaging safe, as this is part
of your guarantee. It is also useful for
storing the heater when not in use.
Item Power Voltage Rating Unit Size Unit Weight
HV180 1800W 220-240V,
50/60Hz
495(L)*150(W)*550(H)mm 4.5kg
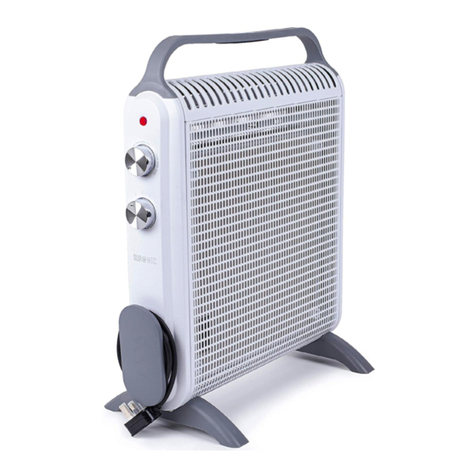
1. Handle
2. Top cover
3. Protective mesh
4. Rear cover
5. Legs
6. Power indicator
7. Temperature control dial
8. Power control dial
9. Front cover
10. Cable storage hook
11. Power cable with 3-pin plug
6 7
Assembly Instructions Operation
1. Position the heater carefully upside
down.
2. Attach one leg at a time. Position the
rst leg onto the base and align with the
screw holes in the bottom of the heater.
Insert two screws into the base of the
leg and tighten them up xing the leg in
place securely.
Repeat the same steps to attach the
second leg.
3. If you wish to add the wheels to the
base, simply align each wheel with the
designated holes on each leg and push
them on into place.
Please read these instructions in full before
using this heater and retain
for future reference.
1. Precautions:
Check that the power switch dial is
turned to OFF [O] (gure 1).
Turn the temperature control dial is
turned to OFF (gure 2).
2. Connecting the Power:
Plug the power cable inot a suitable
mains socket (rated not less than 10
AMP). Once plugged in and the socket
is switched on, the light indicator will turn
on.
3. Setting the Temperature:
Select the temperature you prefer and
the heater will heat the room to the
chosen temperature and then turn off
automatically.
When the indoor temperature drops
below the set temperature, the heater
will start to work again emitting heat
until the indoor temperature reaches the
desired temperature once again. This
cycle will repeat to maintain your chosen
temperature. The temperature can be
adjusted by simply turning the
temperature control dial to the
temperature you want.
8 9
Operation (Cont.) Important Safeguards
4. Switching on the Heater
To turn the heater on, rotate the power
dial to your preferred power level:
[ I ] Setting 1: 900W
[ II ] Setting 2: 1800W
5. Anti-Frost Function
This function will keep the surrounding
temperature above ‘freezing point’.
To activate this function, simply plug in
the power cable and turn the
temperature control dial to
the snowake position.
6. Overheat Protection
A warning label saying
“DO NOT COVER” has been placed
on the heater to warn against putting
anything on top of the heater. Despite
this, it has been known that some users
still accidently cover the heater with a
towel or blanket etc.. Therefore, there is
an inbuilt safety device within the heater
to protect against over heating. If the
heater overheats, the power will be cut
off automatically.
When the heater detects that the tem-
perature has dropped again, the power
will swtich back on.
7. Tip-Over Protection
If the heater is accidently knocked over,
it will switch off automatically.
The heater is hot when in use.
To avoid burns, do not let bare skin touch the
hot surface of the heater.
To move the heater safely, use the handle.
To prevent res, keep ammable materials,
such as curtains and other home furnishings
at least 3 feet (0.9M) radius away from the
heater.
Extreme caution is necessary when the
heater is near children. Do not leave children
unattended when this heater is on.
The heater is not a toy.
Do not use the heater in areas where there
are combustables stored such as gasoline,
paint, ammable liquids or gas.
Do not insert any objects into the ventilation
area of the protective mesh. This can cause
electric shock, a re or damage the heater.
To prevent re, do not cover the heater or
block any of the air vents in any way.
Do not operature this heater on a soft or
uneven surface.
10 11
Important Safeguards Cleaning
Storage
Warning
Always unplug the heater when not in use.
To disconnect the heater, remove the plug
from the mains wall socket.
Avoid using an extension lead with this
heater. All extension leads have a maximum
wattage allowance. Using this heater along
with other appliances may exceed this and
overload the extension lead. Overloading the
extension lead can result in re.
Do not run the power cable under carpeting.
Do not cover the cable with rugs, runners or
mats or any kind.
Arrange the cable away from areas of trafc
and where it will not be tripped over.
Do not use this heater if the power cable,
plug or heater itself are damaged in any way.
Connect to properly grounded mains plug
sockets only.
Use this heater only as described in this
manual. Any other use not recommended
by the manufacturer may cause re, electric
shock, or injury to those around.
To not use this heater with a programmer,
timer or any other device that switches the
heater on automatically. This is because a
risk of re exists if the heater is covered or
positioned incorrectly.
1. Before cleaning, turn off the heater.
Unplug the power cable and allow the heater to cool down.
2. Do not immerse the power cord, plug or the heater itself into water or any liquid.
Do not pour water or any liquid over the heater.
3. To clean the heater safely,
use a vacuum cleaner to remove any dust and lint on the grill/mesh cover.
Wipe the heater with a dry cloth to remove any extra dust and a damp
(well wrung) cloth to clean off any stains.
4. Do not use detergents, abrasive cleaning products or any kind of
polishing material on the body of the heater as this can damage the nish.
1. Unplug the heater and wind up the power cable onto the cable storage hook.
2. Store the heater in a cool dry place.
Cover to prevent dust and dirt building up on the machine.
Old packaging is ideal for using as a cover.
Any other maintenance or servicing should be performed by a qualiied person or by the
manufacturer.
Do not use this heater in the immediate
surroundings of a bath, a shower or a swimming pool.
The heater must not be located
immediately below a socket-outlet.
12 13
Warranty
1 Year Guarantee from Shine-mart Ltd, Trademark owners of Duronic Products.
NOTE: THESE STATEMENTS DO NOT AFFECT YOUR STATUTORY RIGHTS AS A
CONSUMER
This product has been manufactured under the strictest or quality control procedures, and
using the highest quality of materials, to ensure excellent performance and reliability. It will
give very good and long lasting service, provided it is properly used and maintained. The
product is guaranteed for 1 years from the date of original purchase. If any defect arises due
to a faulty materials or poor workmanship, the faulty product must be returned to the original
place of purchase. Refund or replacement is at the discretion of that company.
Duronic Products are offered with a 1 year guarantee under the following conditions:
1. The product must be returned to the retailer with original proof of purchase.
2. The product must be installed and used in accordance with the instructions
contained in this operating manual.
3. It must be used only for domestic purposes.
4. It does not cover wear and tear, malicious damage, misuse, neglect,
inexpert repairs or consumable parts.
5. Shine-Mart Ltd has no responsibilities for accidental or consequential loss or damage.
6. Shine-Mart Ltd are not liable to carry out any type of servicing work,
under the guarantee
7. Valid in the UK only
Imported by Shine-Mart Ltd, RM3 8SB
Information on waste Disposal for Consumers of
Electrical & Electronic Equipment.
This mark on a product and/or accompanying documents indicates that when it
is to be disposed of, it must be treated as Waste
Electrical & Electronic Equipment, (WEEE).
Any WEEE marked products must not be mixed with general household waste,
but kept separate for the treatment, recovery and recycling of the materials used.
For proper treatment, recovery and recycling; please take all WEEE marked
waste to your Local Authority Civic waste site,
where it will be accepted free of charge.
If customers dispose of Waste Electrical & Electronic Equipment correctly, they
will be helping to save valuable resources and preventing any potential negative
effects upon human health and the environment, of any hazardous materials that
the waste may contain.
Contact Information
Distributed by: Shine-mart Ltd.
Address: Unit 1, Spilsby Road, Harold Hill, Romford, Essex, RM3 8SB, UK
Website: www.duronic.com
Troubleshooting
1. Check if the heater is
working or not.
1. Check the power cable
is plugged into the
mains socket.
2. Check if the temperature
setting is in the right position.
2. Check if electricity or the
main fuse is working or not.
3. Check if there is any
object covering the front
of the heater.
3. Make sure the power
switch is at “I” or “II”
position.
4. The heater does not function
when one set of elements are
not working.
4. Check if the temperature
control dial is in a working
position.
Heater does not warm:
Heater not operating:
Smell comes out from the heater:
After storing or restarting the heater, some smell may be released.
This can be because the heater absorbed the air in the room, which may contain cigarette,
smoke, cosmetic smells, household chemical frangrances or any other surrounding
pollutants.
Be assured, when the heater starts up again it will release these smells but after a short
time the smell will disappear.
Other manuals for Mica HV180

1

Other Duronic Heater manuals

Duronic HV052 User manual

Duronic

Duronic HV052 User manual

Duronic CA30 User manual

Duronic

Duronic CA30 User manual

Duronic BFH20 User manual

Duronic

Duronic BFH20 User manual

Duronic FH2KW1 User manual

Duronic

Duronic FH2KW1 User manual

Duronic BFH21 User manual

Duronic

Duronic BFH21 User manual

Duronic HV051 User manual

Duronic

Duronic HV051 User manual

Duronic Mica HV180 User manual

Duronic

Duronic Mica HV180 User manual

Duronic HV120 User manual

Duronic

Duronic HV120 User manual

Duronic HV220 User manual

Duronic

Duronic HV220 User manual

Duronic FH15K User manual

Duronic

Duronic FH15K User manual

Popular Heater manuals by other brands

Pinnacle Climate Technologies HEAT HOG HH-04SLN-A instruction manual

Pinnacle Climate Technologies

Pinnacle Climate Technologies HEAT HOG HH-04SLN-A instruction manual

Protemp PT-515-120 user manual

Protemp

Protemp PT-515-120 user manual

Gasolec M Series manual

Gasolec

Gasolec M Series manual

VIGO EPK4550E05 user manual

VIGO

VIGO EPK4550E05 user manual

Tranquility Bathroomware Whisper BHC manual

Tranquility Bathroomware

Tranquility Bathroomware Whisper BHC manual

Taurus ALPATEC RCMB23 manual

Taurus

Taurus ALPATEC RCMB23 manual

Protemp PT-80-OFR User's manual & operating instructions

Protemp

Protemp PT-80-OFR User's manual & operating instructions

DutchWest 2460 Installation and operating manual

DutchWest

DutchWest 2460 Installation and operating manual

Villager AGM ADH 20 Original instruction manual

Villager

Villager AGM ADH 20 Original instruction manual

DeLonghi HFX65 Series Instructions for use

DeLonghi

DeLonghi HFX65 Series Instructions for use

KENT KPE216-295 Owner's instruction manual

KENT

KENT KPE216-295 Owner's instruction manual

Termozeta TZR09 instruction manual

Termozeta

Termozeta TZR09 instruction manual

Bionaire BFH3520 instruction manual

Bionaire

Bionaire BFH3520 instruction manual

Vivax PH-1502 user manual

Vivax

Vivax PH-1502 user manual

NeoNail Professional 4476 User manual description

NeoNail Professional

NeoNail Professional 4476 User manual description

DEVOLA DVPH1200B user manual

DEVOLA

DEVOLA DVPH1200B user manual

Kingfisher NTY20-16L manual

Kingfisher

Kingfisher NTY20-16L manual

Micasa MA0139OH-11F instruction manual

Micasa

Micasa MA0139OH-11F instruction manual

manuals.online logo
manuals.online logoBrands
  • About & Mission
  • Contact us
  • Privacy Policy
  • Terms and Conditions

Copyright 2025 Manuals.Online. All Rights Reserved.