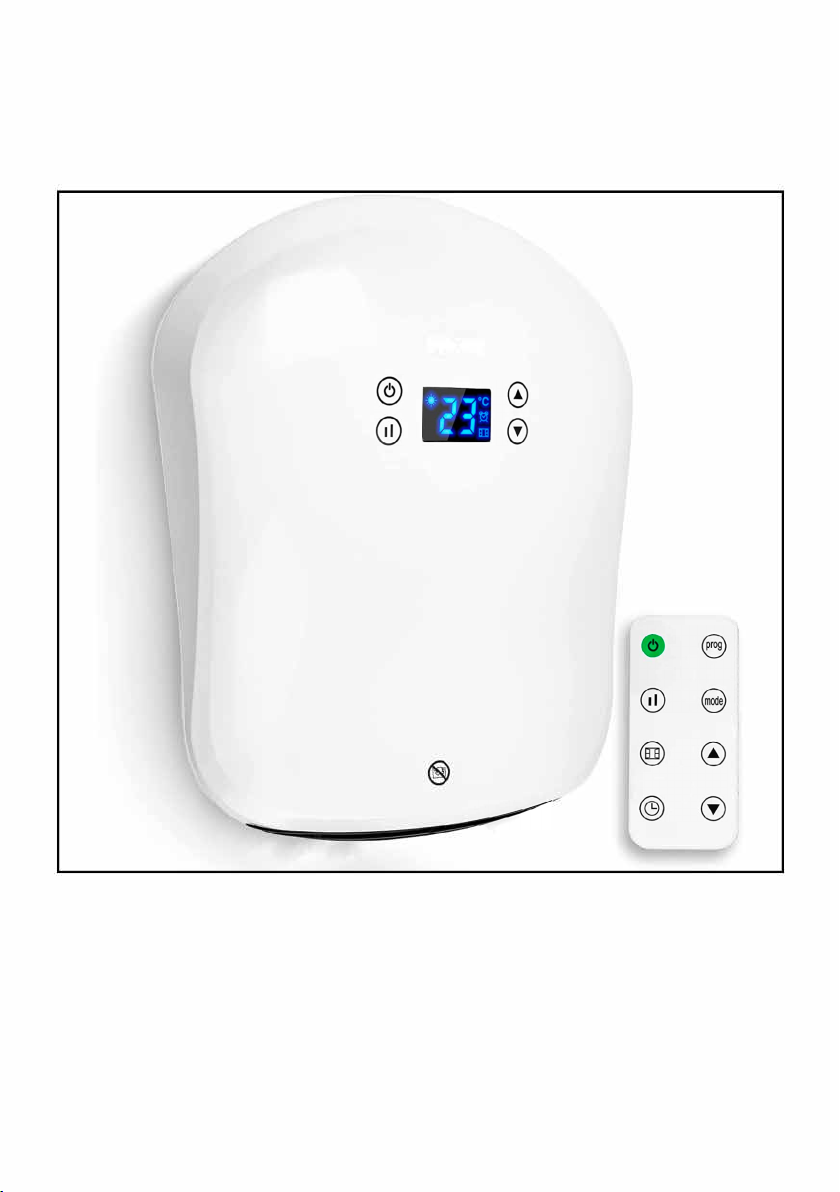
10 11
3. Setting the power level
Changing from full power to low power (2000W to 1000W):
a) Switch on the heater.
b) The screen will display the full sun icon which means it is on full-power mode and will
work at 2000W.
c) To change the power level to half-power, press the power setting button once.
This will change from the full sun icon (2000W) to the half sun icon (1000W).
d) Do nothing more and after a few seconds it will automatically save the setting for you.
e) To switch it back to full-power, follow the same steps.
Straight after setting the power level, set the temperature.
a) Press the up-arrow button or down-arrow button to customise the temperature setting.
b) Select a temperature between 5°C and 35°C.
As soon as you land on the number you wish to select, do nothing more and after 5 seconds
it will automatically save the setting for you.
To help you manage the heat in your home, there are 6 different modes to choose from.
Each have a pre-set pattern to program the heater to go on and off throughout the day.
• P1, P2, P3, P4, P5 are the factory default programs that have already been set for you. Each
follows a different pattern to accommodate for a range of preferences.
Please see the chart below for more information on this.
• UP is the program that you can customise to set a working period/mode to suit your
requirements.
4. Setting the temperature
5. Selecting a pre set mode
Per Week Program
Mode
Anti
frost
Comfort Anti
frost
Comfort Anti
frost
Comfort Anti
frost
Best suited for
Days (1-7) P1 00:00-
24:00
Consistent all-day
comfort; for everyday use
continuously.
Days (1-5) P2 00:00-
06:30
06:30-
08:30
08:30-
17:00
17:00-
22:30
22:30-
24:00
Ideal for family who work on
weekdays and at home on
weekends.
Days
(6-7)
P2 00:00-
07:30
07:30-
10:00
10:00-
12:00
12:00-
14:00
14:00-
17:00
17:00-
22:30
22:30-
24:00
Days (1-5) P3 00:00-
06:00
06:00-
17:00
17:00-
24:00
Ideal for in an ofce where it
is occupied during weekdays
and empty on the weekend.
Days
(6-7)
P3 00:00-
24:00
Days (1-7) P4 00:00-
06:00
06:00-
22:00
22:00-
24:00
Ideal for a commercial place
where it is occupied all day.
Days (1-7) P5 00:00-
24:00
Constant anti-frost, ideal
for family who go out for a
long time.
6. Timer setting
7. Setting the customised Program (UP)
Pre-Set Modes
* *Anti-frost: default mode to keep the room at a temperature of at least 5 to prevent frost.
* *Comfort: this setting is customised by the user when they set up their heater.
This is an option to set a countdown timer to switch off the heater after a certain amount of time. For
instance, if you set it for 2 hours it will stay on for this time and then switch off into standby mode
automatically.
Set the Timer
a) Press the mode button and select P1.
b) Press the timer button quickly two times. The timer icon will ash on the screen.
c) Press the up-arrow button or down-arrow button to select an amount of time you would
like the heater to be on for. You can choose from 1-24 hours.
d) Stop on the number you want to select and do nothing else. After 5 seconds it will
automatically save the setting.
The timer icon will stop ashing and appliance will then start a countdown to turn the heater off.
Cancel the Timer: If you want to cancel the timer setting, press the timer button twice quickly again.
The timer icon will disappear from the screen to conrm that it has been cancelled.
To select a mode
•Switch on the heater.
• Press the mode button to select a pre-set mode from P1, P2, P3, P4, P5, UP in cycle.
You can set your own customised program for the heater to come on and off at specic times
throughout the day. In the UP mode you can set one, two or three periods of time per day for the
heater to go on and off (in comfort mode). Remember, ‘comfort mode’ is the power/temperature that
you set at the beginning. It can be changed by following the steps in section no.3.
a) Switch the heater on.
b) Press the mode button and select the UP mode.
c) Press the program button.
d) The screen will display d1 to begin setting for the rst day of the week.
You can start here or select a different day to program if you wish to skip this day.
e) On your chosen day, press the up-arrow button or down-arrow button once to set the
times for the 1st working period for this day;
the screen will display d1 and the full sun icon will ash.
f) Press the up-arrow button or down-arrow button once again to select the start time.
g) Select an hour (between 0 to 23) when you would like the heater to switch on. When you
have the correct hour selected, press the timer button to conrm.
h) The screen will then prompt you to set a nish time.