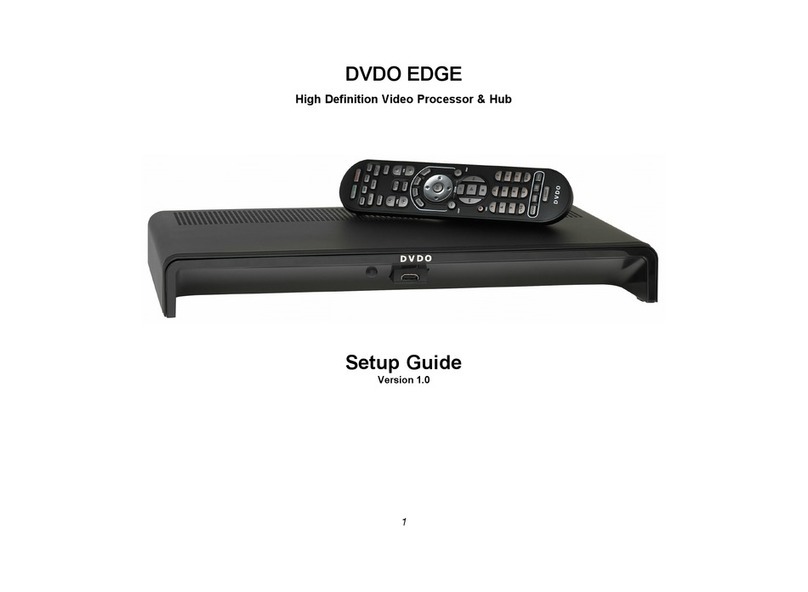
DVDO EDGE User manual

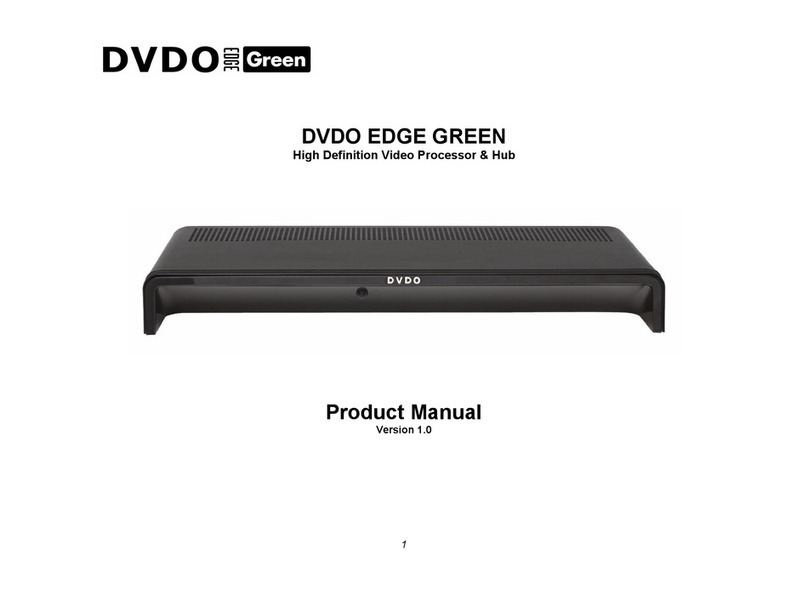
DVDO EDGE
High Definition Video Processor & Hub
Product Manual
Version 1.0
1

Important Safety Information
Never operate this product with the top cover removed.
High Voltages are present inside the enclosure which present
an electrical shock hazard. Never operate this product with
the top cover removed.
Do not expose this product to water or other liquids.
Never insert objects through the vent holes on the top cover.
High voltages are present inside the enclosure which present
an electrical shock hazard.
No user serviceable parts inside the enclosure. Contact Customer
Support for servicing.
2

Customer Support Information
email: [email protected]
phone: 1-877-382-EDGE (1-877-382-3343)
web site: www.dvdo.com/edge
Check the web site for news and updates for your DVDO EDGE
To learn about VRS Video Processing Technology, visit
http://www.anchorbaytech.com/vrs_technology/
DVDO by Anchor Bay Technologies
983 University Avenue, Building A
Los Gatos, California 95032 USA
3

Table of Contents
Safety Information 2
Customer Support Information 3
Table of Contents 4
Section 1: Introduction and Feature Summary
Introduction: What will DVDO EDGE do for you? 6
Using DVDO EDGE in a Home AV System 7
DVDO EDGE Feature Summary 10
Rear Panel Connections 11
Section 2: Set Up
Set Up your DVDO EDGE: Summary 15
Set Up your DVDO EDGE -- Details: Output Connections 16
Display Wizard 17
Input Wizard 20
Section 3: Remote and On-Screen Menus
Using the Remote to Control your EDGE 23
Menus and User Interface 24
Menu Organization 25
Menus: Main Menu 26
Select Input 27
Zoom and Pan 30
Aspect Ratio 35
Picture Controls 36
Brightness 37
Contrast 38
Color Saturation 39
Hue 40
Detail Enhancement 41
EDGE Enhancement 42
Mosquito Noise Reduction 43
4

Table of Contents (continued)
Settings Menu 45
Output Format 46
Switching Output Formats 47
Underscan 48
Input Priority 49
Audio Settings 50
Rename Inputs 53
Game Mode 54
Factory Defaults 55
Section 4: Cables
Video Cables 56
Audio Cables 60
Which Cable Should I Use? 61
Input Cables: Video Cable Hierarchy 62
Section 5: Remote Control: Universal Remote Overview 63
Programming the Remote 67
1. Programming with preprogrammed codes 67
2. Programming with the Learning Method 70
3. Programming with Advanced Functions 72
Remote Control Code Tables 75
5

Section 1: Introduction
Section 1: Introduction: What will DVDO EDGE do for you?
DVDO EDGE will improve the quality of your experience with your home audio and video system.
EDGE achieves this by acting as an intelligent central switching hub and video processor. It connects all of your audio/video
source devices to your high definition TV and AV receiver. It makes switching from one component to another simple, and it comes
with a Universal Remote so that you can manage all the components in your system with one control.
Most home audio video setups consist of a number of separate components that must be connected together. The task of
connecting, configuring, optimizing and operating the system is left to the user. EDGE excels at handling these tasks for you.
DVDO EDGE is a unique product that helps to simplify your system’s interconnections, while delivering ease of use and world
class video processing to your high definition television. The more components your system has, the more you benefit from the
simplification and performance that DVDO EDGE can deliver.
EDGE features a number of technical innovations. EDGE is based on the ABT2010 video processing chip. This chip incorporates
VRS high performance video processing developed for the company’s line of Home Theater Video Processors, including the DVDO
VP 50 Pro. The chip delivers outstanding picture quality at new low price point. Ease of use features include automatic input
switching, based on predetermined priority, so switching audio/video sources is as simple as powering on a component. Controls
for Aspect Ratio, Zoom, and Picture Controls are customizable for each input.
EDGE features dual HDMI output connectors, one for video/audio and a 2nd dedicated audio HDMI connector. This configuration
delivers optimal performance and ease of use in a system that included both a digital display and an AV Receiver. EDGE
communicates with your display to obtain its preferred format, then automatically adjusts its processing to produce to match the
display’s preferred format.
EDGE also communicates with your AV Receiver to learn its audio capabilities, then combines display information and
communicates system capability back to the source components, which provide optimized output. You can let EDGE manage your
system or if you prefer, you can manually control your system through EDGE. Either way, EDGE makes it easier.
DVDO Edge is a result of a vision: Using a home Audio/Video system, with high definition video and surround sound audio should
be and can be much easier.
6

Section 1: Introduction
Using DVDO EDGE in a Home System AV System
The illustration above shows a basic home audio/video system using DVDO EDGE. The components on the left are “sources.”
Sources are DVD Players, set top boxes, or any other component that produces an audio and video signal. These audio and video
signals connect to the inputs of the EDGE, and the output of the EDGE connect to a TV. The EDGE switches audio and video
signals, and provides image processing to match the incoming video formats to the preferred format of the TV.
The source components may use a variety of different signal formats and cabling. EDGE can accept practically all commonly used
cabling, and can handle a mix of cabling and format types. In the illustration above, two of the sources have HDMI outputs, while
the third one uses an older analog audio and video interface. Three sources are shown above, EDGE can accept up to ten.
7

Section 1: Introduction
Using DVDO EDGE in a Home System AV System (continued)
EDGE is optimized for use in a system with an AV Receiver as shown above. It has a dedicated audio HDMI output port, and an
Optical audio output for AV Receivers without HDMI. EDGE accepts audio and video from the source components, then routes
video to the TV and audio to the AV Receiver. Switching source components is simple; EDGE handles the audio and video routing
details.
EDGE provides automatic, intelligent communication between the source devices on the left, and the TV and AV Receiver on the
right. EDGE will automatically adjust its internal processing to produce the preferred video format of your digital TV or display.
8

Section 1: Introduction
Using DVDO EDGE in a Home System AV System (continued)
EDGE comes with a DVDO Universal Remote. It controls EDGE, and it can control up
to seven other components in your system, including your TV, your AV Receiver and
your source components.
Once you have set up your system and programmed your remote, you can use this
single remote for the day to day control of your system. You will need the other
remotes during setup or for specialized functions.
DVDO Universal Remote has advanced Punchthrough and Macro features that make
operation of your system simpler. These features let you control your system in a
more natural way, by function instead of by component.
For example, if you want to control your sound volume, you can simply press the
Volume UP/Down buttons without having to remember which component in your
system controls sount volume.
The Punchthrough feature works with other functions, including Channel Selection,
and the Play--Stop--Pause--Fast Forward--Fast Reverse group.
The Macro function is useful when you find yourself using a sequence of button
presses over and over. Macros allow the combination of a sequence of button
presses into a single button. A Macro is often used to combine a series of power
commands into a single button, for one-button power-on or power-off of some or all of
the components in your system.
You can program Punchthrough and Macro functions as part of your system setup.
9

Section 1: Introduction
DVDO EDGE Feature Summary
Accepts inputs from up to 10 video sources and 10 audio sources.
Outputs video and audio to your digital TV via HDMI.
Dedicated audio HDMI output routes audio to your AV Receiver.
Separate Optical digital audio output for AV Receivers that don’t have HDMI.
Allows use of the highest quality video format your TV can accept and the highest quality audio format your
AV Receiver can accept.
Converts video formats from any video input to the highest quality format your TV can support.
Outstanding video quality using the ABT2010 video processor chip.
Links audio and video inputs so they can be switched together.
Intuitive on-screen Menus for controlling and configuring your system.
Automatically switches inputs using preprogrammed priority. Alternatively, the user may manually switch inputs using the
remote or through the On-Screen Menus.
Wizard guides you through setup of new TVs, receivers, or input devices.
User programmable audio/video lip sync; up to 200mS delay.
Simple Aspect Ratio controls available on the remote to through the On-Screen Menus.
Picture Controls, Aspect Ratio, Game Mode, and Zoom are individually configurable for each video
input.
Backlit DVDO Universal Remote controls all the components in your system.
10

Section 1: Introduction
Rear Panel Connections
Analog Audio
Input
Coax Audio
Input
Optical Audio
Output
Optical Audio
Inputs
Flexible
Component
Video
Inputs
Video
Input
S-Video
Input
5 HDMI 1.3
Inputs
(+1 on Front)
Video & Audio
HDMI 1.3 Output
Audio Only
HDMI 1.3 Output
Service
Connector
MiniUSB
IR Input
(Minijack)
AC Power
Reset
Button
A description of these connectors starts on the next page.
11

Section 1: Introduction
Rear Panel Connections (continued): Video Inputs
Flexible Component Video Inputs
This group of connectors can accept 3 types of analog component video inputs:
YPbPr Component
SCART
Breakout
RGB
SCART
Breakout
CVBS
YPbPr Component
SCART
Breakout
CVBS
SCART
Breakout
RGB
VGA
(RGBHV)
YPbPr Component (2 Inputs)
This is the most common type of component analog signal. Cables are usually, 3 RCA-> RCA type.
RGBHV
RGBHV stands for “Red, Green, Blue, Horizontal Sync, Vertical Sync.
It is usually used to connect a computer’s analog VGA output using the VGA to RGBHV adapter cable.
EDGE can accept these format on RGBHV:
VGA 640 x 480 @ 60Hz
SVGA 800 x 600 @ 60Hz
XGA 1024 x 768 @ 60 Hz
SXGA 1280 x 1024 @ 60 Hz
RGB + CVBS
For use with a SCART breakout cable. Connect the breakout cable to a SCART connector, then connect Red, Green, and
Blue to the component inputs, and connect CVBS to the Sync input horizontally adjacent to the component inputs.
Note: SCART is primarily a European connector type. CVBS means Composite Video Broadcast Signal; typically this would
be an analog PAL or SECAM signal.
12

Section 1: Introduction
Rear Panel Connections (continued)
Video Input (yellow RCA connector)
Composite video input. This signal is also known as “base band NTSC.” Also accepts European standards
PAL and SECAM.
S-Video
S-Video is a analog input signal format similar to base band NTSC (or PAL/SECAM), except that the chroma and luma/sync
components are on separate conductors, for improved signal quality. If you have a choice between Video or S-Video,
choose S-Video.
Audio & Video Inputs
HDMI 1.3
EDGE has a total of 6 HDMI inputs. HDMI version 1.3 is the most current and most full featured revision of the HDMI
standard. One of the HDMI inputs is located on the front of the unit. HDMI is the only input that carries both video and audio.
HDMI is compatible with DVI using an HDMI to DVI adapter cable. If you use a DVI source, you will need a separate audio
cable because DVI connectors do not carry audio.
Audio Inputs
Stereo Audio Input (Red and white pair)
Analog input for stereo audio. The connector is labeled L - Stereo - R.
Coax (orange)
Coax is the name given to a type of audio input. The cable is a RCA style, like the Video input. Coax carries digital audio in
an SP/DIF format.
Optical (Toslink)
EDGE has 3 Optical audio inputs. They carry the same signal format as Coax, i.e. SP/DIF digital audio.
13

Section 1: Introduction
Rear Panel Connectors (continued)
HDMI 1.3 Video/Audio
This connector is used to carry video to your TV or display. It will also carry audio depending on how you configure your
EDGE.
HDMI 1.3 Audio Only
This connector is intended to connect to an AV Receiver for audio processing. EDGE will automatically sent audio to this
connector if it is connected to a powered-up AV Receiver, or you can manually configure EDGE’s audio output.
This connector does not output video.
Optical
If you have an AV Receiver for audio processing, but it does not have an HDMI input, you can use the Optical output to
connect audio from your EDGE to your AV Receiver. Configuration of the audio output of EDGE can be done using the
Settings Menu.
Other Rear Panel Connectors
Service
This connector is used for software upgrades if they are necessary using a mini-USB cable. Refer to the web site:
www.dvdo.com/edge for updates regarding software upgrades.
Reset
Resets the EDGE, and brings it into a known state. Reset does not change user settings. If Reset is used, it should be
pressed and released quickly (less than 2 seconds).
The reset button will also restore factory defaults. If the reset button is pressed and held, the front panel LED will blink for
about 5 seconds. When it stops blinking and stays on, the reset button can be released. All factory defaults will have been
restored, and any user settings will be erased.
IR - In
This connecter can be used in installations where line-of-sight IR reception is not possible in conjunction with accessories
that allow for remote IR connections.
AC Input
Power connection for your EDGE.
14

Section 2: Setup
Section 2: Set Up your DVDO EDGE: Summary
A summary form of the setup procedure appears on this page, followed by a more detailed description over the following pages.
Some steps may be skipped depending on your system configuration and your preferences.
Gather your cables. For help choosing cables, see the “Video Cables” or “Audio Cables” chapter.
Connect your AV Receiver (you can skip this if you will use your TV’s built-in audio).
Connect a cable from your DVDO EDGE to your AV Receiver
If your AV Receiver has HDMI input, connect an HDMI to HDMI cable from EDGE’s Audio HDMI output to your
Receiver’s HDMI input.
If your AV Receiver does not have HDMI, connect a cable from EDGE’s Optical Audio output to your Receiver’s optical
input.
Power up your AV Receiver
Set up your AV Receiver to accept input from EDGE
Connect and set up your TV
Connect a cable from your DVDO EDGE to your TV
If your TV has an HDMI input, use and HDMI to HDMI cable.
If your TV has a DVI input, use an HDMI to DVI adapter cable.
Power up your DVDO EDGE and your TV
EDGE’s Display Wizard will lead you through the remaining setup.
Connect and set up your input components
Connect a cable from your source component’s audio/video outputs to your EDGE
Power up the source component
Input Wizard should appear to guide you through setup.
Test to see that you have both audio and video from the source component
Repeat the steps above for each of your source components
Program the DVDO EDGE Universal Remote
Use the preprogrammed Code Method to program the remote for control of your system’s components
Program punch-through features for channel selection and audio control (a convenience option)
Program a macro for 1 button power on/off (a convenience option)
15

Section 2: Setup
Set Up your DVDO EDGE -- Details: Output Connections
DVDO Edge -- Rear View of output Connectors
Connect your TV to
the Video/Audio output.
1. If you don’t have an AV Receiver, skip to # 2.
If your AV receiver has HDMI input,
connect an HDMI cable from Edge’s Audio
Only HDMI output to an HDMI input on your
AV receiver.
If your AV Receiver does not have HDMI,
connect an Optical cable from the Optical
Audio Out to an optical input on your
AV Receiver.
Use your AV Receiver’s remote to power
on the AV Receiver and set its input
to Edge.
2. Connect your TV.
If your TV has HDMI input,connect an HDMI to
HDMI cable from Edge’s Video/Audio output to
an HDMI input on your TV.
If your TV or monitor has DVI input, you will need
an HDMI to DVI adapter cable. Connect the
HDMI end to Edge’s Video/Audio HDMI output
and the DVI end to your TV or monitor.
Use your TV’s remote to power up and set
its input to Edge.
Plug in Edge’s AC cable (if you haven’t done
so already).
Connect your AV Receiver to
the Audio Only HDMI output
if the Receiver has HDMI.
OR
Connect your AV Receiver to
the Optical Audio Out
connector if your Receiver
does not have HDMI.
continued on the next page.
16

Section 2: Setup
Set Up your DVDO EDGE -- The Display Wizard -- Step 1: Name your display.
1a. Name your Display
If you want to change the name of
your display, press Right Arrow
to go to the on-screen keyboard.
Otherwise, press Down Arrow
to go to the next setup step 2.
1b. Name your Display - Keyboard
Use this on-screen keyboard
to rename your display.
When you are finished, highlight
“Finish” then press OK to accept the
new name.
If you want to exit the keyboard
screen with no changes,
highlight “cancel” then press OK.
You should see the Display Wizard
on your TV as shown left. The Display
Wizard assists setup of your TV and
your audio.
Using Display Wizard, you can
1. Name your Display.
2. Select an output video format.
3. Select an output connector for
audio.
If you don’t want to change anything,
press Left Arrow to Exit the Wizard.
17

Section 2: Setup
Set Up your DVDO EDGE -- The Display Wizard--Step 2: Output Format.
2a. Select an output video format.
EDGE defaults to “Auto Select”
and communicates with your TV to find
the TV’s preferred format.
If you want to change the output format,
press Right Arrow to go to the Output
Format screen, shown below.
Otherwise, use Down Arrow to use
the preferred format, and proceed to
the next step 3.
2b. Output Format Selection.
Use the Down Arrow to highlight
the output format you want, then
press OK.
EDGE will switch to the new output
format. You will have to confirm that
you can see a picture within 10 seconds.
If you don’t confirm, EDGE assumes that
you can’t see the picture and will return
to the previous format.
18

Section 2: Setup
Set Up your DVDO EDGE -- The Display Wizard--Step 3: Audio Output.
3a. Select an audio output connector.
You have 4 choices for audio output:
A. Auto: Default setting.
Automatically chooses an output
depending on the capabilities
of the attached, powered-on
components.
B. Video HDMI: Outputs audio on the
Video HDMI connector.
Use this setting if your TV has
audio capability and you don’t
have (or don’t want to use)
an AV Receiver.
C. Audio HDMI: Outputs audio on the
Audio HDMI connector.
Use this setting if you have
an HDMI capable AV Receiver.
D. Optical: Outputs audio on the
Audio Optical connector.
Use this setting if you have
an AV Receiver that does not
have HDMI input.
Make a selection and/or press < to exit
this screen.
You finished with your Video and Audio
output setup.
Left Arrow Exits Display Wizard
19

Section 2: Setup
Set Up your DVDO EDGE -- The Input Wizard--Step 1: Input Name.
Input Wizard guides you through the setup
of your input components. You can run the
Input Wizard for every input component.
Using the Input Wizard, you may
1. Rename an input component.
2. Set an Input Priority for the component.
3. Associate an Audio Input with the
video input.
1a. Input Name
Use the on-screen keyboard to
rename this input, or press
Down Arrow to go to step 2.
1b. Input Name - Keyboard
Use this on-screen keyboard
to rename your display.
When you are finished, highlight
“Finish” then press OK to accept the
new name.
If you want to exit the keyboard
screen with no changes,
highlight “cancel” then press OK.
20
Other manuals for EDGE
2
Table of contents
Other DVDO Media Converter manuals

DVDO
DVDO DVD VCR Combo Configuration guide

DVDO
DVDO DVDO-DAConv-1 User manual

DVDO
DVDO DVDO-Splitter-14-SE User manual

DVDO
DVDO EDGE User manual

DVDO
DVDO DVDO-VGAHDMI-1 User manual

DVDO
DVDO iScan VP20 User manual

DVDO
DVDO iScan VP50PRO User manual

DVDO
DVDO iScan VP20 Operating instructions

DVDO
DVDO iScan Ultra User manual

DVDO
DVDO iScan Duo User manual