Dvico TVix HD M-5000U User manual

User Manual
TViX HD M-5000U

Safety Notice
Kee
p
y
our TViX awa
y
from heated areas, such as sunlit areas,
heaters etc. Set it up in well ventilated places. Ensure that a
Keep all magnetic materials away from the TViX. Ma
free airflow is maintained around the appliance.
g
netic
materials such as s
p
eakers or ma
g
nets ma
y
erase or cause
Do not set the TViX u
damage to the data stored in the hard disk.
p
in
p
laces that are ex
p
osed to oil,
water, dust, humidity or rain and wind.
Do not touch the
p
ower
p
lu
g
with wet hands or use defective
power cables & electric outlets. It ma
y
cause electric shocks
Do not dro
or fire.
p
the device. Doin
g
so ma
y
cause critical
damage to the hard drive.
Do not tr
y
to disassemble or remodel the device. Doin
g
so
may cause it to malfunction or cause a fire.
2

Usage Precautions
Please read the following usage precautions before using the TViX HD.
Make sure the power is off when you connect the A/V cable between the TViX and the TV.
When cleaning the TViX HD product, pull out the power cord and wipe it with a dry piece of soft cloth.
When connected to the computer through the USB cable the TViX HD acts as an external USB
storage device (In this state there is no video/audio output and the VFD will show as USB ON.) For
normal TViX HD play mode, disconnect the USB cable connected to the computer and turn on the
TViX HD.
When the TViX HD is playing and the USB is connected to the computer, the center of the screen
will show a USB ON icon. Disconnecting the USB port will show the original TViX HD screen.
Make sure the jumper setting of the hard disk that is installed on the TViX HD is set to Single Master.
Otherwise the hard disk will not be recognized by TViX HD.
When you detach the HDD, please let the heat out sufficiently.
We recommend using the supplied cables and accessories for they are customized for the best
performance of the TViX HD. Using other cables or accessories may not give the best performance.
If you want to unplug the device, press the Stop button in 'Unplug or Eject Hardware'.
Windows 98SE and Windows ME does not support NTFS file format. However, NTFS file format is
available in Windows 2000/XP. If you want to create two or more partitions with one hard disk drive,
“Primary Partition” is recommended.
If you choose FAT32 file format on Windows 2000/XP, the drives maximum size will be limited to 32GBs. If
you want to use a single drive letter of 32GBs or more, you have to format on Windows 98SE/ME.
The certificated sticker is on the bottom of the TViX HD
3

Safety Notice.............................................................................................................................................. 2
Usage Precautions..................................................................................................................................... 2
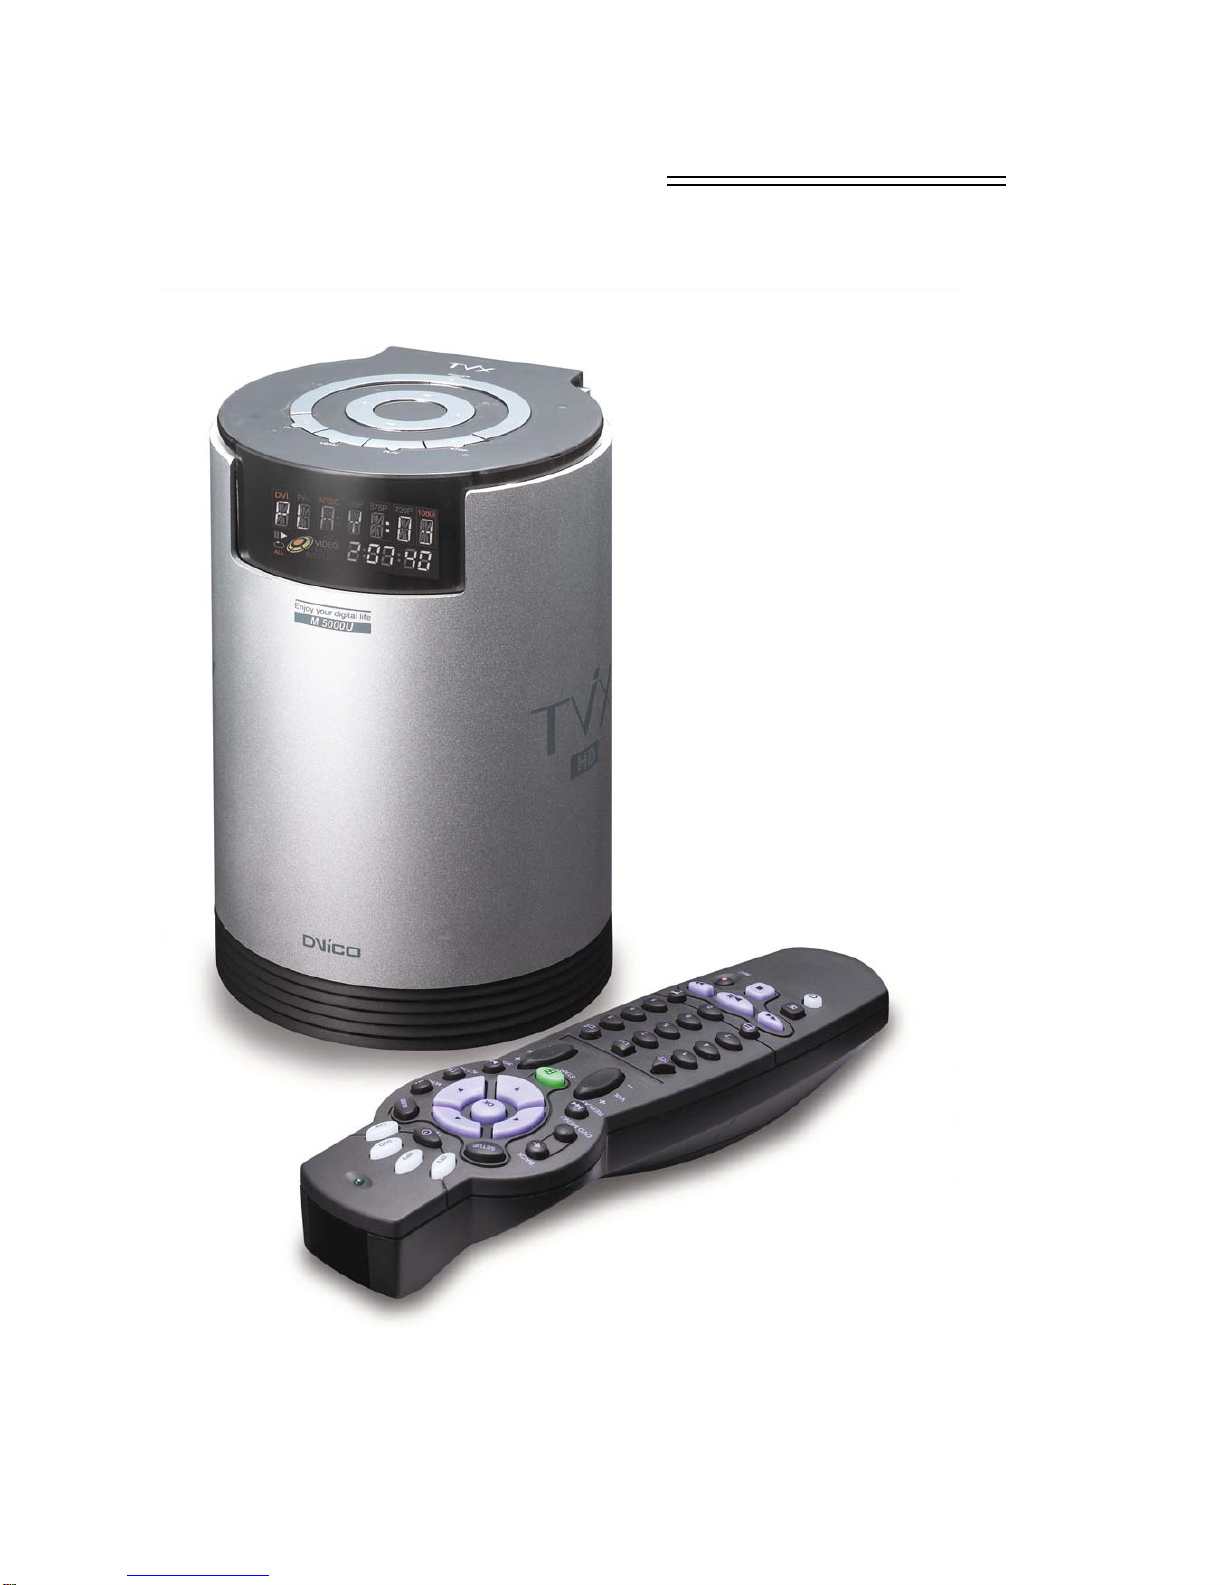
1Introduction...................................................................................................5
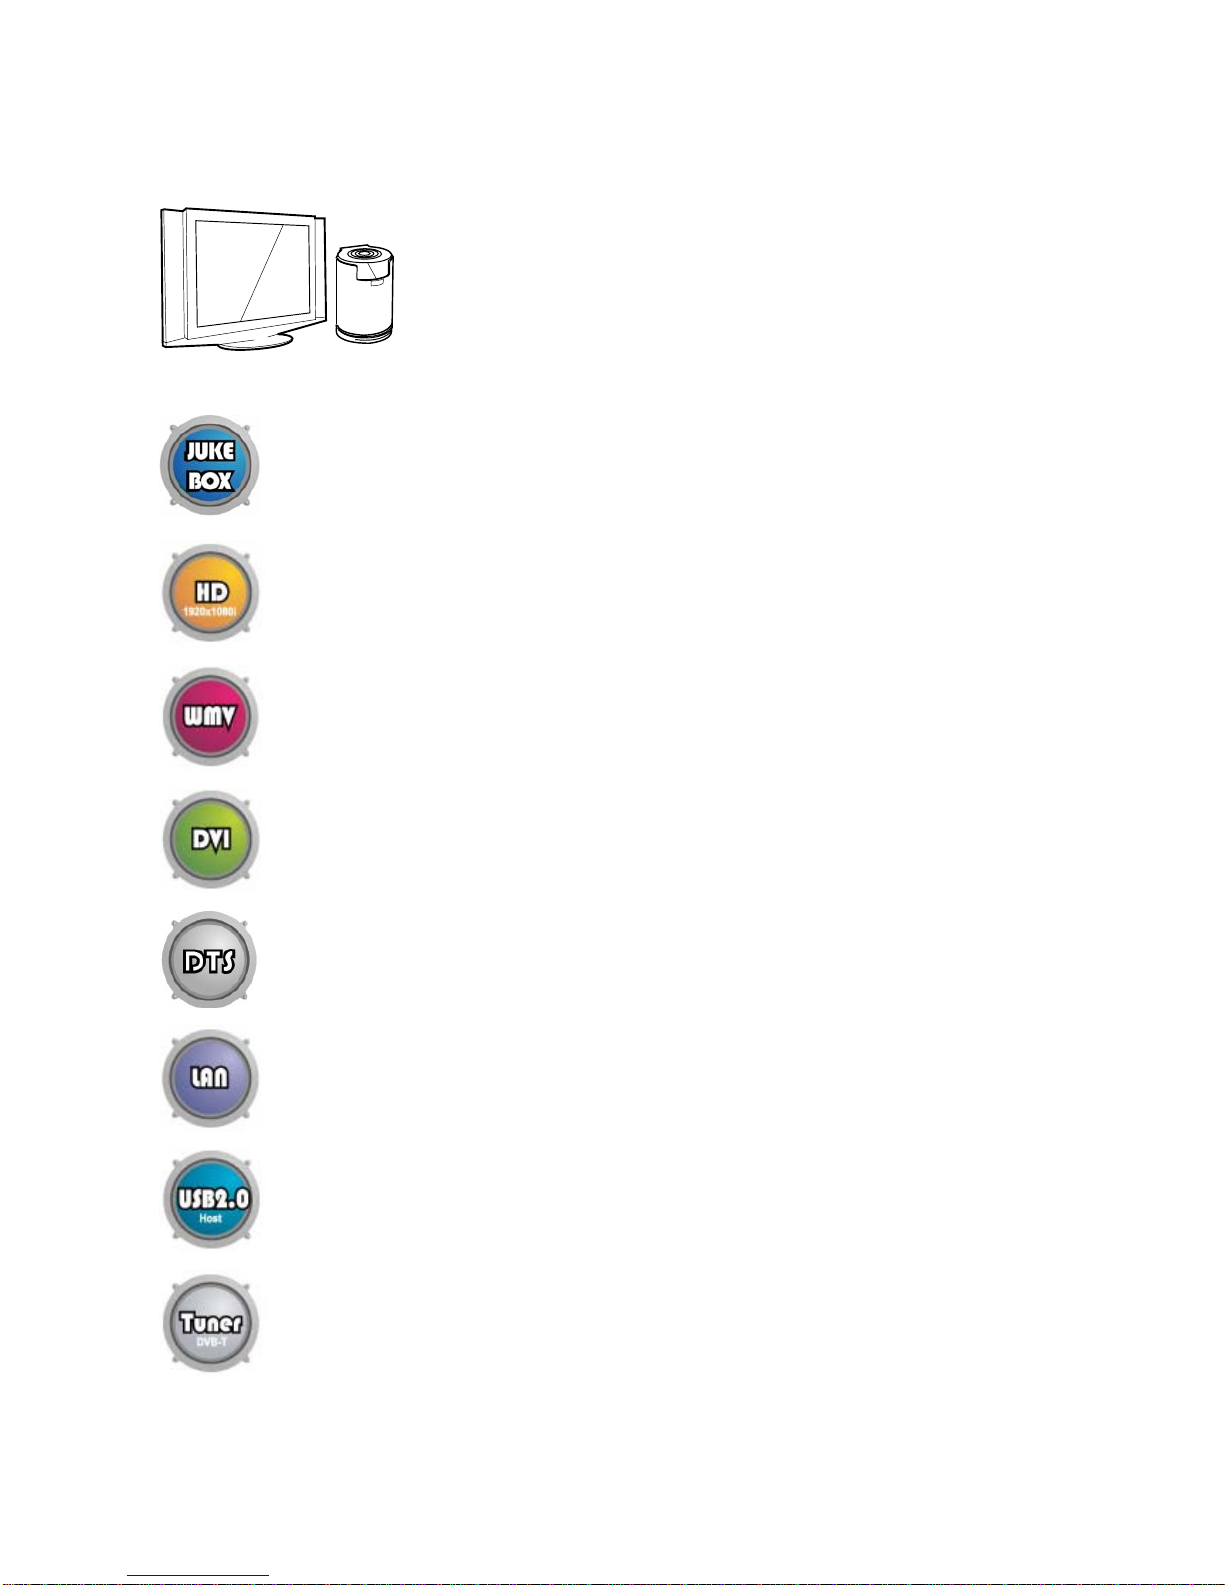
1.1 Multimedia Player....................................................................................................................... 5
1.2 Audio Player ............................................................................................................................... 6
1.3 External Storage......................................................................................................................... 6
1.4 Specifications.............................................................................................................................. 7
2Name of each part........................................................................................8
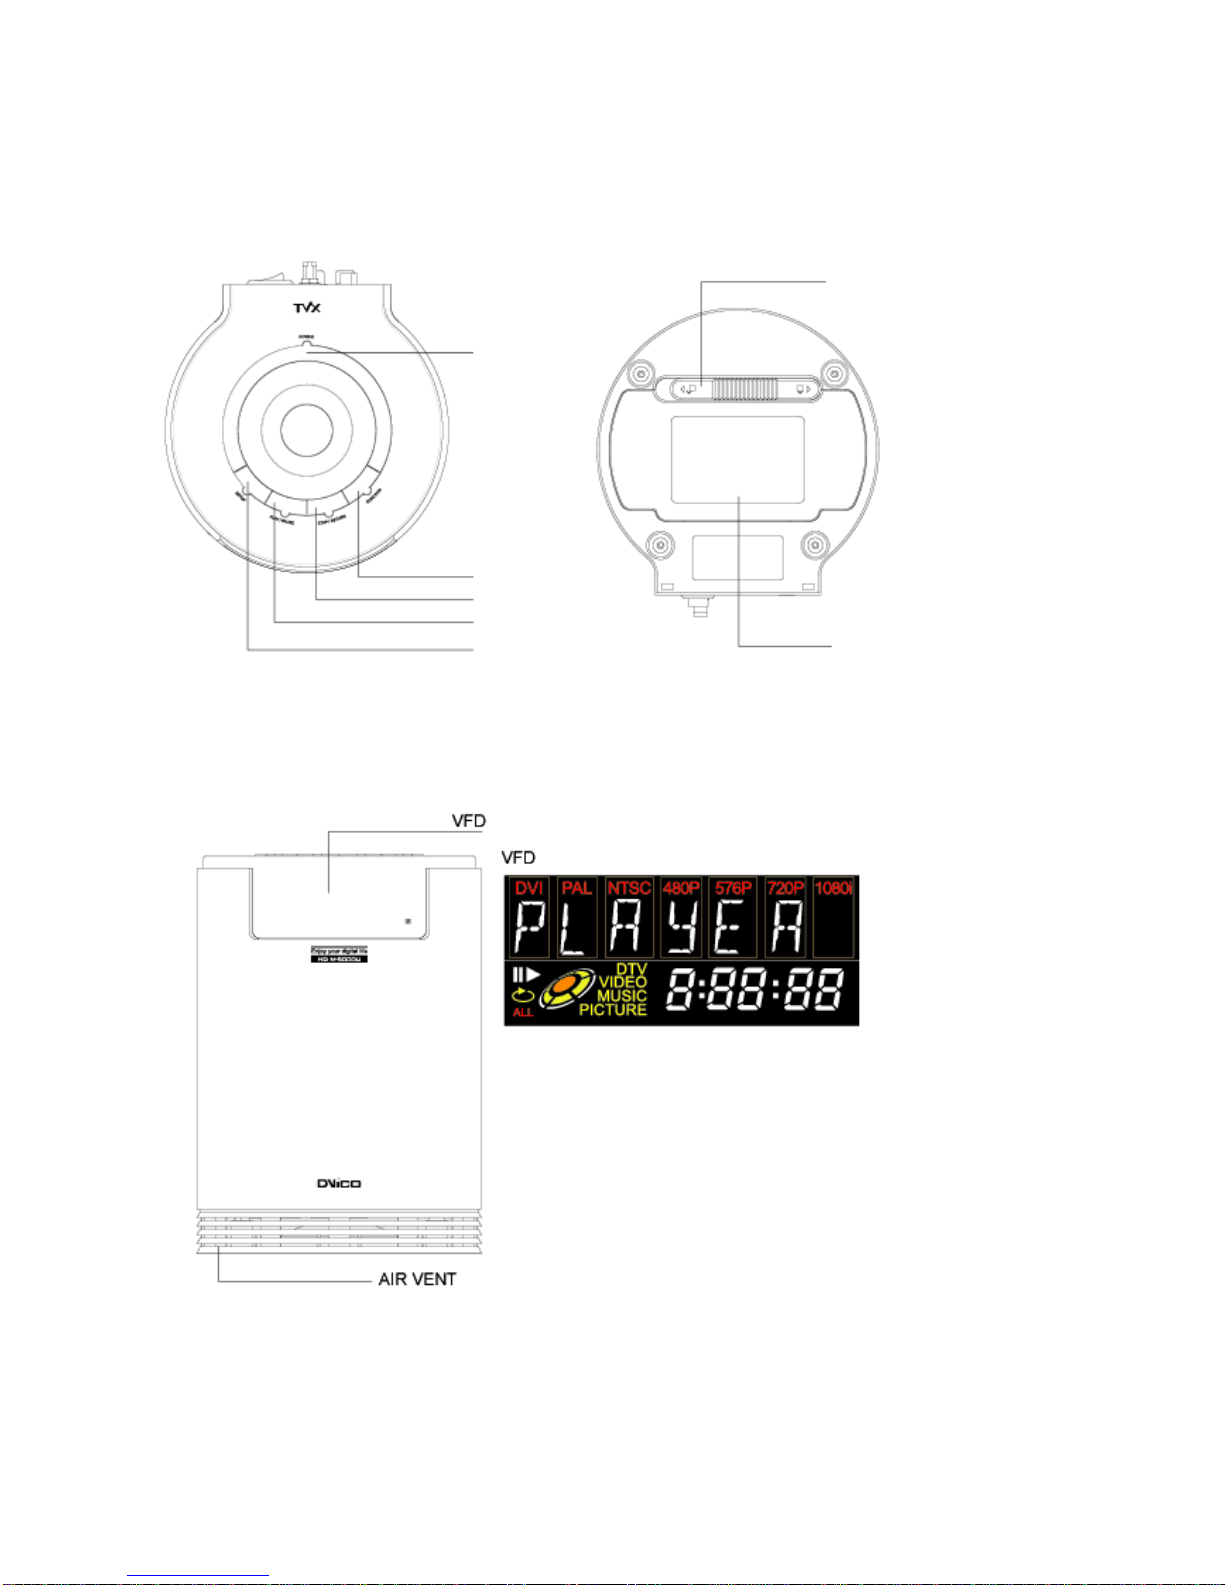
2.1 Unit Control................................................................................................................................. 8
2.2 Front VFD................................................................................................................................... 8
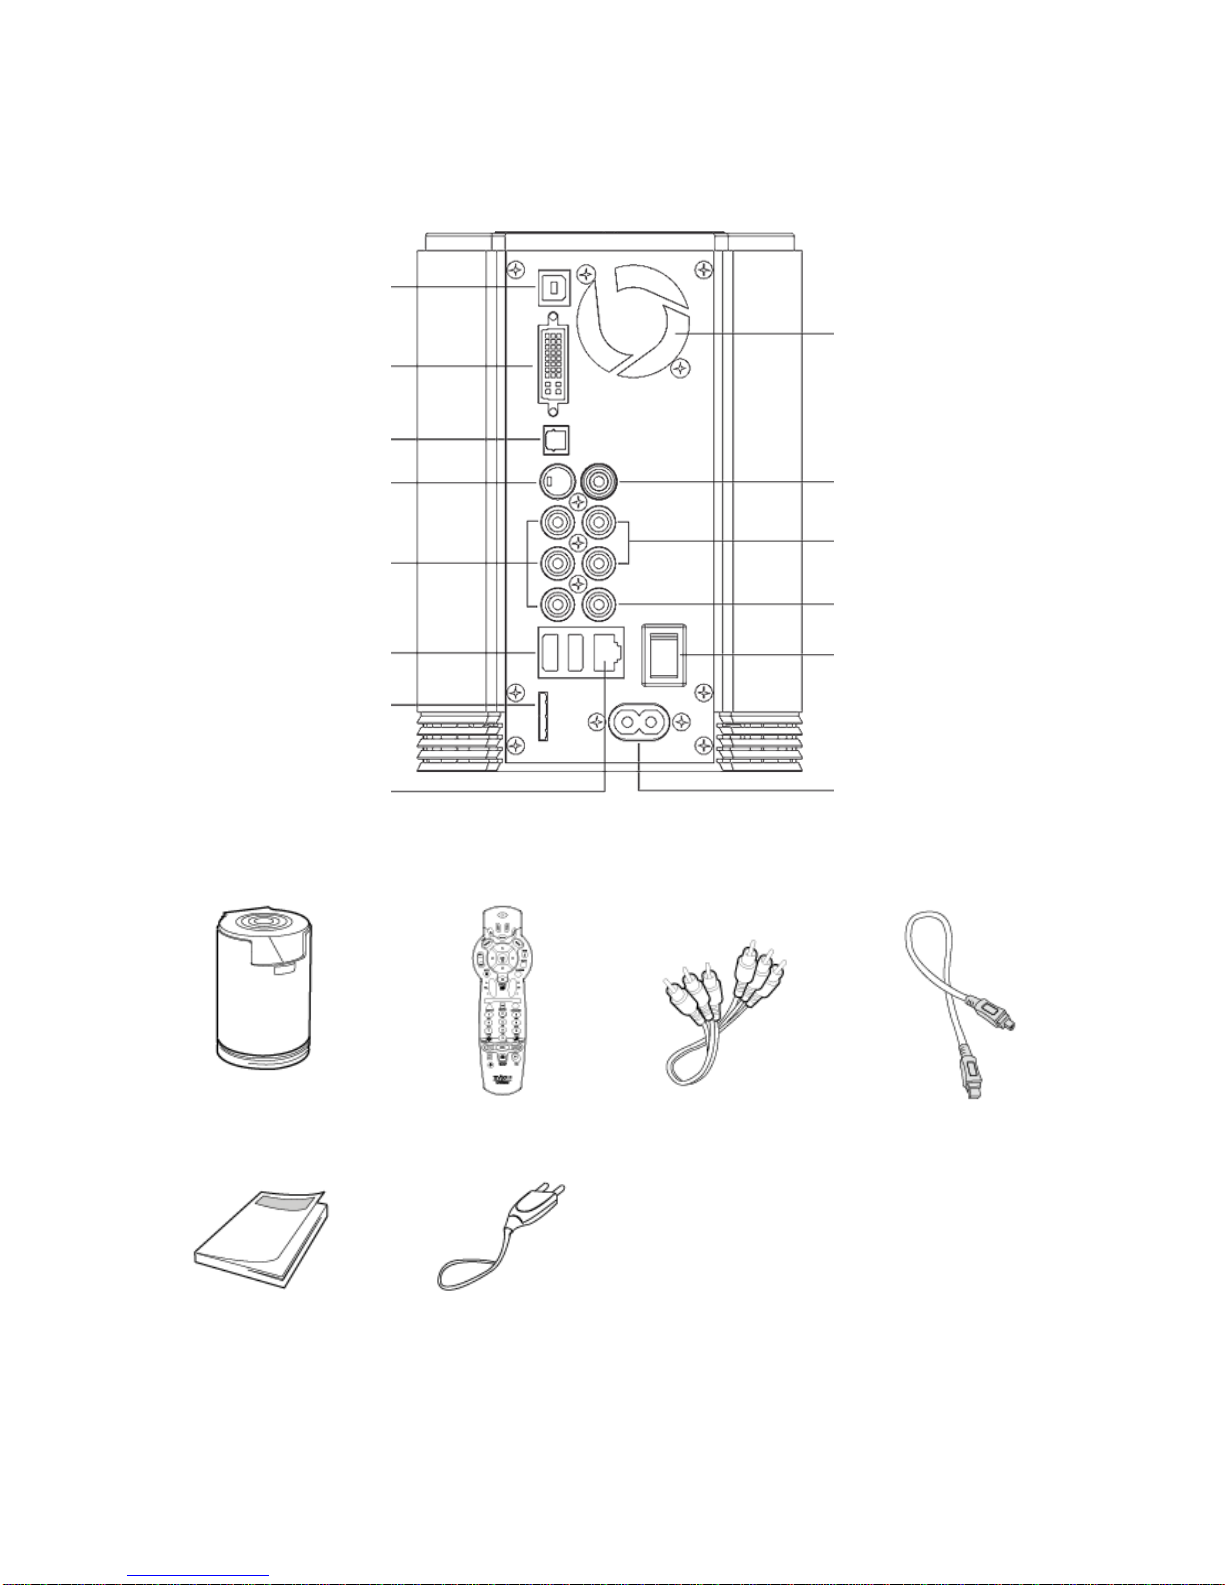
2.3 Cable connection........................................................................................................................ 9
2.4 Package contents....................................................................................................................... 9
3Installation and connection.........................................................................10
3.1 Make HDD Folder..................................................................................................................... 10
3.2 Video Connection ......................................................................................................................11
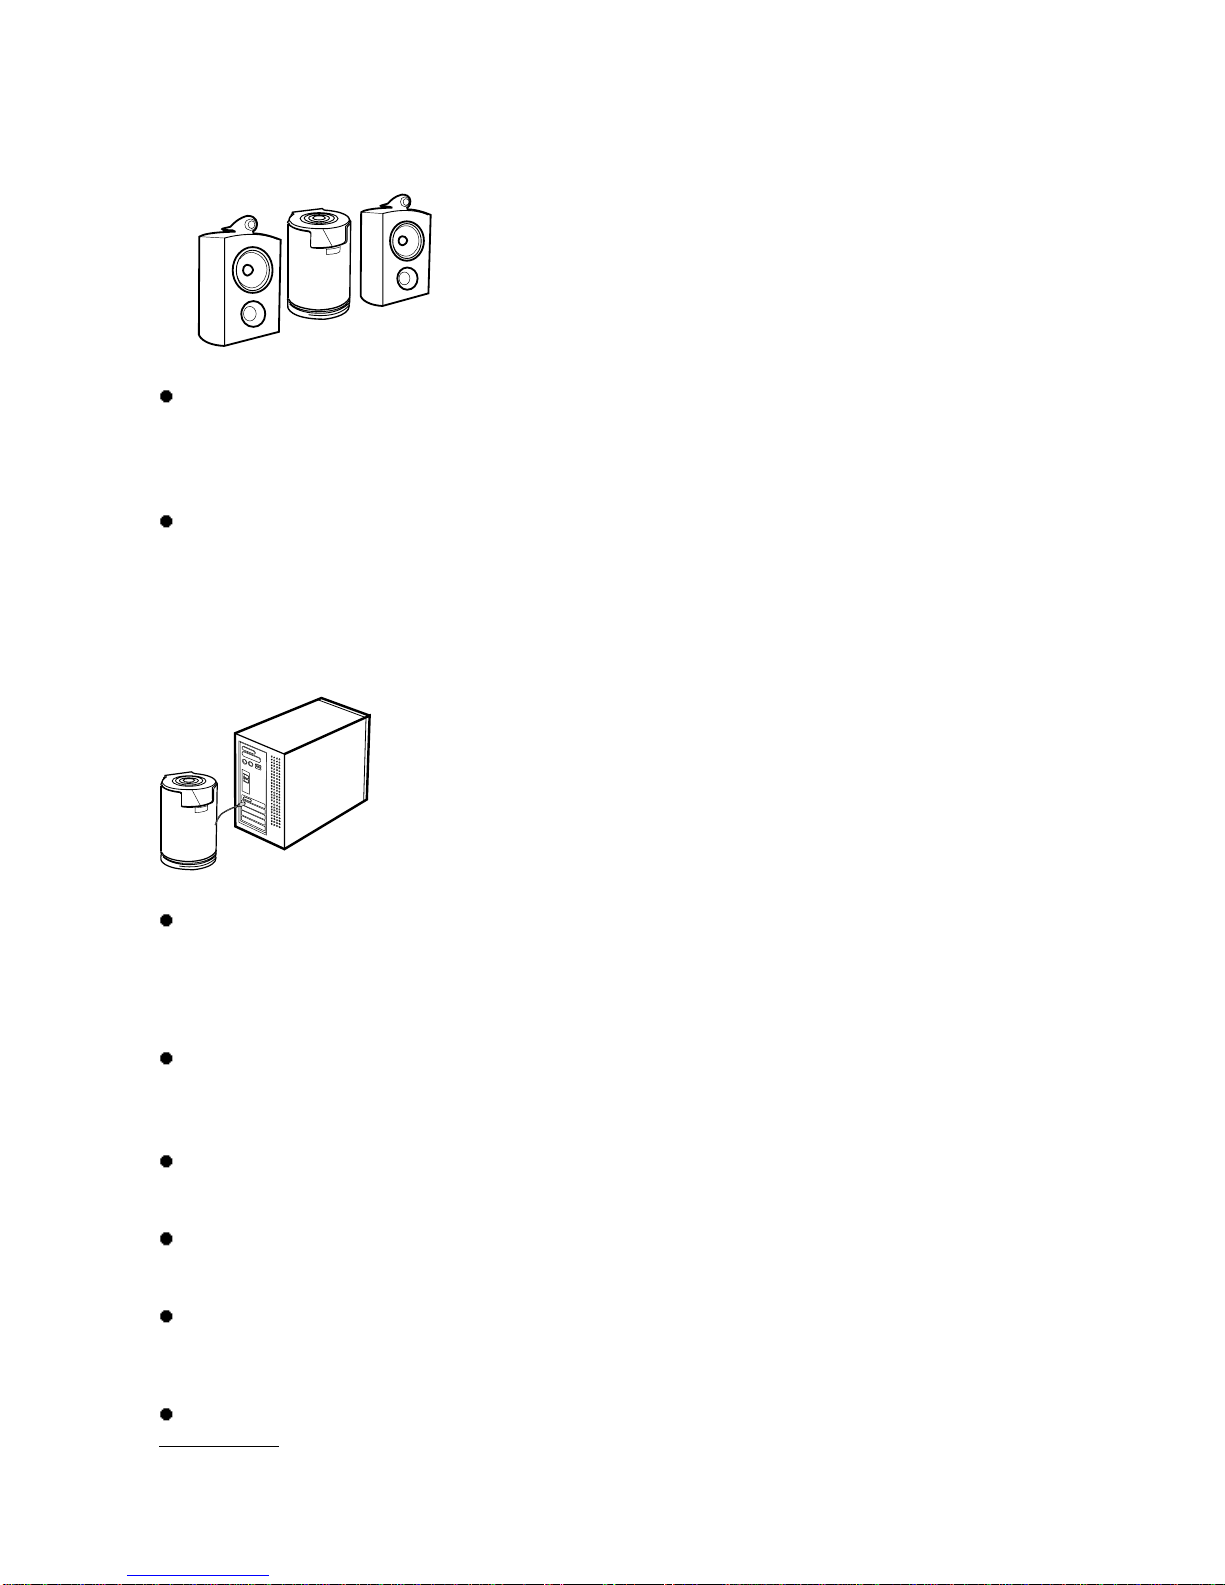
3.3 Audio connection...................................................................................................................... 13
3.4 LAN Connection ....................................................................................................................... 14
3.5 HDD Installation/Exchange....................................................................................................... 23
4TViX HD Setup Menu.................................................................................25
4.1 Audio/Video Setting.................................................................................................................. 25
4.2 MISC Setting............................................................................................................................. 27
5Easy Usage of TViX HD .............................................................................29
5.1 Play Video File.......................................................................................................................... 29
5.2 Play Audio File.......................................................................................................................... 30
5.3 Play Image File......................................................................................................................... 31
6Using remote controller ..............................................................................32
6.1 Basic function ........................................................................................................................... 32
6.2 Descriptions on each buttons................................................................................................... 33
6.3 Extra feature............................................................................................................................. 41
7Firmware upgrade ......................................................................................44
8Using USB connection with PC ..................................................................46
8.1 Windows 98SE Driver Installation ............................................................................................ 46
8.2 Making partition and formatting the HDDs under Windows 98SE / ME................................... 51
8.3 Making partition and formatting the HDDs under Windows 2000 / XP..................................... 53
8.4 Unplug or eject hardware ......................................................................................................... 57
9Appendix - Technical Terms........................................................................58
10 GNU General Public License......................................................................60
4

1 Introduction
1.1 Multimedia Player
TViX HD is a standalone, multimedia hard disk player which plays digital
videos, digital music, digital still images and DVD files to a TV display and
home entertainment system. You can enjoy digital contents in your living room
without having to burn discs or having to play it back on a DVD or CD player
anymore.
TViX HD plays back DVD movies with the full functionality of DVD navigation. You can
create your own virtual DVD library by storing your own private collection of DVDs in .ISO
or .IFO format and watch them exactly as if they were running from the original DVDs (all
original features included: Menu, Chapter, Audio Stream, Subtitle, Fast Forward, Rewind,
Slow, Pause, Step Forward, Repeat, Search etc.).
TViX HD plays back high definition video (up to 1920x1080i) and still images. Pre-recorded
HDTV programs from a digital TV set-top box or personal digital video contents taken by a
HDV™ camcorder can be played back with the TViX HD on a high definition display. The
TViX HD features a DVI connector and component, which will match the high resolution of
HD level video contents.
Using the latest EM8621 processor, TViX HD supports the latest multimedia formats
(WMV9 & WMV HD) as well as MPEG4 3.11,4.0 and 5.0.
Using the high definition DVI output, you can directly connect the TViX HD to your HDTV.
TViX HD supports DTS hardware decoder to mix down DTS sound into 2 channels for a
more dynamic sound quality.
The TViX HD can be networked with a PC system using its built-in LAN port. You are able
to navigate to a PC file through TViX HD’s network and play the file from its original
destination without having to copy it onto the TViX HD first.
With two USB2.0 host ports, you can now attach additional external USB hard drives to
further extend the storage capacity or transfer files from another USB device such as a
thumb drive. You can also playback files from a digital camera, USB flash driver, USB flash
card reader, or a MP3 player.
You can play HDTV without a digital TV set-top box and use the play/pause and recording
functions. (An optional HD Tuner box will be provided with the TViX HD in the future)
5

1.2 Audio Player
TViX HD can play a variety of audio files such as MP3, Ogg Vorbis or WMA (Windows Media Audio)
through the TV speaker or any other audio systems. You can listen to your favorite music files continuously,
by organizing a custom play list. Now you can enjoy music all day without changing CDs.
Watch picture slideshows with the option of background music (supports music slideshows using picture
images).
1.3 External Storage
Supports
If you connect to a USB 1.1 port, the TViX HD will work at USB 1.1 speed, so we strongly recommend that
you use USB 2.0.
Supports both USB 1.1 and 2.0. It can be used as an external device to save video, audio, image
files, work data, program backup, etc.
USB 2.0 enables TViX HD to become an external storage device which supports up to 480Mbps.
Supports Plug & Play, so Windows will recognize TViX HD automatically.
When playing the TViX HD, if you connect the USB port, the VFD will show as USB ON. When you
disconnect the USB, you don’t need to reboot the TViX HD for continuous usage.
If you are a Windows98SE user, you should download a USB storage driver from our web site
www.tvix.co.kr before you connect your TViX HD with your system. You do not need to install a driver in
Windows ME/2000/XP.
6

1.4 Specifications
Main Chipset Sigma Design EM8621
7 Alpha-Numeric Character
VFD Display 5 Digit numeric display
Format :.wmv, .avi, .mpg, .vob, .mp4, .asf, .tp, .trp
Codec : MPEG 1 / 2 / 4, DivX, XVID
Video
Resolution Up to 1920 x 1080i
MP3, WMA, AAC, Ogg, PCM
Audio AC3, DTS pass through and down mixing
Photo BMP, JPG
USB2.0 Host 2 Ports
USB2.0 Target 1 Port
LAN(10/100Mbps)
Connectivity
Multi I/O Jack (Optional breakout box)
Video
DVI, Component, S-Video, Composite,
Audio
AV In / Out
Digital : Coaxial, Optical /Analog: Stereo
File Formats NTFS, FAT32
Sub Title Text Subtitle : smi,sub,srt,aqt,utf,lrc / Image Subtitle : sub (with idx)
ODD Support Through USB 2.0 Host
Language English, French, German, Spanish, Italian, Portuguese, Swedish, Norwegian,
Danish, Japanese, Korean
FAN 40mm Brushless FAN
FAN Control Temperature Sensing, Variable Speed
Main Memory Main Memory
Flash ROM 8 Mbyte
Internal Power 90~240V free voltage
Shape Cylindrical
Dimension 131mm(Diameter) 185mm(Height)
Weight 1,200g (without HDD) 1,800g (with HDD)
7

2 Name of each part
2.1 Unit Control
You can do basic operations without the remote control.
SLIDING LOCK
POWER button
Function button
STOP button
PLAY button HDD Cover
SETUP button
2.2 Front VFD
The VFD will display information
Video out mode
Play mode and information
8

2.3 Cable connection
You can connect to a TV display or audio Amplifier using the A/V cable.
USB In
p
ut Port
Cooling FAN
DVI Out
p
ut Port
O
p
tical Port
VIDEO
S-VIDEO
Stereo
COMPONENT
COAXIAL
USB HOST Power On/Off
Multi I/O Port
Unit Power
LAN Port
2.4 Package contents
TViX HD M-5000U Unit Remote control A/V Cable USB Cable
Manual Power cable x 2
9

3 Installation and connection
3.1 Make a HDD Folder
1. As shown in the picture below, connect one end of the USB cable to the USB connector of the TViX HD
and the other end to the computer.
CAUTION!
The USB cable has a different shape on
both ends. We are using USB 2.0 type "A"
Plug(male) to "B" Plug(male)
2. After connecting to the PC, you have to turn
the TViX HD’s power on.
3. When you right-click on the My Computer
menu on your screen (picture A) you can see the
newly created drive, TVIX (D:).
You can change the name of the drive to what
you want.
4. Double click on TVIX (D:) to open it, then make
separate folders named video, audio, and photo
for easy usage of the files, after storing all the
files for each folder.
10

3.2 Video Connection
We support DVI, Component, S-Video, Composite video output for connecting to the TV and each output
needed to change settings on the TViX HD.
DVI has the highest quality then it is the component >s-video> composite.
3.2.1 Connection with ordinary(Composite) TV output
Connect TViX HD and your TV using the yellow video cable.
Turn on the TViX HD and TV. Select appropriate video input mode on
your TV until you get the initial TViX HD screen.
3.2.2 Connection to S-VIDEO output
Connect TViX HD and your TV using the S-Video cable.
Turn on the TViX HD and TV. Select appropriate video input mode on
your TV until you get the initial TViX HD screen.
(S-Video cable is not included and should be purchased separately.)
11

3.2.3 Connection to component output
Connect TViX HD and your TV with the component cables.
Turn on the TViX HD and TV. Select an appropriate video input mode on
your TV (in this case, Component input mode)
3.2.4 Connection to DVI output
You can simply connect your TViX HD to the DVI port on the TV.
However, if the TV has HDMI port only, you need to buy a HDMI cable to
convert the DVI data and then you will be able to see the processing
digital signal.
CAUTION
NOTE: After you connect the video cable to your TV, press the TV out button repeatedly on your remote
control until you get the initial TViX screen.
* The component cable is not included in the TViX and must be purchased separately.
12

3.3 Audio connection
3.3.1 Connection to 2 CH normal TV
Connect the left(white) and right(red) sound output to the appropriate
terminal of your TV or Hi-Fi system.
3.3.2 Connection to 5.1CH amplifier(Digital)
When you have a multi channel decoder/amplifier with optical/coaxial
input, you can enjoy 5.1 CH high quality sound through the coaxial or
optical cables.
The illustration on the left shows how to connect coaxial cable. Optical
cable connection can be done by a similar method.
(These cables are not included in the package and must be purchased
separately.)
.
CAUTION
When no sound is heard after connecting the Optical or Coaxial Cable, you have to change the audio
setup of TViX to Digital.
13

3.4 LAN Connection
3.4.1 Connect PC via Network
<When connecting the computer directly to the TViX HD >
Connect the LAN cable to the LAN port for both the TViX HD and the PC.
TIP ~
In this case, you generally have to use a LAN cross cable type.
If the computer’s LAN card was connected to an Internet line, you can install an additional LAN
card to your PC and connect that LAN card to the TViX.
< When connecting with IP Router or Hub >
Connect the LAN cable to the LAN port for an IP Router or Hub.
TIP ~
In this case, you generally have to use Direct LAN Cable type.
14

3.4.2 Set Network Configurations under Windows XP
1) Select a folder which you want to share. Right-click the folder
and click ‘Sharing and Security’ in the popup menu.
2) Check ‘Share this folder on the network’ and write the share
name. Ex) TViX hd1
3) Make sure to write the share name within 12 characters in
English.
4) Use ‘Everyone’ if you can see ‘Everyone’, else you don’t
need to change anything. Also add ‘Everyone’ to the security
tab.
5) After that, the shared folder will be displayed like the
following picture.
15

6) Move to 'Settings' > 'Control Panel' > 'Administrative Tools' > 'Computer Management' > 'Local Users and
Groups' > 'Users', and double click ‘Guest’.
CAUTION ~
This is for Windows XP Professional. Windows XP Home users can’t see this window. If you can’t find
‘Administrative Tools’ in the Control Panel, click “Switch to classic view” in upper-left corner on the
screen.
7) You must uncheck ‘Account is disabled’
16

8) ‘GUEST’ must be shown as the following image. (a red X mark should not be shown)
9) Move to 'Control Panel' > 'Network connections', and select ‘Local area connections’ properties by right
clicking the mouse.
10) Remove “Guest” on the ‘User Rights Assignment’ > ‘Deny access to this computer from the network’
option.
11) Move to ‘Access this computer from the network’, and select the ‘Properties’ property by right clicking the
mouse or double clicking it.
17

12) Press ‘Add User or Group’
13) Write “Guest” and then Press the “OK” button.
14) Press OK, and Guest will be registered.
18

< When connecting the computer directly to the TViX HD >
In this case, you generally have to use a LAN cross cable type.
If the computer’s LAN card was connected to an Internet line, you can
mount additional LAN cards to your PC and connect those additional LAN
cards to the TViX HD.
1. Move to ‘Control Panel’ > ‘Network Connections’, and select ‘Properties’ property by right clicking the
mouse.
2. Double click ‘TCP/IP->LAN card’ that you want to use on your computer. You must select the additional
LAN card.
Check ‘Specify an IP address’, and write an IP address & Subnet mask that you want to use.
Ex) IP address : 192.168.0.2 Subnet mask : 255.255.255.0
19

3. Set the network configuration of TViX HD. Press [SETUP] on remote control to view the setup screen. On
that screen, select ‘Network Disk' and write the IP address For example, IPAddress: 192.168.0.2
4. Run the DHCP program, This version requires a DHCP program for 1:1 connection.
** Check out the DHCP program at www.tvix.co.kr
20
Table of contents
Other Dvico Media Player manuals

Dvico
Dvico TViX Slim S1 User manual

Dvico
Dvico TViX PVR M-5130SH User manual

Dvico
Dvico TViX PVR R-2230 User manual

Dvico
Dvico TVX-HD M-6600 User manual

Dvico
Dvico TViX HD M-5000A User manual

Dvico
Dvico TViX HD M-6500A User manual

Dvico
Dvico TViX C-3000U Deluxe User manual

Dvico
Dvico TViX HD M-4000PA User manual

Dvico
Dvico TViX HD M-7000A User manual

Dvico
Dvico TViX HD M-4000P User manual