Please Refer to the Component User Guide for Detailed Operating Instructions
© 2010-2017 Dymax Corporation. All rights reserved. All trademarks in this guide, except where noted, are the property of, or used under license by Dymax Corporation, U.S.A.
Please note that most dispensing and curing system applications are unique. Dymax does not warrant the fitness of the product for the intended application. Any warranty applicable to the product, its application and use is strictly limited to that contained in
Dymax’s standard Conditions of Sale. Dymax recommends that any intended application be evaluated and tested by the user to ensure that desired performance criteria are satisfied. Dymax is willing to assist users in their performance testing and evaluation by offering
equipment trial rental and leasing programs to assist in such testing and evaluations. Data sheets are available for valve controllers or pressure pots upon request. QS028 11/1/2017
Dymax Oligomers & Coatings
Dymax Asia (H.K.) Limited
Dymax UV Adhesives & Equipment (Shanghai) Co. Ltd.
Dymax Asia Pacific Pte. Ltd.
Dymax Engineering Adhesives Ireland Ltd.
+353 21.237.3016 | info_ie@dymax.com | www.dymax.ie
Dymax UV Adhesives & Equipment (Shenzhen) Co. Ltd.
+86.755.83485759 | dymaxasia@dymax.com | www.dymax.com.cn
Dymax Korea LLC
+82.2.784.3434 | info_kr@dymax.com | www.dymax.com/kr
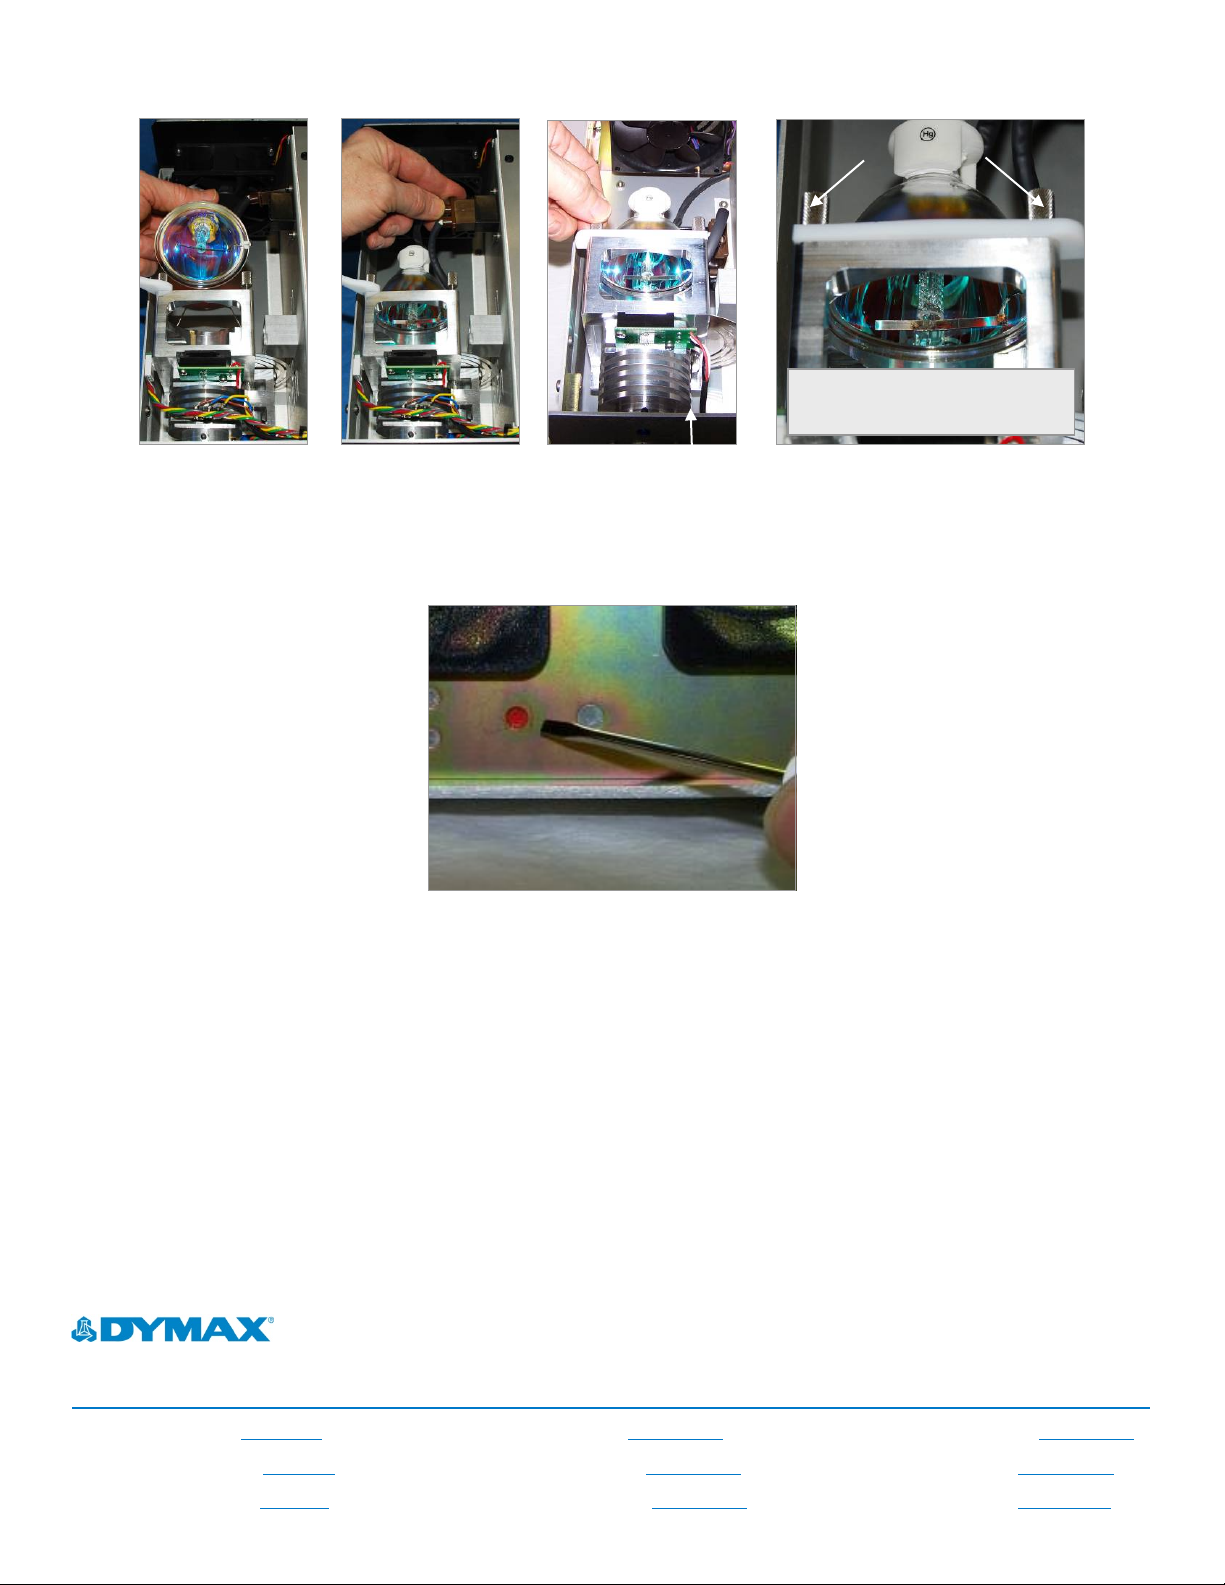
Figure 9. Install Bulb Figure 10.Plug in Bulb Figure 11. Tighten Mounting Figure 12. Bulb Electrode
Bracket Thumbscrews
6. Plug in and turn on the BlueWave 200. Press and release the red Reset Button on the back of the unit (Figure 25).
Figure 25. Reset Button
7. This completes Bulb installation. The Bulb will now ignite. If the Bulb does not light, repeat instruction 5. The unit is
now reset to operate for 2,000 hours.
8. Allow the Bulb to warm up for five minutes and then the unit is ready for use.
This metal Electrode connecting the Bulb
to the wire from the Reflector should be
parallel to the bottom of the unit.
Mounting Bracket Thumbscrews


