6Installation instructionsDX-TVM111
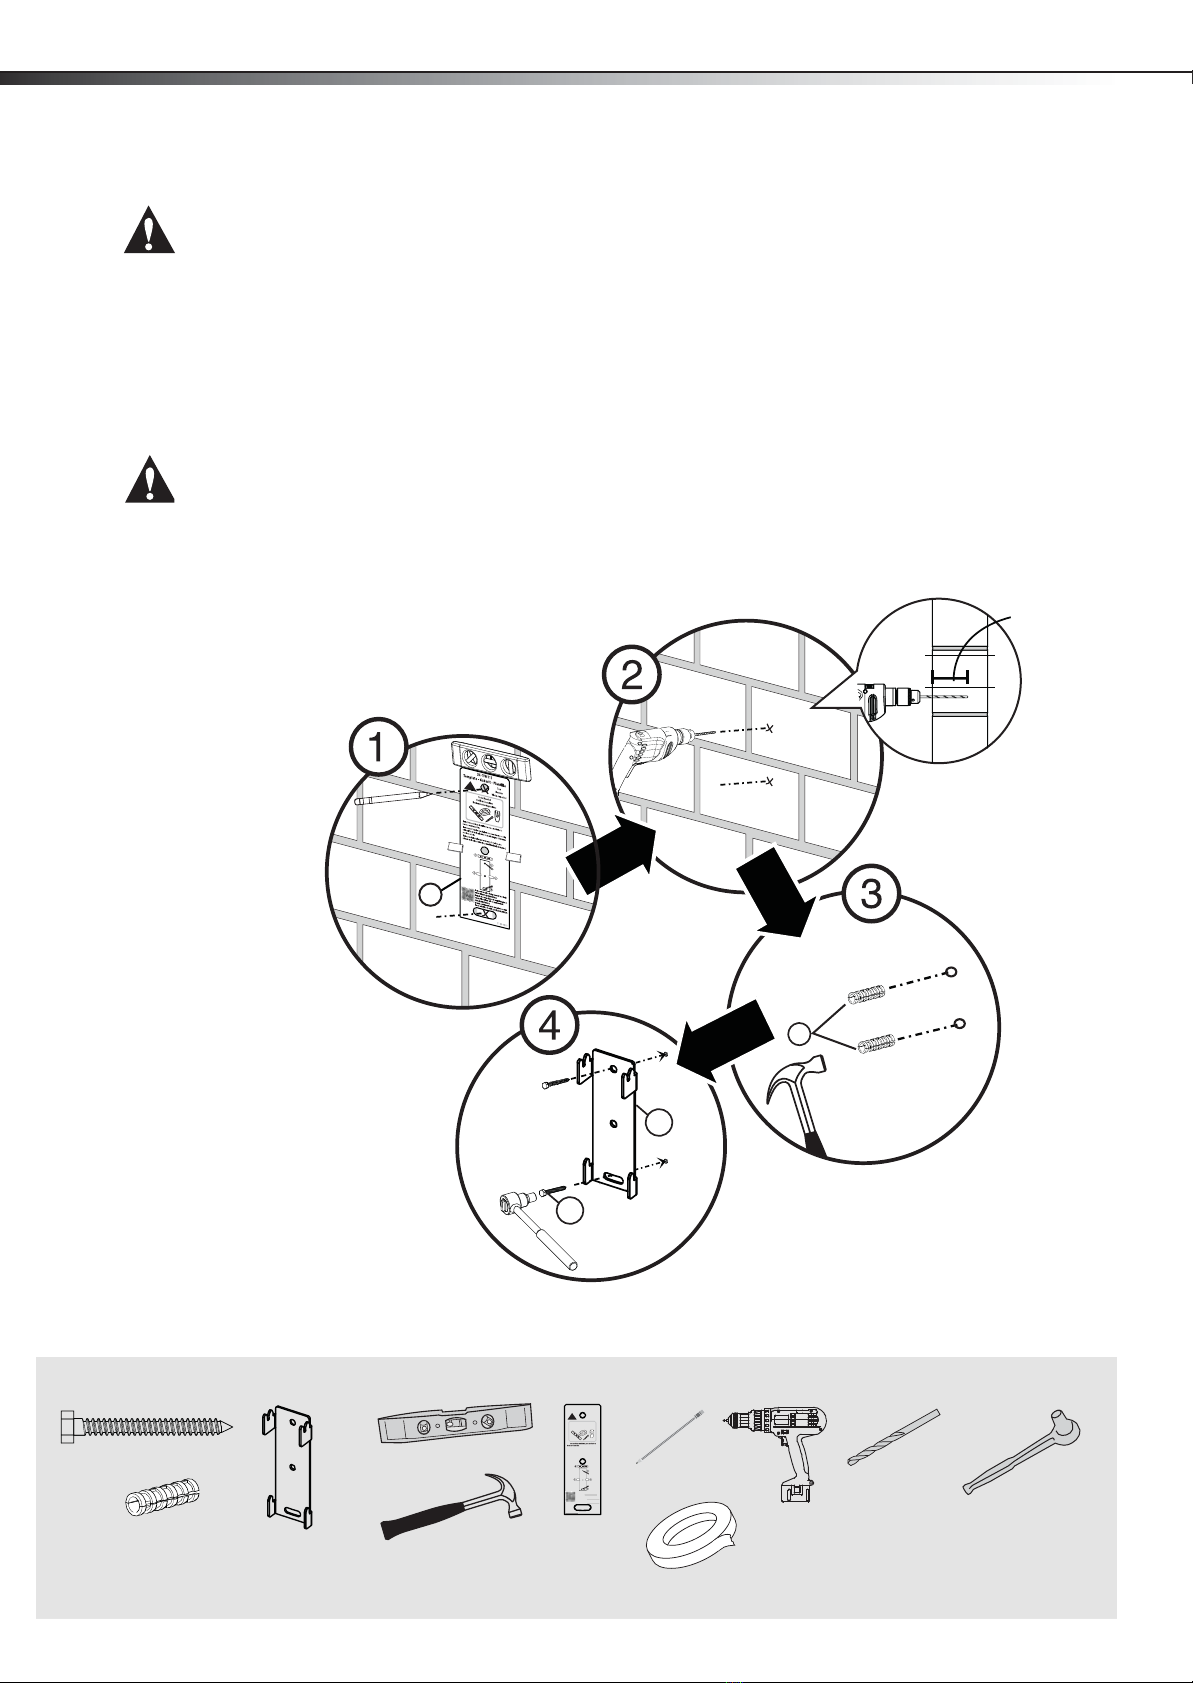
STEP 2 - Option 2: Installing on a solid concrete* or concrete block wall
CAUTION: To prevent property damage or personal injury, never drill into mortar between blocks. Mount wall plate
directly onto the concrete surface.
1Align the wall plate template (J) at the height you determined in the previous step and make sure that it is
level. Tape the wall plate template in position, then use a pencil to mark the lag bolt hole locations (2).
Remove the wall plate template.
2Drill pilot holes to a depth of 2.5 in. (63.5 mm) using a 7/16 in. (11 mm) diameter masonry drill bit.
3Insert the concrete wall anchors (H) into the pilot holes and use a hammer to make sure the anchors are flush
with the concrete surface.
4Align the wall plate (B) with the anchors, insert the lag bolts (G) through the holes in the wall plate, then
tighten the lag bolts only until they are firm against the wall plate.
CAUTION: Avoid potential injuries or property damage!
DO NOT over-tighten the lag bolts (G).
You’ll need
G
B
H
J
2.5 in.
(63.5 mm)
* Minimum solid concrete thickness: 8 in. (203 mm)
* Minimum concrete block size: 8 x 8 x 16 in. (203 x 203 x 406 mm)
G(2)
Drill
7/16"
masonry drill
bit 7/16" socket
wrench
Level
H (2) Hammer
Wall plate (B)
Pencil
Top
Haut
Partesuperior
DX-TVM111
Template• Gabarit • Plantilla
ToolsNeeded
Outilsnécessaires
Herramientasrequeridas
Note
Remarque: Pour une construction à ossature de bois,
localiserd'abord les montants en bois, à l'aide d'un
détecteurde montants.
Nota:para la instalación en construcciones de armazón de
madera,primero debe localizar las vigas de madera con un
localizadorde vigas.
Needmore information about your mount? Scan
thisQR code or visit www.dynexproducts.com.
<FR>Needmore information about your mount?
Scanthis QR code or visit www.dynexproducts.com.
<SP>Needmore information about your mount?
Scanthis QR code or visit www.dynexproducts.com.
http://san.us/284 V113-0138
DX-TVM111_13-0525_MAN_V4_EN-A4.fm Page 6 Friday, June 7, 2013 6:58 AM