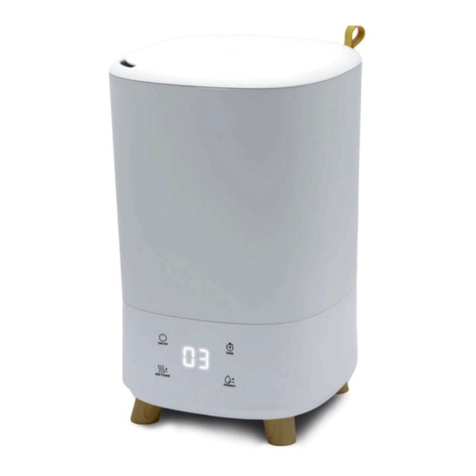
Easy@Home 1094S2022 User manual

English·········02
Español ········ 20
ANIMAL HUMIDIFIER WITH
ULTRASONIC COOL MIST
HUMIDIFICADOR EN FORMA DE ANIMALES
CON NIEBLA FRÍA ULTRASÓNICA
User Manual
Manual
del usuario

Table of contents
2
Table of contents
Package contents....................................................................................... 4
Components ........................................................................................................4
General information ..................................................................................6
Read and save these instructions....................................................................6
Explanation of symbols......................................................................................6
Intended use ....................................................................................................... 7
Safety..........................................................................................................8
General safety instructions ...............................................................................8
First use .....................................................................................................12
Check product and contents of delivery........................................................12
Operation ..................................................................................................12
Setting up the product......................................................................................13
Filling with water ...............................................................................................13
Connecting the product................................................................................... 14
Switching the product on and off .................................................................. 14
Refilling with water .......................................................................................... 14
Cleaning.....................................................................................................15
Cleaning exterior parts.................................................................................... 16
Cleaning and descaling the water tank ........................................................ 16
Cleaning the control unit................................................................................. 16
Cleaning the air vent ........................................................................................ 16
Storage ................................................................................................................17
Trouble shooting.......................................................................................17
Technical specifications ............................................................................19
Disposal .....................................................................................................19
Disposing of packaging ................................................................................... 19
Disposing of the product ................................................................................. 19

Table of contents
3

Package contents
4
A
Components
1Control knob 8Power supply unit
2Red LED 9Control unit
3Green LED 10 Lid
4Fan outlet 11 Connection socket
5Water tank 12 Water Level Sensor
6Water tank cover 13 Mist outlet slot (The
position may vary depending
on the model)
7Mist outlet channel
Instruction manual
Warranty card
Package contents
13 9
10
11

Package contents
5
B
7
3
4
12
2
8
5
6
1
1

General information
6
General information
READ AND SAVE THESE INSTRUCTIONS
Animal humidifier with ultrasonic cool mist (hereinafter referred to only
as „Product“). Please read this instruction manual carefully and
completely. Always comply with any safety instructions. If you have any
questions or are unsure how to handle the product, please contact your
retailer or customer service center. Please keep this manual for reference, and pass it
on to third parties, if applicable.
Explanation of symbols
WARNING!
This signal symbol/word refers to a hazard with a
medium level of risk that, if not avoided, may result
in death or serious injury.
CAUTION!
This signal symbol/word refers to a hazard with a
low level of risk that, if not avoided, may result in
minor or moderate injury.
NOTICE! This signal word warns of possible material
damage.
NOTE! This symbol indicates useful additional information on the
assembly or operation of your product.
Electrical devices that carry this symbol are rated as Protection Class II.
DC Voltage
Alternating current
MINDESTGRÖSSE
RP & GB
17.07.2020
The ETL Listed Mark is proof that the adaptor has been independently
tested and meets the applicable published standard.
This symbol indicates the polarity of the current at the mains
connection.

General information
7
Suitable for indoor use only.
FCC PART 15
This device complies with Part 15 of the FCC Rules. Operation is subject to the following
two conditions: (1) this device may cause harmful interference, and (2) this device must
accept any interference received, including interferences that may cause undesired
operation.
Warning: Changes or modifications to this unit not expressly approved by the party
responsible for compliance could void the user’s authority to operate the equipment.
NOTE: This equipment has been tested and found to comply with the limits for a Class
B ISM equipment, pursuant to Part 15 of the FCC Rules. These limits are designed to
provide reasonable protection against harmful interference in a residential installation.
This equipment generates, uses and can radiate radio frequency energy and, if not
installed and used in accordance with the instructions, may cause harmful interference
to radio communications.
However, there is no guarantee that interference will not occur in a particular
installation. If this equipment does cause harmful interference to radio or television
reception, which can be determined by turning the equipment off and on, the user is
encouraged to try to correct the interference by one or more of the following measures:
• Reorient or relocate the receiving antenna.
• Increase the separation between the equipment and receiver.
• Connect the equipment into an outlet on a circuit different from that to which the
receiver is connected.
• Consult the dealer or an experience radio/TV technician for help.
Intended use
The product is designed exclusively for humidifying interior spaces.
It is intended only for private use and is not suitable for commercial purposes.
This product is not a toy! The product must not be used in any way other than that
described above and must not be modified in any way, as doing so may result in
damage to property or even personal injury. The manufacturer and/or retailer
accepts no liability whatsoever for damage arising from use other than intended or
incorrect use.

Safety
8
Safety
General safety instructions
WARNING!
Danger for children and persons with impaired physical, sensory,
or mental capacities (e.g. partially disabled persons, older persons
with reduced physical and mental capacities) or lack of experience
and knowledge (e.g. older children).
− This product may be used by children aged eight and over as well as persons with
impaired physical, sensory or mental capacities or those lacking experience and
knowledge if they are supervised or have been instructed in how to safely use the
product and have understood the risks associated with operating it. Children must
not play with the product. Cleaning and user maintenance must not be performed
by unsupervised children.
− Keep children under eight years of age away from the product and connection
cable.
− Do not leave the product unattended while in operation.
− Do not let children play with the packaging.
Children may get caught in it when playing and suffocate.
WARNING!
Risk of electric shock!
Incorrect electrical installation or a power supply voltage that is
too high can potentially cause electric shocks.
− Only connect the product if the line voltage of the power socket corresponds to
the rating plate specification.
− Only connect the product to an easily accessible socket so that you can quickly
disconnect it from the power grid in case of a failure.
− Do not use the product if it is visibly damaged or if the connection cable or power
supply unit is defective.
− If the product’s connection cable is damaged, the cable must be replaced by the
manufacturer, its after-sales support, or a person with similar qualifications to
avoid risks.

Safety
9
− Only use the product with the enclosed power supply unit.
− Do not open the housing; instead, have a qualified professional carry out the
repairs. Contact a qualified workshop for this. Liability and warranty claims are
waived in the event of repairs performed by the user, improper connection of the
device or incorrect operation.
− Only parts that comply with the original device information may be used for
repairs. This product contains electrical and mechanical parts which are essential
for providing protection against sources of danger.
− Do not operate the product with an external timer or separate remote control
system.
− Do not submerge the product, connection cable, or power supply unit in water or
other liquids.
− Never touch the power supply unit with wet hands.
− Never pull the power supply unit out of the socket by the power cable; instead,
always do so by taking hold of the power plug.
− Never use the connection cable as a carrying handle.
− Keep the product, power supply unit, and connection cable away from open
flames and hot surfaces.
− Lay the connection cable out in such a way that it does not pose a tripping ha-
zard.
− Do not kink the connection cable and do not lay it over sharp edges.
− Only use the product in indoor areas. Do not use it in wet rooms or in the rain.
− Never store or use the product so that it is at risk of falling into a bathtub or
washbasin.
− Never retrieve an electrical device by hand if it has fallen into water. In this case,
immediately pull the DC connector/power supply unit out of the power socket.
− Make sure that children do not insert any objects in the product.
− Always switch the product off and pull the power supply unit out of the socket
when you are not using the product, cleaning it, filling it with water (see chapter
on “Filling with water”), or in the event of a fault.

Safety
10
CAUTION!
Health hazard!
Improper use of the product may result in injury to your health.
− WARNING: Microorganisms, which might be in the water or surrounding
environment where the product is being used or stored, can grow in the water
tank and be released into the air, leading to serious health risks if the water is not
replaced and if the water tank is not properly cleaned every three days.
− Please note that high air humidity can promote the growth of biological
organisms in the environment.
− Do not allow the area around the product to get wet or damp. Reduce the release
of vapor if moisture occurs. Only use the product periodically if you cannot reduce
the release of vapor. Do not let absorbent materials
(e.g. carpets, curtains, drapes, or tablecloths) get wet.
− Do not leave any water in the water tank if the product is not being used.
− The product must be emptied and cleaned before being put away. The product
must be cleaned before the next use.
NOTICE!
Risk of damage!
Handling the product improperly may damage the product.
− Place the product on an easily accessible, level, dry, heat-resistant, and sufficiently
stable work surface. Do not place the product on the edge of the work surface.
− Prevent heat from building up by not placing the product directly up against a wall
or under cupboards or similar. The released vapor or heat produced could damage
pieces of furniture.
− Do not cover the product during operation.
− Never place the product on or near hot surfaces (hotplates, etc.).
− Never expose the product to high temperatures
(heaters,etc.) or to the effects of the weather (rain, etc.).
− Do not expose the product to direct sunlight or hot circulating air.
− Do not use the product with ambient temperatures below 32°F (0°C). If the
water in the water tank is frozen, wait until it has melted.
Safety
11
− If the room temperature is below 32°F (0°C), empty the water tank. Freezing
water can damage the product.
− Never fill the water tank with water that is above 104°F
(40°C) to prevent discoloration or deformation.
− Only put water in the water tank; never put water in the other parts of the
product.
− Never put water into the product’s vapor discharge opening or vapor discharge
channel. Wipe wet areas on the product with a dry cloth.
− Do not put any metals, chemicals, or cleaning agents in the water tank.
Otherwise, humidification won’t work properly.
− Never remove residual water from the steam pipe when the product is switched
on. This can destroy the sensor.
− Do not move the product around too much if there is a lot of water in the water
tank. Otherwise, water may leak and can get into other parts of the product.
− Never attempt to clean the product by immersing it
in water, and do not use a steam cleaner to clean it. Otherwise, the product could
be damaged.
− Do not in any case place the product in the dishwasher. It would be destroyed as
a result.
− Stop using the product if its plastic parts exhibit cracks or breaks or are deformed.
Replace damaged parts only with corresponding original spare parts.
− Pefer to the “Cleaning” chapter.

First use
12
First use
Check product and contents of delivery
NOTICE!
Risk of damage!
Be careful when opening the package with a sharp knife or other
pointed object, as the product could easily be damaged.
− Proceed with great care when opening.
1. Take the product out of the packaging.
2. Check if the delivery is complete (see Fig. A).
3. Please check the product itself and all its components for damage. Should you
detect any damage, do not use the product. Please contact the manufacturer’s
service address stated on the warranty card.
4. Make sure that the water level sensor 12 is properly attached and not blocked.
(seeFig.B).
5. Rinse the water tank 5and the water tank cover 6with clear water.
Operation
NOTICE!
Risk of damage!
Unusual noises or odors may be a sign that the product is damaged.
− If there are any unusual noises or odors coming from the product, immediately
pull the power supply unit out of the power socket.
− Contact the warranty provider as specified on the warranty card.
NOTICE!
Risk of damage!
The product can be quickly damaged when used with an empty
water tank.
− Never use the product without water in the water tank.

Operation
13
It is best to use the product with cool boiled or distilled water.
Change the water tank’s water on a regular basis to keep the product clean.
With a full tank, the product can operate continuously to 24hours without having to
refill.
Setting up the product
− Connect the product to a socket with a power voltage corresponding to the rating
plate. Make sure that the connection socket 11 is freely accessible.
− Connect the hollow plug of the plug-in power supply unit 8to the socket on the
back of the product.
Filling with water
WARNING!
Risk of electric shock!
If the product falls over with a full water tank, the outcoming water
can flow out onto other electrical devices and cause electric shock.
− Set the product down in a safe place.
− Empty the water tank if you do not intend to use the product
for an extended period.
− Make sure that the device is unplugged when you are adding
water to it.
1. Take off the lid 10 from water tank 5.
2. Grab the water tank 5by the carrying handle and remove it from the control unit
9. Turn the water tank 5upside down.
3. Unscrew the water tank cover 6counterclockwise off the water tank 5.
4. Use the water tank opening to pour max. 1 gallon (3 780 ml) of water into the
water tank 5. Do not fill water in the mist outlet channel 7.
5. Screw the water tank cover 6back on clockwise and wipe off any water residue
with a dry cloth.
6. Turn the water tank 5over again and place it on the control unit.

Operation
14
Connecting the product
− Connect the product to a properly installed power outlet using the plug-in power
supply.
Switching the product on and off
The amount of humidification can be progressively adjusted with the control knob
1
.
1. Turn on the product by turning the control knob
1
clockwise. The control knob
1
can be used to adjust the intensity of the mist output.
− If the green LED
3
lights up, there is a sufficient amount of water in the water tank
5
.
− If the red LED
2
lights up, there is an insufficient amount of water in the water tank
5
.
2. To turn the product off, turn the control knob
1
counterclockwise until you hear a
„click“ sound.
SET THE CORRECT HUMIDITY OUTPUT: Adjust the control knob
1so the mist
rises up to be absorbed by the room air. If mist drops quickly, turn down the
control knob 1until the mist is rising up.
A NOTE ABOUT HUMIDITY: To reduce excessive humidity or condensation,
especially in small rooms, leave the roomdoor open and adjust mist intensity
to the low output setting.
− Too much humidity in the room may allow moisture to accumulate on surfaces
wherebacteria and fungi can grow. Moisture that gathers may also damage
furniture andwalls, especially wallpaper.
Refilling with water
The integrated safety mechanism automatically stops the humidification
process when there is no water in the water tank 5. The red LED 2is on and
mist is no longer released from the mist outlet slot 13 .
1. To use the product again, pull the power supply unit 8out of the socket and fill
the water tank 5with water (see chapter “Filling with water”).
2. Insert the power supply unit into the socket and switch on the product (see
chapter “Switching the product on and off”).

Cleaning
15
Cleaning
WARNING!
Risk of electric shock!
If the product falls over with a full water tank, the outcoming water
can flow out onto other electrical devices and cause electric shock.
− Always disconnected the power supply unit and let it cool
completely before cleaning and putting it away!
WARNING!
Health hazard!
Improper use of the product may result in injury to your health.
− The water tank must be emptied and refilled every three
days. Before the water tank is filled, it must be cleaned. Any
deposits, residues, or dirty film that has formed on the water
tank’s surfaces or inner surfaces must be removed. All surfaces
must be rubbed dry.
NOTICE!
Risk of short circuit!
Water or other liquids that have penetrated the housing may cause
a short circuit.
− Never submerge the product in water or other liquids.
− Make sure that no water or other liquids penetrate the
housing.
NOTICE!
Risk of damage!
Improper handling of the product may damage the product.
− Do not use any aggressive cleaners, brushes with metal or
nylon bristles, or sharp or metallic cleaning utensils such as

Cleaning
16
knives, hard scrapers and the like. They could damage the
surfaces.
− Never attempt to clean the product by immersing it in water
or any other fluids, and do not use a steam cleaner to clean it.
Otherwise, the product could be damaged.
− Do not in any case place the product in the dishwasher. It
would be destroyed as a result.
The water tank must be cleaned every three days.
All other components must be cleaned once a week.
− Before cleaning, pull the power supply unit out of the socket.
Cleaning exterior parts
− Use a slightly moistened cloth to wipe down the outside of the product. Then let
all parts dry completely before operating the product again
Cleaning and descaling the water tank
1. Unscrew the water tank cover 6from the water tank 5and remove any deposits
or dirt that may have collected in the water tank 5.
2. Fill the water tank 5halfway with warm water and add 2 tablespoons of white
vinegar. Close the water tank 5by twisting the water tank cover 6tightly. Shake
the water tank 5vigorously and let the solution soak in for about 30 minutes.
3. Drain the water tank 5and rinse it thoroughly with clean water.
4. Allow the product to air dry completely.
Cleaning the control unit
1. Remove the water tank 5by lifting it from the control unit and set it aside.
2. Remove any deposits or dirt that may have accumulated.
3. Fill some water into the control unit 9and add 1 tablespoon of white vinegar. Let
this soak for about 30 minutes.
4. Empty the control unit 9and rinse it with clear water. Make sure that the water
does not flow into the fan outlet 4when draining.
5. Allow the product to air dry completely.
Cleaning the air vent
1. Use a damp cloth to wipe off the air vent on the control unit 9.
If necessary, use a little vinegar to dissolve the limescale.

Trouble shooting
17
2. Let the air vent dry completely.
Storage
− Empty and clean the water tank 5, remove the water from the inside of the
control unit 9, and wipe all parts dry with a cloth.
− Keep the product in the original packaging, out of the reach of children, and in a
dry place.
Trouble shooting
CAUTION!
DO NOT attempt to repair the motor yourself.
If the humidifier continues to not operate, please call
customer service.
Problem Solution
Indicator light is staying
red
• Ensure the cap is secured properly to the tank allowing
water to pass through to the base.
• Clean the Water Level Sensor: Pull of the plastic cap
from the peg. Remove the water level sensor float
and clean with warm sudsy water. Replace parts by
first putting the float onto the peg, then replacing the
plastic cap on the peg.
Humidifier does not have
any power
• Ensure unit is properly plugged into a power outlet /
try another power outlet.
• Check the Control Knob is turned to the ON position.
• If Power On indicator light does not come on, contact
Customer service.
There is a strange odor • Clean the Water Tank with a water & white vinegar
solution and rinse with clean water (see chapter
“Cleaning and descaling the water tank“).
• Leave the empty Water Tank open in a cool place
for 12 hours without the Water Tank Cap attached.

Technical specifications
18
Indicator light ist green,
but there´s no mist
• Complete the weekly maintenance (see chapter “Clea-
ning“).
• The base might be overfilled: Remove the tank, empty
the base & replace the filled tank on the empty base.
• Humidifier should be placed on a hard flat surface &
fan vent should not be blocked.
• Try turning the control knob up to MAX and let it run
for 10 minutes.
White dust appears & sett-
les outside the humidifier
• Area tap water may have too many minerals.
Change to filtered or distilled water..
Humififier is leaking
• From MIST LID: Turn control knob down
• From TANK: Check for possible cracks in the tank or
around the seam
• From BASE: Call Customer service
Technical specifications
Product
Model Number: 1094S2022, 1094F2022
Item number: 817293
Rating voltage: 24 V 1 A
Wattage: 24 W
Frequenzy: 50/60 Hz
Noise Level: < 37 decibles from 3 ft away
Protection class: II
Dimensions (W x D x H): Sheep: 9 x 9.4 x 11.4 in
(23 x 24 x 29 cm)
Fox: 9 x 9.4 x 11.1 in
(23 x 24 x 28.3 cm)
Power supply
Manufacturer´s name: Shenzhen Flypower Technology Co., Ltd.
Model: PS24D240K1000UD
Input voltage: 100-240 V~
Input alternating
current frequency: 50/60 Hz
Output voltage: 24 V

Disposal
19
Output current: max. 1 A
Output power: max. 24 W
Protection class: II
Disposal
Disposing of packaging
Please dispose of package in an environmentally friendly way.
Disposing of the product
If the product should no longer work at all, please make sure that it is disposed of in
an environmentally friendly way and according to local regulations.

Índice
20
Índice
Contenido del paquete............................................................................ 22
Componentes ....................................................................................................22
Información general................................................................................ 24
Lea y guarde estas instrucciones...................................................................24
Explicación de los símbolos.............................................................................24
Uso previsto .......................................................................................................25
Seguridad................................................................................................. 26
Instrucciones generales de seguridad .........................................................26
Primer uso ................................................................................................30
Compruebe el producto y el contenido de la entrega................................30
Funcionamiento.......................................................................................30
Preparación del producto ................................................................................31
Llenar con agua..................................................................................................31
Conectar el producto........................................................................................32
Encender/apagar el producto ........................................................................32
Rellenar con agua.............................................................................................32
Limpieza ................................................................................................... 33
Limpieza exterior ..............................................................................................34
Limpieza y descalcificación del depósito de agua ......................................34
Limpieza de la unidad de control...................................................................34
Limpieza de la ranura de ventilación ............................................................35
Almacenamiento...............................................................................................35
Solución de problemas............................................................................ 35
Especificaciones técnicas......................................................................... 37
Eliminación............................................................................................... 37
Eliminación del embalaje ................................................................................37
Eliminación del producto ................................................................................37
This manual suits for next models
2
Table of contents
Languages:
Other Easy@Home Humidifier manuals

Easy@Home
Easy@Home HTJ-2108-USBM User manual

Easy@Home
Easy@Home MD19143 User manual

Easy@Home
Easy@Home EE-3186A User manual

Easy@Home
Easy@Home 49136 User manual

Easy@Home
Easy@Home EE-5201W User manual

Easy@Home
Easy@Home 1058-2021-W User manual

Easy@Home
Easy@Home EE-5200 W User manual

Easy@Home
Easy@Home HTJ-2060 User manual

Easy@Home
Easy@Home EE-5201W User manual

Easy@Home
Easy@Home HTJ-2060B User manual