manuals.online logo
Brands
  1. Home
  2. •
  3. Brands
  4. •
  5. Eaton
  6. •
  7. Control Unit
  8. •
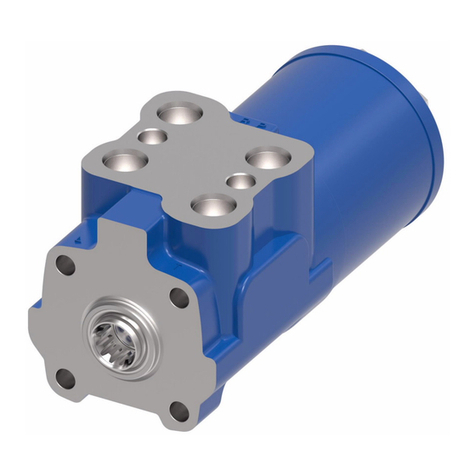
  9. Eaton Char-Lynn 5 Series User manual

Eaton Char-Lynn 5 Series User manual

TE
LR
P
Power Steering
Repair Information
Square Housing
with Side Ports
Round Housing
with Side Ports
Round Housing
with End Ports
5 Series
Steering
Control Units
001
2EATON Char-Lynn Power Steering, Steering Control Units 001, 5 Series C-STCU-TS002-E August 2003
Dust
Seal
Housing Quad
Seal**
Thrust
Bearing
Sleeve
Spool
Pin
Centering
Springs*
Bearing
Race (2)
O-ring
Seal**
O-ring
Seal**
Wear
Plate
Drive
Gerotor
Spacer
Manual Steering
Relief Valve
O-ring**
O-ring**
O-ring**
O-ring** Seal
Ring**
End
Cap
Cap
Screw
(7)
Plug
Plug
Check
Ball
Spring
Retaining
Ring*
Round Housing
and Square
Housing with
Side Ports
REPLACEMENT PART NO. DESCRIPTION
64456-00 Centering Spring Kit (contains parts with *)
64455-00 Seal Kit (contains parts with **)
*Round housing shown,
but applies to square
housing also.
Tools Required
• 10 mm Socket
• 7/8 in. Socket
• Torque Wrench
(18 Nm [160 lb-in]
Capacity)
• Small Blade Screwdriver
O-ring
Seal
O-ring
Seal
Wear
Plate Drive
Gerotor
Seal
Ring
Spacer
Manual Steering
Check/Relief Valve
O-ring
O-ring O-ring
End
Cap
Cap
Screw
(7)
Plug
Dust
Seal
Housing Quad
Seal
Thrust
Bearing
Bearing Race (2)
Spool and Sleeve
EATON Char-Lynn Power Steering, Steering Control Units 001, 5 Series C-STCU-TS002-E August 2003 3
Round Housing
and Square
Housing with
Side Ports
Disassembly
Cleanliness is extremely
important when repairing
hydraulic Steering Control
Units (SCU). Work in a clean
area. Before disconnecting the
hydraulic lines, clean the port
area of the SCU. Before disas-
sembly, drain the oil, then plug
the ports and thoroughly clean
the exterior of the SCU.
During repairs, always protect
machined surfaces.
Disassembly
1. Remove the seven cap
screws and disassemble
the SCU as shown in
figure 1.
2. Remove the plug and
manual steering check
as shown in figure 1.
Note: The manual steering
check may be a check ball
or a check/relief valve.
Disassembly
3. Slide the spool and sleeve
from the housing, see
figure 2.
4. Remove the thrust bearing
and bearing races.
5. Remove the quad seal.
Disassembly
6. Using a small blade screw-
driver, carefully pry the
dust seal from the housing.
Important: Do not damage
the dust seal seat.
Figure 1
Figure 2
4EATON Char-Lynn Power Steering, Steering Control Units 001, 5 Series C-STCU-TS002-E August 2003
Standard Torque
Centering Springs
and Spacers
Sleeve
Pin
Spool
Spring
Retaining
Ring
Disassembly cont.
7. Remove the pin that holds
the spool and sleeve
together, see figure 3.
8. Carefully slide the spool out
of the sleeve. The springs
and retaining ring will stay
with the spool as it’s
removed.
9. Remove the retaining ring
and springs.
Caution: The centering
springs are under tension;
remove the retaining ring
carefully.
Figure 3
Figure 4 Figure 5
Reassembly
Check all mating surfaces.
Replace any parts with
scratches or burrs that could
cause leakage. Wash all metal
parts in clean solvent. Blow
them dry with pressurized air.
Do not wipe parts dry with
paper towels or cloth as lint
in a hydraulic system will
cause damage.
Note: Always use new
seals when reassembling
hydraulic steering control
units. Refer to page 2 for
seal kit part numbers.
Important: During reassembly
lubricate the new seals with
a petroleum jelly such as
Vaseline®. Also lubricate
machined surfaces and bear-
ings with clean hydraulic fluid.
Reassembly
10. Install the quad seal:
•Put one of the bearing
races and sleeve into
the housing.
•Together, the housing and
bearing race create a
groove into which the
quad seal will be installed.
•Hold the bearing race tightly
against the input end of the
housing by pushing on the
gerotor end of the sleeve.
•Fit the quad seal into its
seat through the input end
of the housing. Be sure
the seal is not twisted.
•Remove the sleeve and
bearing race.
Reassembly
11. Lubricate and install the
dust seal (see Figure 4 for
correct seal orientation).
12. Install the centering
springs in the spool. It is
best to install the two flat
pieces first. Next, install
the curved pieces, three
at a time.
13. Fit the retaining ring over
the centering springs.
14. Apply a light coating of
clean hydraulic fluid to
the spool and slide it into
the sleeve. Be sure the
centering springs fit into
the notches in the sleeve.
15. Install the pin
(see Figure 3).
Reassembly
16. Apply a light coating of
petroleum jelly to the
inner edge of the dust
and quad seals.
17. Put the thrust bearing and
races into the housing.
The thrust bearing goes
between the two races
(see Figure 2).
18. Apply a light coating of
clean hydraulic fluid to
the spool and sleeve
assembly and slide it
into the housing.
Important: Do not dam-
age the dust or quad
seals.
19. Clamp the housing in a
vise as shown in Figure 5.
Use just enough clamping
force to hold the housing
securely.
Quad Seal
Dust Seal Thrust Bearing
and Race (2)
Round Housing
and Square
Housing with
Side Ports
EATON Char-Lynn Power Steering, Steering Control Units 001, 5 Series C-STCU-TS002-E August 2003 5
Reassembly cont.
20. Lubricate and install a new
o-ring seal in the groove in
the housing.
21. Install the wear plate and
align the holes in the wear
plate with threaded holes
in the housing.
Note: The holes in
the wear plate are
symmetrical.
22. Install the drive, be sure
the slot in the drive
engages the pin.
23. Lubricate and install a new
o-ring seal in the groove in
the wear plate.
24. Install the gerotor and
align the screw holes.
25. Lubricate and install a new
o-ring seal in the groove in
the gerotor ring.
26. Lubricate and install a new
o-ring and seal ring in the
groove in the gerotor star.
27. Install the spacer.
28. Install end cap and seven
cap screws. Tighten cap
screws, in a crisscross
pattern, to 16 -18 Nm
[140 -160 lb-in].
29. Remove the SCU from
the vise.
30. Install the relief
valve/check or check ball
and plug. Use a new o-ring
and tighten the plug to
17 Nm [150 lb-in].
Round Housing
and Square
Housing with
Side Ports
6EATON Char-Lynn Power Steering, Steering Control Units 001, 5 Series C-STCU-TS002-E August 2003
Round Housing
with End Ports
Housing
Dust
Seal
Quad
Seal**
Thrust
Bearing
Sleeve
O-ring
Seal**
Bearing Race (2)
Spool
Centering
Springs*
O-ring
Seal
Wear
Plate
Drive
Spacer
Spring
Retaining
Ring*
Pin
O-ring**
O-ring**
Seal
Ring**
End
Cap
Cap Screw
Gerotor
Manual
Steering
Check/Relief
Valve
Plug
O-ring
REPLACEMENT PART NO. DESCRIPTION
64456-000 Centering Spring Kit (contains parts with *)
64455-000 Seal Kit (contains parts with **)
Tools Required
•10 mm Socket
•7/8 in. Socket
•Torque Wrench
(18 Nm [160 lb-in]
Capacity)
•Small Blade Screwdriver
EATON Char-Lynn Power Steering, Steering Control Units 001, 5 Series C-STCU-TS002-E August 2003 7
Housing
Dust
Seal
Quad
Seal
Thrust
Bearing
Bearing Race (2)
Spool and
Sleeve
Round Housing
with End Ports
Disassembly
Cleanliness is extremely
important when repairing
hydraulic Steering Control
Units (SCU). Work in a clean
area. Before disconnecting the
hydraulic lines, clean the port
area of the SCU. Before disas-
sembly, drain the oil, then plug
the ports and thoroughly clean
the exterior of the SCU.
During repairs, always protect
machined surfaces.
Disassembly
1. Remove the plug and inlet
relief as shown in figure 1.
Note: The manual steering
check is part of the inlet
relief valve. If inlet relief
valve is not present, the
manual steering check is
located in the housing.
2. Remove the four cap
screws and disassemble
the SCU as shown in
figure 1.
Disassembly
3. Slide the spool and
sleeve from the housing,
see figure 2.
4. Remove the thrust bearing
and bearing races.
5. Remove the seal.
Disassembly
6. Using a small blade
screwdriver, carefully pry
the dust seal from the
housing.
Important: Do not damage
the dust seal seat.
Figure 1
Figure 2
O-ring
Seal
O-ring
Seal
Wear
Plate Drive
Spacer
O-ring O-ring
Seal
Ring
End
Cap
Cap Screw
Gerotor
Manual
Steering
Check/Relief
Valve
Plug
O-ring
Dust
Seal
8EATON Char-Lynn Power Steering, Steering Control Units 001, 5 Series C-STCU-TS002-E August 2003
Standard Torque
Centering Springs
and Spacers
Sleeve
Pin
Spool
Spring
Retaining
Ring
Disassembly cont.
7. Remove the pin that holds
the spool and sleeve
together, see figure 3.
8. Carefully slide the spool out
of the sleeve. The springs
and retaining ring will stay
with the spool as it’s
removed.
9. Remove the retaining ring
and springs.
Caution: The centering
springs are under tension;
remove the retaining ring
carefully.
Figure 3
Figure 4 Figure 5
Reassembly
Check all mating surfaces.
Replace any parts with
scratches or burrs that could
cause leakage. Wash all metal
parts in clean solvent. Blow
them dry with pressurized air.
Do not wipe parts dry with
paper towels or cloth as lint
in a hydraulic system will
cause damage.
Note: Always use new seals
when reassembling hydraulic
steering control units. Refer
to seal kit part numbers on
page 6.
Important: During reassembly
lubricate the new seals with a
petroleum jelly such as
Vaseline®. Also lubricate
machined surfaces and bear-
ings with clean hydraulic fluid.
Reassembly
10. Install the quad seal:
•Put one of the bearing
races and sleeve into
the housing.
•Together, the housing and
bearing race create a
groove into which the quad
seal will be installed.
•Hold the bearing race tightly
against the input end of the
housing by pushing on the
gerotor end of the sleeve.
•Fit the quad seal into its
seat through the input end
of the housing. Be sure the
seal is not twisted.
•Remove the sleeve and
bearing race.
Reassembly
11. Lubricate and install the
dust seal (see Figure 4 for
correct seal orientation).
12. Install the centering
springs in the spool. It is
best to install the two flat
pieces first. Next, install
the curved pieces, three
at a time.
13. Fit the retaining ring over
the centering springs.
14. Apply a light coating of
clean hydraulic fluid to the
spool and slide it into the
sleeve. Be sure the center-
ing springs fit into the
notches in the sleeve.
15. Install the pin
(see Figure 3).
Reassembly
16. Apply a light coating of
petroleum jelly to the
inner edge of the dust
and quad seals.
17. Put the thrust bearing and
races into the housing.
The thrust bearing goes
between the two races
(see Figure 2).
18. Apply a light coating of
clean hydraulic fluid to
the spool and sleeve
assembly and slide it
into the housing.
Important: Do not dam-
age the dust or quad
seals.
19. Clamp the housing in a
vise as shown in Figure 5.
Use just enough clamping
force to hold the housing
securely.
Quad Seal
Dust Seal Thrust Bearing
and Race (2)
Round Housing
with End Ports
EATON Char-Lynn Power Steering, Steering Control Units 001, 5 Series C-STCU-TS002-E August 2003 9
Reassembly cont.
20. Install manual steering
check ball and pin into
housing, if no relief valve
is present.
21. Lubricate and install a new
o-ring seal in the groove in
the housing.
22. Install the wear plate and
align the timing groove
on plate with the timing
groove on the housing.
Note: The holes in
the wear plate are
not symmetrical.
Reassembly cont.
23. Install the drive, be sure
the slot in the drive
engages the pin.
24. Lubricate and install a new
o-ring seal in the groove in
the wear plate.
25. Install the gerotor and
align the timing groove
with the timing groove in
the wear plate.
26. Lubricate and install a new
o-ring seal in the groove in
the gerotor ring.
Reassembly cont.
27. Lubricate and install a new
o-ring and seal ring in the
groove in the gerotor star.
28. Install the spacer.
29. Install end cap and four
cap screws. Align timing
groove on endcap with
timing groove on gerotor.
Tighten cap screws, in
a crisscross pattern, to
16 -18 Nm [250 lb-in].
Reassembly cont.
30. Install the relief
valve/check if present.
Use a new o-ring and
tighten the plug to 17 Nm
[150 lb-in].
31. Remove the SCU from
the vise.
32. Check SCU and confirm all
timing grooves are in line.
Note: If timing grooves
are not aligned properly,
SCU will not function.
Round Housing
with End Ports
10 EATON Char-Lynn Power Steering, Steering Control Units 001, 5 Series C-STCU-TS002-E August 2003
EATON Char-Lynn Power Steering, Steering Control Units 001, 5 Series C-STCU-TS002-E August 2003 11
© 2003 Eaton Corporation
All Rights Reserved
Printed in USA
Document No. C-STCU-TS002-E
August 2003
Eaton
14615 Lone Oak Road
Eden Prairie, MN 55344
USA
Tel: 952 937-9800
Fax: 952 974-7722
www.hydraulics.eaton.com
Eaton
20 Rosamond Road
Footscray
Victoria 3011
Australia
Tel: (61) 3 9319 8222
Fax: (61) 3 9318 5714
How to Order Replacement
Parts
Each Order Must Include the
Following:
1. Product Number
2. Date Code
3. Part Name
4. Part Number
5. Quantity of Parts
For More Detailed Information
Contact Eaton Corp.
Hydraulics Division
15151 Highway 5
Eden Prairie, MN 55344
•Specifications and perform-
ance data, Catalog No. 11-872
Eaton
Dr.-Reckeweg-Str. 1
D-76532 Baden-Baden
Germany
Tel: (49) 7221 682-0
Fax: (49) 7221 682-788

Other Eaton Control Unit manuals

Eaton Power Xpert PXGX Programming manual

Eaton

Eaton Power Xpert PXGX Programming manual

Eaton SL4-SWD Series Manual

Eaton

Eaton SL4-SWD Series Manual

Eaton Vickers RF Series User manual

Eaton

Eaton Vickers RF Series User manual

Eaton MFD-TP12 Series Manual

Eaton

Eaton MFD-TP12 Series Manual

Eaton Vickers SA4-03 1 Series User manual

Eaton

Eaton Vickers SA4-03 1 Series User manual

Eaton Crouse-hinds series User manual

Eaton

Eaton Crouse-hinds series User manual

Eaton Crouse-hinds series User manual

Eaton

Eaton Crouse-hinds series User manual
Eaton XNE-2CNT-2PWM User manual

Eaton

Eaton XNE-2CNT-2PWM User manual

Eaton Crouse-hinds series User manual

Eaton

Eaton Crouse-hinds series User manual

Eaton SmartWire-DT SWD Series User manual

Eaton

Eaton SmartWire-DT SWD Series User manual

Eaton Crouse-hinds series User manual

Eaton

Eaton Crouse-hinds series User manual

Eaton XVM PCBA Series User manual

Eaton

Eaton XVM PCBA Series User manual

Eaton Crouse-hinds series User manual

Eaton

Eaton Crouse-hinds series User manual

Eaton DX-NET-BACNETMSTP Manual

Eaton

Eaton DX-NET-BACNETMSTP Manual

Eaton XC-CPU101-FC128K-8DI-6DO Manual

Eaton

Eaton XC-CPU101-FC128K-8DI-6DO Manual

Eaton SystemStak DGM 3 40 Series User manual

Eaton

Eaton SystemStak DGM 3 40 Series User manual

Eaton PXS24 Series User manual

Eaton

Eaton PXS24 Series User manual

Eaton eNMC2 User manual

Eaton

Eaton eNMC2 User manual

Eaton HMi VU Series Manual

Eaton

Eaton HMi VU Series Manual

Eaton MN024002EN User manual

Eaton

Eaton MN024002EN User manual

Eaton xComfort F94 Series User manual

Eaton

Eaton xComfort F94 Series User manual

Eaton RF96APM User manual

Eaton

Eaton RF96APM User manual

Eaton SL4-FMS Series Manual

Eaton

Eaton SL4-FMS Series Manual

Eaton OPTC4 LonWorks User manual

Eaton

Eaton OPTC4 LonWorks User manual

Popular Control Unit manuals by other brands

GEM 611 operating instructions

GEM

GEM 611 operating instructions

Danfoss AK-SM 800A Quick reference guide

Danfoss

Danfoss AK-SM 800A Quick reference guide

NI 9512 C Series Getting started

NI

NI 9512 C Series Getting started

LG PQNFG14B0 installation manual

LG

LG PQNFG14B0 installation manual

CLA-VAL 50B-4KG1 Installation, operation and maintanance

CLA-VAL

CLA-VAL 50B-4KG1 Installation, operation and maintanance

CALEFFI 630 Series manual

CALEFFI

CALEFFI 630 Series manual

BVA Hydraulics PUW2 instruction manual

BVA Hydraulics

BVA Hydraulics PUW2 instruction manual

Littfinski Daten Technik RS-16-O-B Assembly instruction

Littfinski Daten Technik

Littfinski Daten Technik RS-16-O-B Assembly instruction

Siko AS510/1 installation instructions

Siko

Siko AS510/1 installation instructions

hager TN002S User instructions

hager

hager TN002S User instructions

EUTHANEX SMARTBOX PRODIGY EA-3300TS manual

EUTHANEX

EUTHANEX SMARTBOX PRODIGY EA-3300TS manual

THORLABS ITC8 Series Operation manual

THORLABS

THORLABS ITC8 Series Operation manual

Swidget WI000UWA manual

Swidget

Swidget WI000UWA manual

ASA Hydraulik SDA Series manual

ASA Hydraulik

ASA Hydraulik SDA Series manual

National Instruments NI 9853 Getting started guide

National Instruments

National Instruments NI 9853 Getting started guide

HEIDENHAIN ITNC 530 - CONVERSATIONAL PROGRAMMING user manual

HEIDENHAIN

HEIDENHAIN ITNC 530 - CONVERSATIONAL PROGRAMMING user manual

MSA ICU operating manual

MSA

MSA ICU operating manual

Elko iNels RFATV-2 quick start guide

Elko

Elko iNels RFATV-2 quick start guide

manuals.online logo
manuals.online logoBrands
  • About & Mission
  • Contact us
  • Privacy Policy
  • Terms and Conditions

Copyright 2025 Manuals.Online. All Rights Reserved.