manuals.online logo
Brands
  1. Home
  2. •
  3. Brands
  4. •
  5. Eaton
  6. •
  7. Control Unit
  8. •
  9. Eaton NZM2-XMVR Manual

Eaton NZM2-XMVR Manual

This manual suits for next models

3

Other Eaton Control Unit manuals

Eaton Cutler-Hammer Modbus mMINT Quick start guide

Eaton

Eaton Cutler-Hammer Modbus mMINT Quick start guide

Eaton Moeller SL7-CB Series Manual

Eaton

Eaton Moeller SL7-CB Series Manual

Eaton ELC-PC12NNDR User manual

Eaton

Eaton ELC-PC12NNDR User manual

Eaton PXR-PCAM Manual

Eaton

Eaton PXR-PCAM Manual

Eaton SL4-SWD Series Manual

Eaton

Eaton SL4-SWD Series Manual

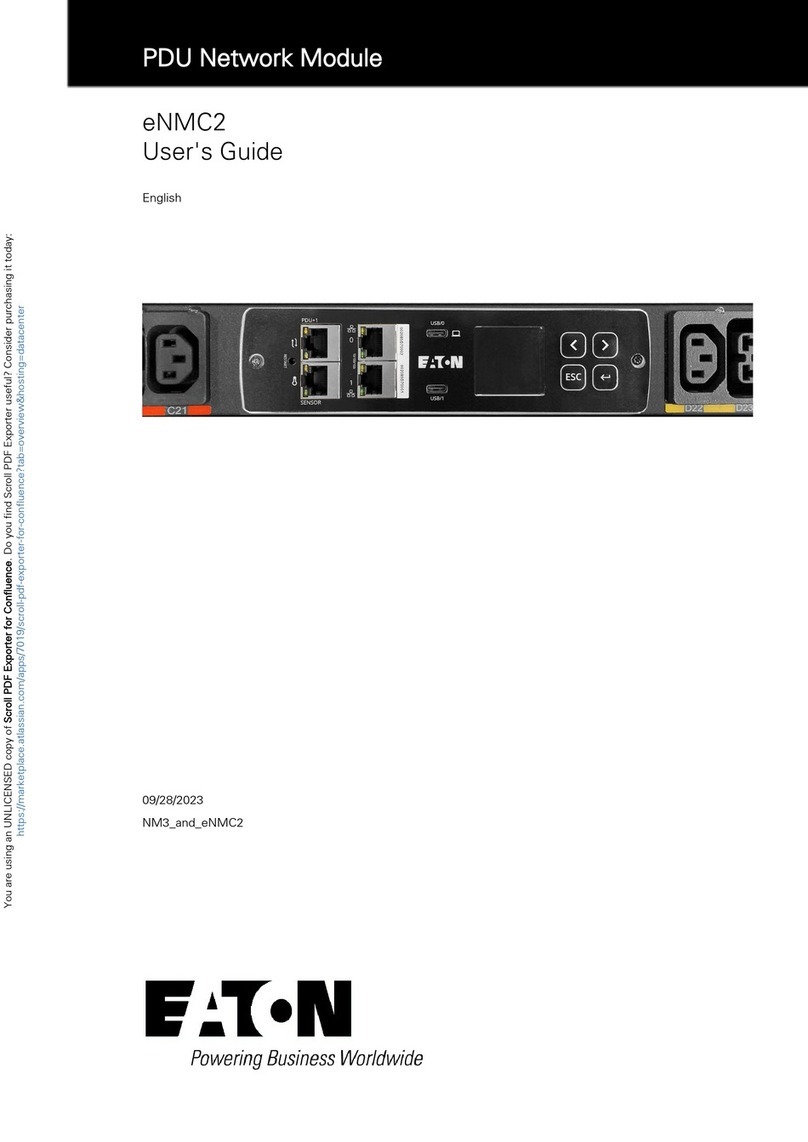
Eaton eNMC2 User manual

Eaton

Eaton eNMC2 User manual

Eaton EU1E-SWD Series Manual

Eaton

Eaton EU1E-SWD Series Manual

Eaton xComfort F94 Series User manual

Eaton

Eaton xComfort F94 Series User manual

Eaton 33 User manual

Eaton

Eaton 33 User manual

Eaton ZB150 Series Manual

Eaton

Eaton ZB150 Series Manual

Eaton ELC-COPBDP User manual

Eaton

Eaton ELC-COPBDP User manual

Eaton Cutler-Hammer Digitrip RMS 510 Manual

Eaton

Eaton Cutler-Hammer Digitrip RMS 510 Manual

Eaton EC4E-221-6D4T1 User manual

Eaton

Eaton EC4E-221-6D4T1 User manual

Eaton XNE-2CNT-2PWM User manual

Eaton

Eaton XNE-2CNT-2PWM User manual
Eaton Powerware Series User manual

Eaton

Eaton Powerware Series User manual

Eaton PXS24 Series User manual

Eaton

Eaton PXS24 Series User manual

Eaton EU1E-SWD Series Manual

Eaton

Eaton EU1E-SWD Series Manual

Eaton ELC-MC01 User manual

Eaton

Eaton ELC-MC01 User manual

Eaton HK-K95-K150 User manual

Eaton

Eaton HK-K95-K150 User manual

Eaton NEMA 12 User manual

Eaton

Eaton NEMA 12 User manual

Eaton ELC-EX08NNSN User manual

Eaton

Eaton ELC-EX08NNSN User manual

Eaton DILM12-XMSM Manual

Eaton

Eaton DILM12-XMSM Manual

Eaton Vickers RF Series User manual

Eaton

Eaton Vickers RF Series User manual

Eaton Scantronic i-on10 User manual

Eaton

Eaton Scantronic i-on10 User manual

Popular Control Unit manuals by other brands

Seitz 14A80 user manual

Seitz

Seitz 14A80 user manual

Wilo RS485 Installation and operating instructions

Wilo

Wilo RS485 Installation and operating instructions

Becker CentralControl CC41 Commissioning Instruction

Becker

Becker CentralControl CC41 Commissioning Instruction

SICK CDB650 operating instructions

SICK

SICK CDB650 operating instructions

Panduit NetKey NKP5E88M Series installation instructions

Panduit

Panduit NetKey NKP5E88M Series installation instructions

MX Options Concentric Petite Fitting instructions

MX

MX Options Concentric Petite Fitting instructions

Clean Water Systems Fleck 2510 Installation & start?up guide

Clean Water Systems

Clean Water Systems Fleck 2510 Installation & start?up guide

Fairchild FSB44104A user guide

Fairchild

Fairchild FSB44104A user guide

LEGRAND Wattstopper LMIN-104 installation instructions

LEGRAND

LEGRAND Wattstopper LMIN-104 installation instructions

PMK ATT10BNCS instruction manual

PMK

PMK ATT10BNCS instruction manual

Tektronix TDS3FFT user manual

Tektronix

Tektronix TDS3FFT user manual

Woodward easYgen Technical manual

Woodward

Woodward easYgen Technical manual

Balluff BNI EIP-502-105-R015 user guide

Balluff

Balluff BNI EIP-502-105-R015 user guide

NXP Semiconductors TWR-LS1021A Getting started

NXP Semiconductors

NXP Semiconductors TWR-LS1021A Getting started

Advantech PCM-3117 Startup manual

Advantech

Advantech PCM-3117 Startup manual

Danfoss MCO 101 manual

Danfoss

Danfoss MCO 101 manual

Moons' Lin Engineering R701P user manual

Moons'

Moons' Lin Engineering R701P user manual

Aventics RV1 operating instructions

Aventics

Aventics RV1 operating instructions

manuals.online logo
manuals.online logoBrands
  • About & Mission
  • Contact us
  • Privacy Policy
  • Terms and Conditions

Copyright 2025 Manuals.Online. All Rights Reserved.

Electric current! Danger to life!
Only skilled or instructed persons may carry out the
following operations.
Lebensgefahr durch elektrischen Strom!
Nur Elektrofachkräfte und elektrotechnisch unterwiesene
Personen dürfen die im Folgenden beschriebenen Arbeiten
ausführen.
Tension électrique dangereuse !
Seules les personnes qualifiées et averties doivent
exécuter les travaux ci-après.
¡Corriente eléctrica! ¡Peligro de muerte!
El trabajo a continuación descrito debe ser realizado por
personas cualificadas y advertidas.
Tensione elettrica: Pericolo di morte!
Solo persone abilitate e qualificate possono eseguire le
operazioni di seguito riportate.
触电危险!
只允许专业人员和受过专业训练的人员进行
下列工作。
Электрический ток! Опасно для жизни!
Только специалисты или проинструктированные
лица могут выполнять следующие операции.
en
de
fr
es
it
zh
ru
Emergency On Call Service: Local representative (http://www.eaton.com/moeller/aftersales) or +49 (0) 180 5 223822 (de, en) 1/4
Instruction Leaflet
Montageanweisung
Notice d’installation
Instrucciones de montaje
Istruzioni per il montaggio
安装说明
Инструкция по монтажу
09/12 IL01219035Z
(AWA1230-2350)
NZM2-XMVR
NZM2-XMVRL
NZM2/3-XMVR
NZM2/3-XMVRL
NZM2-…
NZM2/3-…
NZM2-XMVR(L), NZM2/3-XMVR(L)
NZM2-… NZM2/3-…
1
Z 2
charged OFF
1
Z 2
charged OFF
2
1
2
3
3
4
X
R
L
Z 2
0.8 Nm
(7.08 lb-in)
5
3
2
1
6
charged OFF
Z 2
1 Nm
(8.85 lb-in)
7
Z 2
1 Nm
(8.85 lb-in)
charged OFF
2/4 Emergency On Call Service: Local representative (http://www.eaton.com/moeller/aftersales) or +49 (0) 180 5 223822 (de, en)
09/12 IL01219035Z
8
OFF
1
2
4 x
Z 2
0.8 Nm
(7.08 lb-in)
10
Y
R
L
NZM2-XMVRL
NZM2/3-XMVRL
NZM2-XMVRL
NZM2/3-XMVRL
NZM2/N2
NZM2/N2
NZM3/N3
R
L
R f60 mm
(R f2.36”)
9
NZM2-XMVR(L)
L
R
NZM2/3-XMVR(L)
NZM2-XMVR(L)
NZM2/3-XMVR(L)
NZM2/N2
NZM3/N3
NZM2/N2
L
R
R f60 mm
(R f2.36”)
11
4
2
3
NZM2/3-XMVR(L)
NZM2-XMVR(L)
charged OFF
discharged ON
1
NZM2-XMVR(L)
NZM2/3-XMVR(L) L
NZM2-XMVR(L)
NZM2/3-XMVR(L)
R
L
L
R
8 mm
1.5 Nm
(13.28 lb-in)
12
3
7
OFF
charged
4
2
8
6
charged
discharged
OFF
ON
NZM2/3-XMVR(L)
NZM
2-XMVR(L)
1
NZM2-XMVR(L)
NZM2/3-XMVR(L)
L
NZM2-XMVR(L)
NZM2/3-XMVR(L)
R
charged OFF
5
NZM2-XMVR(L)
NZM2/3-XMVR(L)
L
NZM2-XMVR(L)
NZM2/3-XMVR(L)
R
R
L
R
L
R
8 mm
1.5 Nm
(13.28 lb-in)
Emergency On Call Service: Local representative (http://www.eaton.com/moeller/aftersales) or +49 (0) 180 5 223822 (de, en) 3/4
09/12 IL01219035Z
Interlock is active if the switch is in tripped position (display OFF and discharged) and
the push to trip button is in the "operated" position.
Possible causes:
– Error in the electronic interlock
– Electrical or manual switch-on attempt at locked switch
– Switch was in tripping position (OFF), other switch was switched on
Steht der Schalter in Ausgelöst-Stellung (Display-Anzeige OFF und discharged) und der
push to trip-Taster in „Betätigt“-Stellung, so ist der Verriegelungsfall eingetreten.
Mögliche Ursachen:
– Fehler in der elektrischen Verriegelung
– Einschaltversuch elektrisch oder manuell am verriegelten Schalter
– Schalter war in Ausgelöst-Stellung (OFF), anderer Schalter wurde eingeschaltet
Le verrouillage est activé lorsque le disjoncteur se trouve en position « déclenché »
(indications sur l’afficheur : OFF et discharged) et que le bouton « push to trip » est en
position « activé »
Causes possibles :
– Défaut au niveau du verrouillage électrique
– Tentative d’enclenchement électrique ou manuelle au niveau du disjoncteur
verrouillé
– Le disjoncteur était en position « déclenché » (OFF) ; l’autre disjoncteur a été
enclenché
El enclavamiento se produce si el interruptor está en posición de disparo (indicador del
display OFF y discharged) y la tecla push to trip en posición “accionado”.
Posibles causas:
– Error en el enclavamiento eléctrico
– Intento de conexión eléctrica o manual con el interruptor bloqueado
– El interruptor estaba en posición de disparo (OFF), se conectó otro interruptor
L’interblocco ? attivo se l’interruttore si trova in posizione di sgancio
(display OFF e discharged) e se l’interruttore push to trip ? “attivato”.
Possibili cause:
– Errore nell’interblocco elettrico
– L’interruttore era in posizione di sgancio (OFF), l’altro interruttore era attivato
– Tentativo di azionamento elettrico o manuale sull’interruttore bloccato
–
–
–
Разомкнутое положение защитного автомата [на дисплее «OFF» («Выкл.»)
и «discharged» («нагрузка снята»)] и рабочее (нажатое) положение
размыкающей кнопки свидетельствуют о происшедшей блокировке.
Возможные причины:
– Неисправна защитная электроблокировка
– Заблокированный выключатель попытались включить электрически или
вручную
–Когда один автомат находился в разомкнутом состоянии, произошло
включение второго
OFF
discharged
TEST
A
NZM2-XR…, ≈ 15 x NZM2-XR…, ≈ 15 x
NZM3-XR…, ≈ 20 x
A
B
7
1
8
A
A
9
A
2
5TRIP
OFF
ON
discharged
discharged
charged OFF
discharged
charged OFF
OFF
3
4
B
B
B
6
4/4 Emergency On Call Service: Local representative (http://www.eaton.com/moeller/aftersales) or +49 (0) 180 5 223822 (de, en)
09/12 IL01219035Z
Eaton Industries GmbH, Hein-Moeller-Straße 7-11, 53115 Bonn, Germany
© 2006 by Eaton Industries GmbH, www.eaton.com/moeller/support All Rights Reserved
09/12 IL01219035Z 12289662/DE08 Doku/DM
Printed in Germany (10/12)
Note – Hinweis – Remarque – Nota – Nota – – Примечание
Check the function of the mutual mechanical switch interlock after approx. 5000 operations and adjust Bowden cables if necessary.
Korrekte Funktion der gegenseitigen mechanischen Schalterverriegelung nach ca. 5000 Schaltungen überprüfen und Bowdenzüge gegebenenfalls nachjustieren.
Au bout de 5000 manœuvres, vérifier le fonctionnement correct du dispositif d’interverrouillage mécanique des disjoncteurs et ajuster le cas échéant les câbles sous gaine.
Comprobar la correcta función del enclavamiento mecánico del interruptor mutuo después de aprox. 5000 maniobras y ajustar de nuevo los cables Bowden en caso necesario.
Controllare il corretto funzionamento del blocco interruttore meccanico reciproco dopo ca. 5000 commutazioni e, all’occorrenza, regolare i tiranti Bowden.
Проверьте работу переключателя механической блокировки после 5000 рабочих циклов и при необходимости настройте тросы Боудена.
XMVR
XMVRL
NZM…XMVR
Mounting side-by-side – Maximum switch distance X...
Montage nebeneinander – Maximaler Schalterabstand X...
Montage côte-?-côte – Distance maximale entre disjoncteurs : X...
Montaje lateral – Distancia máxima de los interruptores X...
Montaggio affiancato – Massima distanza degli interruttori X...
–
Монтаж в горизонтальной плоскости – Макс. расстояние Х между защитными автоматами
NZM…XMVRL
Mounting in adjacent control panel sections – Maximum switch distance X...
Montage in benachbarten Schaltschrankfeldern – Maximaler Schalterabstand X...
Montage dans des colonnes d’armoire adjacentes – Distance maximale entre disjoncteurs : X...
Montaje en los paneles colindantes de los armarios de distribución – Distancia máxima de los interruptores X...
Montaggio in campi del quadro attigui – Massima distanza degli interruttori X...
–
Монтаж на смежных панелях приборного шкафа, – Макс. расстояние Х между защитными
автоматами
NZM...XMVRL
Mounting above each other – Maximum switch distance Y...
Montage übereinander – Maximaler Schalterabstand Y...
Montage superposé (l’un au-dessus de l’autre) – Distance maximale entre disjoncteurs Y...
Montaje en la parte superior – Distancia máxima de los interruptores Y...
Montaggio sovrapposto – Massima distanza degli interruttori Y...
–
Монтаж в вертикальной плоскости – Макс. расстояние Y между защитными автоматами
AB
x3P
x4P
NZM2/N2
NZM2/N2
NZM3/N3
Y
A
B
NZM3/N3
NZM3/N3
NZM-XMVR B
NZM2
X3p X4p
B
NZM3
X3p X4p
B
NZM4
X3p X4p
ANZM2/ 3p/4p 130 mm
(5.12“)
95 mm
(3.74“)
95 mm
(3.74“)
50 mm
(1.97“)
––
NZM3/ 3p/4p – – 135 mm
(5.31“)
90 mm
(3.54“)
155 mm
(6.10“)
85 mm
(3.35“)
NZM4/ 3p/4p – – – – 120 mm
(4.72“)
50 mm
(1.97“)
NZM-XMVRL B
NZM2
X3p X4p
B
NZM3
X3p X4p
B
NZM4
X3p X4p
ANZM2/ 3p/4p 350 mm
(13.78“)
315 mm
(12.4“)
420 mm
(16.54“)
385 mm
(15.16“)
––
NZM3/ 3p/4p – – 400 mm
(15.75“)
365 mm
(14.37“)
460 mm
(18.11“)
390 mm
(15.35“)
NZM4/ 3p/4p – – – – 420 mm
(16.54“)
350 mm
(13.78“)
NZM-XMVRL B
NZM2
Y
B
NZM3
Y
B
NZM4
Y
ANZM2/ 3p/4p 220 mm
(8.66“)
255 mm
(10.04“)
–
NZM3/ 3p/4p – 220 mm
(8.66“)
230 mm
(9.05“)
NZM4/ 3p/4p – – 230 mm
(9.05“)