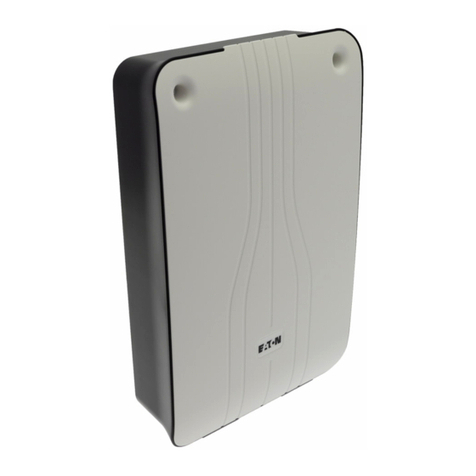
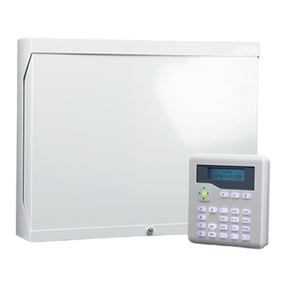
Eaton FX6100 User manual

FX6100, FX61002
Installation and Operation Manual
VdS
G211013
0786
DoP0228
16
EN54-2:1997 + A1:2006
EN54-4:1997 + A1:2002 + A2:2006
General
Fault
FIRE
General
Disable
Power
ON
TEST
Sounder
Disable
Fault
System
Fault
Power
Fault

2INSTALLATION AND OPERATION MANUAL 25-16329-B December 2019 www.eaton.com
Contents
Contents
SECTION 1: SYSTEM INSTALLATION AND DESIGN..................8
Introduction........................................................8
Project planning ....................................................8
System design guidelines .............................................9
Compatible equipment:. . . . . . . . . . . . . . . . . . . . . . . . . . . . . . . . . . . . . . . . . . . . . .10
Equipment compatibility .............................................11
System overview ..................................................13
Technical specification. . . . . . . . . . . . . . . . . . . . . . . . . . . . . . . . . . . . . . . . . . . . . . .15
Optional functions as per EN54 P2&4 ..................................17
Installation........................................................19
External connections. . . . . . . . . . . . . . . . . . . . . . . . . . . . . . . . . . . . . . . . . . . . . . . .21
Networking .......................................................22
Input/outputs......................................................23
Maintainance......................................................25
SECTION 2: COMMISSIONING..................................26
Commissioning mode...............................................26
Configuration......................................................26
Panel fault finding ..................................................28
PC comissioning software ...........................................29
Device input programming ...........................................29
Device outputs ....................................................30
Panel outputs .....................................................31
SECTION 3: PANEL CONTROLS & INDICATORS....................32
Touch screen display................................................33
Panel operation ....................................................34
Public access level 1................................................35
Evacuate (access level 2) ............................................36
Silence alarms.....................................................37
Mute buzzer ......................................................38
Reset............................................................38
Pre-Alarms .......................................................39
Disabled devices ...................................................39
Faults ...........................................................40

3INSTALLATION AND OPERATION MANUAL 25-16329-B December 2019 www.eaton.com
Contents
Enable/disable (others menu) .........................................40
Enable/disable .....................................................41
Lamp test ........................................................43
Weekly test.......................................................44
Installation instructions for: Single channel input unit MCIM-C ...............45
Viewing events ....................................................47
Check auto config ..................................................48
Replace device ....................................................49
Test device (access level 3) ..........................................50
Test zone.........................................................51
Sounder level test mode.............................................52
Global flashing LED on/off ...........................................53
One man walk test .................................................54
Commission: Load CDR from laptop ...................................55
Commission: Download CDR to laptop .................................56
Commission: Auto learn .............................................57
Erase log .........................................................58
System details ....................................................59
Load logo from PC .................................................60
Analogue level.....................................................61
Change panel number...............................................62
Number of panels in network .........................................63
Screen cover ......................................................64
Italian mode ......................................................65
Programming I/O and sounders T1 .....................................66
Programming I/O and sounders T2 .....................................67
Programming I/O and sounders. Panel outputs ...........................68
Programming I/O and sounders. Auxiliary board ..........................69
Programming I/O and sounders alarm verification .........................70
Sound settings ....................................................71
Change date/time ..................................................72
Change zone text ..................................................73
Change text.......................................................74
Change panel text..................................................75
Configure zones ...................................................76

4INSTALLATION AND OPERATION MANUAL 25-16329-B December 2019 www.eaton.com
Contents
Change passcode ..................................................77
Add zone .........................................................78
Delete zone.......................................................79
Add device .......................................................80
Delete device .....................................................81
Configure heat detectors ............................................82
Network filter .....................................................83
Network filter .....................................................84
Language ........................................................85
Day/night.........................................................86
Password protection ................................................87
SECTION 4: APPENDIX ........................................88
System wiring .....................................................88
Detector base wiring (CAB300) .......................................89
Call point wiring (CBG370S/CBG370WP) ................................90
Base sounder wiring (CAS380, CASBB384) ..............................90
Loop powered beacon wiring (CAB382) .................................91
Wall sounder wiring (CAS381, CASB383)................................91
IP66 wall sounder wiring (CAS381WP, CASB383-WP) ......................92
Base Sounder VAD (CASBB394).......................................93
Wall Sounder VAD (CASB393) ........................................94
IP66 Wall Sounder VAD (CASB393WP)..................................95
3 way input output unit (CIO351, CIO351S, CIO351SST) ...................96
1 Channel mains rated I/O unit wiring (CMIO353) .........................97
Zone monitor unit wiring (CZMU352) ...................................98
Intrinsically safe zone monitor unit wiring (CZMU352-IS)....................99
Shop monitor unit wiring (MSU840) ...................................100
Spur isolator wiring (CSI350) ........................................101
4 Way sounder controller wiring (CSC354CPR) ..........................102
4-20mA interface wiring (CGI420, CIT420, CGI420R, CIT420R)..............103
Micro zone monitor module wiring (MIU872)............................104
Micro input module wiring (MCIM) ...................................105
Micro output module wiring
(MCOM, MCOM-R, MCOM-S) .......................................106
Technical I/O Unit Wiring (CFC301) ....................................107

5INSTALLATION AND OPERATION MANUAL 25-16329-B December 2019 www.eaton.com
Contents
DOCUMENT UPDATE NOTES
S.No. Release / Change Notes Date
AFirst release June 2019
BSecond release December 2019
PROPRIETARY NOTICE
All data and information contained within this manual is of a proprietary nature. Do
not reproduce, transcribe, store in a retrieval system or translate into any language,
any part of this manual without the prior permission of ‘EATON‘. EATON reserves the
right to make changes to product specification without notice or liability. Every care
has been taken to ensure the accuracy of the information contained in this manual,
but no liability can be accepted for any errors or omission.
DISCLAIMER OF WARRANTIES AND LIMITATION OF LIABILITY
The information, recommendations, descriptions and safety notations in this
document are based on Eaton Corporation’s (“Eaton”) experience and judgment and
may not cover all contingencies. If further information is required, an Eaton sales
office should be consulted. Sale of the product shown in this literature is subject
to the terms and conditions outlined in appropriate Eaton selling policies or other
contractual agreement between Eaton and the purchaser.
THERE ARE NO UNDERSTANDINGS, AGREEMENTS, WARRANTIES, EXPRESSED
OR IMPLIED, INCLUDING WARRANTIES OF FITNESS FOR A PARTICULAR
PURPOSE OR MERCHANTABILITY, OTHER THAN THOSE SPECIFICALLY SET
OUT IN ANY EXISTING CONTRACT BETWEEN THE PARTIES. ANY SUCH
CONTRACT STATES THE ENTIRE OBLIGATION OF EATON. THE CONTENTS OF
THIS DOCUMENT SHALL NOT BECOME PART OF OR MODIFY ANY CONTRACT
BETWEEN THE PARTIES.
In no event will Eaton be responsible to the purchaser or user in contract, in tort
(including negligence), strict liability or other-wise for any special, indirect, incidental
or consequential damage or loss whatsoever, including but not limited to damage
or loss of use of equipment, plant or power system, cost of capital, loss of power,
additional expenses in the use of existing power facilities, or claims against the
purchaser or user by its customers resulting from the use of the information,
recommendations and descriptions contained herein. The information contained in
this manual is subject to change without notice.

6INSTALLATION AND OPERATION MANUAL 25-16329-B December 2019 www.eaton.com
Contents
SUPPORT SERVICES
The goal of Eaton is to ensure your greatest possible satisfaction with the operation
of our products. We are dedicated to providing fast, friendly, and accurate assistance.
That is why we offer you so many ways to get the support you need. Whether it is
by phone, fax, or email, you can access Eaton’s support information 24 hours a day,
seven days a week. Our wide range of services is listed below. You should contact
your local distributor for product pricing, availability, ordering, expediting and repairs.
Website
Use the Eaton website to find product information. You can also find information on
local distributors or Eaton’s sales offices.
www.eaton.com
EatonCare Customer Support Center
Call the EatonCare Support Center if you need assistance with placing an order,
stock availability or proof of shipment, expediting an existing order, emergency
shipments, product price information, returns other than warranty returns, and
information on local distributors or sales offices.
Voice: 877-ETN-CARE (386-2273) (8:00 a.m. to 6:00 p.m. EST)
After-Hours Emergency: 800-543-7038 (6:00 p.m. to 8:00 a.m. EST)

7INSTALLATION AND OPERATION MANUAL 25-16329-B December 2019 www.eaton.com
Contents
Important Safety Information
Personnel who install, maintain or repair this equipment
must read the safety information below before
starting work.
Definitions and Symbols
WARNING
Indicates a potentially hazardous situation which, if
not avoided, can result in serious injury or death.
CAUTION
Indicates a potentially hazardous situation which, if
not avoided, can result in minor to moderate injury, or
serious damage to the product.
General Safety Precautions
NOTICE
The operating system of the control panel may be
revised as a result of enhancements to the system
software or hardware. Revisions to this manual will be
issued and supplied on request and should be logged
in the table supplied on the contents page.
CAUTION
RISK OF EXPLOSION IF BATTERY IS REPLACED BY
AN INCORRECT TYPE. DISPOSE OF THE USED
BATTERIES ACCORDING TO THE INSTRUCTIONS.
This product must only be disposed of in
accordance with the WEEE directive.

8INSTALLATION AND OPERATION MANUAL 25-16329-B December 2019 www.eaton.com
Section 1: System installation and design
Introduction
The Panel provides all of the sophisticated features required of a leading edge
analogue addressable fire system along with the simple operation and neat
installation demanded by installers and building users.
The panel can be flush or surface mounted and the generously sized metal back box
allows ample facilities for rear or top cable entries.
The panels are available in either Single or Two LoopConfiguration.
A loop connected and a network connected repeater panel is available (see
equipment listing page 10).
A comprehensive range of ancillary devices is available to operate with the Panel,
including Optical, photo-thermal and heat detectors, base mounted and stand alone
sounders (including an IP67 version) a loop powered beacon and a wide range of
input and output interfaces.
Each of the Panel system components has been specifically designed to operate as
part of a Panel system, this provides an assurance that the panel, the detectors, the
interfaces and the ancillaries are all fully compatible with each other and that the full
range of system functionality is supported by each device.
Project planning
The following is a typical program and timetable for a Panel installation project, once
the initial order has beenreceived:
1. Project meeting
Installer and user to be present; system specifications, schematic diagram and
proposed circuit drawing to be available. Panel Installation & Commissioning Guide to
beprovided.
2. Equipment fix
Typically 2 week’s notice is required for equipment to be delivered. Cable to be
installed and bases/back boxes to be fitted. Then fire detectors, call points, alarm
sounders, isolator units and interface units to be installed.
3. Address schedule
Schedule of sensor locations to be completed by installer and returned to enable
System programming.
4. Auto learn
Fire panel/repeater panels to be installed and terminated. System to be powered up
by installer and auto learn mode activated (see Auto Learn section). System to be
tested and verified by installer, prior to final commissioning.

9INSTALLATION AND OPERATION MANUAL 25-16329-B December 2019 www.eaton.com
Section 1: System installation and design
5. Final commissioning
Minimum 2 weeks notice is required from receipt of Address Schedule and
Commission request form. Eaton Lighting Service Engineer to attend site implement/
oversee the final commissioning procedures (see Commissioning section), in
conjunction with the installer.
System design guidelines
Guidelines
Systems should to the relevant local standards and codes of practice, for the UK
this is BS5839 part 1. The panel meets all the relevant requirements of BS5839 part
1: 2002. Installation planning is simplified by the fact that every addressable device
contains an integral short circuit isolator. Care must be taken to ensure that local
standards requirements regarding aspects such as loop coverage, area covered by a
single spur and cable specification areobserved.
There may be certain applications in which deviations from the code may be
necessary and these must be listed on the commissioning certificate. (See
commissioning section).
Loop lengths
The maximum permitted loop length is 2 km measured from the near to the far
terminals on Panel Motherboard PCB. There is no minimum limit to loop length. Any
wiring spurs off the loop must be included within the 2 km limit. On long loop runs,
the lengths of wiring rises and falls (between floors, down to manual call points)
must be included. Remember to include these especially when taking loop lengths
from plan drawings.
Loop loading - total number of addresses
The total number of addresses per loop is 200. This includes sensors, call points
and all other addressable items (e.g. interfaces, loop repeaters etc.) When designing
systems its recommended that allowances are made for future expansion, Short
circuit isolators are incorporated into every loop device, including Smoke sensors,
heat sensors, sounders, callpoints and interfaces. Therefore, no further fault
protection is required , in the event of a single fault, none of the devices connected
to the loop will fail to operate as the fault will be isolated by the
two adjacent devices.
Spur connected devices downstream of a cable fault will cease to function.
Loop connected repeater panels
Each repeater unit requires one address and consumes no more current from the
loop than a smoke sensors. The repeater also requires a local mains supply and
incorporates battery backup.
Loop loading system verification
Loop load calculations should be carried out prior toinstillation.

10 INSTALLATION AND OPERATION MANUAL 25-16329-B December 2019 www.eaton.com
Section 1: System installation and design
Compatible equipment:
Order code Description Dimensions (mm)
FX6100 1 Loop Addressable Panel 375H x 357W x 50D
FX6100NC 1 Loop Addressable Panel c/w Network Card 375H x 357W x 50D
FX61002 2 Loop Addressable Panel 375H x 357W x 50D
FX61002NC 2 Loop Addressable Panel c/w Network Card 375H x 357W x 50D
400002FIRE-0005X Addressable Optical Sensor (FXN723) 101 Dia x 33D
400003FIRE-0006X Addressable Heat Sensor (FXN725) 101 Dia x 33D
400004FIRE-0007X Addressable Photo Thermal Sensor (FXN722) 101 Dia x 33D
MAB50R Addressable Beam Detector (50m) 210H x 130W x 120D
MAB100R Addressable Beam Detector (100m) 210H x 130W x 120D
FXN720 Addressable Sensor Base 104 Dia x 22D
FXN538 Addressable Sounder Base 120 Dia x 40D
CAS380AU Addressable Australian Sounder Base 120 Dia x 40D
FXN537 Addressable Sounder Beacon Base 115 Dia x 44D
CASBB384-B Addressable Bell Tone Sounder Beacon Base 115 Dia x 44D
CASBB394 Addressable VAD Sounder Beacon Base (Open Class) 115 Dia x 44D
FXN251D Conventional Remote Indicator (Connects to Detector) 87H x 87W x 30D
CIR301WP Conventional Weatherproof Remote Indicator
(Connects to Detector) 87H x 87W x 30D
MRIAD Addressable Remote Indicator 87H x 87W x 49D
FXN501 Addressable Callpoint 87H x 87W x 57D
FXN503 Addressable Weatherproof Callpoint 87H x 87W x 59D
FXN538LPS Addressable Wall Sounder 105H x 105W x 95D
FXN538LPSWP Addressable Weatherproof Wall Sounder 108H x 109W x 103D
CAS381AU Addressable Australian Wall Sounder 105H x 105W x 95D
CAS381AU-WP Addressable Australian Weatherproof Wall Sounder 108H x 109W x 103D
CAB382 Addressable Beacon 95 Dia x 53D
FXN539LPS Addressable Wall Sounder Beacon 105H x 105W x 95D
FXN539LPSWP Addressable Weatherproof Wall Sounder Beacon 108H x 108W x 103D
CASB393 Addressable Wall VAD Sounder Beacon 105H x 105W x 95D
CASB393WP Addressable Weatherproof Wall VAD Sounder Beacon 108H x 108W x 103D
CGI420 Addressable 4-20mA Interface 130H x 180W x 60D
CGI420R Addressable 4-20mA Interface with Relay 130H x 180W x 60D
CSC354CPR Addressable 4-Way Sounder Controller 300H x 300W x 74D
CZMU352 Addressable Zone Monitor Unit 88H x 147W x 57D
CZMU352-IS Addressable Zone Monitor Unit (Intrinsically Safe) 88H x 147W x 57D
MSU840 Addressable Shop Unit Monitor 88H x 147W x 57D
CSI350 Addressable Spur Isolator 88H x 147W x 57D
CMIO353 Addressable Mains Relay 130H x 180W x 60D

11INSTALLATION AND OPERATION MANUAL 25-16329-B December 2019 www.eaton.com
Section 1: System installation and design
Order code Description Dimensions (mm)
CIOP4 Addressable 4 Way Mimic Relay Board (4 In, 4 Out) 180H x 254W x 90D
CIOP8 Addressable 8 Way Mimic Relay Board (4 In, 8 Out) 180H x 254W x 90D
CIOP-7273 Addressable Door Release Module 130H x 180W x 60D
CIO351 Addressable 3 Channel I/O Unit (Reset on Reset) 130H x 180W x 60D
CIO351S Addressable 3 Channel I/O Unit (Reset on Silence) 130H x 180W x 60D
CIO351SST Addressable 3 Channel I/O Unit (Triple Address) 130H x 180W x 60D
400008FIRE-0022X Addressable Micro Input Module (MCIM) 65H x 35W x 18.5D
400010FIRE-0024X Addressable Micro Output Module (MCOM) 65H x 35W x 18.5D
400011FIRE-0025X Addressable Micro Output Module
(MCOM-R, Reset Pulse) 65H x 35W x 18.5D
400012FIRE-0026X Addressable Micro Output Module
(MCOM-S, Sounder ID) 65H x 35W x 18.5D
MIU872 Addressable Micro Zone Monitor Unit 65H x 35W x 18.5D
MAR724 Heavy Duty Relay 88H x 147W x 57D
ZPCB2252-MML Addressable Master LED MIMIC 190H x 350W x 75D
ZPCB2252-MSL Addressable Slave LED MIMIC 190H x 350W x 75D
ZPCB2223 Loop Splitter (optional card in the panel) 136H x 102W x 75D
Equipment compatibility
Sensors
Loop wired sensors must be of the Eaton soft addressed analogue type. Eaton
conventional detectors can be connected via a Zone Monitor Unit or Shop Unit
interface. The connection of other detector types via a Zone Monitor Unit or Shop
Unit interface is not recommended,
Call points
Loop wired call points must be the Eaton series soft addressed analogue type,
Eaton series conventional callpoints can be connected via a Zone Monitor Unit or
Shop Unit interface.
The connection of other callpoint types via a Zone Monitor Unit or Shop Unit
interface is not recommended,
Sounders
Loop powered addressable sounders must be of the Eaton series soft addressed
analogue type.
Conventional sounders can also be connected either to the conventional sounder
circuits at the panel or to the loop via an addressable sounder controller interface
providing they meet the following:

12 INSTALLATION AND OPERATION MANUAL 25-16329-B December 2019 www.eaton.com
Section 1: System installation and design
1. They are suitable for operation between 18V and 28V.
2. They are polarised and suppressed.
3. The total alarm load is less than the rating of the panel/ Alarm Power Interface.
ote:N It is possible to use devices outside these requirements if they are supplied
with power from a separate source and switched via a suitable relay.
Relay circuits
There are Relay circuits built-in the standard Panel. Additional relays can be added
to the system by using Eaton soft addressing, Single Channel or 3 Channel Input/
Output Units.
Relays/Auto-dialers and auxiliary equipment
A wide variety of relays and other equipment can be connected to the system, but
you should note the following constraints:
1. The Panel provides monitored outputs to drive fire and fault relays mounted in
external equipment. External relays should be suppressed. If a non-suppressed
relay is used then a diode can be connected as shown in the wiring diagram in
the appendix, to suppress any reverse EMF on the release of the relay which
might cause the panel to malfunction.
2. A 24V DC output is provided at the panel to make it easy to connect ancillary
equipment. Although the panel can supply a continuous quiescent load of up to
30mA, BS5839 precludes this practice and any ancillary equipment you connect
should only consume power in the alarm or fault mode to meet the requirements
of BS5839.
Additional instructions for electromagnetic compatibility
When used as intended this product complies with EMC Directive (89/336/EEC)
and the UK EMC regulations 1992 (SI 2372/1992) by meeting the limits set by the
standards BS 5406 (Pts 2&3) 1988, EN50130-4 immunity and EN61000-6-3 emission
requirements.
The following installation guidelines must be followed.
1. External cables must be connected using the cable entries or knockouts provided.
2. When routing external cables inside the product they must be
a. Kept as short as possible
b. Routed close to the housing
c. Kept as far as possible from the electronics
Any modifications other than those stated in this manual, or any other use of this
product may cause interference and it is the responsibility of the user to comply with
the EMC and Low Voltage Directives.

13INSTALLATION AND OPERATION MANUAL 25-16329-B December 2019 www.eaton.com
Section 1: System installation and design
System overview
Simple user interface
The main element of the user interface with is a large (120mm x 90mm visible area)
touch screen display, which provides comprehensive user information and also acts
as a multifunctional keypad.
Comprehensive context sensitive help information is provided throughout the menus
to assist unfamiliar users with system operation.
The Panel touch screen display automatically reconfigures to suit the selected
function, for example, if the change device text menu option is selected, the touch
screen is automatically formatted as a full QWERTY keyboard to enable fast and
simple textentry.
The use of the touch screen display enables a wide range of user and engineering
facilities to be incorporated into the panel whilst still offering simple operation.
User configuration and maintenance facilities
The Panel has comprehensive facilities for on site system configuration, whereby
the user can add or remove simple devices or change device text directly via the
panel, without the need for a service engineer to visit site. For initial configuration or
major system changes special PC configuration software is available enabling Eaton
Lighting and Security personnel to do this more efficiently than can be achieved
using the system screen. Exiting configurations can be uploaded to the PC so that
changes can be made to the existing system rather than having to revert to
initial files.
Sophisticated sounder control facilities
The Panel has the ability to support highly complex ringing pattern requirements.
Multistage cause and effect programming is possible whereby each addressable
sounder or output interface can be programmed independently if required and can be
set to respond to specific addresses, specific detection zones, specific panels on a
networked system or standard global ringing.
The panel supports three separate sets of programming per sounder and each
stage can be triggered differently For example, if a single detector is triggered the
panel can be programmed such that the sounder nearest to the detector operates
immediately and continuously, the remaining sounders in the affected zone operate
in pulsed mode and the other sounders delay for a selectable period to allow the
cause of the alarm to be investigated before global ringing commences.
Spur tolerant soft addressing
The Panel utilises intelligent soft addressing technology to greatly simplify the
installation and commissioning processes.
Once the system has been installed and the autolearn menu selected, the

14 INSTALLATION AND OPERATION MANUAL 25-16329-B December 2019 www.eaton.com
Section 1: System installation and design
control panel will automatically scan the detection loop and allocate each device
with an address number corresponding with its position on the loop, this avoids
the traditional need for manual addressing of the system devices which is time
consuming and provides a potential for error.
A major innovation with the Panel is the ability to incorporate spurs of analogue
devices which are fed from the loop by utilising a spur isolator.
Whenever the panel detects a spur, it breaks from allocating address numbers to the
loop wired devices, allocates address numbers to each of the devices on the spur in
sequence and then continues to address the devices on the main loop.
Every analogue device incorporates an integral short circuit isolator ensuring
maximum system integrity. A single short circuit will not disable any loop-mounted
devices, the isolators in the devices each side of the short circuit will operate and the
control panel will drive communication from both ends of the loop.
The spur isolator also incorporates a short circuit isolator such that in the event of
a short circuit on the spur, the integrity of the main loop will not be compromised.
Please refer to local standards e.g. BS5839 Pt1:2002 for details of the maximum
allowable are to be covered by a single spur.
Simple future expansion
The Panel is designed to ensure simplicity of future expansion.
If an additional device is added after the system has been programmed, the Panel
will allocate the next available address, it will not alter any of the existing address
numbers allocation thus enabling simple updating of as fitted drawings etc.
Similarly if a device is removed, the relevant address is saved as a spare address for
future use, the addresses of the remaining devices are not altered.
Multiple languages
The Panel supports a large number of languages as standard.

15INSTALLATION AND OPERATION MANUAL 25-16329-B December 2019 www.eaton.com
Section 1: System installation and design
Technical specification
Power specification
Mains Fuse : 1.6A Slow Blow
Nominal Voltage : 230 Vac + 10%, -15%
Nominal Current : 75mA
The Panel is protected by an internal thermal device, this requires no maintenance.
Batteries
Number of Batteries : 2
Manufacturer: : YSP12-7
Capacity : 7 Ah
Battery Fuse : 4A Quick Blow (F4)
Maximum battery current; : 3.5 Amps
Inputs
Addressable Loops
Max Number : 1 or 2 (Panel depending)
Max Loop Load per loop : 350 mA
Max Number of Addressable : 200
Devices per loop
Class Change : Operated by external volt free contact
Outputs
Conventional sounder circuits
Number of sounder circuits : 2
Total sounder Load : 1.5 A
Sounder Circuit Fuses (F1/2) : 1.6 Amp (Quick Blow)
End of line device : 210Ω + Diode
AUX 1
Max Load : 1 Amp
Fused (PTC2) : 1.1A polyswitch

16 INSTALLATION AND OPERATION MANUAL 25-16329-B December 2019 www.eaton.com
Section 1: System installation and design
AUX 2
Max Load : 60 mA
Fused (PTC3) : 1.1A polyswitch
Fault routing equipment
Max Load : <10 mA
Fused (PTC1) : 100mA polyswitch
End of Line resistor : 2K
Auxiliary 24V supply
Nominal Voltage : 24 Volts ±10%
Fuse (PTC5) : 100 mA Polyswitch
Maximum current : 30 mA
This output is not to be used for Fire protecting equipment or Fire alarm routing
Equipment.
Any power taken from the alarm system will effect the standby duration.
Mechanical specification
Weight including batteries : 9 Kg
Weight excluding batteries : 4 Kg
Dimensions (Standard batteries) : 395mm(L) x 270mm(H) x 115mm(D)
Type of Material (backbox) : Mild Steel (Power Coated)
Type of Material (Facia) : PC/ABS
Flammability Rating : UL 94 V0
Total Number of knockouts : 11
Diameter of Knock out : 20mm
TERMINAL BLOCKS : DO NOT USE EXCESSIVE FORCEWHEN TIGHTENING THE
SCREWS ON THE TERMINAL BLOCK

17INSTALLATION AND OPERATION MANUAL 25-16329-B December 2019 www.eaton.com
Section 1: System installation and design
Optional functions as per EN54 P2&4
The Panel is Designed to the requirements to EN54 Parts2 & 4 including all the
following options which can be selected as required.
Panel outputs
Panel Sounders: (OPTION 7.8 EN54 PT 2).
Two Sounder outputs are provided. ONLY polarised equipment should be used.
Ensure the polarity of the connections are observed at all times and end of line
device are fitted for correctoperation.
The total alarm load across all sounder outputs = 1.5 Amp.
All outputs are fused with 1.6 Amp Glass fuse Alarm devices should be spread
equally across the 2 soundercircuits.
WARNING
Do not exceed the rated output current.
Output to fault warning routing equipment (Option 9.4.1C EN54 pt 2)
This output, which is fused and monitored using 2k0 end of line resistor, is used
for the transmission of fault signals to fault warning routing equipment This output
is monitored using 2k0 end of line resistor and it current limited to 30 mA. Under
normal condition it operates by providing 12vdc which can be connected directly to a
12v auxiliary device( relay).It is current limited to 30 mA.
Under fault conditions or even if the Panel is powered down, this output will be
switch to O volts. Ensure the polarity of the connections is observed at all times and
end of line resistors ( 2K0 5% ) are fitted for correctoperation.
Delays to outputs (Option 7.11 of EN54 pt 2)
The Panel has the option to delay the operation of panel sounders, the fire routing
equipment output and the fire protecting Equipment. This delay is selectable using
the site installer download software. The delay is configurable in increments of 1
minute up to a maximum of 10 minutes. This delay can be enabled and disabled at
access level 2.
The Panel has the facility for a specific call point to override this delay by
programming this call point via an input interface to provide an evacuate signal using
siteInstaller.
Coincidence detection (Option 7.12 of EN54 pt 2)
The Panel has the facility to inhibit the operation of the output sounders, Output
to Fire routing equipment and the output of the fire protecting equipment until
one more confirmatory signals are received from different zones. This feature is
programmable using Site InstallerSoftware.

18 INSTALLATION AND OPERATION MANUAL 25-16329-B December 2019 www.eaton.com
Section 1: System installation and design
Alarm counter (Option 7.13 of EN54 pt 2)
The Panel has provision to record the number of instances that the CIE enters the
fire alarm condition.
The information is available at access level 2.
TEST (Option 16 of EN54)
The Panels equipped with the test option and can be implemented by either
Zone or Address.
Alarm verification
The Panel has the facility for global alarm verification where the detector alarm
decision is integrated over 30seconds.
Cable & wiring
Only the cable types listed below are allowable for loopconnections.
1. Enhanced Fire TUF™
2. Fire TUF™
3. FP200
4. MICC
When choosing your preferred cable type, you must take note of the following cable
and wiring requirements.
1. The cable must be 2 core screened with an over sheath.
2. Maximum loop length with any of the above cables is2KM.
3. Maximum volt drop must be limited to 7 volts.
4. The conductors should be 1.5mm minimum.
5. Multicore cable should not be used for detector wiring.
6. Different loops should NEVER be run within the samecable.
7. Loop feeds and returns should never be used within the same cable.
Cable resistance
Core diameter Typical FP200 resistance
1.0mm² 18.1 Ohms/km/Core
1.5mm² 12.1 Ohms/km/Core
2.5mm² 7.41 Ohms/km/Core
4.0mm² 4.61 Ohms/km/Core

19INSTALLATION AND OPERATION MANUAL 25-16329-B December 2019 www.eaton.com
Section 1: System installation and design
Installation
The panel should be installed in a clean, dry, reasonably well ventilated place, and
not in direct sunlight. Temperatures in excess of +45°C and below -10°C may cause
problems, if in doubt consult Technical Support. The panel should be located away
from any potential hazard, in a position where it is readily accessible to authorised
staff, and the fire services, ideally on the perimeter of a building near a permanent
entrance. Mount the panel to the wall using the drill template provided. Do not drill
through the panel to the wall as dust will contaminate thecircuitry.
Installation guide
1. Never carry out insulation tests on cables connected to electronic equipment.
2. DO NOT OVER TIGHTEN TERMINAL CONNECTOR SCREWS
3. Always use the correct type of cables specifically designed for the operation of
fire detection and alarm circuits.
4. Always adhere to volt drop limitation when sizingcables
5. Always observe polarity throughout. Non colour coded conductors should be
permanently identified.
6. Screen continuity must be maintained throughout the entire loop circuit including
at each junction point and at each device, terminals are provided on each device
to facilitate this.
7. The screen should be earthed at the connection point provided at the Panel and
not at any other point. Both the loop start and the loop end must be connected to
the appropriate earthing points.
Care must be taken to avoid connecting the screen to the earthed body of any metal
devices, enclosures or cable containment. The screen or drain wire of the loop cables
should not be considered as safety earth and therefore should not be connected
to terminals marked with the earth symbol, except at the panel, and should not be
insulated with green and yellow sleeving.
8. The Panel utilises intelligent soft addressing technology to greatly simplify
the installation and commissioning processes. Once the system has been
installed and the autolearn menu selected, the control panel will automatically
scan the detection loops and allocate each device with an address number
corresponding with its position on the loop, this avoids the traditional need for
manual addressing of the system devices which is time consuming and provides
a potential for error.

20 INSTALLATION AND OPERATION MANUAL 25-16329-B December 2019 www.eaton.com
Section 1: System installation and design
Fixing details
Read all the installation instructions before commencing with the installation.
The installation of this panel must be carried out by a suitably qualified/trained
person. The installation must comply with IEE wiring regulations and with BS5839
part 1 2002.
The electronic components within the fire panel are Static Sensitive.
Do not touch the electronics directly.
Mounting the Backbox
The Panel can be surface mounted and recessed . To surface mount; drill three holes
and fix the backbox to the wall using suitable screw fixings.
MAINS
-+-+-+-+ABXYEABXYE E
EF+F-
LOOP 1
S+ S- E
EF+F-
LOOP 2
S+ S-
NO NCCNONCC
LNE
AUX RELAY 1NETWORK NETWORK
+24V OUT
AUX RELAY 2 FAULT
RELAY
SOUNDER
CIRCUIT 1
SOUNDER
CIRCUIT 2
This example can be
seen again and more
clearly in Appendix
(A) System Wiring
This manual suits for next models
1
Table of contents
Other Eaton Security System manuals

Eaton
Eaton Menvier 20 User manual

Eaton
Eaton 460-CSA Manual

Eaton
Eaton CU1 Series User manual

Eaton
Eaton RTK 725B range User manual

Eaton
Eaton 414-CTF Manual

Eaton
Eaton i-on Compact User manual

Eaton
Eaton DFDAP-M User manual

Eaton
Eaton i-on40 User manual

Eaton
Eaton BiWire Ultra User manual

Eaton
Eaton i-on16 User manual
Popular Security System manuals by other brands

Voyager
Voyager WVHS43 manual

FingerTec
FingerTec TA100 DIY SERIES user guide

patura
patura 15631 Mounting instructions

Marmitek
Marmitek PROGUARD800 Series user manual

Federal Signal Corporation
Federal Signal Corporation 400HMK-AC instruction sheet

Zerio-Plus
Zerio-Plus EDA-Z5008 Installation & operation manual