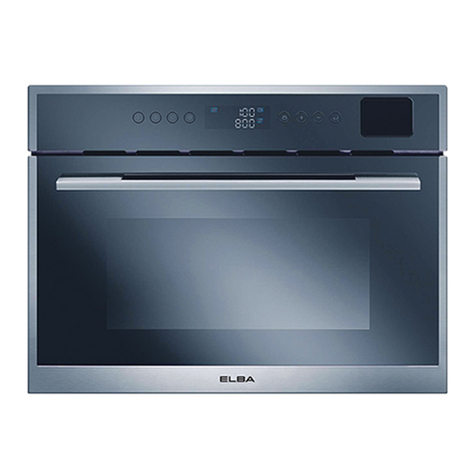
Elba ESPERTO EBO-F7018TW(SS) User manual

BUILT-IN TWIN OVEN
MODEL: ESPERTO EBO-F7018TW(SS)
Owner’s Manual
Please read this manual carefully before
operating your set.
Retain it for future reference.
Record model number and serial number
of the set.
See the label attached on the set and
quote this information to your dealer when
you require service.
For The Warranty Terms & Conditions, Please Refer To Warranty Certificate

INSTRUCTIONS FOR INSTALLATION AND USE
Using This Manual
This Owner’s Manual contains important information on safety and instructions intended to assist
you in the operation and maintenance of your appliance. Please take the time to read this Owner’s
Manual before using your oven and keep this book for future reference.
The following symbols are used in the text of this Owner’s Manual
SAFETY INSTRUCTIONS
Installation of this oven must be performed only by a qualified technician. The installer is
responsible for connecting the appliance to the mains power supply in observance of the relevant
safety recommendations.
Electrical Safety
If the oven has been damaged in transport, do not connect it.
-
Appliance must be connected to the mains power supply only by a qualifiedtechnician.
-
In the event of a fault or damage to the appliance, do not attempt to operate it.
-
Repairs should be performed by an authorized technician only. Improper repair mayresult in
considerable danger to you and others.
-
If the supply cord is defective, it must be replaced by a qualified servicetechnician.
-
Electrical leads and cables should not be allowed to touch theoven.
-
Never use adaptor or shunts to connect to the mains powersupply.
-
The power supply of the appliance must be turned off when it is beingcleaned.
WARNING
The appliance should be disconnected before replacing the lamp to avoid the possibility of electric
shock. During oven operation, the interior surfaces will become extremely hot.
Safety during Operation
-
This oven is designed only for the cooking of householdfood.
-
During use, the oven interior surfaces are hot enough to cause burns. Avoid touching the
heating element or interior surfaces of the oven until they have had time to cooldown.
-
Never store flammable materials in the oven.
-
When cooking, take care when opening the oven door as hot air and steam canescape
rapidly.

-
Never pour water into the oven when it is hot. It will damage the enamel surface.
-
The oven door must be closed during cooking.
-
Do not rest bake ware on the open oven door.
-
This appliance is not intended for use by person (including children) with reducedphysical,
sensory or mental capabilities unless they have been given supervision or instruction
concerning use of the appliance by a person responsible for theirsafety.
-
Only use the temperature probe recommended for this oven.
Child Safety
-
Always place oven racks in desired location while oven is cool. If a rack must be moved
while oven is hot, do not let potholder contact the heatingelements.
-
Always use dry potholders. Moist or damp potholders on hot surfaces may result in burns
from steam. Do not let potholder touch hot heatingelements.
WARNING: Accessible parts may become hot during use. You children should be kept away.
-
Secure all loose garments, etc. before beginning. Tie long hair so that it does not hang loose,
and do not wear loose fitting clothing or hanging garments, such as ties, scarves, jewelry, or
dangling sleeves.
-
When children become mature enough to use the appliance, it is the legal responsibility of
the parents or legal guardians to ensure that they are instructed in safe operation of the
appliance by qualified persons.
-
Do not allow anyone to climb, stand, lean, sit, or hang on any part of an appliance, especially
a door, warming drawer or storage drawer. This can damage the appliance and potentially
causing severe injury.
WARNING: The appliance and its accessible surface parts become hot during use. Care shall
be taken to avoid touching heating elements. Do not allow children to use this appliance.
Children and pets should not be left alone or unattended in the area where the appliance is in
use. They should never be allowed to play in its vicinity, whether or not the appliance is in use.
Cleaning Safety
Oven exterior
-
For cleaning both the interior and exterior of the oven, use a cloth and a mild cleaning agent
or warm soapy water.
-
Dry with kitchen paper or a dry towel
-
Do not use scourers, caustic cleaners or abrasive products.
Stainless steel oven fronts
-
Do not use steel wool, scouring pads or abrasives. They may damage thefinishing.
Aluminum oven fronts
-
Wipe the plate gently with a soft cloth or microfiber cloth and a mild window cleaning
detergent.
WARNING: Make sure the oven is cool before cleaning.
Oven interior
-
Do not use coarse scouring pad or cleaning sponges.
-
Do not use coarse scouring pads or cleaningsponges.
-
Toavoid damaging the enameled oven surfaces, use commercially available oven cleaners.
Oven glass door
-
The oven door is equipped with three sheets of glass placed against each other. The inner &
middle sheets can be removed for cleaning.
Accessories
-
Wash all bakeware and accessories after each use and dry with a kitchen towel.To
clean easily, soak in warm soapy water for about 30 minutes.

INSTALLING THE OVEN
Electrical installation of this appliance must be performed only by a qualifiedelectrician.
Installing into a low cabinet
Connecting to the mains power supply
Electrical connections must be made as per the connection plate fixed to the back of the appliance
by a technician who must ensure that the appliance has been connected up in accordance with
fitting instructions and local regulations.
The earth wire must be connected to the terminal of the oven.
If the oven is connected to the power supply by a plug, this must remain accessible once the oven
has been fitted.

Installing into a high cabinet
-
Observe minimum clearance requirements.
-
The oven should be slid into place at the proper angle of alignment.
PARTS AND FEATURES
Oven
-
Racks Levels 4 and 5 are used mainly for the grillfunction.
-
Please refer to the cooking guides provided throughout this manual to determine appropriate
shelf levels for your dishes.

OVEN CONTROLS
1.
On/Off Button
2.
Function Button
3.
Temperature Button
4.
Window Display
5.
Timer Button
6.
Upper and Lower Exchange Button
7.
Time / Temp/ Function Control Knob
8.
Light Button
Special features
The oven comes equipped with the following special features.
-
Divider modes: When the divider inserted, the appliance’s divider facility enables
independent cooking in two separated partitions, enhancing energy efficiency.
-
Probe: This device is only to be used in single mode. There is a Probe Outlet to matchwith
the Probe.
How to set the oven for roasting when using the probe
-
Insert the probe into the meat.
-
Plug the probe into the outlet in the oven. Make sure it is pushed all the way in. If the probe is
inserted correctly, will shows on the display.
-
Close the oven door.
-
Switch the Oven On by touching the On/Off Button, then touch the Time / Temp / Function
Adjust Button to select the function you need.
-
Touch the Temperature Button, the oven temperature will shows on the display, you can
using the Time / Temp / Function Adjust Button set the desired oven temperature, in 5℃
increments, from 40℃to 250℃.
-
Touch the Temperature Button again, the Probe temperature will shows on the display, you
can using the Time / Temp / Function Adjust Button set the Probe temperature ,in 5℃
increments, from 40℃to 95℃.
-
When the internal temperature of the meat reachesthe number you have set, the probe and
the oven will automatically turn off. The cooking process is completed and oven willbeep.

Accessories
The following accessories are provided with your oven.
1.Wiregrill 2. Wireroast
3.Baking tray 4. Deeppan
5.Rotisseriespit 6.Divider (used in level 3)
If you hear two beeps after inserting the divider, which means you can use dividerfunction.
When you take off the divider, two beeps means this function cannot be used.
The baking tray, deep pan and wire grill
should be inserted correctly into the side
runners. When taking out the cooked
foods from the oven, be careful of hot
utensils and surfaces.
Ensure that the pan or tray is properly placed in
the side runners. Allowing these accessories to contact the bottom surface of the oven can
damage the enamel of the surface. Trays and pans placed on level 1 should clear the bottom
surface of the oven by at least 2 cm.
Positioning the Divider
-
Insert the divider into level 3 of the oven.
Positioning the Probe
-
Insert the Probe into the Probe outlet.
Positioning the Wire Grill
-
Insert the wire grill at any desired level.
Positioning the baking tray or deep pan
-
Insert the baking tray into level 4 of the oven and the deep pan into level 1 of theoven

WARNING: To cook in the lower, upper or twin divider modes, you must insert the divider.
Safety shutoff: If a cooking time is not entered, the oven will shut itself off after 2 hours.
-
This oven’s electrical circuitry features a thermal shutoff system. If the oven heats to
abnormally high temperatures, the system will shut off the power supply to the heating
elements for a period of time or oven for allalong.
Cooling fan
-
During cooking, it is normal for the vent to release hot air from the front of theoven.
-
When the oven gets hot, the cooling fan will automatically enabled.
-
The cooling fan will also continue to operate after the oven has been in use. It will turn off
when the internal cabinet temperature has dropped to 110 °C or after 22 minutes.
BEFORE YOUBEGIN
Setting the clock
When power is first supplied to the oven, the display on the control panel will light and 0:00 will
begin blinking in the display. The oven cannot be operated until the clock is set.
1.
“0: ”will blink in the display when power is first supplied to the appliance and shows the set
hour.
2.
Touch the Time / Temp / Function Adjust Button “+” or “-” to set the hour of the day.
3.
Wait about 5 seconds, the clock stops blinking and show the set hour.
4.
Press the Time Button . The “:00” will blink.
5.
Touch the Time / Temp / Function Adjust Button “+” or “-”to set the minute of the time.
6.
Press the Time Button to finish setting the clock or wait for 5 seconds. The time will stop
blinking. The display shows the time of the day.
7.
The appliance is now ready to use.
Initial cleaning
Clean the oven thoroughly before using for the first time.
Do not use sharp or abrasive cleaning materials. These could damage the oven
surface.
To clean the oven
1. Open the door, the oven lights comes on by touching the Light Button.
2. Clean all oven trays, accessories and side runners with warm water or washing liquid and
polish dry with a soft clean cloth.
3. Clean the oven interior with a soft damp cloth.
4. Wipe the front of the appliance with a damp cloth.
5. Remove all accessories and operate the oven at the convection setting at 200ºC for 1 hour
before using. There will be a distinctive odor; this is normal. Ensure the kitchen is well
ventilated during this period.

OVEN FUNCTIONS
The features of this oven include the following functions:
CONVENTIONAL
Suggested temperature: 200 °C
The conventional function is ideal for baking and roasting foods arranged on one rack. Both the top
and bottom heating elements operate to maintain the oven temperature.
Before starting to cook you should preheat the oven.
Food Item
Shelf Level
Temperature (ºC)
Accessory
Time(min)
Lasagna frozen
(500-1000g)
3
180-200
Wire grill
40-50
Dorado or same size fish (300-1000g)
3-4 cut on each side (With oil)
3/2
240
Wire grill/Baking tray
15-20
Fish filets (500-1000g)
3-4 cut on each side (With oil)
3
200
Baking tray
13-20
Frozen cutlets
(minced meat & with ham,
cheese or Mushroom filing)
(350-1000g)
DROP OIL
3
200
Baking tray
25-35
Frozen cutlets from
minced, carrot, beetroot or
Potato(350-1000g)
DROP OIL
3
200
Baking tray
20-30
Pork on bone cutlets (500-1000g)
With oil, salt and pepper
3/2
200
Wire grill/Baking tray
40-50
Baked potato (cut in half) (500-1000g)
3
180-200
Baking tray
30-45
Meat roll with mushroom filling
(Frozen) (500-1000g) (With oil)
3
180-200
Baking tray
40-50

TOP HEAT + CONVECTION
Suggested temperature: 190 °C
This setting should be used when cooking cakes placed on one shelf and biscuits that must be well
browned or crispy on the bottom. It is also good for pizzas, quiches lorraine and cheesecakes. The
top heating element is in operation and the fan operates to constantly circulate the hotair.
Before starting to cook you should preheat the oven.
Food Item
Shelf Level
Temperature (ºC)
Accessory
Time(min)
Pork on bone (1000g)
With oil, salt & pepper
3/2
180-200
Wire grill, Baking tray
50-65
Pork shoulder in foil
(1000-1500g)
Marinated meat
3/2
180-230
Baking tray
60-120
Whole chicken
(700-1500g)
With oil, salt & pepper
3/2
190-200
Baking tray
40-55
Meat or fish steaks
(400-800g)
With oil, salt & pepper
3/2
180-200
Baking tray with a
wire roast on top
15-35
Sponge cake (1000g)
3/2
180
Deep pan
20
CONVECTION
Suggested temperature: 170 °C
This function bakes foods placed on up to three shelves and is also appropriate for roasting.
Cooking is achieved by the heating element on the rear wall and the fan distributes the heat. Before
starting to cook you should preheat the oven.
Food Item
Shelf Level
Temperature (ºC)
Accessory
Time(min)
Lamb rack (350-700g)
With oil, salt & pepper
3/2
190-200
Wire grill /
Baking tray
40-50
Bananas in foil with chocolate, nuts
&brown sugar 3-5pcs
Each cover by foil with 3-4 pcs with
sugar. Make a small cut & put on the
cut 10-15g chocolate, 5-10g nuts
3
220-240
Wire grill
15-25
Bake apples 5-8pcs x 150-200g
Take out the hearts, add sugar in.
Put in a pan with water
3
200-220
Wire grill
15-25
Cutlets from minced meat
(300-600g) With oil
3
195
Baking tray
18-25
Meat roll with filling (minced meat)
(500-1000g) With oil
3
180-200
Baking tray
50-65

GRILL
Suggested temperature: 240 °C
The grill function grills large quantities of flat foods, such as steaks, schnitzels and fish. It is also
suitable for toasting. Both the top outside element and the top inside element are on in this
mode. Before starting to cook you should preheat the oven.
Food Item
Shelf Level
Temperature (ºC)
Accessory
Time(min)
Sausages 5-10pcs
4/3
200
Wire grill /Baking tray
10-15
Hunters sausages
8-10pcs With oil
4/3
200
Wire grill /Baking tray
10-12
Toasts 5-10pcs
4
240
Wire grill /Baking tray
8-12
Cheese Toasts 5-10pcs
3/2
200
Baking tray
18-25
“Bliny” (Pancakes) with
filing frozen (200-500g)
Put before preheat (with oil)
3
180-200
Baking tray
20-30
Fan Assisted Grill
Suggested temperature: 240 °C
The top central heating elements and the fan come on. This combination of features increases the
effectiveness of the unidirectional thermal radiation of the heating elements through forced
circulation of the air throughout the oven. Before starting to cook you should preheat the oven.
Food Item
Shelf Level
Temperature (ºC)
Accessory
Time(min)
Camembert for frying,
Frozen (2x75g-4x75g)
3
200
Wire grill
10-12
Tomato-Mozzarella Baguettes
(French bread) (with ham, with
salami) frozen
3/2
200
Wire grill /Baking tray
15-20
Fish fingers (300-700g)
Put before preheat (with oil)
3/2
200
Wire grill /Baking tray
(for cheese catching)
15-25
Fish burger frozen
(300-600g)
3
180-200
Baking tray
20-35
Pizza frozen
(300-500g)
3/2
180-200
Baking tray
23-30
BOTTOM HEAT + CONVECTION
Suggested temperature: 190 °C
The Bottom Heat + Convection mode is for recipes calling for a moist topping and a crisp base, as
with foods like pizzas, quiches lorraine, German-style open fruitcakes and cheese-cakes.
Before starting to cook you should preheat the oven.
Food Item
Shelf Level
Temperature
(ºC)
Accessory
Time(min)
Yeast dough pie with apple Frozen
(350-700g)
3
180-200
Wire grill
15-20
Puff pastry small pie with
filling frozen (300-600g)
Brush egg yolk, put before preheat
3
180-200
Baking tray
25

Meat balls in sauce (250-500g)
Use a frying pan
3
180-200
A pan on a Wire grill
25-35
Puff pastry fans (500-1000g)
Brush egg yolk
3
180
Baking tray
15-23
Cannelloni in sauce (250-500g)
Use a pan
3
180
A pan on a Wire grill
22-30
Yeast dough pies with filling
(600-1000g) Brush egg yolk
3
180-200
Baking tray
20-30
TWIN CONVECTION
In the models of ovens where the Twin Convection function is, one can cook 2 dishes with 2
different modes at the same time, using the divider. For example, you can cook apple pie putting it
in lower part of the oven with meat steak putting it in the upper part of the oven. Before starting to
cook you should preheat the oven.
Variant 1
PARTITION
Food Item
Shelf
Level
Cooking
Mode
Temperature
(ºC)
Accessory
Time
(min)
UPPER
OVEN
Meat, fish or steaks
(400-800g)
With oil, salt & pepper
4
Top-heat+
convection
180-200
Baking tray
with wire
roast on top
15-35
LOWER
OVEN
Yeast dough pie with
apple frozen (350-700g)
1
Bottom Heat+
Convection
180-200
Wire grill
15-20
Variant 2
PARTITION
Food Item
Shelf
Level
Cooking
Mode
Temperature
(ºC)
Accessory
Time
(min)
UPPER
OVEN
Meat, fish or steaks
(400-800g)
With oil, salt and pepper
4
Top-heat+
convection
180-200
Baking tray
with wire
roast on
top
15-35
LOWER
OVEN
Puff pastry small
pie with filling frozen
(300-600g) brush egg
yolk, put before preheat.
1
Bottom Heat+
Convection
180-200
Wire grill
25

PROBE
Meats
Minutes
Oven Temp
Internal Temp.
Beef
Rib, Boneless Rib, Rare Top Sirloin
Medium Well (1360 to 2270g)
20-24
24-28
28-32
165℃
165℃
165℃
60℃
70℃
75℃
Beef Tenderloin, Rare Top Sirloin
Medium Well
10-14
14-18
165℃
165℃
60℃
70℃
Pork
Bone-in Boneless
(1360 to 2270 g)
23-27
165℃
75℃
Chops (1/2 to 1” thick) 2 chops
4 chops
6 chops
30-35 total
30-40 total
40-45total
165℃
165℃
165℃
75℃
75℃
75℃
Ham
Canned, Butt, Shank (1360 to 2270g)
(fully cooked)
14-18
165℃
60℃
Lamb
Bone-in Boneless (1360 to 2270g)
Medium Well
17-20
20-24
165℃
165℃
70℃
75℃
Seafood
Fish whole
(1360 to 2270g)
30-40 total
205℃
Lobster Tails
(170-230g each)
20-25 total
175℃
Poultry
Whole Chicken
(1134 to 1588g)
24-26
175℃
80-85℃
Cornish Hens Unstuffed (453-680g)
(Stuffed 453-680g)
50-55 total
55-60 total
175℃
175℃
80-85℃
80-85℃
Ducking
(1800-2270g)
24-26
160℃
80-85℃
Turkey, whole*
Unstuffed (4536-7260g)
Unstuffed (8165-10890g)
8-11
7-10
160℃
160℃
80-85℃
80-85℃
Turkey Breast
(1814-2720g)
16-19
160℃
75℃
OVEN USE
Setting the divider mode
For upper, twin and lower modes, insert the divider at the “OFF” position. For single mode, remove
the divider at the “OFF” position. And switch on the oven by touch “On/Off” Button, then touch the
Function Button to select the mode you want. For further details, see the table below.
1.
Switch on the oven by touch “On/Off” Button.
2.
Touch the Function Button to select the desired partition.
3.
Turn the Time / Temp/ Function Adjust Button “+” or “-”to select the desired oven function.
If 3 seconds have elapsed and there are no further adjustment, the oven will begin
automatically in the selected mode and function.

If you want to change the partition, Touch the Function Button and hold for about 3 seconds.
Then touch the Function Button to select the desired partition.
Divider
Marking
Oven Function
Insert
Divider
Usage Information
Upper
Mode
1.
Convection
2.
TopHeat + Convection
3.
Large Grill
Yes
This mode saves energy and time when
cooking small amounts of food.
Twin
Mode
Both Upper and Lower
Mode Function
Yes
You can cook two dishes at two different
temperatures at the same time.
Lower
Mode
1.
Convection
2.
Bottom Heat + Convection
Yes
This mode saves energy and time when
cooking small amounts of food.
Single
Mode
1.
Convection
2.
TopHeat+ Convection
3.
Convectional
4.
Large Grill
5.
Small Grill
6.
Bottom Heat + Convection
7.
Defrosting
No
This mode give you extra large oven
combining top and bottom oven with dual
cooking fan for rapid cooking of large
amount of food.
UPPE
R MOD
E
The divider should be inserted.
Convection TopHeat + Convection Top Heat
LOWER MODE
The divider should be inserted.
Convection Bottom Heat + Convection

TWIN MODE
The upper and lower modes operate at the same time. It is possible to set which mode activates
first. When one of the dishes has finished cooking in twin mode and you would like to change the
cooking time or temperature of the other partition, touch the Function Button to select the mode
(upper or lower) that you would like to continue operating, then touch the Time Button and the
Temperature Button to select the cooking time or temperature. Divider should be inserted.
SINGLE
MODE
Convection TopHeat + Convection
Conventional Large Grill
Fan Assisted Grill Bottom Heat + Convection
Defrosting

SETTING THE OVEN TEMPERATURE
In Single, Upper and Lower Modes
1. Touch theTemperature Button and hold for about 3 seconds, the temperaturewill flash.
2. Touch the Time / Temp/ Function Adjust Button “+” or “-” to adjust the temperature in
increments of 5 °C.
Single Mode
40°C -250°C
Upper Mode
40°C -250°C
Lower Mode
40°C -250°C
The temperature may be adjusted during cooking.
In Twin Mode
1. Touch the Temperature Button and hold for about 3 seconds, the temperature willflash
(Upper or Lower mode).
2. Touch the Time / Temp/ Function Adjust Button “+” or “-”to adjust the temperature in
increments of 5 °C.
3. Touch the upper and lower exchange button, the temperature will flash (lower or upper
mode)
4. Touch the Time / Temp/ Function Adjust Button “+” or “-”to adjust the temperature in
increments of 5 °C.
The temperature may be adjusted during cooking. Temperature difference of upper and lower is
30°C.
SWITCHING THE OVEN ON/OFF
To switch the oven off, touch the on/off button.
End time –you can set the end time during cooking.
In Single, Upper And Lower Modes
1.
Touch the Time several times until the end time icon and the three digits on the
display begin to flash.
2.
Touch the Time / Temp /Function Adjust Button “+” or “-” to set the desired end time.
3.
The oven operates with the selected end time automatically after press theTime Button
or wait for 3 seconds.
(a) During cooking, you can adjust the previously set end time with the Time Button
and Time / Temp /Function Adjust Button for better results.
(b) You cannot set cook time during the function with probe.
Upper Mode
180°C -250°C
Lower Mode
180°C -250°C

In Twin Mode
End times for the upper and lower modes can be selected using the Time Button, the upper and
lower exchange button and the Time/ Temp/ Function Adjust Button.
1.
Touch the Time Button several times until the end time icon and the three digitson the
display begin to flash (upper or lower).
2.
Touch the Time / Temp /Function Adjust Button “+” or “-” to set the desired end time.
3.
Touch the upper and lower exchange button ,the end time icon and the three digits on
the display begin to flash (upper or lower).
4.
Turn the Time / Temp/Function Adjust Button to set the desired end time.
5.
The oven operates with the selected end time automatically after pressthe Time B
u
tt
on
or wait for 3 seconds.
During cooking, you can adjust the previously set end time with the Time Button and Time
/ Temp / Function Control Knob for better results.
COOK TIME
You can set the cook time during cooking.
In Single, Upper And Lower Modes
1.
Touch the Time Button several times until the cooking time icon and the three digits
on the display begin to flash.
2.
Touch the Time / Temp /Function Adjust Button “+” or “-”to set the desired cook time.
3.
The oven operates with the selected cook time automatically after press the Time Button
or wait for about 3 seconds.
(a)During cooking, you can adjust the previously set cook time with theTime Buttonand
Time / Temp/Function Control Knobfor better results.
(b) You cannot set cook time during the function with probe.
In Twin Mode
1.
Touch the Time Button several times until the cooking time icon and the three digits
on the display begin to flash (upper and lower).
2.
Touch the Time / Temp /Function Adjust Button “+” or “-”to set the desired cook time.
3.
Touch the upper and lower exchange Button , the cook time icon and the three digits
on the display begin to flash (upper and lower).
4.
Touch the Time / Temp /Function Adjust Button “+” or “-”to set the desired cook time.
5.
The oven operates with the selected cook time automatically after press the Time Button
or wait 3 seconds.
During cooking, you can adjust the previously set cook time with the Time Button and Time /
Temp / Function Control Knob for better results.

"""""
""""
"""""
""""
DELAYED START
If the end time is entered after the cook time has already been set, the cook time and the end
time are calculated and if necessary the oven sets a delayed start point.
1.
Touch the Time Button .
Example: Current time is 03:30and the desired cook time is 5 hours.
2.
Touch the Time / Temp /Function Adjust Button “+” or “-”to set the end time.
Example: You want to cook for 5 hours and finish at 8:30.
3.
Touch the Time Button . The oven is inoperable until the delay start initiate.
KITCHEN TIMER
1.
Touch the Timer Button several times until “ ” icon and the three digits on the display
begin to flash.
2.
Touch the Time / Temp /Function Adjust Button “+” or “-” to set the desired time.
3.
Touch the Timer Button to start the kitchen timer. When the set time has elapsed,
an audible signal sounds.
CHILD SAFETY FUNCTION
1. Touch the Time Button and Function Button at the same time and hold for 1
seconds. icon will appear in the display .
2. Touch the Time Button and Function Button at the same time and hold for 3
seconds again to unlock.
When locked, all buttons and knobs except the Divider Select Knob and theUnlock button
will not operate. The lock is available whether or not the oven is inoperation.
CHECK THE TEMPRETURE
-
Touch the Temperature Button and Time Button at the same time to check the
temperature of the upper test probe
-
Touch the Temperature Button and Upper and lower exchange Button to check the
temperature of the lower test probe.
-
Touch the Temperature Button and Function Button to check the temperature of
probe.

CLEANING AND MAINTENANCE
Cleaning The Oven Door
For normal use, the oven door should not be removed but if removal is necessary, for example, for
cleaning, follow these instructions.
Removing The Door
1.
Open the door to full extend as Figure 1.
2.
Open the lever A completely on the left and right hinge as Figure 2.
3.
Hold the door as shown as Figure 3.
4.
Rotate the door by approximately 70º until the hinges can be taken out completely from the
hinge holes as Figure 4.
Attaching The Door
1.
With the clips still flipped open, align the door hinges into the hingeholes.
2.
Rotate the door toward the horizontal line and flip the clips closed.
Disassembling The Door
1.
Push the rods on the left and right sides as Figure 1.
2.
Remove the seal A as Figure 2, follow by B and C as Figure 3.
Table of contents
Other Elba Oven manuals

Elba
Elba EB 1722 User manual

Elba
Elba PXDO 906 DF Installation and operating instructions

Elba
Elba EBO 9910 S Technical manual

Elba
Elba ESMO-C3582ST User manual

Elba
Elba EBO-D7080D(SS) User manual

Elba
Elba EL 731 Technical manual

Elba
Elba ESO-2633BI User manual

Elba
Elba EEO-A1713 User manual

Elba
Elba ESGO-H3850TFT(BK) User manual

Elba
Elba E 5 XLX GE Technical manual

Elba
Elba OB60SC SERIES User manual

Elba
Elba EGC-C9783E(SS) User manual

Elba
Elba 6306110 Technical manual

Elba
Elba 1788 Manual

Elba
Elba OB60 Series Mounting instructions

Elba
Elba IGM-25A-60 User manual

Elba
Elba EO-1688 User manual

Elba
Elba ESO-G3070ST(BK) User manual

Elba
Elba OB60 Series User manual

Elba
Elba ENTWIN 90 DF Technical manual