7Printed in Italy - EE167/0105
11- Maintenance
To maintain a good performance of the system, almost
once a year, an inspection of the valve is recommended.
External inspection
Turn off all power before servicing any part of the
system.
Check the conditions of the DIN plug gasket. If gasket is
deteriorated, replace it with a new one.
Check the electrical connections are clean, dry and
correctly tightened.
Check the conditions of pipe connections: cover them
with a soap solution and check for leakages.
Check the proper operation of the valve: power the coil
and verify the valve closing.
Internal inspection
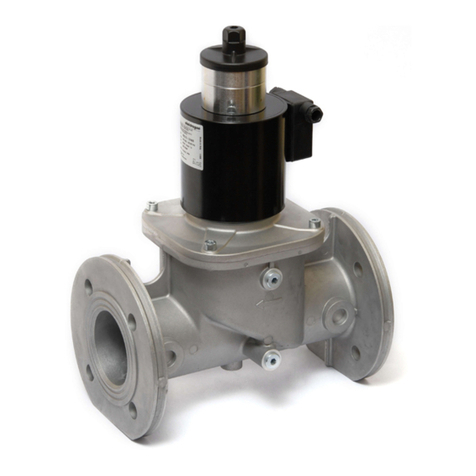
If the valve does not work properly, do not dismount
the resetting mechanism, but replace it with a new
one.
Threaded models:
1. Close ball valve upstream the system.
2. Reset the valve (valve open).
3. Unscrew the knob, but do not remove the nut below.
This to avoid the accidental dismounting of the
resetting mechanism.
4. Remove the locking nut and the coil.
5. Using an Allen key, remove the screws on the upper
flange, in cross way. The gas in the valve will come
out during this step.
6. Check the main O-ring. If it’s necessary, replace it.
7. Blow the spring with compressed air and check it is
corrosion free.
8. Check the conditions of the sealing gasket. If gasket
is deteriorated, replace it with a new one.
9. Clean the sealing lip with a clean cloth. Do not use
tools, because a lip damage could result.
10. Remove the filter and blow it with compressed air.
11. Reassemble the valve following the inverse
sequence.
Flanged models:
1. Close ball valve upstream the system.
2. Unscrew the knob.
3. Using an Allen key, remove the screws on the upper
flange, in cross way. The gas in the valve will come
out during this step.
4. Check the main O-ring and the rod O-ring. If it’s
necessary, replace them.
5. Remove the spring and blow it with compressed air.
Check the spring is corrosion free.
6. Clean the disc assembly with a clean cloth and
compressed air. Grease the rod O-ring.
7. Check the conditions of the sealing gasket. If gasket
is deteriorated, replace it with a new one.
8. Clean the sealing lip with a clean cloth. Do not use
tools, because a lip damage could result.
9. Remove the filter and blow it with compressed air.
10. Reassemble the valve following the inverse
sequence.
To insert the rod inside the flange assembly, power the
coil and, using a screw driver, move the pin to allow the
rod inserting.
When the reassembly is finished, verify the correct
sealing between the upper flange and the valve body:
1. Open ball valve to restore pressure into the valve.
2. Apply a soap solution between the upper flange and
the valve body and check for leakages.
3. Remove the soap solution with a clean cloth and
compressed air.
WARNING
•When reassemble, use all gaskets properly.
•Perform functional test after mounting.
•All works must be executed by qualified
technicians only and in compliance with local
and national codes.


