ElektroPhysik QuintSonic 7 Technical Document

ElektroPhysik
Technical Manual and Operating
Instructions
Ultrasonic Coating
Thickness Measuring System QuintSonic 7

© ElektroPhysik QuintSonic 7 2 von 184
ElektroPhysik
Dr. Steingroever GmbH & Co. KG
Pasteurstr. 15
50735 Köln
Deutschland
Tel.: +49 221 752040
Fax.: +49 221 7520467
Internet: http://www.elektrophysik.com/
Mail: info@elektrophysik.com
© ElektroPhysik
Version 0.92 13.08.2013 /Rh/bo-r
Subject to change without notice

Table of Contents
© ElektroPhysik QuintSonic 7 3 von 184
Table of Contents
1Introduction..........................................................................................................................8
1.1 General Remarks ............................................................................................................8
1.2 Field of Applications ........................................................................................................8
1.3 Measuring Procedure......................................................................................................8
1.4 The QuintSonic 7 Measuring System...............................................................................9
2First Steps..........................................................................................................................11
2.1 Insert batteries and connect sensor...............................................................................11
2.2 Switching-on and taking readings..................................................................................12
2.2.1 Setting language....................................................................................................13
2.2.2 Taking readings.....................................................................................................14
3Description of the System.................................................................................................16
3.1 Display unit....................................................................................................................16
3.1.1 General properties.................................................................................................16
3.1.2 Operating keys.......................................................................................................16
3.1.3 Sockets and Interfaces ..........................................................................................17
3.1.4 Power Supply.........................................................................................................18
3.2Sensor...........................................................................................................................19
3.2.1 SIDSP®-Technology...............................................................................................19
3.2.2 Measuring ranges..................................................................................................21
4User Interface.....................................................................................................................22
4.1 Important Menu Screens ...............................................................................................22
4.1.1 Start screen...........................................................................................................22
4.1.2 Measure mode –numerical and graphical screen..................................................23
4.1.3 Measure mode –Large numerical screen..............................................................24
4.1.4 Measure Mode –A-screen Image with Echo Signal...............................................25
4.1.5 Statistics screen.....................................................................................................26
4.1.6 Main menu.............................................................................................................27
4.2 How to navigate in the main menu.................................................................................28
4.3 Parameter setting..........................................................................................................29
4.3.1 Setting a switch parameter (Example: Backlight)...................................................29
4.3.2 Setting selection parameters (Example: language)................................................30
4.3.3 Setting a numerical parameter (Example: pos. clip-limit)........................................30
4.3.4 Alphanumercial parameter entries (Example: directory name)...............................31
5Calibration..........................................................................................................................33
5.1 Particularities of ultrasonic coating thickness measurement systems ............................33
5.2 How to calibrate for the sound velocity ..........................................................................33
6Measure Mode....................................................................................................................36

Table of Contents
© ElektroPhysik QuintSonic 7 4 von 184
6.1 Important remarks on ultrasonic measurement..............................................................36
6.2 Limits to the measurement technique............................................................................37
6.3 Settings to make prior to measurement .........................................................................39
6.3.1 Using the Direct Mode ...........................................................................................39
6.3.2 How to create or select a batch..............................................................................40
6.3.3 Selecting a measuring range .................................................................................40
6.4 How to prepare Measurement .......................................................................................41
6.4.1 Taking a reference signal.......................................................................................41
6.4.2 Selecting a couplant...............................................................................................42
6.4.3 Checking / carrying out calibration.........................................................................43
6.5 Taking Readings............................................................................................................44
6.5.1 How to use the sensor...........................................................................................44
6.5.2 Measuring procedure.............................................................................................45
7Signification and Use of A-scan Images..........................................................................47
7.1 Introduction....................................................................................................................47
7.2 Description of A-scan Image Types...............................................................................48
7.2.1 Reference signal....................................................................................................48
7.2.2 Raw measuring signal............................................................................................49
7.2.3 Echo signal with echo lines....................................................................................50
7.3 Application.....................................................................................................................52
7.3.1 Reference signal....................................................................................................52
7.3.2 Raw measuring signal............................................................................................52
7.3.3 Echo signal with echo lines...................................................................................52
7.4 How to use the A-scan screen.......................................................................................59
7.4.1 Zoom-in and zoom-out in amplitude direction.........................................................61
7.4.2 Zoom- in and zoom-out in time direction...............................................................61
7.4.3 Graphics cursor and displacement in time direction...............................................62
7.4.4 Zoom and position indicator...................................................................................63
7.4.5 A-scan image menu...............................................................................................63
7.4.6 Measure mode with A-scan image being shown....................................................65
7.4.7 Icons to identify invalid echoes ..............................................................................65
7.4.8 Quit the A-scan image ...........................................................................................66
8Echo Signal Processing....................................................................................................67
8.1 Introduction....................................................................................................................67
8.2 Levels of Processing .....................................................................................................68
8.3 Preprocessing ...............................................................................................................68
8.3.1 General remarks....................................................................................................68
8.3.2 Time-clipping .........................................................................................................69

Table of Contents
© ElektroPhysik QuintSonic 7 5 von 184
8.3.3 Amplitude-clipping .................................................................................................69
8.4 Least-Squares Optimisation ..........................................................................................73
8.5 Postprocessing..............................................................................................................74
8.5.1 General remarks....................................................................................................74
8.5.2 Multiple-echo suppression .....................................................................................74
8.5.3 Manual echo selection...........................................................................................75
8.5.4 Blocked domains ...................................................................................................76
8.5.5 Expectancy domains..............................................................................................77
8.5.6 Number criteria......................................................................................................78
9Tips and tricks ...................................................................................................................81
9.1 Cross-section ................................................................................................................81
9.2 Measuring range............................................................................................................81
9.3 How to proceed for a new setting of task.......................................................................81
9.4 Amplitude clipping with optimisation enabled.................................................................82
9.5 High level of unwanted echoes in the layers..................................................................82
9.6 Inhomogeneous bases..................................................................................................83
9.7 Multiple reflections.........................................................................................................83
9.8 Measuring object of unidentified nature.........................................................................83
9.9 Interaction of preprocessor, optimisation and postprocessor parameters ......................84
10 Application examples........................................................................................................86
10.1 Three-layer paint on plastic ...........................................................................................86
10.2 One-layer paint on wood................................................................................................86
10.3 Two-layer paint on steel.................................................................................................87
10.4 Thin one-layer paint on body sheet................................................................................88
10.5 Wall thickness measurement.........................................................................................89
10.6 Multi-layer plastics foil ...................................................................................................89
11 Data Management..............................................................................................................91
11.1 Introduction....................................................................................................................91
11.1.1 Batches..................................................................................................................91
11.1.2 Memory capacity / using the data memory.............................................................91
11.1.3 Parameter sets ......................................................................................................91
11.2 Data base......................................................................................................................92
11.2.1 General remarks / How to call the data base..........................................................92
11.2.2 Directories .............................................................................................................92
11.2.3 Batches..................................................................................................................97
11.2.4 Parameter sets ....................................................................................................104
12 Setting Parameter Sets....................................................................................................106
12.1Edit a parameter set (alphanumerically) ......................................................................106

Table of Contents
© ElektroPhysik QuintSonic 7 6 von 184
12.1.1 General................................................................................................................108
12.1.2 Preprocessor .......................................................................................................108
12.1.3 Optimisation.........................................................................................................110
12.1.4 Postprocessor......................................................................................................111
12.1.5 Edit the User-values table....................................................................................118
12.2 Edit a parameter set (graphically)................................................................................120
12.2.1 How to call the menu ...........................................................................................121
12.2.2 Clipping................................................................................................................121
12.2.3 Blocked domains .................................................................................................131
12.2.4 Expectancy domains............................................................................................134
13 Statistics / Batches..........................................................................................................139
13.1 General remarks..........................................................................................................139
13.2 View statistics..............................................................................................................139
13.2.1 Statistical values..................................................................................................139
13.2.2 Readings .............................................................................................................140
13.2.3 Histogram............................................................................................................141
13.2.4 Trend diagram .....................................................................................................142
13.2.5 Help / Extras........................................................................................................143
13.3 Delete a reading from a batch......................................................................................143
13.3.1 Delete single readings .........................................................................................143
13.3.2 Delete all readings...............................................................................................144
13.3.3 Delete a current value..........................................................................................144
14 Data Output / Data Transfer ............................................................................................145
14.1 Data print-out...............................................................................................................145
14.2 Transfer data to a PC (terminal program) ....................................................................146
14.3 Data transfer to a PC (QSoft 7)....................................................................................148
15 The Menu..........................................................................................................................149
15.1 Main menu...................................................................................................................149
15.2 Submenu “Database“ ..................................................................................................149
15.3 Submenu “Statistics” ...................................................................................................149
15.4 Submenu “A-scan image” ............................................................................................149
15.5 Submenu “Active batch” ..............................................................................................150
15.5.1 Properties............................................................................................................150
15.5.2 Readings .............................................................................................................150
15.5.3 Configuration .......................................................................................................151
15.6 Submenu “Setup” ........................................................................................................152
15.6.1 General remarks..................................................................................................152
15.6.2 Display.................................................................................................................152

Table of Contents
© ElektroPhysik QuintSonic 7 7 von 184
15.6.3 Date / time...........................................................................................................153
15.6.4 Data output..........................................................................................................153
15.6.5 User preferences.................................................................................................156
15.6.6 Gauge specifications............................................................................................157
16 Special Functions............................................................................................................158
16.1 Initialisation..................................................................................................................158
16.2 Special functions menu................................................................................................159
16.3 Sensor service menu...................................................................................................160
16.3.1 Call the service menu ..........................................................................................160
16.3.2 A-scan images for servicing purpose...................................................................160
16.3.3 Readjust the magnetic switch ..............................................................................161
16.3.4 Readjust the sensor tip echo suppression............................................................162
16.3.5 Readjust the temperature compensation reference point.....................................162
17 Connectable accessories................................................................................................164
17.1 General remarks..........................................................................................................164
17.2 Direct connection.........................................................................................................164
17.3 Connection via the multi-purpose connection box........................................................166
18 Care and Maintenance.....................................................................................................167
18.1 Care ............................................................................................................................167
18.1.1 Using NiMH storage batteries..............................................................................167
18.2 Maintenance....................................................................................................................167
19 Technical Data .................................................................................................................168
19.1 Gauge specifications...................................................................................................168
19.2 1 Gauge specifications ................................................................................................168
19.3 Sensor.........................................................................................................................169
20 Supply Schedule, Accessories.......................................................................................171
20.1 Supply schedule..........................................................................................................171
20.2 Accessories.................................................................................................................172
21 Appendix ..........................................................................................................................173
21.1 Error messages and trouble shooting..........................................................................173
21.2 Statistical Terms..........................................................................................................178
21.3 Safety Notes................................................................................................................180
21.4 Declaration of Conformity................................................................................................181
21.4 After-sales Service ......................................................................................................182
22 Change-history ................................................................................................................183
23 Index.................................................................................................................................183

Introduction
© ElektroPhysik QuintSonic 7 8 von 184
1 Introduction
1.1 General Remarks
This instruction manual describes how to use the ultrasonic coating thickness measuring system
QuintSonic 7 and provides all necessary information on the manifold application options offered by
the system.
Section 2 provides short instructions along with an operating example. All further sections deal with
the individual subjects. For technical data and general information on care and maintenance,
supply schedule and accessories, please refer to the end of this manual.
1.2 Field of Applications
QuintSonic 7 is an ultrasonic coating thickness measuring system for measuring paint, lacquer and
plastic layers applied on metal, plastic, wood, glass or ceramic. Up to five layers can be measured
non-destructively in one operation. Thanks to the innovative technology, QuintSonic 7 is the first
gauge of its kind to determine exactly the layer thickness applied on components made of GRP or
CRP material. QuintSonic 7 offers a wide range of applications in the automotive industry,
aerospace or any other industrial branch. Additional feature: QuintSonic 7 can also be used for
measuring thin bases through the coating, especially the wall thickness of thin metal sheets
starting from 50 µm.
1.3 Measuring Procedure
The working principle of QuintSonic 7 is based on the reflection of ultrasonic waves at the
interfaces between the individual layers of a coating system. For measurement, a liquid or pasty
couplant is applied on the sample at the point of measurement. The sensor is put on the measuring
spot. The high-frequency ultrasonic sound generator of the sensor head emits an ultrasonic pulse
of a broad bandwidth to travel through sensor head, couplant and finally through the coating
system. At each interface between two layers as well as at the interface to the base, some of the
sonic energy reflects. These portions of pulse –also referred to as “echoes” – return to the
measuring head at different velocities and the receive signals are registered in the measuring
head. As the time of travel is a function on the sound velocity in the respective material, it can be
used as indicator for the coating thickness. Thickness is calculated according to the time of travel
and sound velocity, transferred to the gauge and shown on display.
Unlike in wall thickness measurement, the layers to be measured with ultrasonic coating thickness
gauges are extremely thin and thus travel times very short, i.e. in the nanoseconds range (a

Introduction
© ElektroPhysik QuintSonic 7 9 von 184
billionth of a second). As a consequence, the sound echoes may overlap in the receive signal.
Before the signal evaluation can take place, it is necessary to separate the individual echoes with
respect to their travel times. This is done in a complex mathematical process. Thanks to the high
computing power of the sensor, the complete measuring result is made available not later than
after one second approximately.
Some measuring samples such as GRP or CRP materials exhibit material discontinuities
(inhomogeneities) or inclusions in the base that may cause false echoes. QuintSonic 7 offers a
wide range of methods for the suppression of unwanted echoes so that only the “true” echoes, i.e.
the sound waves reflected from the layer interfaces, will be used for evaluation.
1.4 The QuintSonic 7 Measuring System
The portable system consists of two elements:
The intelligent ultrasonic SIDSP®-technology based sensor (see section 3.2.1)
The operating and display unit
Both elements are cable connected.
Designed for user-friendly operation, QuintSonic 7 features an intuitive menu control with context-
sensitive online help. Large backlit control keys allow extra comfort. Excellent viewing conditions
provided by the large backlit graphics display allow convenient usage at night and in conditions of
poor visibility.
Special feature of QuintSonic 7: A-scan images (see section 7) are shown directly on the gauge
display for immediate quality assessment of the readings obtained without the need to connect a
computer. On the other hand, additional PC software is available (see below) to provide large-
sized coloured A-scan images on your computer. This makes QuintSonic 7 the ideal tool for both,
portable use on site or use in the laboratory.
The advanced PC-like data management offers quick creation of folders and easy set-up of
customized batches. QuintSonic 7 simplifies the calibration and parameter set-up allowing to solve
also difficult settings of task in a minimum of time without the need for special skills.
The „QSoft7 Basic“ PC software (supplied with the gauge) enables easy parameter setting via the
usual input devices (keyboard, mouse) of your computer. In addition, large, colour A-scan images
can be displayed on your computer screen.
As an option, the PC software “QSoft 7 Professional” is available, for convenient set up and
evaluation of measuring groups and export in various data formats. The software exports data as
text documents, Excel® spread sheets or in the PDF file format and allows entries of notes and
annotations. Also pictures of your measuring samples may be added to the data reports.
Featuring numerous interfaces, QuintSonic 7 connects to peripheral devices such as the portable
printer MiniPrint 7000 (available as an option). The standard supply schedule of the QuintSonic 7
includes an infrared interface (IrDA®1.0) as well as a USB adapter cable. Via this cable, a USB

Introduction
© ElektroPhysik QuintSonic 7 10 von 184
interface is available. As an option, a multi-purpose adapter unit can be supplied to provide an
extra USB interface for connecting a mains unit, headphones, a footswitch and or an alarm device.
If only single functions are requested, an RS232 adapter cable as well as an IR/ USB converter
unit (for connecting a PC) can be supplied.

First Steps
© ElektroPhysik QuintSonic 7 11 von 184
2 First Steps
This section is addressed to persons to use the gauge for the first time. It explains the main
features of the gauge and how to take readings. For a better overview and simplification, this
section will not discuss all details. For a detailed description of all subjects please refer to the
relevant sections later in this manual.
2.1 Insert batteries and connect sensor
Take gauge and batteries from the carrying case.
Push the battery compartment lid in direction of the arrow (as shown below).
Insert the batteries supplied with the gauge into the battery compartment. Respect polarities
(as shown below).
Push the battery lid over the housing and close housing.
Open the battery compartment
Insert batteries
Take the sensor form the carrying case and connect it to the sensor socket on top of the base
unit (see fig. below). Make sure the nib of plug is correctly inserted into the guide way of
socket. The red marking at the connector must be positioned correctly to the red marking of the
socket.
Fully engage the sensor plug into the sensor socket all the way to the stop.

First Steps
© ElektroPhysik QuintSonic 7 12 von 184
2.2 Switching-on and taking readings
The gauge is equipped with a round-shaped navigation key block with the following functions:
“ESC“, ““ and ““ (arrow up/down).
Three functions keys are located below the display. Their current function is shown above the
respective key at the bottom of display.
The “ON/OFF“ -button is located on the left side of gauge.
Prior to the initial operation of the gauge, please proceed according the instructions below. The
menu will guide you through the procedure.
sensor
socket
multi-purpose
socket
Function keys
ON/OFF-button
Command and
navigation block

First Steps
© ElektroPhysik QuintSonic 7 13 von 184
2.2.1 Setting language
Press the red ON/OFF button on the left side of gauge and ESC simultaneously. First release
ON/OFF key. The initialisation menu will appear.
A banner appears with the currently set language.
Use arrow arrow up/down-keys to go to the requested language
option.
Press OK-key or OK-function key to confirm.
Now “Total Reset” appears on display. A Total Reset restores the
factory settings. For the initial operation, there is no need to carry out
this function.
Therefore press the “NO” function key.
To complete the initialisation procedure, the type of power supply is
displayed. Do not change this setting. Just confirm by pressing
“Finish” (Done).

First Steps
© ElektroPhysik QuintSonic 7 14 von 184
2.2.2 Taking readings
The start screen appears for about 3 seconds showing company
logo, gauge version and the type of connected sensor.
You will be requested to hold the sensor into the air for taking a
reference signal. Please check the transparent measuring surface of
the sensor tip. Make sure it is clean and free of dust, dirt, grease or
couplant residuals. If necessary, use a moist soft cloth for cleaning.
Lift the sensor and hold it in the air. Press OK to proceed on
acquisition of the reference signal.
Once the signal has been taken, the gauge will switch automatically
to measuring mode.
The gauge is ready for measurement and the measuring screen
appears. At this point, no reading is available.
The "Direct mode“ (see section 6.3.1) along with the parameter set "Demo“ are preset. The
current setting is always shown in the status line. In this setting you can take readings at a
medium accuracy. It is not necessary to make further settings prior to measurement.
Take the test foil from the case. Open the bottle with couplant by raising the measure pourer.
Apply a small quantity of couplant on one side of the centre of foil.
Hold the grey spring-loaded sleeve of the sensor with one hand and place the sensor vertically
onto the measuring spot where you have applied the couplant. Push the sensor sleeve fully
down to the stop.
Measurement will launch automatically. This will take around one second.

First Steps
© ElektroPhysik QuintSonic 7 15 von 184
Lift the sensor from the measuring spot. The reading is shown on display (see below).
Repeat measurement as requested. Make sure a sufficient quantity of couplant is applied on
the measuring surface of the sensor, otherwise no readings will be obtained and an error
message appears “Coupling echo faulty !”. If necessary, apply some more couplant.
After measurement has been completed, use a clean cloth to clean the foil and the sensor
measuring surface. Briefly press ON/OFF-button to switch off the gauge.
The figure above shows all data displayed on the measuring screen. For more details please
refer to the following sections of this manual.
Schematic
representation of the
layer system (here: one
layer only
Active parameter set (in
this figure “Demo“)
Active batch
(here: “Direct mode”)
Current properties of the function
keys
Number of readings
stored in the batch
Coupling
index
flashing antenna icon
(if sensor is connected)
Time
Total thickness
ss
Thickness #1
Sensor
icon

Description of the System
© ElektroPhysik QuintSonic 7 16 von 184
3 Description of the System
3.1 Display unit
3.1.1 General properties
3.1.2 Operating keys
Use the ON/OFF button to switch the gauge ON or OFF. If, at switch on, you press ON/OFF-
button and ESC simultaneously, the initialising procedure will be launched (for more details please
refer to section 16.1). If you press the ON/OFF-button for a longer time while the gauge is in
switched-on state, the Special Functions menu will be called (s. section 16.2).
The Function keys may assume different functions according to the screen content. Their current
properties are shown on display upper to the function keys.
The command and navigation key block may also assume different functions:
Press OK to confirm settings, store values or select items from the menu.
Function keys
ON/OFF button
Command and
navigation key-block
Graphical display
160 x 160 dots
Large backlit display for easy reading of
measuring values, A-scan image, statistical data,
histogram and trend diagram.
Robust scratch resistant plastics housing.

Description of the System
© ElektroPhysik QuintSonic 7 17 von 184
Press ESC to abort actions or quit submenus.
Use arrow up/down-keys to navigate through the menu or change settings.
If the alphanumerical block has been activated, OK and ESC keys will also assume navigation
functions.
In poor-lit conditions, the function keys and the command and navigation key-block may be backlit
(see also section 15.6.2).
Most screens dispose of a “Help” Function key for calling the context-oriented on-line “Help“.
Press the “Help” Function key on the left to call the direct help.
3.1.3 Sockets and Interfaces
The sensor socket connects to all SIDSP®coating thickness sensors of the MiniTest 7 series, also
to sensors such as the F-, N- or FN-type (magnetic induction and/or eddy currents principle), i. e.
you only need one display unit and can operate several sensors. The multi-purpose socket is used
for connecting the plug-in mains unit or other optional accessories such as the foot switch, the
alarm device, RS232 interface cable, USB interface cable, headphones or the multi-purpose
connection box (see sections 15.6.4 and 17).
Note:
This manual only describes the operation of the QuintSonic 7 as an ultrasonic coating thickness
gauge. If you wish to connect the display unit to an F, N or FN sensor, please refer to the MiniTest
7400 operating instructions.
Multi-purpose socket
Sensor socket
Infrared interface

Description of the System
© ElektroPhysik QuintSonic 7 18 von 184
3.1.4 Power Supply
3.1.4.1 Batteries and storage batteries
The QuintSonic 7 gauge is powered by a set of four alkaline-manganese cells, 1.5V, AA LR6 size,
(batteries included in the standard supply schedule). As an alternative, it may be operated on
rechargeable NiMH storage batteries (type AA-HR6 or via a plug-in mains unit (available as an
option). Please use only products recommended by ElektroPhysik. Please also refer to section 17
“Accessories”.
If you wish to use the storage batteries, they must be recharged using the external charger unit
(available as an option). Make sure to adjust the gauge to storage battery operation (see section
16.1). For more details on the use of batteries and storage batteries, please also refer to section 18
“Care and maintenance”.
Important notes:
Remove batteries or storage batteries from the instrument if you are not going to use the gauge
for a longer period of time.
The battery symbol indicates the battery/storage battery state in 6 stages: (0, 20,
40,…100%).
If the lowest stage has been reached, “Battery almost empty” will be indicated.
In case of total discharge, “Battery too low” will be indicated and the gauge will switch off.
Make sure to replace empty batteries within a period of about one minute after you have
removed the exhausted ones. If the gauge remains longer without power, date and time
settings will get lost. If the time interval for battery change has been exceeded, “Check clock
setting” is shown after you have inserted fresh batteries (see also section 15.6.3). Batches and
calibration values, however, are retained in memory.
For field use, replacement batteries should be made available.
Erratic readings due to low battery voltage do not occur. If voltage is too low, the gauge
switches off or will not switch on at all.
Used or defective batteries or storage batteries may contain hazardous substances and must
be disposed according to the legal provisions of your country.
3.1.4.2 Plug-in mains unit
For mains operation, the plug-in mains unit must be used. If operated via the plug-in mains unit,
batteries should be inserted to supply the internal time clock; otherwise the settings of the real-time
clock will get lost approximately one minute after the mains supply has bee cut.

Description of the System
© ElektroPhysik QuintSonic 7 19 von 184
The plug-in mains unit comes with two different adapter plug versions (Euro and US plug). If the
adapter plug does not match your socket, simply change the adapter plug accordingly.
For this purpose, remove the adapter from the plug-in mains unit and fix the other one as required.
Note: The adapter is not designed for frequent change.
3.1.4.3 USB-Interface
The QuintSonic 7 can also be powered via the USB interface of a PC. For this purpose, please use
the USB adapter cable (supplied as an option). Connect the gauge to your PC. The gauge
switches on automatically. It is recommended to operate the gauge in the permanent mode (see
section 15.6.5) to make sure it is always switched on.
3.2 Sensor
3.2.1 SIDSP®-Technology
SIDSP®is world wide leading state-of-the-art-technology for coating thickness sensors developed
by ElektroPhysik. With this new technology, ElektroPhysik has set another new benchmark for
innovative magnetic induction or eddy-currents based coating thickness gauges. With QuintSonic
7, this new technology has also made its entry into the ultrasonic coating thickness measurement.
Compared to the conventional procedures, the new technology offers considerable advantages
that will be explained in detail in the following section.
SIDSP®stands for sensor-integrated digital signal processing. With this technique, all necessary
measuring signals are generated and processed inside the sensor itself.
The sensor of the QuintSonic sensor emits the ultrasonic signal at a peak voltage of approx.140V.
Unlike conventional methods, the new SIDSP®technology does not transfer this signal via a
cable, but the signal is directly generated in the sensor to be transferred via the shortest way to the
measuring head. As a consequence, an impact on the transmit signal through the cable can be
excluded and at the same time, an optimum protection against contact is given, even if the cable is
damaged.
Conventional methods transfer signals via cable. With the new technology, however, the sensitive
ultrasonic signal is not transferred via cable, but processed directly in the sensor. As a
consequence, an optimal protection against interferences of any kind is given. The complete
process from mathematical editing up to the coating thickness value is performed by a 32-bits
controller. The calculated coating thickness values are available in digital form to be transformed
flawlessly via the sensor cable to the gauge.

Description of the System
© ElektroPhysik QuintSonic 7 20 von 184
With the SIDSP®technology, adverse interferences through changing cable properties (as they
often occur with conventional methods) that might affect readings can be totally excluded. As a
result, QuintSonic 7 provides long-term stability enabling the user to take full advantage of the
precision and reliability of the system.
During the manufacture of a sensor, sensor calibration values are determined. Such values are
vital for the precision of a sensor. They are stored in the sensor itself to make them available at
any time. They will be retained even if the sensor is connected to another QuintSonic 7 gauge, in
other words, you can use a QuintSonic 7 sensor and connect it to any QuintSonic 7 gauge as
requested.
Table of contents
Other ElektroPhysik Measuring Instrument manuals

ElektroPhysik
ElektroPhysik MiniTest 4500 User manual

ElektroPhysik
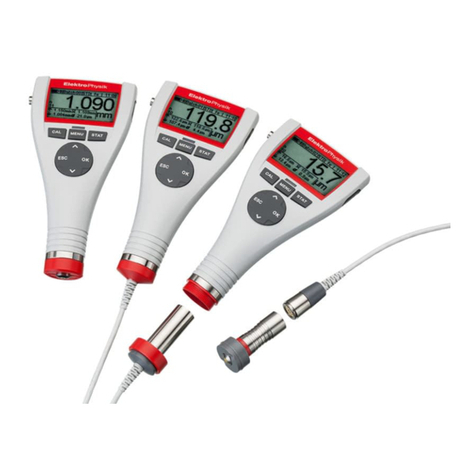
ElektroPhysik MiniTest 430 Technical Document
ElektroPhysik
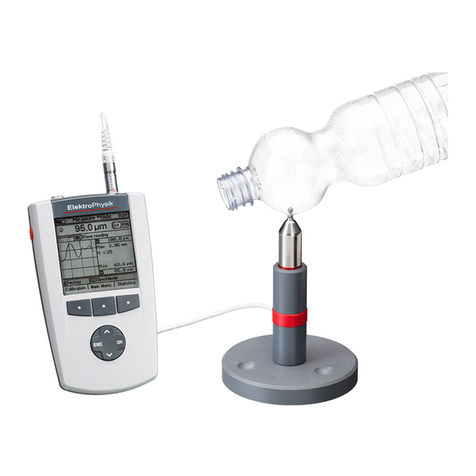
ElektroPhysik MiniTest 725 Technical Document
ElektroPhysik
ElektroPhysik MiniTest 7200 FH Technical Document

ElektroPhysik
ElektroPhysik MiniTest 403 Use and care manual

ElektroPhysik
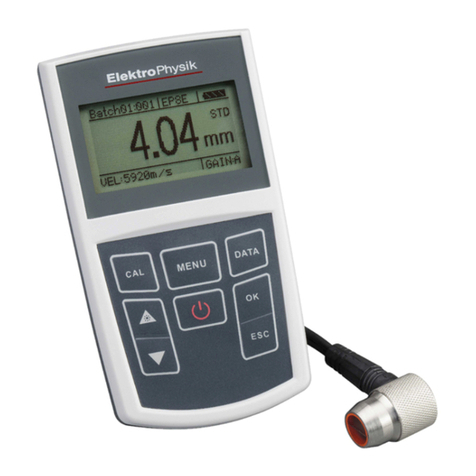
ElektroPhysik MiniTest 700 Manual
ElektroPhysik
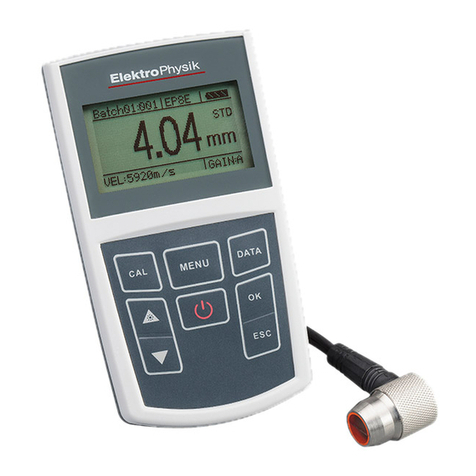
ElektroPhysik MiniTest 440 Use and care manual
ElektroPhysik
ElektroPhysik MiniTest 430 Use and care manual

ElektroPhysik
ElektroPhysik SmarTest User manual

